How to adjust the image and sound home theater
The most correct way to create the perfect home theater - This is a selection of equipment certified by THX. In order to achieve maximum results in the quality of audio and video playback, it is required to correctly design the room, arrange all components of furniture and equipment, and set up a home theater.
Content
The room under the cinema
There are some premises equipment rules that should be followed:
- Place for a chair should be away from the speakers.
- Around the chair is important to have free space, it should not stand near the wall.
- The high back of the chair will dampen the sound.
- Do not make the room too empty: there will be a lot of echo in it.
- Do not overdo it with the suppression of sound waves with special wall covering. Perfectly extinguish the sound: furniture, various shelves, carpets, fabrics.
Placing and setting up a TV or screen
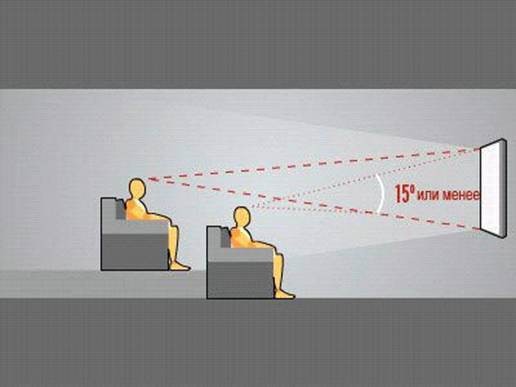
Calculate what screen size is suitable for your room. The horizontal viewing angle from the chair should be 40º.
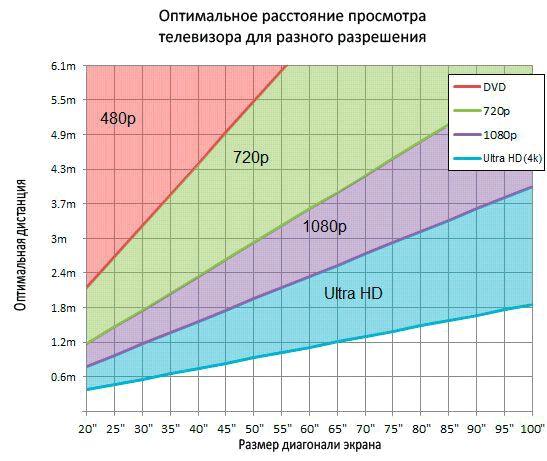
You can use by formula to determine the size of the diagonal: the distance from the chair to the screen translate into inches. Multiplying this distance by 0.84, you get the value of the size of the diagonal of the screen. For example, the distance from the chair to the intended screen is 85 inches, then we think so - 85 x 0.84 = 71.4. This means that the screen should be about 70 inches.
THX recommends that you install the TV vertically at eye level so that you look at the screen perpendicularly. To increase the viewing angle, in some cases, you can not more than 15º.
Calculate distance to the viewer's eyes depending on the diagonal and the resolution of the TV, you can use the table in the figure below.
If you are not at all involved in adjusting your television panel, it is likely that it shows not perfect. Of course, you can adjust some parameters "by eye", but it is better to use special test disks. These test Blu-ray discs can be useful for both novice and expert. The program will help to significantly improve the quality of the image. Unfortunately, most test disks have an English interface. The most popular of them are:
- Disney WOW Disk - This is a great test option for beginners that will help to improve the quality of the picture optimally It has a lot of versatile test patterns.
- Test Spears & Munsil HD - This option is more suitable for advanced users and professionals. Includes unique test events for scaling and deinterlacing. This disc can be called a find for owners of DC.
If for some reason you do not want to use test discs, you can alternatively use manual calibration of the TV using test images.
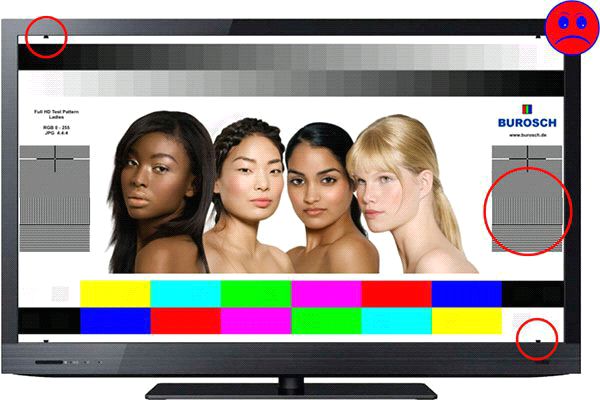
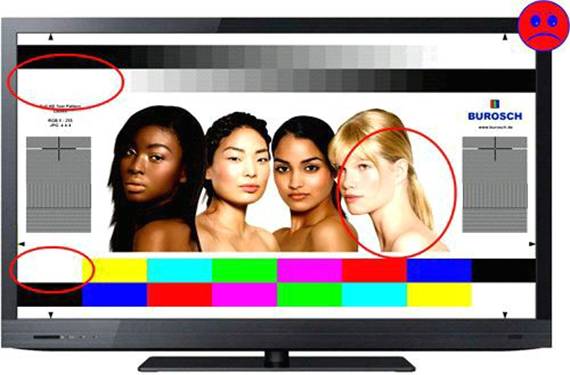
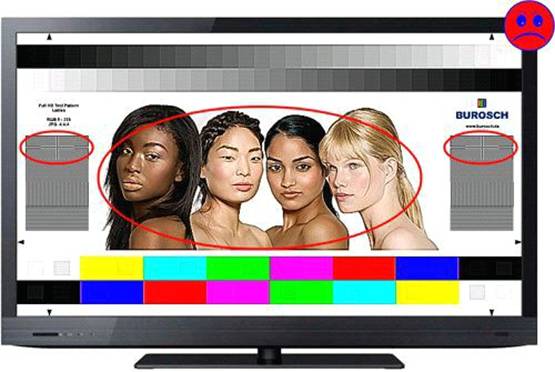
Ladies test for manual adjustment of the television panel
In this example, we will use test, specially created images, which can be downloaded on the Internet, in the resolution of Ultra HD 4K (3840 × 2160) and in Full HD (1920 × 1080).
Before adjusting, turn off the automatic presets on the TV to improve the picture.
The picture can be viewed from flash drivesconnected to a USB TV receiver. In the proposed test there are several reference zones for correct adjustment of the picture. Adjustment of all five parameters will be required:
- borders, image format;
- brightness level;
- contrast level;
- color correction;
- image clarity (focus).
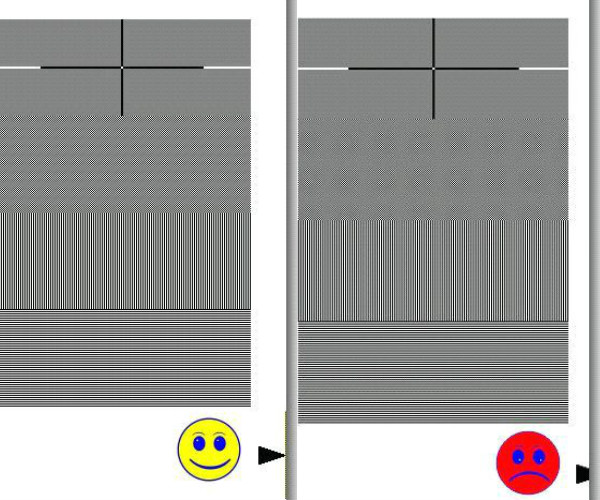
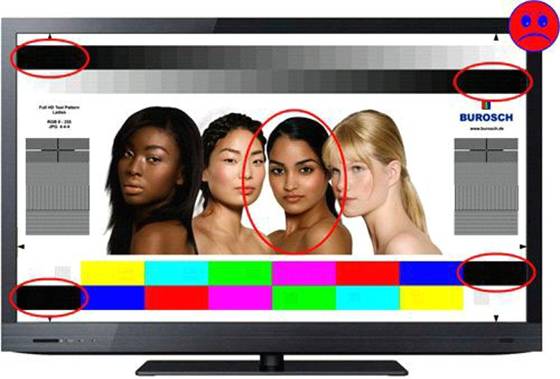
Borders and image format
In the corners of the picture are arrows. They should have contact with the edge of the screen with their sharp ends. If the size is chosen incorrectly, the clarity will decrease and the picture will be cropped. In the menu, items for changing the borders of pictures can be named: Overscan, Pixel-to-Pixel, Full Pixel, Original, Just Scan.
Below is an example of how the image is lost in the wrong scaling.
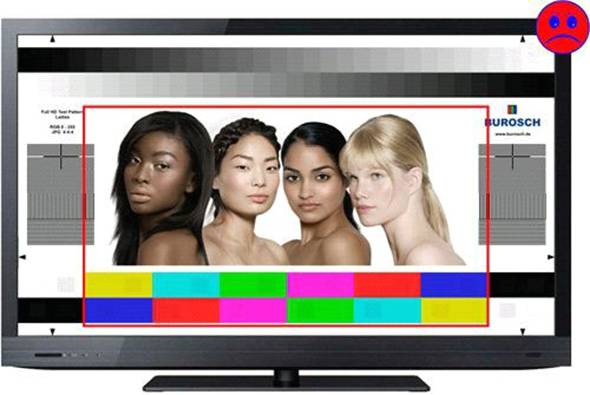
Brightness level
With correct brightness adjustment, at the bottom of the picture all 32 shades with clear contours will be visible. At low brightness grayscale merge with dark areas.
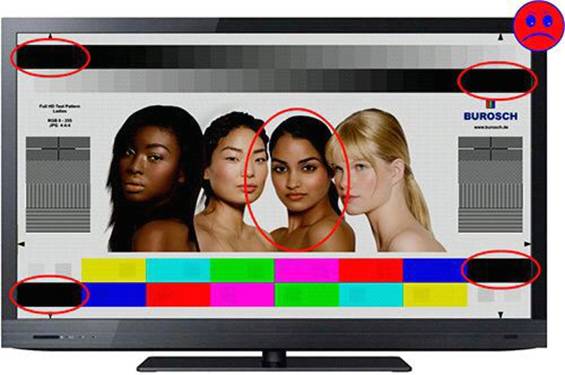
When overestimated brightness will merge gradations with light areas.
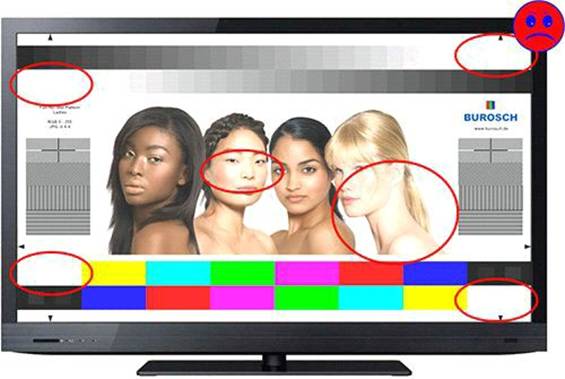
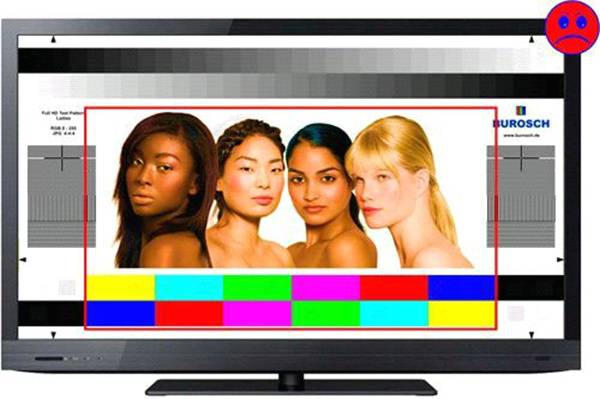
Contrast level
To debug the contrast, use the same scale with grayscale. Proper adjustment, as in the previous case, implies the visibility of all areas of the scale. If the tincture is wrong, some areas of the skin will change to negative.
After completing these manipulations, it is recommended to return and look at the brightness scale - whether the indicators have changed. Then make a contrast check again.
Below is a very low contrast level.
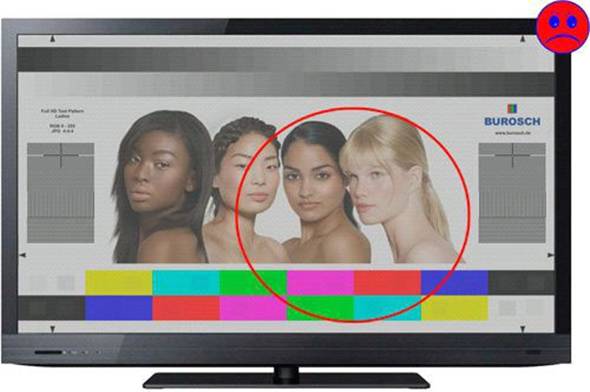
Color correction
The color of the skin in this test is an indicator for correct correction. Try to find a balance between visible shaded areas and visible light. For a natural display, reduce saturation, trying to avoid underestimate color.
When customizing white color remains white, without impurities of shades. You should carefully look at color bar: on it are translucent squares. They should be visible and visible in the background. To adjust their visibility used saturation adjustment.


Image clarity
Image clarity is checked at the intersection of two lines. These lines should not have shadows and be surrounded by halos.Most often, clarity rarely adjusts due to good factory settings.
Some TVs have the option “Gamma". To check this parameter, a color bar and a picture of girls are also used.
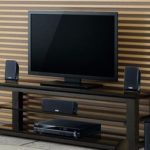
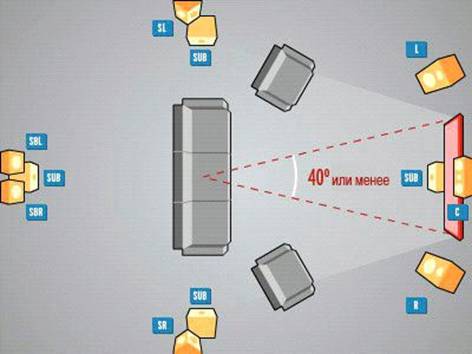
Placement and configuration of the speaker system
Most Popular Acustic systems for home theater it is 5.1 and 7.1. The number “1” means that the system has one subwoofer channel. The numbers “5” and “7” indicate the number of elements in the set.
The recommended option for placing columns in the 5.1 system is shown in the figure below:
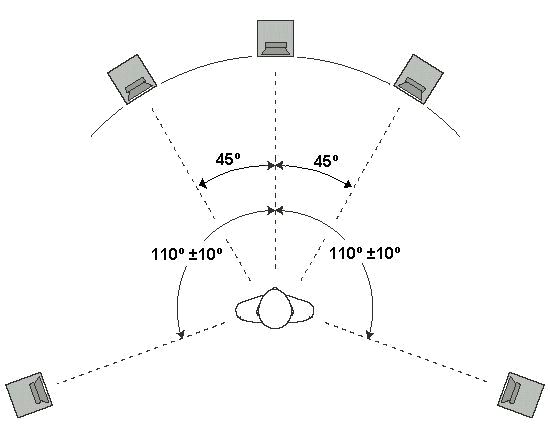
All columns are equally spaced from the listener, and are located in a circle.
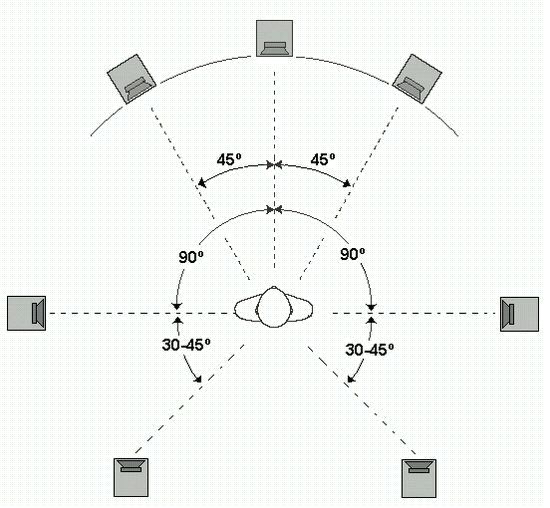
Similarly, the columns for the 7.1 system are also located.
Manual system setup is a very complicated and time-consuming process; only a specialist (installer) can cope with it. To properly set up the sound environment you need a professional measuring equipment.
In modern AV-receivers for inexperienced DC users, the mode of automatic debugging of acoustics is provided. You only need to connect microphone to the receiver and place it in the place where the viewer will sit. The microphone is set at ear level.After turning on the automatic tuning, after a while (sometimes testing takes about 30 minutes), the device will select the best option of frequency characteristics ideally suited to the type of your movie theater. After the debugging procedure, you can correct the sound by running test disk, for example with music, and manually remove the annoying frequencies.
By completing the above recommendations, you can set up a home theater on your own and save money without attracting specialists. Of course, if you have very expensive, professional equipment, and you place great demands on quality, then the challenge of a professional home theater installation In this case, the ideal option.
/rating_off.png)