Handicrafts from the camera and for the camera
Virtually every home has an old, waste camera. It can be very old, film, or digital, from the very first model range. Many owners of such technology ask themselves: what to do with it? After all, it is a pity to throw it away, because at one time the equipment cost a lot of money, and at first glance it is not possible to find its use in the modern world. But craftsmen have long found a solution to this problem and make various crafts from the camera and for him.
Content
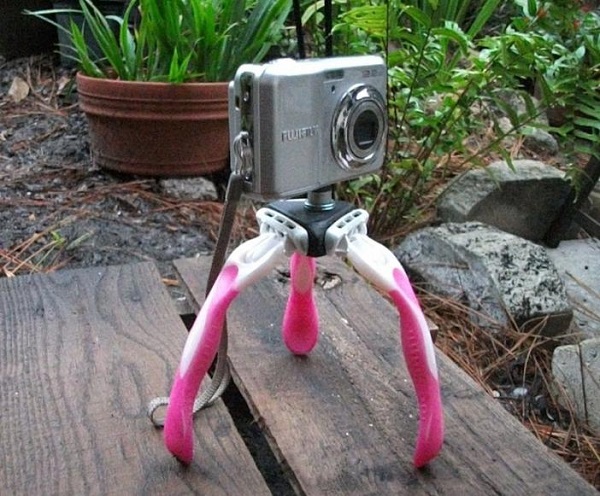
Tripod for the camera
There are times when during video or photography there is a need to fix the camera to eliminate vibrations and shaking.But not always at hand is a tripod, and many amateurs do not buy it because of very rare use.
From plastic bottle
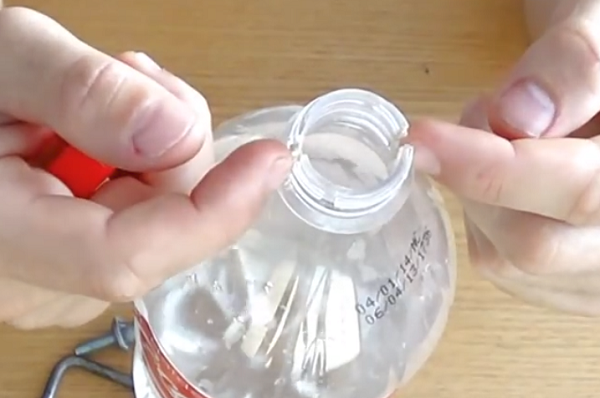
it elementary option making a tripod for the camera. You will need a plastic bottle, a bolt, a nut and 2 washers.
Important! The thread on the bolt should be inch. Usually the carving on the camera under a tripod has a size of 1/4 or 3/8 inch. It is impossible to screw the metric screw into the camera, as this can damage the tripod mount.
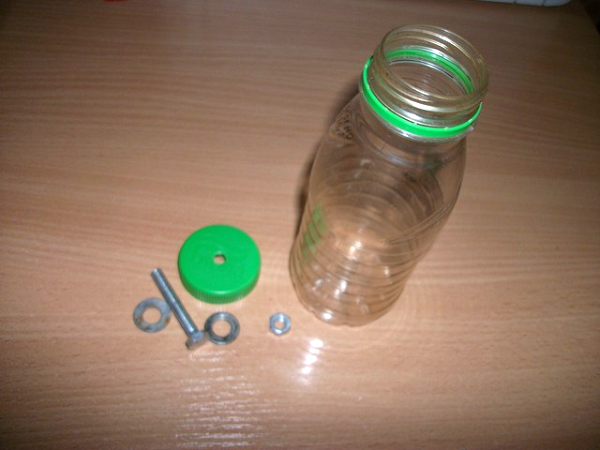
Drill or burn in the lid bolt hole. Next, put a washer on the bolt, insert it into the hole made, put another washer on and tighten the nut.
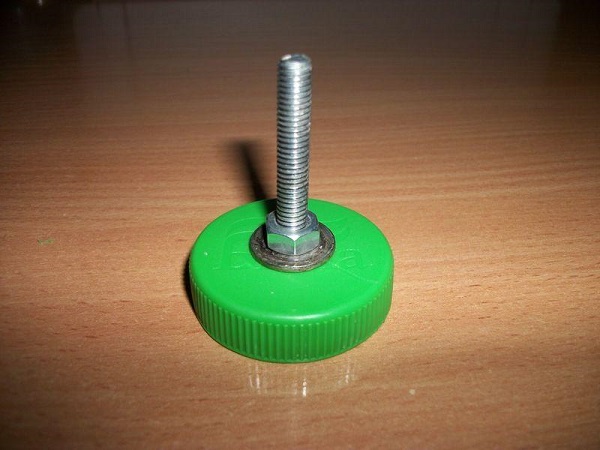
For the stability of the whole structure, type in a bottle of water (you can pour sand), screw the bolt into the camera and screw the cap with the attached device to the bottle.
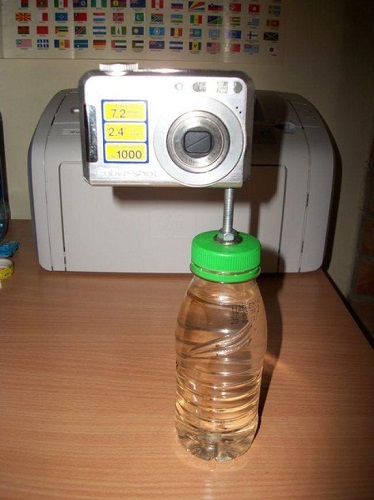
You will have a primitive tripod made in 10 minutes. The disadvantage of such a device is that the camera can only be rotated in the horizontal plane, and the camera cannot be raised or lowered.
A more “advanced” tripod from a plastic bottle is made as follows.
- Prepare a plastic bottle, glue gun, nail, wooden block and bolt with an inch thread.
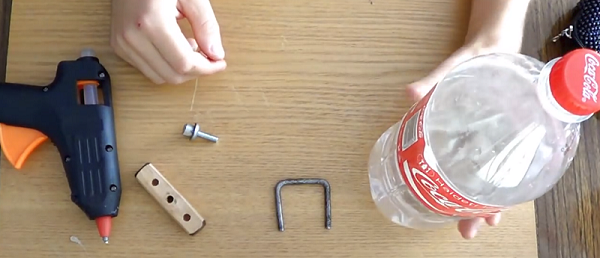
- In the neck of the bottle it is necessary to make a cut, for example, a grinder. Also, the grooves can burn a red-hot nail, as shown in the following photo.
- Next, hold the nail in a vice and bend it in the shape of the letter “P”.
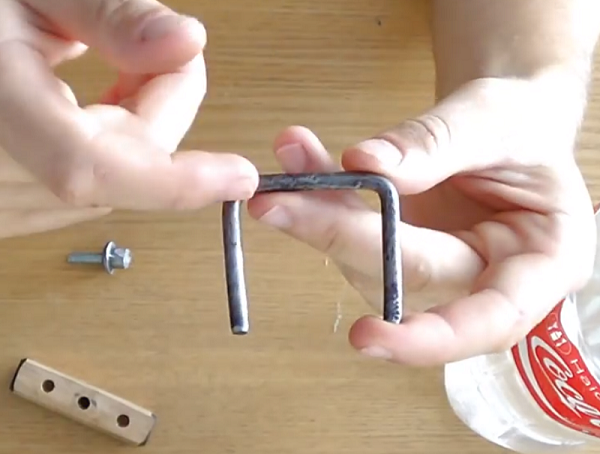
- Make a small wooden block and drill a hole in its center that is slightly larger than the diameter of the bolt.
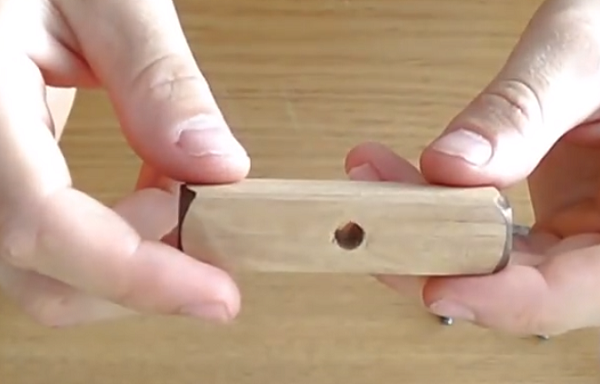
- Drill 2 non-through holes on the other side of the bar to insert a bent nail into them.
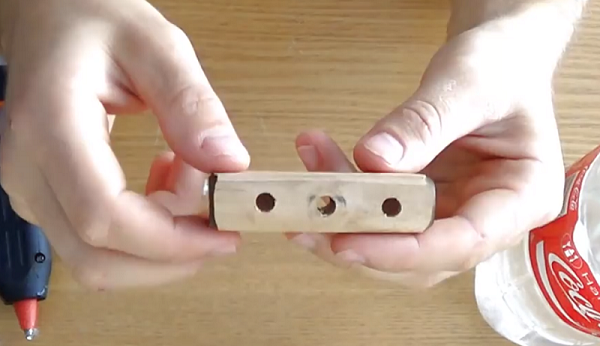
- Add some glue to the side holes and insert the U-shaped part into them.
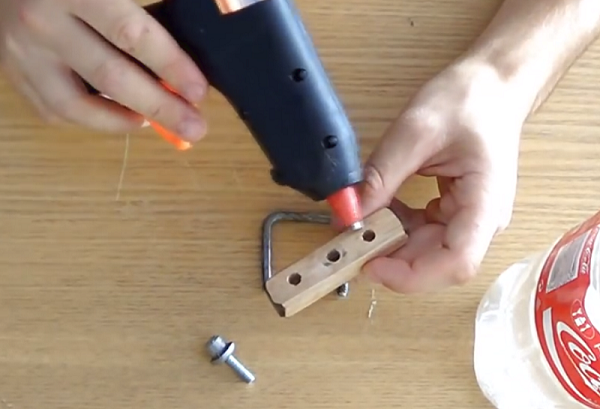
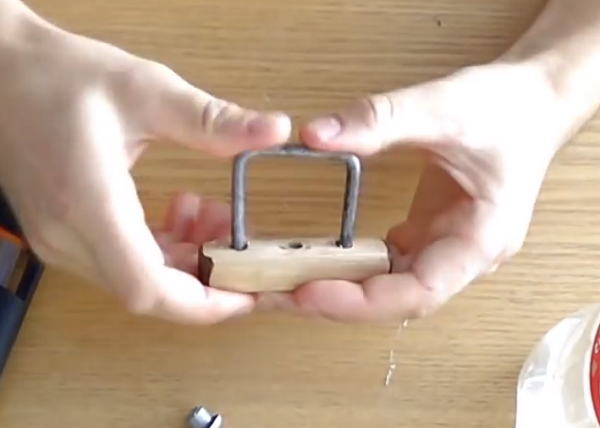
- When the glue hardens, insert a bolt into the center hole and attach the bar to the chamber.
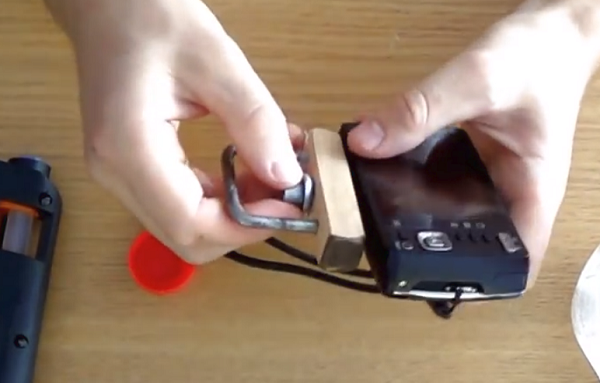
- Next, insert the U-shaped part in the cut grooves on the neck of the bottle and tighten the cap.
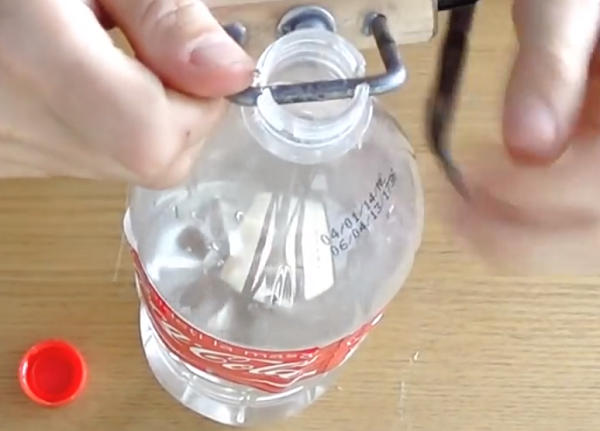
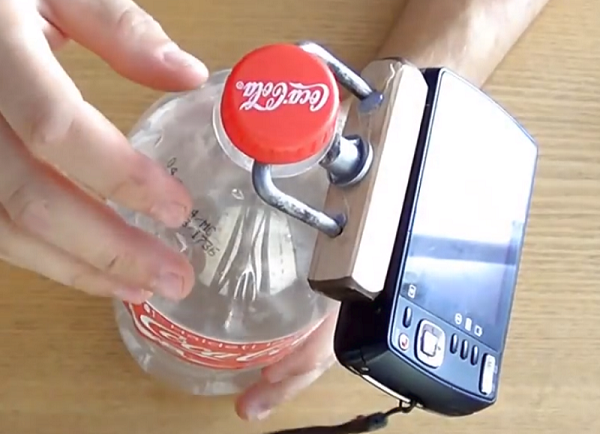
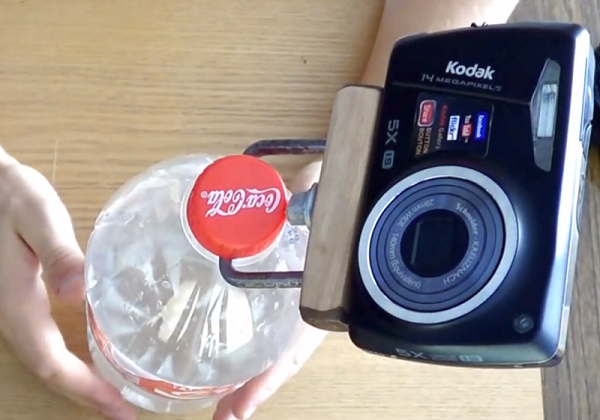
- If the cap is tightened further, the camera will be held at any angle.
Razor stand
For the manufacture of this simple tripod with your own hands, you will need 3 identical shaving razors (it is possible with floating heads), a wooden bar and a bolt with a suitable thread. First you need to make small triangle from wood or thick plywood, then drill a hole in its center and insert a bolt into it, as shown in the photo below.
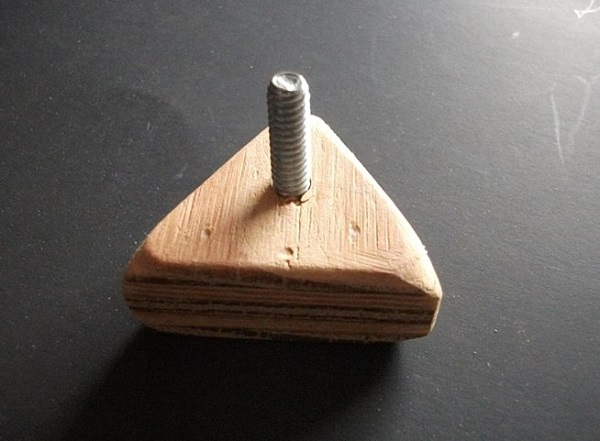
Further, it is necessary to glue the machines to this triangle using a glue gun. If not, then you can fasten the razors with small screws.
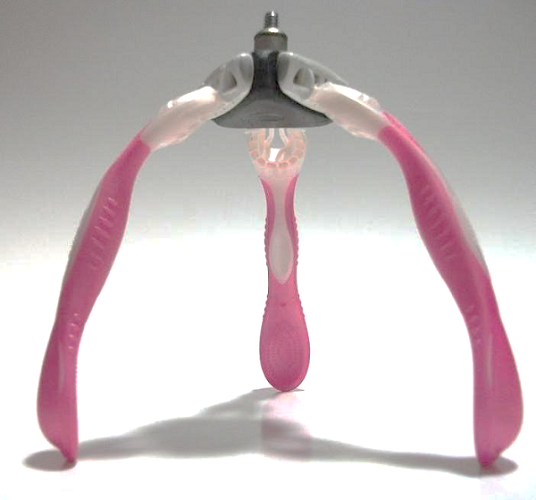
When the tripod is ready, install a camera on it.
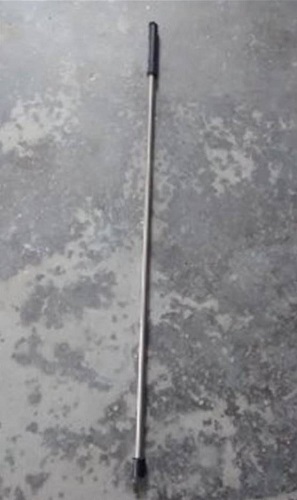
From aluminum tubes
The tripod for the camera with your own hands can be made of a small piece of board, metal rods or aluminum tubes. Tube length may be arbitrary, depending on what height you need a tripod.

It is made in the following way.
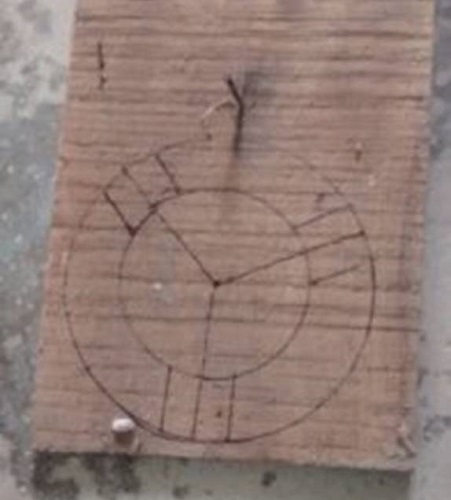
- Draw two circles on the board, break them into 3 parts and make a markup similar to the one shown in the following figure.
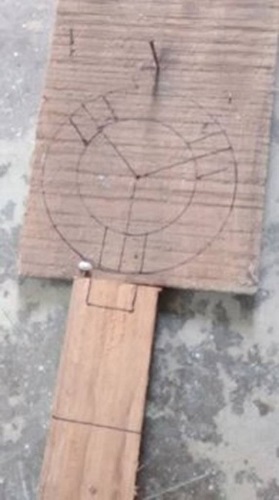
- Attach a narrow plank to the markup and draw a rectangle in front of it that is slightly wider than the last. Measure down a few centimeters (depending on the overall size of the tripod) and draw another line. This will be the length of the part.
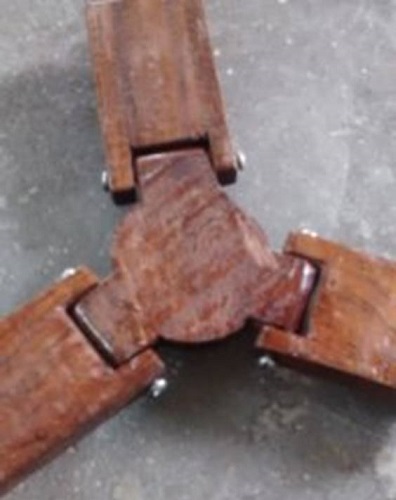
- Cut out all the details and polish them. Next, drill the side holes in the narrow planks and in the protruding parts of the base, then bolt all the elements together, as shown in the following photo.
- Cut aluminum tubes to the same length. At their ends you can wear rubber tips from rubber hose or heat shrink tubing.
- Drill holes in the tubes and screw them to the movable wooden parts of the base.
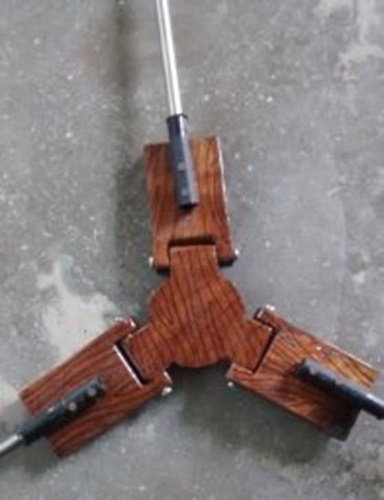
- Further, it follows from an aluminum plate (3 x 6 cm) to cut a strip and bend it in the shape of the letter “U”. Drill one hole in the center of the plate and 2 holes along its edges, then insert the previously prepared bolts into them.
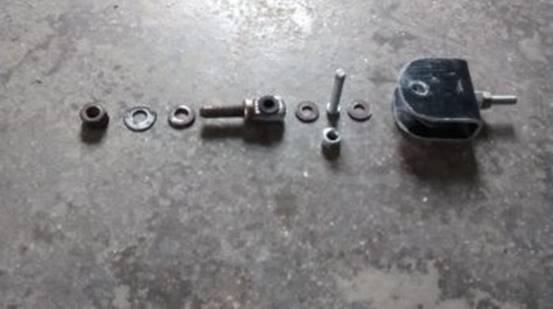

- Drill a hole in the center of the wooden base and fasten a previously made tripod element.

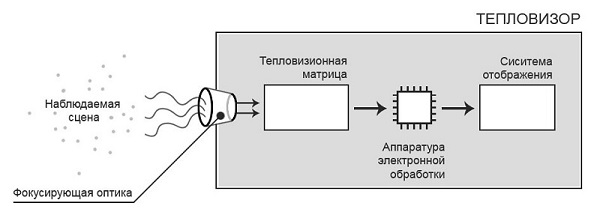
Camera thermal imager
Thermal imager is pretty complex device, able to fix at a distance the infrared radiation emitted by surrounding objects. Basically, this device is used in repair and rescue activities, and it is also used by professional hunters to search for prey. The thermal imager is similar in design to a digital camera.
Despite its similarity with a digital camera, a full-fledged thermal imager cannot be made of it. On the Internet you can find a lot of tips on how to make a thermal imager from a camera.For example, it is advised to remove the infrared filter from the matrix, after which the device will allegedly begin to record thermal radiation. But in practice, except for the breakdown of the digital device, you will not get anything. In that video It shows what happens if you remove the filter from the matrix of the camera.
Microscope from the camera
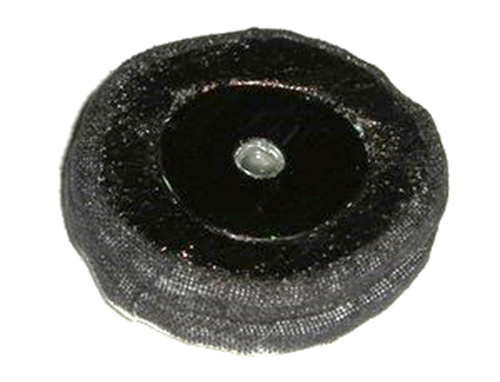
First of all, to make a microscope from a camera, you need to find a suitable lens. The best option is lens from an old CD-ROM drive.
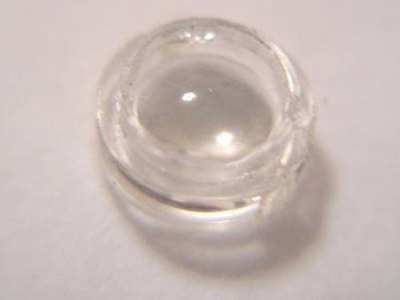
To attach the lens to the camera lens, you must make a mandrel. It is made of foam, and then painted in black for better light absorption.
On this manufacture of the microscope can be considered finished. But for its application you will need to make the simplest tripod.
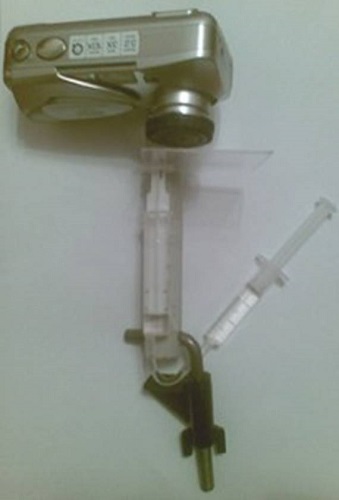
- To create a tripod will need: plastic tube; a small piece of plastic (you can use the lid from under the case for disks); 2 syringes with a volume of 5 ml and 2 ml; mounting bracket.
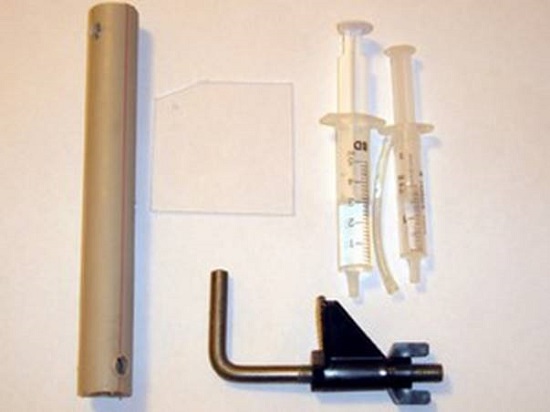
- Drill 2 holes in the tube. One for mounting the camera, and the second for the mounting bracket.
- Connect both syringes with a dropper tube, pre-filling a 5 ml syringe with water.
- Glue a plastic square to the top of the syringe piston (5 ml).
- Attach a syringe (5 ml) with a pad to the tube with adhesive tape.
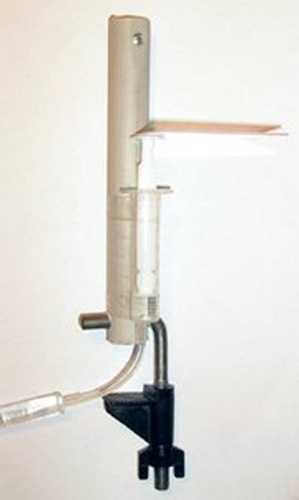
- Mount the camera on the tube.
- Attach the microscope to the table, place on the plastic table the item you want to view.
- Next, turn on the camera and use the bottom syringe (2 ml) to move lens focusing on the desired item: when you press the piston, the table will rise, and when the piston is pulled out, it will go down.
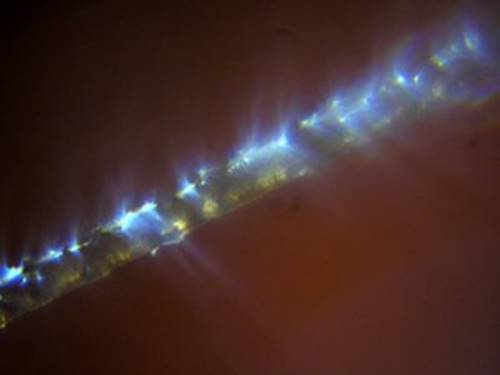
The examples below show photos taken with such a microscope:
- LCD matrix Nokia E51;

- HP iPAQ hx2190 LCD Matrix;
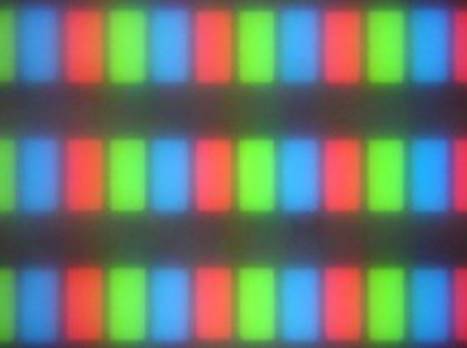
- human hair;
- onion cells.

Thus, with virtually no investment you get a simple microscope. Its only drawback is the poor quality of shooting opaque objects, since external lighting is required. The above photo of the hair was made with a backlit flashlight.
Telescope from the camera lens
To make a telescope from improvised means, you need two lenses: one short-focus and the second long-focus.
Important! As the main lens to use the camera lens does not work, since it has a small focal length. From the lens of a camera, for example, a soap box, you can only make an eyepiece on a telescope.
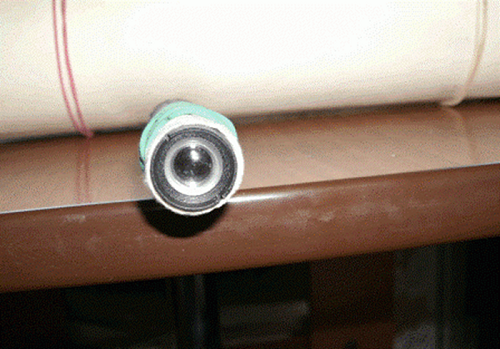
The photo below shows the lens from the camera.
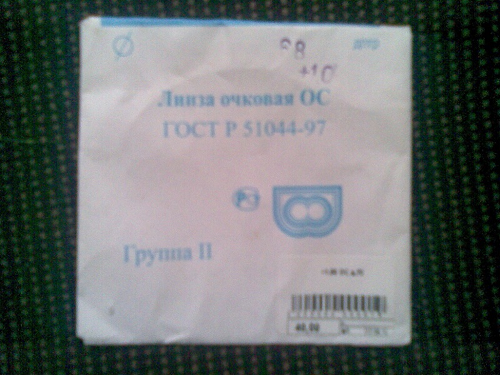
The main optics are made from spectacle lensesbought in a pharmacy. The spectacle lens must have an optical power of 1 diopter, which corresponds to a focal length of 1 meter, and a diameter of 68 mm.
For an eyepiece fit lens with focal length from 20 to 50 mm. It is determined simply: substitute a lens under any light source and begin to focus the luminous point, for example, on a sheet of paper. When the smallest luminous dot forms, measure the distance from the paper to the lens. This will be the focal length of this lens.
Below is a diagram that shows the simplest telescope device.
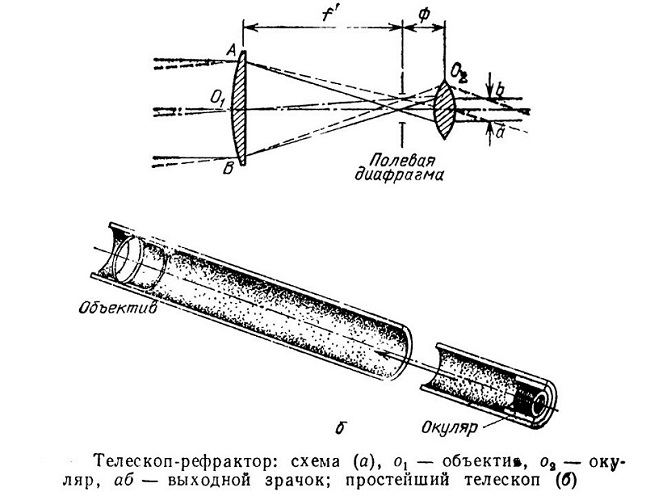
The telescope body is made from cardboard, one side of which is necessary to paint over with black paint.
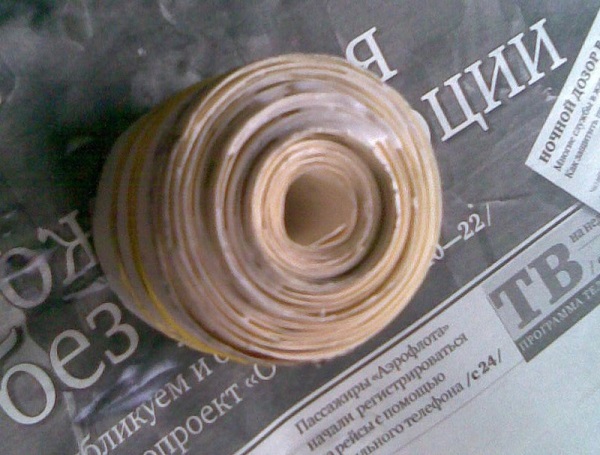
The paper should be wound on a disc with a diameter equal to the diameter of the lens, then glue it. You can use PVA glue. The main tube of the telescope should be 10 cm shorter than the focal length of the lens. The inner tube is made 30-40 cm long and must fit tightly into the main, with friction. The eyepiece is inserted with the cap into the second tube.
As a mandrel for a large lens, you can use hand magnifier case appropriate size.
By inserting plugs with lenses into the tubes, you get a homemade telescope. Sharpness is induced by movement of the tube with the eyepiece.
Camera as a webcam
Of course, you can make a webcam from an old camera, but not from any model. Some cameras already have a built-in Webcam function that allows you to use the device for this purpose. Therefore, in order to start communicating on the network, it is enough to connect it to the PC via the USB connector and install the drivers.
Cameras that do not have a Webcam function are divided into 2 groups:
- devices that can work as a webcam, but this requires special software and the availability of cables for video transmission;
- devices that cannot work in streaming video mode.
To determine which group your camera belongs to, connect it to the TV via a cord that has a plug for connecting to the camera on one side, and one USB plug and 2 tulips on the other.
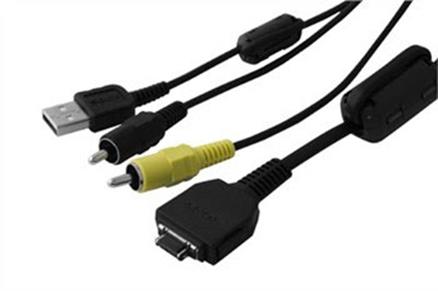
When connected to a TV through a yellow tulip, you will see on its screen an image coming from your camera in real time. On the camera to include a photo or video is not required. Live broadcast video from the camera means that such a device can be used as a webcam, you only need customize the software.
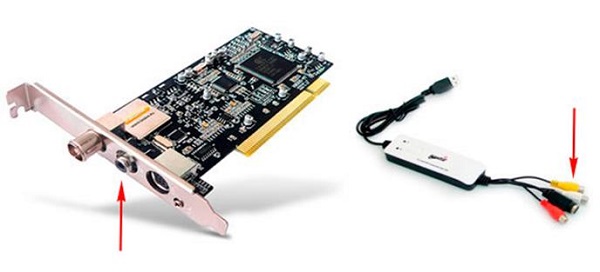
Important! In order for the webcam from the camera to start working with a computer, it must have a video capture device (TV tuner card, video card or special adapter) with a tulip socket. Connect the yellow plug of the cable from the camera to it.
In order for the webcam from the camera to start working with a computer, do the following.
- Install the necessary camera drivers. You should also install any software to control your webcam (SplitCam, ManyCam or WebCam).
- Disable the camera off function when idle. If possible, connect the camera to the power supply to prevent batteries from sinking.
- Turn off the computer and connect the yellow tulip cable to it.
- Turn on the computer and run video capture program. In her window you will see the image transmitted by the camera.
- Open the settings of the utility (File> Video Source) and assign your device video source. Also assign the signal parameters. If the speed of the Internet is low, you should reduce the quality of the video.
- Now you can check the camera in action. Open Skype and go to the program settings. Specify in it that the installed and configured utility will serve as the source of the video signal, then make a call to someone.
/rating_off.png)


