Connecting a printer to a laptop
Connecting a printer is a fairly simple procedure, but not without certain nuances. In this article we will try to give the most complete overview of the process of properly setting up the printer when it is synchronized with a laptop. The same tips are quite applicable in the case of stationary computers - there are no significant differences in the rules of customization.
Content
Connection process
The process of installing and configuring the printer can be divided into several stages:
- device connection;
- installation and configuration of drivers;
- print setting.
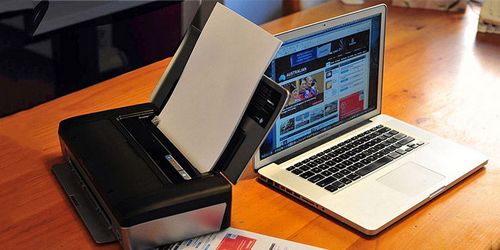
Initially, the procedure for attaching a printer to a laptop is best done. with power off both devices. It is necessary to choose the place where the printing device will be located. It is better if this is a space that does not require a permanent release after the completion of the paper output procedure. The printer, as a rule, is quite a massive device, and it is inconvenient to carry it from place to place and is fraught with consequences associated with accidental damage to the device.
Most printers connect via usb ports, so take care in advance about the availability of free ports in your laptop, so that, again, there is no need to constantly pull out the wires of other application equipment in cases where you need to print something.
The problem of the lack of free connectors today without problems is solved by the acquisition of a usb-splitter.
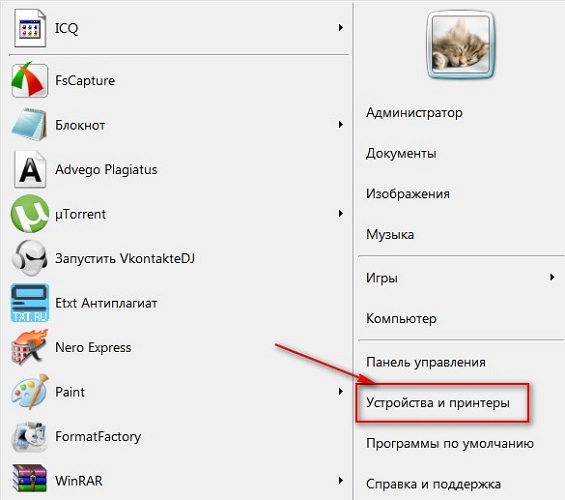
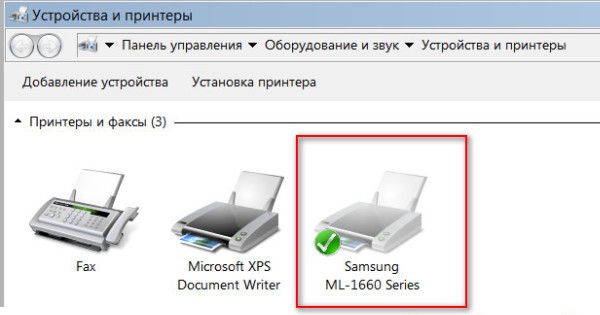
When the wires are properly connected and the equipment is turned on, a message will appear on the screen about the appearance of a new device on the network, accompanied by a characteristic sound signal. If this does not happen, then, first of all, once again carefully inspect all the wires for their integrity and close fit of the plugs to the connectors.In parallel, you can do the following: through the "Start" menu, open the "Devices and Printers" window. In the opened window the icon of your printer should be visible.
Driver installation
The greatest difficulty, as a rule, is the procedure for correctly installing and configuring drivers. If the printer was purchased recently, then you can certainly find it in the factory box installation disk with the necessary information and a list of necessary programs for correct operation. Using the installation disk during the initial connection is the simplest procedure, which is also the fastest setup option. But what to do if you are unlucky and the disc is not in the box? Or maybe there is no box itself, since the printer was purchased a very long time ago or was given as unnecessary by someone from the acquaintances.
To "get" the necessary drivers for the printer without a disk, you need 10-15 minutes of time, a small amount of ingenuity and focus on the result. There are two ways to search:
- through the means of Windows;
- through downloading software on manufacturers' websites.
Using windows
This option, as a rule, is relevant for the simplest models, the functionality of which provides for the elementary procedures of standard printing and scanning (in the case of MFP), without the possibility of applying advanced parameter settings. Windows Update contains drivers for the most popular models in their simplest form and can itself search for the necessary programs when the printer is connected.
If within a few minutes after joining this did not happen, then it is recommended to go the following way:
- open the "Control Panel";
- select the menu item "Equipment and Sound";
- find "Devices and Printers";
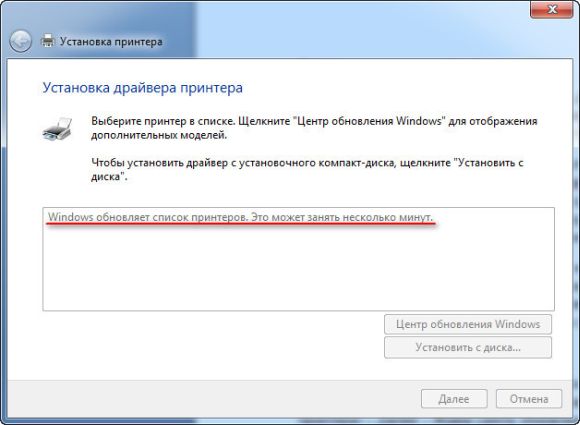
- In the window that appears on the screen, select the image with the right mouse button and click the Windows Update Center item;
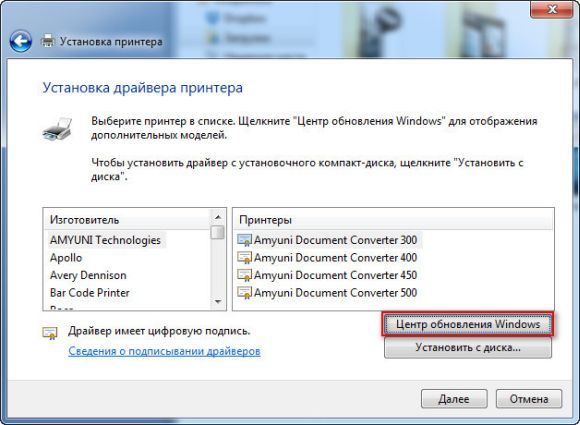
- in the opened window, click on the “Check for updates” line and wait for 15-35 minutes to complete the process of searching for all available updates, as well as downloading them;
- restart the computer and check the correct operation of the printer.
Setting the parameters correctly automatic driver installation using Windows as follows.
- In the “Devices and Printers” menu, select “Computer” with the right mouse button.
- In the window that appears, click on "Device Installation Settings".
- In the next window, select the menu item “Yes (recommended)” and confirm the selection with the “Save” button.
From now on, with a stable Internet, all the necessary driver updates and other software updates will be downloaded and installed on your computer without your direct participation.
Using producer resources
This method involves the independent installation of drivers from the sites of companies-manufacturers of the connected equipment. Accessing official websites of famous brands, such as Canon or HP, through a computer is absolutely safe from the point of view of the possibility of obtaining malicious software.
To find the right driver, you just need to know the model of the existing printer. Exact specifications can be found either in the accompanying documentation, or on the case. Once the model name is found, you can start searching through the browser. As a rule, when specifying the exact name in the search line of any browser,in the list of drop-down options for various sites offering programs, the first position will be the manufacturer’s site. As a rule, but not always. Therefore, to eliminate potential threats to your computer, pay close attention to the site where you hit when you click on the link. Products webpage difficult to confuse with any other: firstly, its name, as a rule, speaks for itself, secondly, such a site is usually clearly structured and devoid of all sorts of unnecessary information that is not directly related to the maintenance of branded equipment.
Drivers need to be downloaded only from official sites, because it is safe and you are guaranteed to get the latest version of the software.
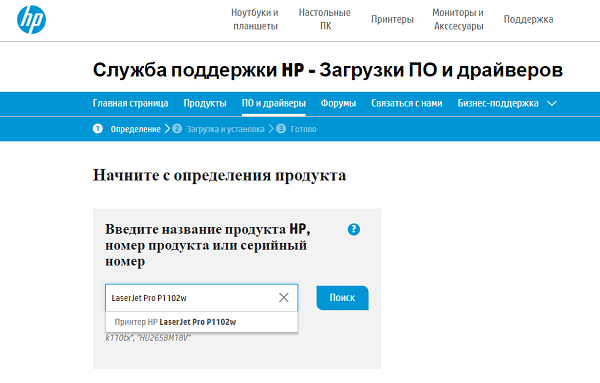
For example, you need drivers for your HP printer.
- Through the menu "Support" we find the item "Drivers and Programs."

- Enter the product name or serial number in the search box.
- We find the list of the software offered in our case.
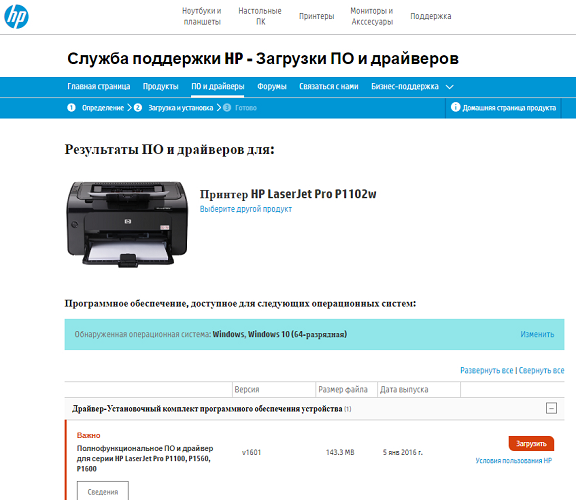
- Select the necessary (you may need information about the version of your OS, be ready for this).
- We wait for the package to finish loading and, after running the file, install the drivers, following the wizard’s prompts.
Connecting the printer to a laptop via wi-fi
With the advent of wi-fi in everyday life, there is no need to use the countless number of wires connecting gadgets. Using a router when connecting a printer to a laptop allows you to use a mobile computer anywhere in the apartment without having to connect it to the press in the case when you need to print text or pictures on paper.
Connect using WPS
The simplest synchronization option, a necessary condition of which is the existence of the very possibility of “Wi-Fi Protected Setup” in the functionality of both devices. On the bottom of the router should find the WPS icon, in the immediate vicinity of which you can find the PIN code required when setting up. The next step is to configure the router through the system menu.
- To do this, go to the web interface through any browser, typing the path 192.168.0.1 or 192.168.1.1 in the address bar, depending on the device model, and find the string Device PIN, where we enter the pin code mentioned above.
- Make sure there is WPA / WPA2 protection and disable MAC filtering.
- If the printer has a button that activates WPS, press it and wait until the wi-fi system finishes the search process.
- Through "Printers and Faxes" we find the device we need and open the context menu where we put a check mark in front of the "Use Default" line.
Using the Connection Setup Wizard
The connection wizard is built into the printer's operating system and allows you to quickly and easily make a wifi connection. A prerequisite will be WPA or WEP protocol support. For the setup itself, you will need information about the SSID of the network and the password to access it.
Through the printer’s control panel, go to the “Setup” menu item and select “Network”. After that, the wizard will begin to search all available wi-fi networks in the immediate vicinity without your participation, and their full list will be displayed on the screen. If the proposed list does not contain the required network, try to find it by manually entering the name. If the network is found, it remains only for security reasons to change the password to access it. Everything, it is possible to begin using the device in an operating mode.
Setting up a network printer
To configure the access of the laptop to a printer that is already connected to another computer, the network printer configuration feature allows. When you select driver properties, you need to activate the ability to access over the network, and from the laptop print through the connection to the equipment via the network.
The wizard is launched through the "Control Panel" of the computer. In the window that opens, you need to add the printer through the item “Add network” in the context menu, after a few minutes or seconds, depending on the operating system speed, the necessary equipment will be found. After that, you need to go to the printer settings via the appeared shortcut and enter the IP address of the device (it can be found in the instructions). After the manipulations, the laptop needs to be rebooted, and if everything is done correctly, the printer will start its work.
Print setting
By setting up the printer’s access to the laptop via a normal wired connection or via a wi-fi access point, you were able to use it. Directly printing a document, picture or photo can be done in various ways, depending on what kind of information processing software you use.
The easiest way to print a file is to use combinations of keys Ctrl and P. This method is applicable both for printing "Word" documents, and for putting images on paper. Thus, you can print only one copy of the file in its original format.
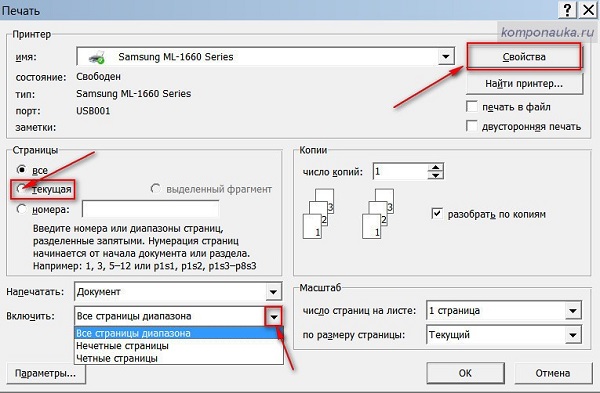
The most commonly used MS Office editors offer users a wide range of printing options. Settings include the ability to select the number of copies needed, page orientation, allowing you to conveniently arrange the text in the required format, other useful functions. You can change the size of the document fields, as well as adjust the toner save mode. Having set all necessary parameters, through "Preview" You can see how the file will be presented in the final version, make adjustments if necessary and print out the final copy.
Connecting a printer to a laptop is quite a doable task that even a novice user can handle. If you correctly take into account all the nuances described above, and get acquainted with the instructions attached to the printer in a timely manner, you can avoid many problems associated with incorrect settings. Modern technology is equipped with a maximum of features that facilitate the synchronization process, but even if you are using outdated models,Remember, there are no insoluble problems!
/rating_off.png)


