Making a plotter with your own hands
Plotters are devices that automatically, with a given accuracy, produce a drawing of drawings, drawings, diagrams on paper, fabric, leather and other materials. Common models of technology with a cutting function. Making a plotter with your own hands at home is quite possible. To do this, you need parts from an old printer or dvd drive, certain software, and some more materials.
CNC plotter from dvd drive
Making a small plotter from a dvd drive yourself is relatively easy. Such a device on arduino will cost much cheaper than its corporate counterpart.
The working area of the device being created will be 4 by 4 cm.
For the work will require the following materials:
- glue or double-sided tape;
- solder for soldering;
- jumper wires;
- dvd-drive (2 pcs.), from which stepper motor is taken;
- Arduino uno;
- servomotor;
- IC L293D (driver that controls the engines) - 2 pcs .;
- breadboard prototype (plastic base with a set of conductive electrical connectors).
In order to bring the planned project to life, you should collect such instruments:
- soldering iron;
- screwdriver;
- mini drill.
Experienced lovers of electronic home-made can use additional parts to assemble a more functional machine.
Assembly stages
Assembling the cnc plotter is carried out according to the following algorithm:
- using a screwdriver, 2 dvd drives are disassembled (the result is shown in the photo below) and the stepping motors are taken out of them, while from the remaining parts two side bases are selected for the future plotter;
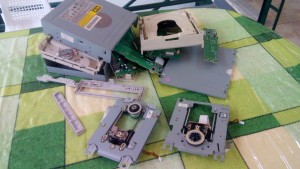
Disassembled dvd drive
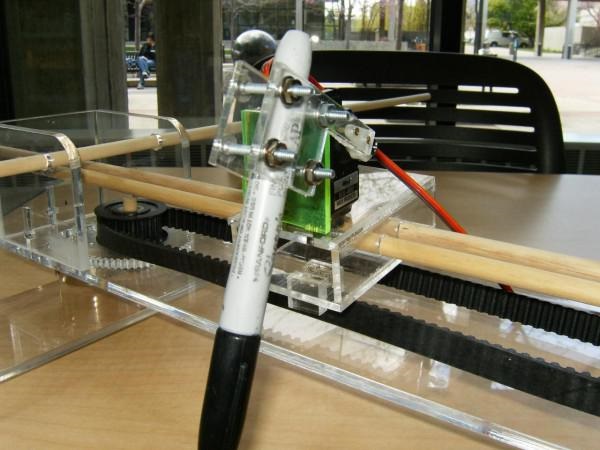
- the selected bases are connected with screws (having previously adjusted them in size), thus obtaining the X and Y axes, as in the photo below;
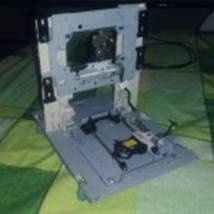
X-Y axis in the assembly
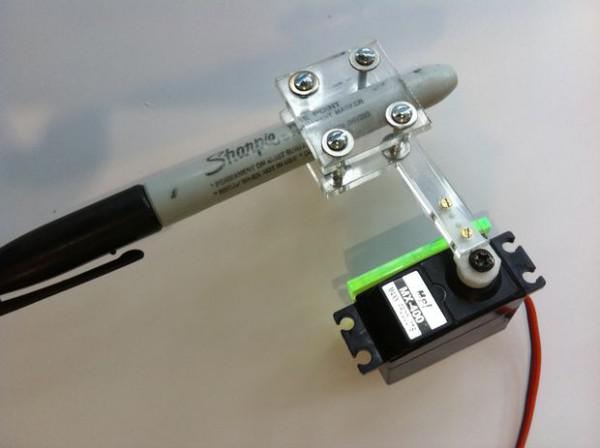
- to the X axis attach the Z axis, which represents servo drive with holder for a pencil or pen, as shown in the photo;
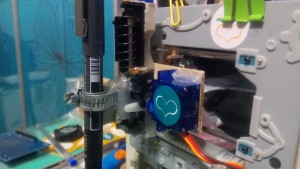
Z axis
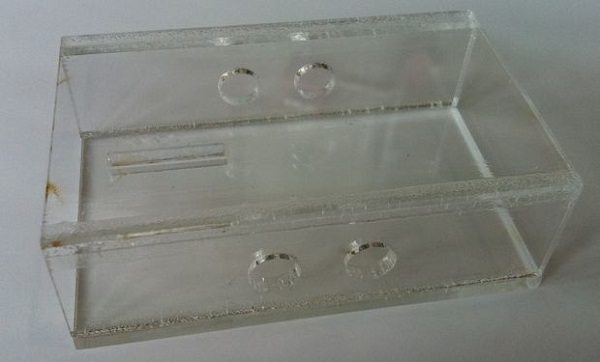
- Attach a 5 by 5 cm square of plywood (or plastic, board) to the Y axis, which will serve as the basis for the paper to be laid;
Basis for paper placement
- collect, with particular attention to the connection of stepper motors, an electrical circuit on the solderless board according to the scheme below;
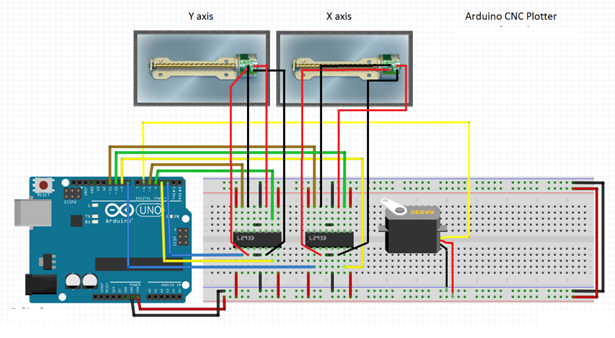
Wiring diagram
- enter the code to test the performance of the axes XY;
- check the functioning of homemade: if the stepper motors are working, then the parts are connected according to the scheme correctly;
- load the working code (for Arduino) into the cnpu plotter;
- Download and run the exe program to work with the G-code;
- Inkscape (vector graphics editor) is installed on the computer;
- install an add-on to it that allows you to convert G-code into images;
- customize Inkscap work.
After that, a homemade mini plotter is ready for use.
Some nuances of work
Coordinate axes must be located perpendicular to each other. At the same time, the pencil (or pen), fixed in the holder, should move up and down with a servo without any problems. If the stepper drives do not work, then you need to check the correctness of their connection with the L293D chips and find the working version.
The code for testing X-Y axes, the plotter’s work, Inkscape with the supplement can be downloaded from the Internet.
G-code is a file containing the coordinates X-Y-Z. Inkscape acts as an intermediary, allowing you to create files compatible with the plotter with the given code, which is then converted into the movement of electric motors. To print the desired image or text, you will need to use the Inkscape program to translate them into G-code, which will then be sent to print.
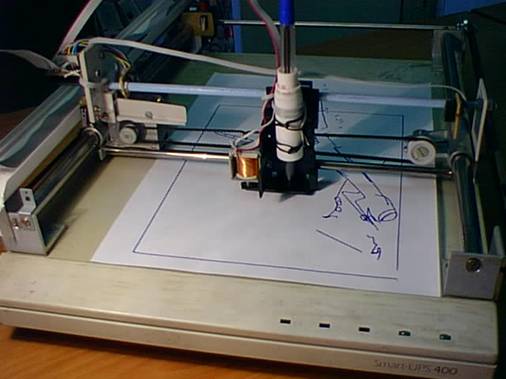
The following video demonstrates the work of a homemade dvd-drive plotter:
Printer plotter
Plotters are classified according to various criteria. Devices in which the carrier is fixed motionless by mechanical, electrostatic or vacuum method are called tablet. Such devices can either simply create an image, or cut it out, with the appropriate function. At the same time, horizontal and vertical cutting is available. The parameters of the carrier are limited only by the size of the tablet.
Cutting plotter differently called a boat. It has a built-in cutter or knife. Most often images are cut out by the apparatus from such materials:
- plain and photo paper;
- vinyl;
- cardboard;
- different types of film.
You can make a flatbed printing or cutting plotter from a printer: in the first case a pencil (pen) will be installed in the holder, and a knife or a laser in the second.
Homemade Tablet Plotter
To assemble the device with your own hands, you will need the following components and materials:
- stepper motors (2), guides and carriages from printers;
- Arduino (compatible with USB) or a microcontroller (for example, ATMEG16, ULN2003A), which is used to convert incoming commands from a computer into signals that cause the movement of drives;
- 300 mW laser;
- Power Supply;
- gears, belts;
- bolts, nuts, washers;
- organic glass or board (plywood) as a base.
The laser allows you to cut thin films and burn wood.
The simplest version of the tablet plotter is assembled in the following sequence:
- make the basis of the selected material, connecting elements with bolts or gluing them together;
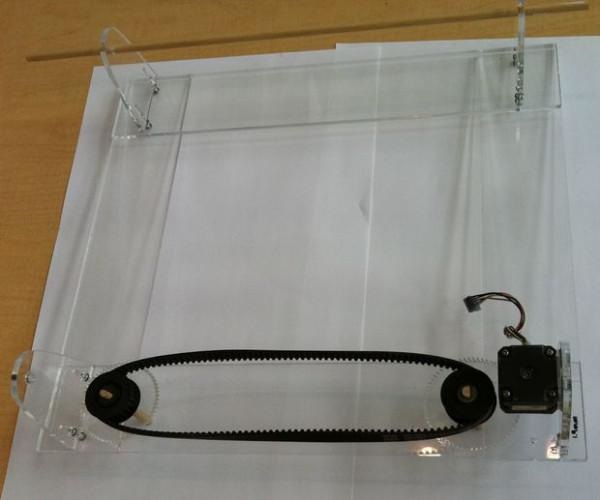
The foundation
- drill holes and insert guides into them as in the photo below;
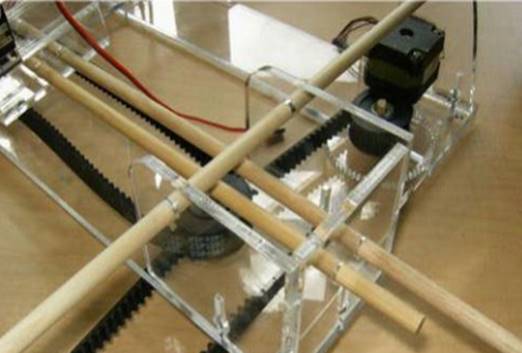
Installation of guides
- assemble the carriage to install the pen or laser;
The carriage with holes for guides
- assemble mount;
Marker mount
Locking mechanism
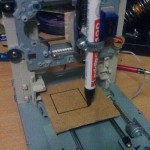
- install stepper motors, gears, belts, getting the construction shown below;
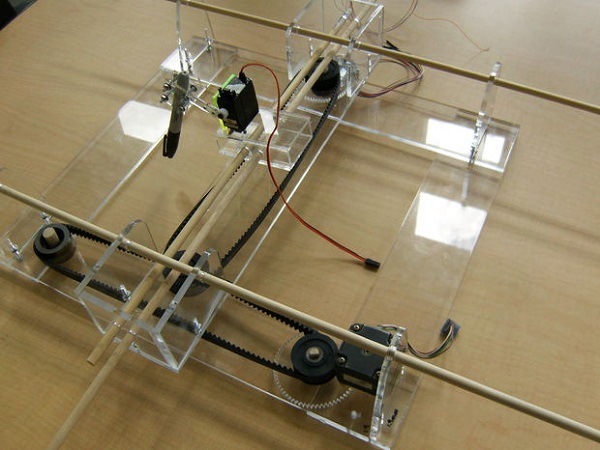
Assembled homemade plotter
- connect the electrical circuit;
- install the software on the computer;
- start the device to work after checking.
If a use arduinothen fit the above program. The use of different microcontrollers will require the installation of various software.
When a knife is installed to cut a film or paper (cardboard), the depth of its penetration should be correctly adjusted experimentally.
This design can be improved. adding automation. Details of the parameters will need to choose empirically, based on the available. Perhaps some need to buy.
Both considered variants of plotters can be made independently if only there was an old unnecessary equipment and desire. Such cheap devices are capable of drawing drawings, cutting various images and figures. They are far from industrial analogues, but if they are needed to create drawings frequently, they will make their work much easier.However, the software is available online for free.
/rating_off.png)


