Rules of overclocking before work
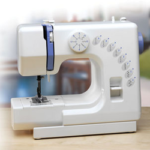
After buying a new sewing machine, the owner is impatient to try it out, but do not rush things. Such an accurate and sensitive to small things device must be pre-configured. Only this will ensure your normal work and allow you to get high-quality seams. Consider, for example, how to configure overlock - this will help you gain the necessary experience.
Content
Thread tension before sewing
It is considered to be quite difficult to understand how to properly configure the overlock to set balanced indicators. This statement was relevant for devices of the previous generation. In them, all manipulations were carried out using conical springshidden in the body of the machine. New devices are simple and understandable designsAll necessary controls are placed on the front panel and are available to the user at any time.
Experts recommend adjusting the tension of the thread integer values on the regulator. The division between integer indicators is designed to adjust the seam for each individual work session. The same is true for the overlock of the previous generation, and for the Chinese overlock. First, unscrew the nuts of the conical springs strongly, and then proceed to fine tune adjustment. You can record the set values - this will allow you not to look for them by trial and error next time.
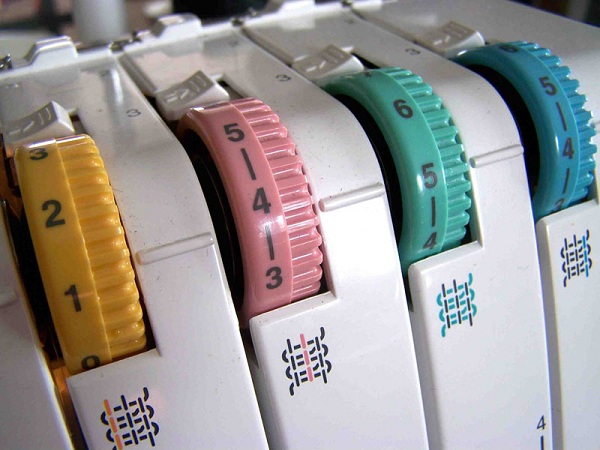
Let's proceed to the setup procedure. In order to achieve the optimum tension of the overlock thread with your own hands, it is necessary to correctly set the corresponding regulator on the device case:
- low tension is provided when the value is set from two to three;
- medium tension can be achieved by setting the regulator to a mark from four to five;
- for high tension choose a position from six to seven.
It is important to remember that all regulators should be set to the same value, and all the threads tucked into them should be the same in number and structure.
Different values are intended for different fabrics. It is not recommended to sew thin materials in a mode designed for thick ones.
Stitch size and slice
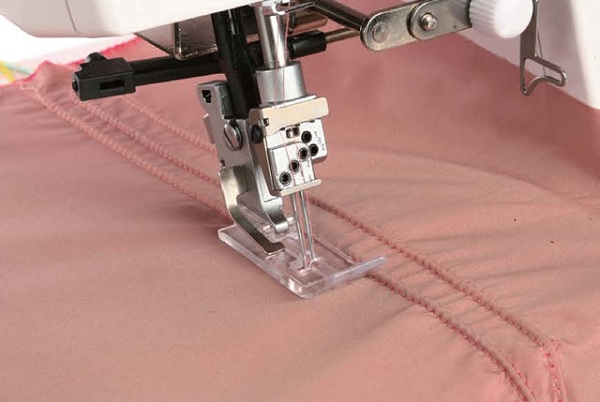
Setting the stitch width and length is necessary to improve the quality of the stitch. For each new session, it is necessary to select your own settings. For standard work on this machine is provided universal mode, combining indicators suitable for most fabrics. For small seams to adjust the machine is not necessary.
The stitch length in this setting is from two and a half to three millimeters, which is perfect for thin fabrics and materials of average thickness. Stitches shorter or longer than this value may result in poor-quality stitching and fabric stitching.
Stitch width, which is selected before starting work, must match the width of the installation of the cut line. The selected indicator on the device controls such processes as:
- the distance from the trimming knife to the needles;
- the length of the fabric left inside the machine;
- system speed.
The largest stitch length value is used during work, in which a large part of the fabric should be positioned inside the stitch.It is rather difficult to work with the lowest value, since the optimal tension of the thread is required such that the threads begin to break periodically.
Narrow seam is convenient to use when role-playing line or for other specific works.

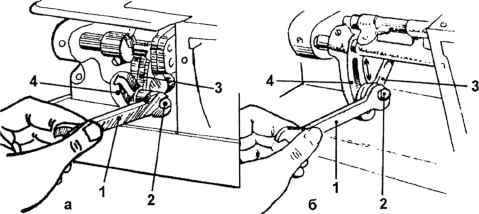
The direct adjustment of the length takes place with the help of special bolts provided by the design. Turn them to the required position. The operation should be carried out in stages, checking the stitch length on a piece each time a slight scrolling was performed.
The details of getting a quality stitch
There is an optimal way to configure overlock before work. To do this, you need a piece of dough fabric, which checks the quality of the seam. Pass the blank through the machine and carefully inspect the resulting line.
- Inspection start with eyelets of the left needle. Shrunken cloth means excessive tension on the needle thread. Loosen it by gradually changing the value on the controller. After each single change spend a piece of cloth through the machine, repeat the procedure until the matter ceases to be crushed.
- The next step involves checking for evenness of the seam.When the fabric has stopped wrinkling, you can proceed to the next procedure - take the fabric so that the seam is in the middle. Pull the ends in different directions and take a look. If instead of tightly fitting halves you see a ladder of threads, you need to increase thread tension. The procedure, like the previous one, is carried out step by step. Take your time, setting up a sewing machine is a painstaking task. Pay special attention to the left needle thread, it is she who connects the loop with each other. The quality of the stitch depends on the correctness of its tension. Having identified the optimal value for the left thread, set exactly the same for the right one. This rule is relevant for all types of fabrics, the ratio between the right and left thread never changes.
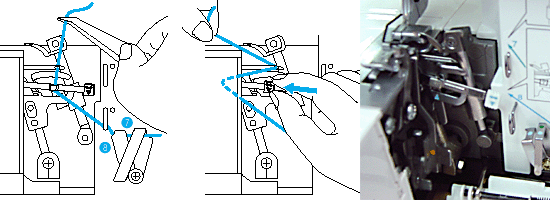
- The final stage is the definition looper stitches - it should be located at the extreme end of the segment of fabric. In this case, the seam should be laid in a straight line, forming a flat pattern between the stitches. The loops protruding beyond the edge of the fabric signal a low tension on the looper threads. Pull them up a bit, and check for a new piece of matter.If loops of one looper creep over the edge, it means you only need to pull up its thread. Watch this carefully, because if you make the wrong choice, you run the risk of creating excessive tension and provoking an interweaving only on one side of the matter. In this case, you have to step by step loosen the thread until the looped line comes back to normal. In some cases it is required to simultaneously tighten one looper and loosen the other. Experts recommend starting with a weakening.
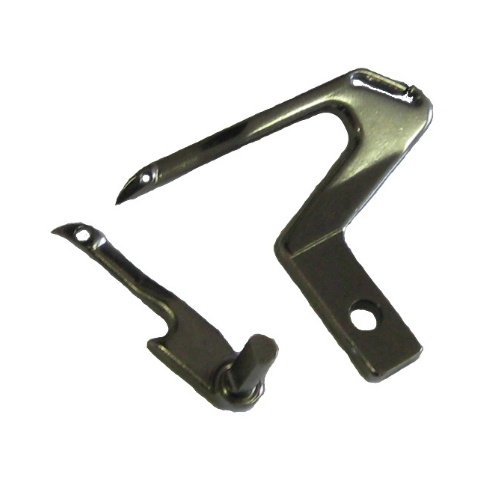
Overlock looper
Adjusting overlok according to the above scheme, you can avoid many problems. The instruction allows adjusting the settings to any type of fabric and successfully performing work of any complexity.
Setting up a sewing machine requires focused attention and complete dedication to the process. Get ready for the fact that you will spend a whole hour adjusting all the settings you need to work. During the procedure, you can not hurry, if you are not sure that you can cope on your own, contact the master better.
/rating_on.png)
/rating_half.png)
/rating_off.png)