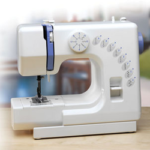
Causes of stitching stitches in the sewing machine
Working with a sewing machine, you can see that the bottom line of the seam has started to wind. In most cases, the cause of the problem is a loosely stretched thread. The line becomes uneven in the bottom row, which logically leads us to the bottom thread, but do not be deceived. It is the upper thread that leads to the looping and, if it is properly tensioned, the unpleasant effect should disappear. Unfortunately, a simple solution is not always the right one, and the manipulation performed may not lead to improvement. Let us see why a sewing machine can wag, what is the cause of this effect and how to fix the problem.
Content
- 1 Jerking thread
- 2 The shuttle is too low relative to the needle
- 3 Problems with passing the upper end
- 4 Incorrect operation of the conical spring
- 5 Faulty washer pusher
- 6 Insufficient washer clamp
- 7 Latch knob too long
- 8 Uneven thickness of filaments
- 9 Lack of a compensation spring
- 10 Excessive thread tension
- 11 Out of the washer thread
Jerking thread
Does the thread move in a sharp motion between the shuttle and the pusher, lingering a little after this? This means that the gap between the input part of the pusher and the shuttle nose is smaller than the instruction prescribes. In such a situation, normal operation is impossible, so the bottom line will loop.
Elimination of damage is complicated by the lack of uniform values. For each model it is selected individually.
Experts recommend trying to increase the space at the exit of the thread from the shuttle. You can also reduce the voltage compensation springwhich can be over tightened. Although it is paradoxical, but its such position also leads to the fact that the lower thread winds.
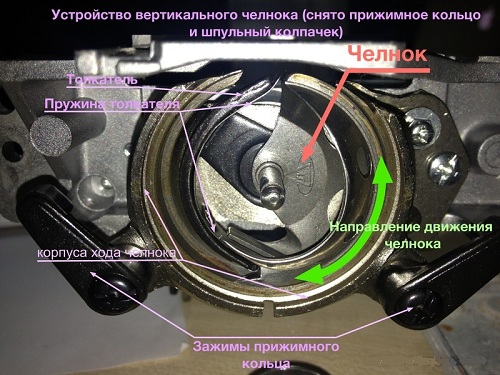
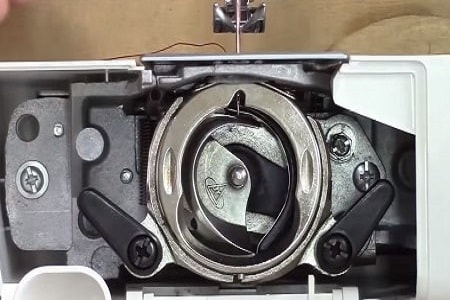
The shuttle is too low relative to the needle
You fixed the problems with tension, but the problem did not disappear. Why does the thread loop in this case? It is likely that the nose of the shuttle, in its most extreme position, stands behind the needle by more than two millimeters. The situation is complicated increased clearance between the spacer plate on the body of the shuttle and the needle.If it exceeds one millimeter, the thread will be firmly seized by the hook, but fly off of it too slowly.
This is the main failure in many models. It's all about the method of mounting the shuttle shaft with the capsule crank. The use of a pin for these purposes is no longer justified and is amenable to great criticism of experts. This design is not able to ensure reliable operation.
Correct the situation will help replacement of the guide plate in a sewing machine or repair it.
- Carefully remove the part and burn the place with technical holes on the open fire, for this you can use a candle.
- Leave only the working area untreated, it should not be annealed.
- After that, take a large file and saw through the holes in the direction from the working area.
- Replace the part by aligning the gap between the needle and the plate to one millimeter.
- Upon completion of the procedure you have to replace the unreliable pin on the mounting bolt.
- Having secured the fixation, set the distance between the nose of the shuttle and the needle in the extreme position so that it is equal to two millimeters.
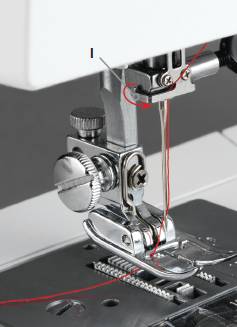
Problems with passing the upper end
In this case, the thread in the sewing machine with a noticeable force squeezes through the end of the locking pin located in the bobbin case. This fault is characteristic of the machines in which it is installed bobbin case from another model. Owners have resorted to this when they can not find factory parts, but such repairs can only aggravate the situation.
Bobbin sewing machine
To fix it you have to bring to mind the non-native detail. Grind the end of the locking finger on both sides by 0.25 millimeter. Also on the bobbin case there is a special channel of the bobbin holder. It also needs to be cut a little for a smoother sliding thread. For grinding, it is recommended to use a felt circle, previously soaked in GOI paste.
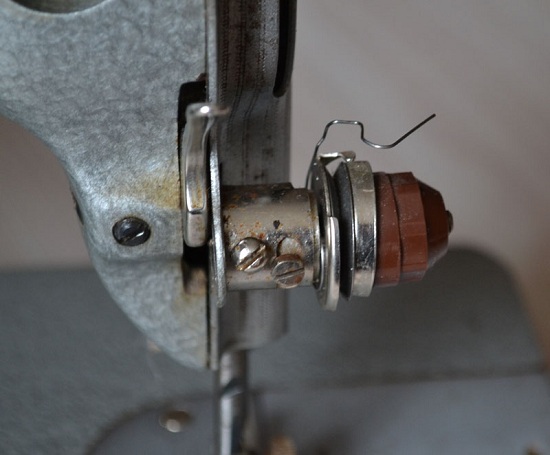
Incorrect operation of the conical spring
As a rule, when such a breakdown occurs, a conical spring sticks. This affects the tension regulator of the upper threads. The material is not pressed by washers and wags, creating unevenness at the bottom of the seam. In this position, the threaded axial ends are compressed in a longitudinal section, deforming the upper turn of the spring mechanism.
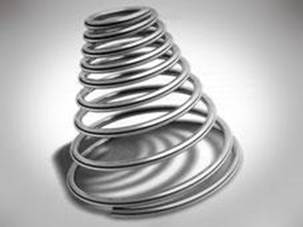
Taper spring
Solves the problem by manipulating regulatory axis. Bring it in such a position that the conical spring moves easily along the axial slot. The procedure should be carried out carefully, without damaging the small parts of the device.
Faulty washer pusher
This mechanism performs the function of moving the washer. After raising the foot, the pusher pushes the puck, but when lowering it does not move it to its original position. Staying in a slightly pressed position, the washers do not trap the thread, which slips too easily and dangles from the bottom. Pusher jamming is a rather frequent phenomenon, it can be triggered by the formation of rust, contamination of parts, damage to the mechanism and other malfunctions.
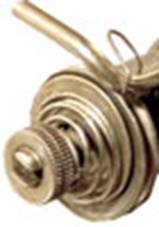
Pusher washer
To eliminate the need to:
- clean the rust from small parts with fine-grained emery paper;
- restore the original form of damaged items or replace them with new ones.
Easiest purchase a new pusher to replace your part. But if you could not find the right parts or the machine is needed right now, you can try to repair it.
Insufficient washer clamp
Sometimes the tensioner of the upper thread pulls the puck poorly.This is the most simple failure, which can easily be fixed at home.
Compress the conical spring with the nut. Carry out the procedure carefully, gradually tightening the nut. Periodically check the condition of the device so as not to over-tighten the spring. Manipulations need to be carried out with great precision, as it is easy to miss the right moment.
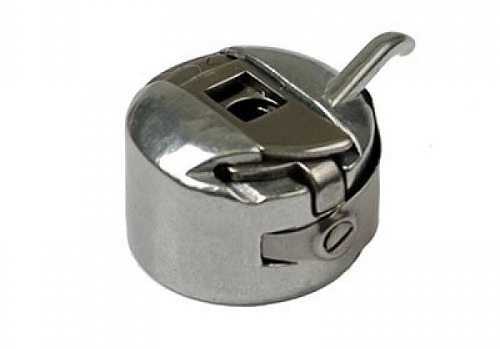
Latch knob too long
On some models, this part may be too long, and at the same time its lower part has an angular configuration. A thread passed through the bobbin case clings to these sharp protrusions and is stuck in the lower edge of the latch handle.
Bobbin case
The situation will correct the operation shortening the locking handle on the bobbin case. After that, the bottom edge is carefully rounded and ground. All elements must be adjusted to the size of the bobbin case, otherwise the building up of the thread will appear again.
Uneven thickness of filaments
The thickness of the thread located on the bobbin is greater than the upper thread. Since the upper end is the leading one, it lifts the lower end and uses it to tighten the stitch.Such position obliges the lower thread to be flexible and pliable, without interfering with the mechanism. Otherwise, there are looping and unevenness of the seam.
In this situation will only help thread replacement. They should be used from either one set, or the top thinner than the bottom. Check all ratios carefully before sewing.
The instruction manual for the device contains tables with all recommended ratios.
Lack of a compensation spring
The thread tension regulator cannot function normally due to the absence of a key element. This spring helps the hook at the top point to drop the thread, tighten the stitched seam in the lower-case row, and then get the amount of material needed to continue working.
The compensation spring is important in this design and affects the quality of the seam being created. You can fix the damage, only putting a new spring mechanism. Without it, can not do.
This part is consumable and eventually fails. She can fly, bend or burst. Many owners do not pay attention to this and continue to work, but this is fundamentally wrong.Normal operation of the device in such conditions is impossible. Do not be lazy to purchase the necessary part and install it if necessary.
Excessive thread tension
Sometimes a sewing machine overtightens the thread. Because of this, the upper thread is not able to lift the upper thread, and the line goes out of the curve or looping. In the correct line, the lower thread is visible from above, and the upper thread goes to the wrong side of the fabric. Lower case in this position looks smooth and the same. In case of excessive tension of the lower thread, the lower case picture is broken, since the thread was not pulled into the fabric and is easily pulled out of the stitching. In addition, when you try to smooth out such a seam with your hands, the lower thread will simply break.
Loosen the thread used and watch her while you work. Remember that any trifle may affect the operation of the sewing machine, strictly adhere to the recommendations for its operation.
Out of the washer thread
Before starting work, a new thread is always put, and sometimes it happens that when refueling it is not included in the inside of the regulator washer. The thread remains free and not clamped by the guides.In this position, the regulator is not able to control the thread, which leads to poor quality work. The line may not be formed at all, the thread may get tangled and cause a lot of trouble.
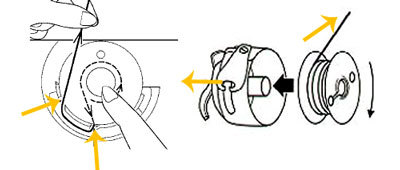
Pull the thread out of the device, make sure that it does not break, and its parts do not remain inside the machine. Strictly following instructions, Thread the thread in the compartment. Carefully ensure that its end is pressed against the washers.
Careless attitude to the device can provoke even more serious damage. Always control the position of the thread, the only way you can be sure of the quality of the future seam.
Sewing machine is very thin device. His work may be disturbed by the slightest discrepancy with the parameters specified by the developer. Take time to check all the items before you begin, so you can avoid serious problems.
/rating_off.png)