Change the bearing on the washing machine Ariston
Prolonged operation of the washing machine leads to the fact that the rubber seal hardens and begins to poorly hold the water that falls on the bearing. From the effects of moisture, it rusts and fails. Usually washing machine bearings Ariston serve 6-10 years, but if they are exposed to moisture, then bearing replacement will be required much earlier.
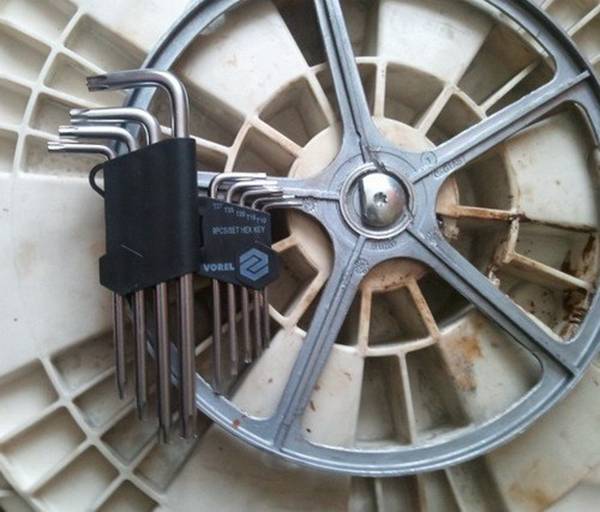
Preparation for work
Before you start the repair, it is necessary to unplug the washing machine from the network and provide convenient access from all sides. We release the tank, if there is something in it, and prepare the necessary tools. You will need:
- crosshead screwdriver;
- flat screwdriver;
- keys set.
Be sure to disconnect all connections and hoses, and in order not to fill the floor, prepare a couple more tanks.
AGR disassembly process
Disassemble washing machine need to get to the tank.To remove it, follow these steps:
- Unplug the plug on the back wall, unscrew the clamp holding drain hose. Remove the pipe from the tank.
- Disconnect the motor power connector.
- Remove the drive belt - it is better to do it from the side of the drum.
- Remove the electric motor. To do this, you need not completely unscrew the bolts, then gently push the mounting bolts to move the motor from the runners. As soon as he succumbed, we unscrew everything completely and remove it.
- Pulling the engine off a heating element. It is located at the bottom under the drum.
- Disconnect any remaining wires.
- Next, to get to the tank on a washing machine Ariston, you must remove the top cover. It is fastened with two bolts to the back wall, unscrewing which, you need to slide the cover back and remove it from the car.
- After removing the top panel, it is necessary to pull out the powder container and disconnect it from the drum. This opens access to the remaining mounting screws. Unscrew them too.
- Remove the control unit.
- To dismantle the tank, it is necessary to disconnect the rubber seal. It is attached to the front wall with a metal clamp with a spring.To find the spring, you need to check the seal around the perimeter. Once you have found the spring, you need to disconnect it with a flat screwdriver, pulling it along with the clamp.
- Take off manhole lock. It is mounted on 2 bolts in the right side.
We have practically freed the tank, but for its complete removal it is necessary to removefront panel. In the washing machine, Ariston, for this it is necessary to disconnect the base panel - under the front wall fasteners are hidden. It rests on several screws. To remove the front cover, move it up.
With the front cover removed, you can easily get to tank balances and unscrew them. Counterweights are attached to the bottom and top of the tank with three bolts. A bulk rubber fitting that fits on the clamp is suitable for the tank. It must be removed and after that you can not disconnect all the elements separately, but simply push everything superfluous aside.
It remains to disconnect the suspension tank and the tube level switch. Worth starting with shock absorbers. They are located at the bottom of the washing machine. Disconnect the shock absorber from the tank, pulling out a plastic pin with a latch.To facilitate the dismantling of the pin, it is necessary to screw the screw and pull over, at the same time squeezing the latch with a cap key.
To remove suspension springs, you need to pry them with a flat screwdriver. Just hook the mounting with a screwdriver and disconnect from the drum. Now once again check that all elements are disconnected from the tank. To pull the tank you have to lift it and pull it towards you.
The drum is best put on the cuff, otherwise you can damage the plastic elements and fasteners.
Disassemble the drum
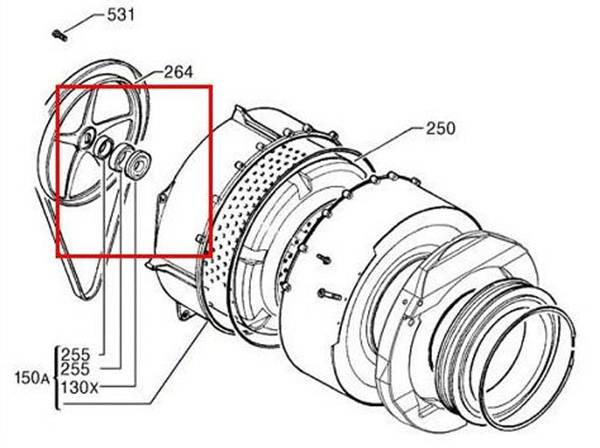
- Let's start with the removal pulley. The pulley must be locked and unscrew the mounting bolt. Next, remove the pulley from the shaft.
- Located under the pulley outer bearing. To remove it, you need to put on the bearing bar and make a few blows with a hammer.
- Removing the outer bearing is necessary disassemble the tank. Along the perimeter, the two halves of the drum are bolted together. The tank fastens not only on bolts, but also on latches. In order not to break them, it is necessary to separate the two halves with a slotted screwdriver.
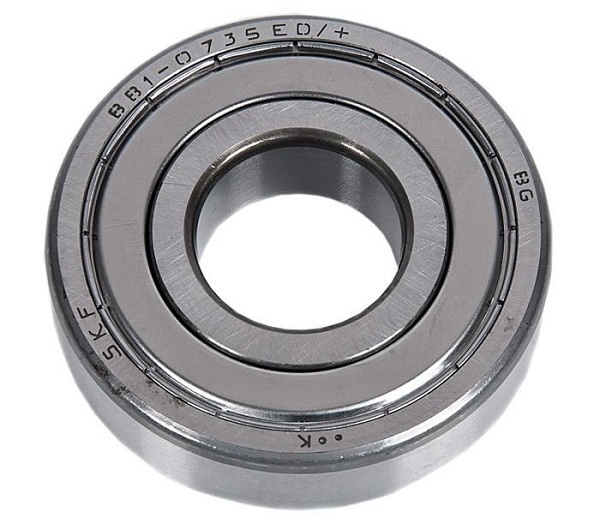
Disassembled drum - pay attention to the shaft and sleeve. It should not be mechanical damage, if you did find them, it is best to change them. The main thing is that the new bearing in the washing machine fits snugly to the hub, otherwise the water will again fall inside the drum. Also need to check the mounting mounts.
Old bearings must be removed, checked and cleaned seats, and then replaced with new ones. All is well worth it lubricate, then after repair the washing machine will last for a long time. New bearings must be carefully pressed; for this purpose it is necessary to strike the chisel in a circle. The blows must be applied until the new part rests and will sit tight on the seat.
Before assembling the drum, replace all seals and apply sealant, otherwise the repair will have to be repeated very soon.
Assembly
Collecting a washing machine is in the reverse order. When assembling, be sure to check that all the elements fit snugly together and that the fastenings are securely assembled. It is better to assemble and fix the electric motor before you install the tank in the case of the washing machine.
After collecting the washing machine, conduct a test wash. In the tank should not be linen, and the temperature you need to choose a small, 60-70 degrees will be enough.
/rating_on.png)
/rating_off.png)