Dismantling washing machine "Ariston"
Imagine that your Hotpoint Ariston washing machine has some kind of non-critical fault, which can be completely eliminated with your own hands without calling a qualified specialist. Or you simply do not have the opportunity to contact the service center. how disassemble the washing machine brand "Ariston" independently so as not to aggravate the situation even more? You need to carefully prepare and think about each step.
Preparation for work
First, turn off the water supply and disconnect the machine from the mains and sewer. Carefully fold all hoses so that the remaining water does not spill out, and fasten them to the back wall. Unscrew the cap drain filter and drain the water from the tank into some container. Then, together with an assistant, move the washing machine to a convenient place where it can be disassembled without interference.

Body disassembly
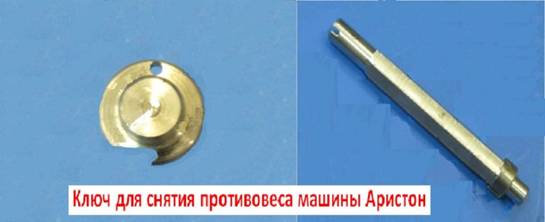
The degree of disassembly of the machine "Ariston" depends on the nature of its failure. Often, a complete disassembly is not required and you can do only partial - to inspect the main components. Washing machine disassembly begins with the removal of the service hatch, located on its rear wall. This allows you to immediately access the electric motor with a driving belt, a temperature sensor, TENU and drum pulley. If further disassembly is required, then remove the top cover, which is fastened with two screws on the back of the washing machine. Beneath it you will find a large counterweight, tank springs, a control panel and a noise filter. Counterweight prevents us from getting to the drum tank and some of the sensors located below. Therefore, if necessary, it will have to be removed using a special key.

To remove the front control panel, you need to get powder tray and unscrew the screws under it, as well as the two screws on the left and right under the top cover. Now, if you pull the control panel up, it will be removed easily.
Then turn the machine on the left side and see what is below. If your model has a washer bottom, then remove it. But usually it is not.From the bottom, we can access the drain pipe, engine, pump, filter and shock absorbers.
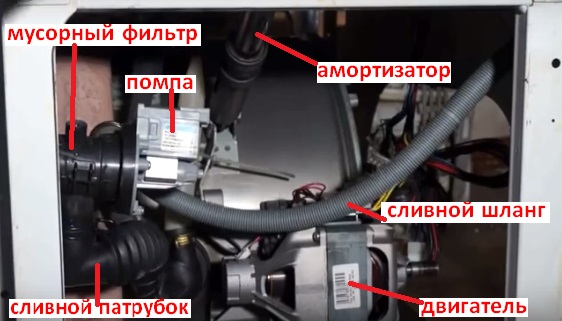
Location of parts in the bottom of the washing machine
On this partial disassembly of the washing machine completed, and now we can remove from it some components and parts.
Complete disassembly
If up to this point we were treated with one cross screwdriver, then for further disassembly we will need a whole arsenal of tools:
- hammer;
- knob with nozzles;
- pliers;
- flat screwdriver;
- key for counterweights;
- colored markers.
Through the service hatch remove drive belt from the pulley of the drum, unscrew the bolts of the electric motor with the driver and pull it off the seat.
When disassembling a machine, do not forget to mark with a marker all the wires that you disconnect from the sensors and other electrical components, so as not to confuse them during assembly.
We unscrew the central nut of the heating element (TENA) not up to the end and insert its hairpin inside up to the stop with a hammer or other suitable tool. Then we get the heater from the tank with a flat screwdriver.

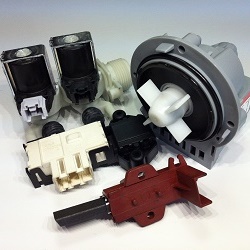
We unscrew all the screws down the front next to the garbage filter and pull the pump assembly with the filter out of the seat.Next, using the pliers carefully remove the clamps from the pipe drain hosethen disconnect the hose from the pump and filter.
In case of damage to the “native” drain hose clamps, they can easily be replaced with any others.
Even at the top of the washing machine can get noise filterby first disconnecting all the wires from it. And on this partial disassembly is completed. There are only those parts and parts that are better not to remove if they are in good condition.
In Ariston cars, the drum tank is cast and cannot be disassembled, although in practice it is possible, and the disassembled tank can then even be re-soldered. So if you still need to remove it, then you should start with the upper counterweight, fasteners that can be unscrewed only with a special key. Read how to disassemble the drum here.
Next you need unscrew the rack, supporting the tank, and with someone together get it through the top of the washing machine, yanked off the springs. This complete disassembly of the machine is finished and you can proceed to its repair or replace defective parts.
Conclusion
There is no particular difficulty in dismantling modern models of washing machines and replacing their parts.Diligent manufacturer initially makes them in view of possible problems and ease of service repair. Difficulties can arise only when trying to repair those nodes that were not provided by the manufacturer for this.
For a better perception of the actions described above, you can watch a video on this topic.
/rating_off.png)