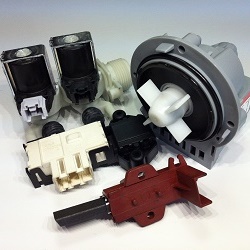
Disassembly of the washing machine drum
Disassembly washing machine drum it is required in cases when it is necessary to replace its bearings, glands, flanges and other damaged parts, or when something is stuck in it. Let us consider in detail how to disassemble the washing machine drum to identify and eliminate these faults.
When should I start self-disassembly
With all the above malfunctions appear noises during washing: screech, creak, whistle and other sounds. Hard objects, buttons, cuff links, loose change, paper clips, pins, nails can seriously damage the drum, bearings or its gland. Although it is quite possible to eliminate all the above-described faults on its own, for this you first have to almost completely disassemble the entire machineand then collect it back.
The drum itself should be disassembled only if the service center refused to carry out repairs.
This failure is most often due to the fact that some washing machines Indesit, Ariston, Samsung and others, can be soldered, that is, non-separable tankswhich are replaced only entirely. You may also be forced to carry out repairs on your own, constrained financial situation or expired guarantee. Otherwise, it is better to trust a qualified specialist.

Instruments
For dismantling washing machine drum Indesit, LG, Ariston, Samsung or Bosh, we may need the following tools:
- Crosshead screwdriver.
- Slotted screwdriver.
- Pliers.
- Hammer.
- Hacksaw.
- Set of open-end or hex keys.
- Puller for dismounting bearings.
- Small adjustable wrench.
- Drill with drills.
- Hotmelt glue.
- WD-40 grease.
This list of necessary tools and materials has been compiled with a large "margin", since we do not know in advance the design features of some parts that we will have to deal with. Many of these tools may simply be redundant.
Step-by-step instruction
Let's say you already pulled out the tank and partially dismantled it, if it turned out to be folding, or sawed with a hacksaw along the welding seam, if not. What's next?

First you need to remove from him the back forecastle, with which he is still connected with the drive belt pulley. Different models of styralok tanks may differ slightly, but the sequence of actions when disassembling them is about the same for all.
Holding the pulley from turning with a stick, unscrew the bolt of the pulley with a horn or hex key, depending on which one fits. We remove a pulley, then we twist a bolt of its fastening back up to the stop.

For bearing removalMost likely, you will need a special car puller and a gas burner to heat them, although sometimes they leave the shaft without any special problems. It is also a good idea to have WD-40 lubricant on hand, which will help you more quickly cope with various attached details.
Unscrewing a bolt (nut) of a pulley can be a daunting task, since its threaded bore is filled with a special compound that prevents its spontaneous unscrewing during vibration.
Then with light blows of the hammer we knock out the shaft. Beat through the wooden block so as not to damage the bolt head.To remove the back of the tank, you also need a couple of hammer blows on it. The main thing is not to break anything.
After we got the drum, you can proceed to its direct repair or replacement. The drums of collapsible and welded tanks are arranged in the same way.. Reassemble in the reverse order. The sawn-off part of the tank can be installed back by fastening its halves with hot melt glue and bolts, pre-drilling small holes for them.

Conclusion
In conclusion, it is worth warning that this repair will take a lot of time. And if the tank of your washing machine Ariston, Indesit or Samsung turns out to be non-separable, then it will take more time at times: it will take three to four hours to cut it and then install it back!

Therefore, be mentally prepared for the difficulties with the drum, be patient, carefully weigh all the pros and cons, before starting to disassemble and repair the washing machine. And do not be afraid to stop in time if you go into a dead end.
To make it as clear as possible, we recommend watching the thematic videos before starting the repair.
/rating_off.png)