We repair the thermopot with our own hands
Thermopot is a mixture of a kettle and a thermos. To maintain a certain temperature of the liquid in the apparatus has a heating function. Despite the fairly reliable design, the device eventually fails, and the question arises: is it possible to repair a thermoplot with your own hands?
Content
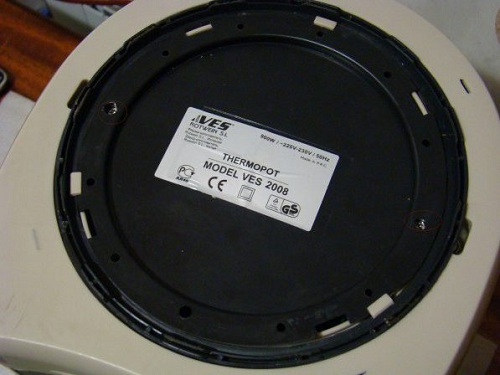
The device kettle thermos
Before you begin to search for the causes of problems in the device, it is desirable to know a little about its device. Thermopot consists of a plastic or metal case, inside of which is a metal water tank. Closed apparatus with a cover located on it. controls.
In any thermopot there are 2 heaters: one for boiling water, and the second for maintaining the desired temperature. To monitor the heating of the fluid to a certain value, the apparatus is set thermostat. The latter is of 2 types.
- Stepless - differs smoothly adjustable water temperature in the range from 60 to 100 degrees.
- Stepped - temperature control occurs at fixed temperature values, for example, as in the VITEK VT-1187 GY thermopot, Saturn ST-EK8032, as well as in the MYSTERY MTP-2403 apparatus
Thermopots always have at their disposal several heating adjustment modes. The more modes, the more flexibility you can control the device.
But practice suggests that in most cases there are enough 3 modes to control temperature indicators. In low-cost models, such as Magnit RTP-013 and MAGNIT RTP-002, only 1 temperature mode is available, which allows only boiling water.
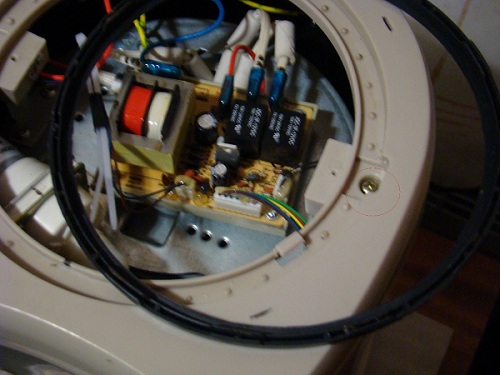
Also the thermobot is equipped with an electronic board (control module) and electric pump (pump) to supply heated water from the tank. In order to supply heated water to the cup, there are several modes: manual filling, auto-feeding and filling with a lever on the spout. Such filling functions are available, for example, in the Polaris pwp 4012d or Saturn ST-EK8034 NEW.
Typical faults
The most common causes of damage are the following parts of the device:
- network wire;
- control module;
- water pump;
- electric heaters;
- thermal switch.
Network wire
Before repairing a thermo sled with your own hands, you should disconnect it from the network. After that, in order to “ring out” the wire of the apparatus with a tester, it must be disconnected. To do this, unscrew the screws on the bottom of the device and remove it. You will see the terminals attached to power cord. Unplug the cord and start “ringing” it with the tester. If the cord is in order, you can start further troubleshooting.
Microcircuits
If you find that on the device the button does not work or all keys, the failure of the control unit may be the cause of the malfunction. It is not recommended to repair it yourself, since it is necessary to have certain knowledge in radio electronics. It will be better if the repair center will be engaged in repair of a teapot of a thermos.
Electric heaters
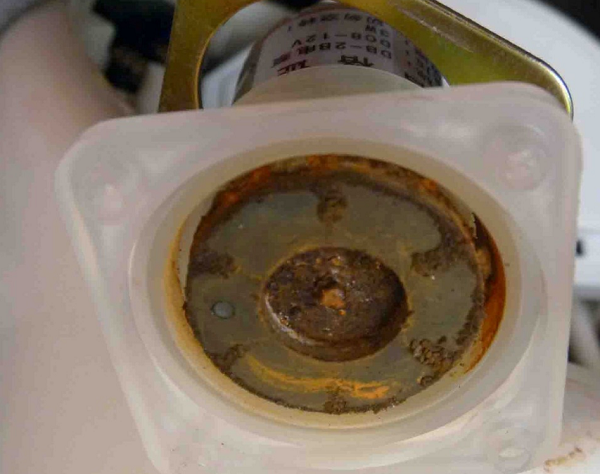
If, after turning on the device, it does not boil water, while all heating modes, as well as automatic, work, then these symptoms indicate that the heater may have blown or the thermal relay has failed. To find out, it will take disassembly of the unit.
- Pour the water out of the container and turn the device over. At the bottom you will see the screws that need to be removed.
- Using a flat object (you can use a screwdriver), remove the plastic ring from the clips. Under it you will see the fasteners that need to be unscrewed.
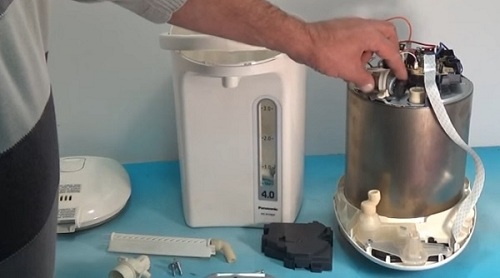
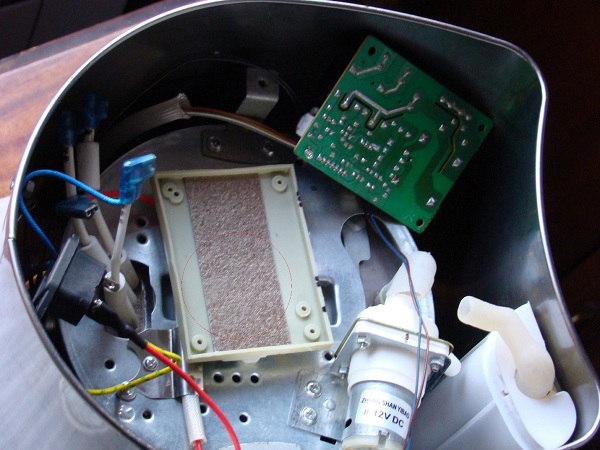
- After removing the screws, remove the pan. To continue disassembly, it is recommended to mark all wires of the same color with a marker and take a picture of the location of all the other conductors. This should be done so that then during assembly no difficulty arises.
- Disconnect the clamps holding the hoses connected to the pump. They can be simply cut with scissors or nippers.
- Disconnect the hoses from the pump nozzles.
- Remove the top cover of the thermopot, without making much effort, turn it upside down and lower the tank so that it becomes on the table.
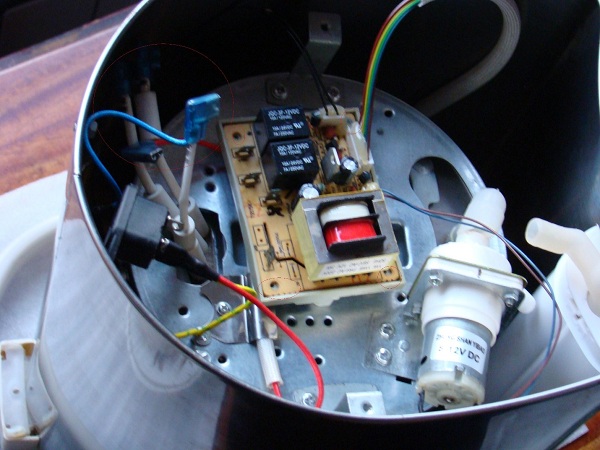
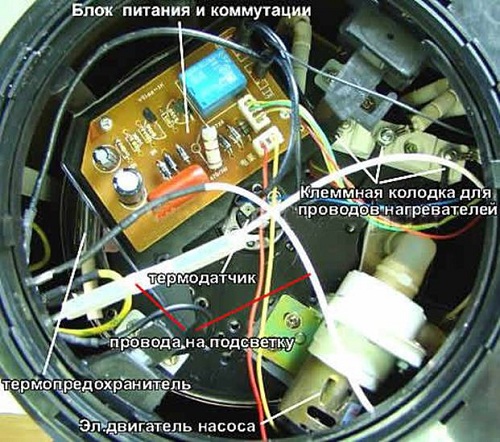
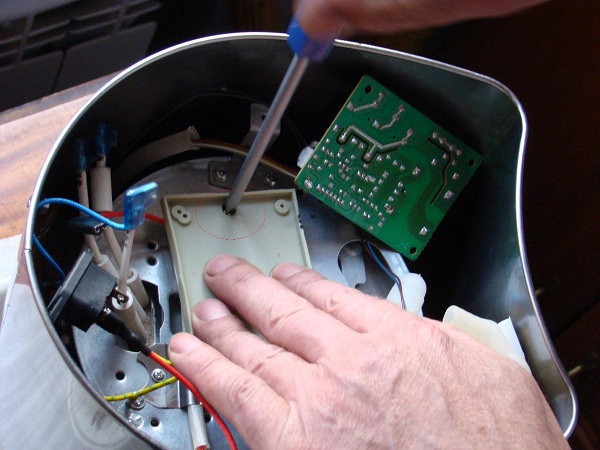
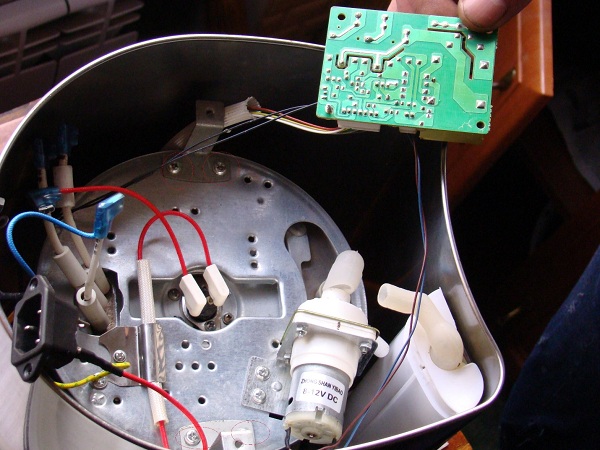
- Unscrew the circuit board and put it aside.
- Under the gasket, you can find another 2 screws.
- After loosening all the screws on the metal tray, it can be removed along with the bottom.
- Next, unscrew the 8 screws holding the cover.
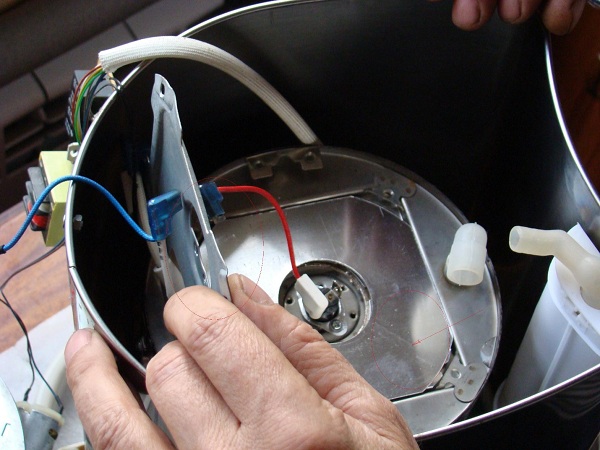
- Now use a screwdriver to pry the protective cover and remove it.You will see a heating element.
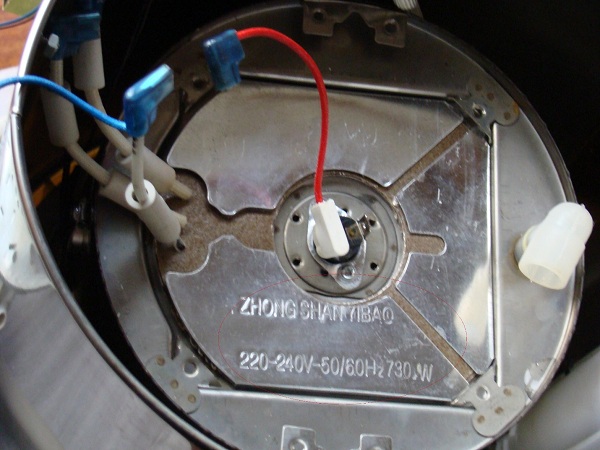
- After removing the heating element, it must be checked for an open circuit. using a tester. If changes have shown that there is damage to the heater, then it will have to be replaced with a new one, since water does not boil due to this breakage.
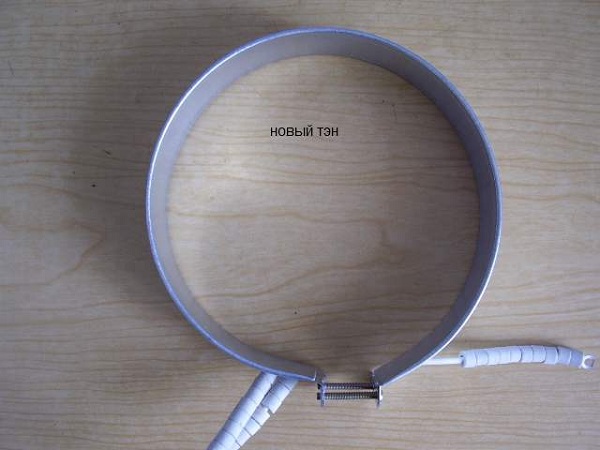
In different models of units the type of heating elements may differ. Their location may also vary. But the disassembly algorithm of the apparatus, in most cases, is similar. To learn more about how to change heaters, you can see video.
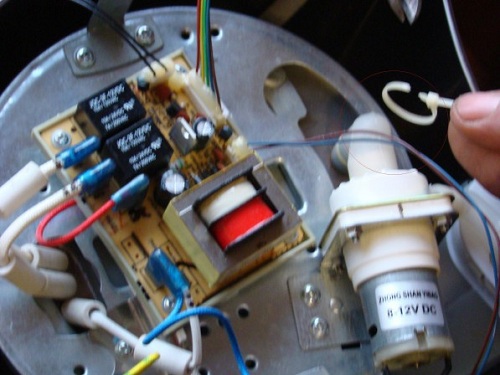
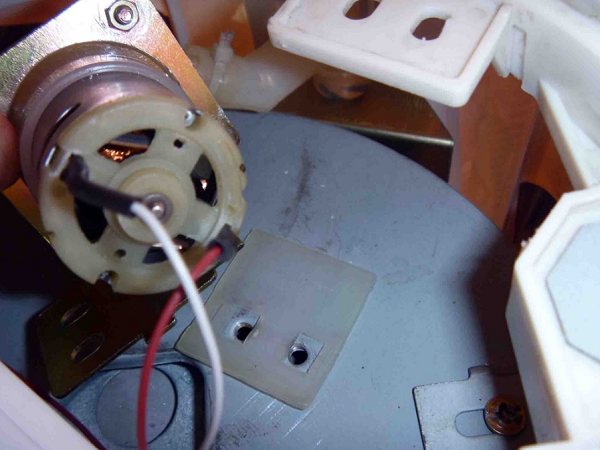
water pump
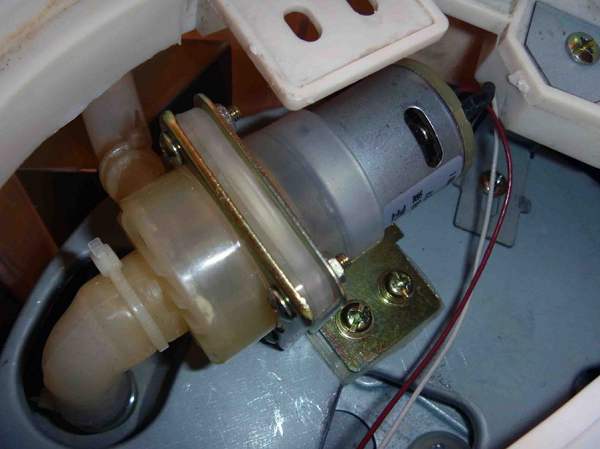
If the thermotube when trying to pour hot liquid into the cup does not pump water, then the pump most likely does not work, due to its failure. To get to the pump, you need to disassemble the machine as described above. After removing all parts of the bottom, you will see a pump.
Next, do the following.
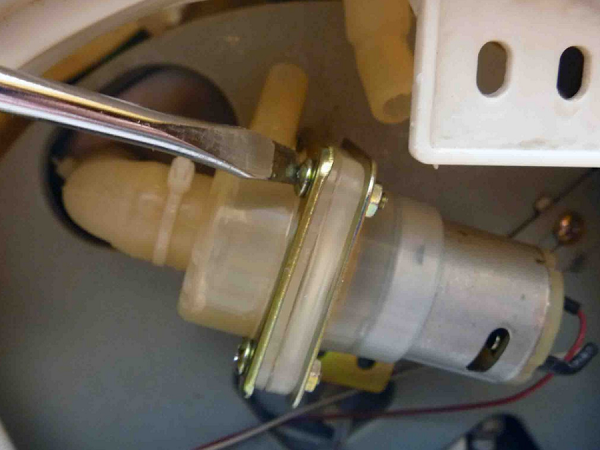
- To conveniently remove the pump, disconnect one of the tubes connected to the pump. If the tubes are clogged, it is recommended to remove them and clean.
- Separate the pump from the housing and try not to lose the silicone gasket.
- After that, unscrew the fasteners connecting the motor with the impeller to the pump body.
- After disconnecting the pump casing and the electric motor, you can notice scalingwhich interferes with the rotation of the impeller.
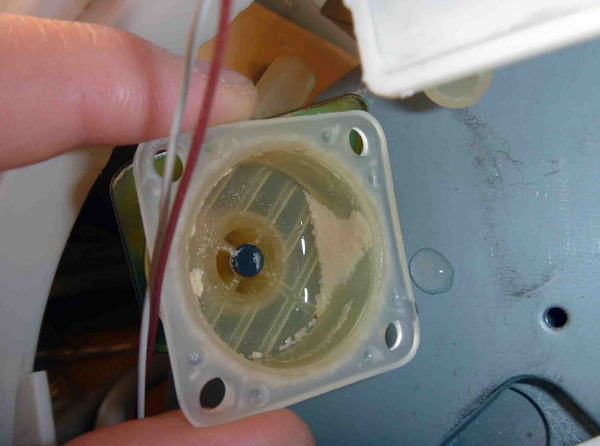
- Also, if you remove the impeller (it is she who is responsible for the water supply), you can detect clogged magnet, which must be cleaned of dirt.
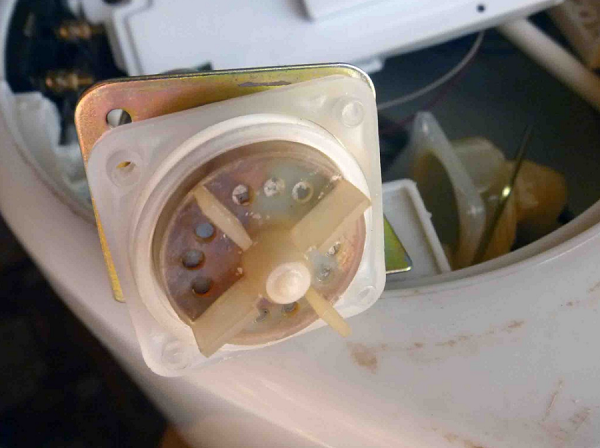

If, after removing all contaminants, the pump does not turn on and there is no water supply, then you will need to buy a new pump, since these signs indicate that the motor winding has burned out.
Thermal switches
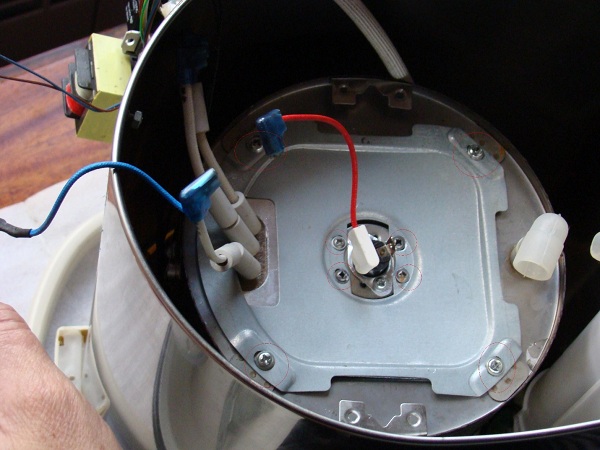
Sometimes there is a situation when the thermal steam does not turn off and constantly boil water. Or vice versa: you poured water, the apparatus heats it, but turns off when the liquid is not boiling. Why is this happening? This fault may occur when the thermal switches are faulty. They can be found on the bottom and walls of the tank. For their better contact with the surface, special thermal grease is used.
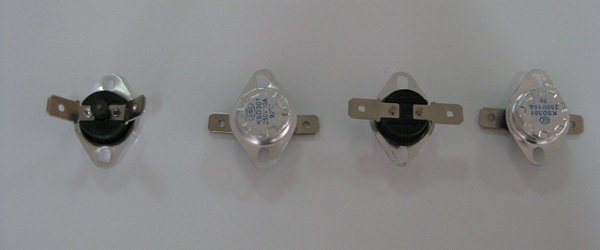
Thermal switch, located at the bottom of the tank, is attached to it with two screws. Sometimes the manufacturer, especially the Chinese, causes little thermal paste, because of what the thermal relay starts to work incorrectly: the device may not turn off for a long time while boiling water.
To check the thermostat for performance, you need to disconnect it from the tank body, and remove the wires from the terminals. In the normal state (without heating), the relay is in the “on” position. If you check it with a tester, the device will show a resistance of 0 OM.
Next, you should connect to the switch 2 wires and lower it into the water, brought to a boil. Now measure the resistance again. If the device shows infinity, it means that the switch is turned off, and it functions normally. If the sensor is not working, then you should purchase a new one and replace it. Regarding the replacement of the temperature switch, you can see the following video.
Above were considered some of the breakdowns of the kettle-thermos, which can be easily eliminated without the involvement of a specialist. In other cases, the unit should be attributed to repair in a specialized service center. But before you hand over the device for repair, ask how much it will cost you. Most often, from a financial point of view, the repair is not justified, since its cost will be within the price of a new thermopot.
/rating_on.png)
/rating_off.png)