Do-it-yourself breadmaker repair for various faults
A malfunction in the home bakery can take you by surprise. It can, of course, be referred to a service center, but some of the faults that have arisen in your bread maker can be eliminated on your own.
In the stoves such breakdowns are most common:
- temperature sensor malfunction;
- burnout TENA;
- software failure in the control module;
- the electric motor failed;
- slipped off the belt;
- no power supply;
- faulty reverse relay;
- breaking the bucket for ingredients.
Other breakdowns inherent in other models and brands are not excluded, because they may contain differences in design features.
Content
Thermal sensor malfunction
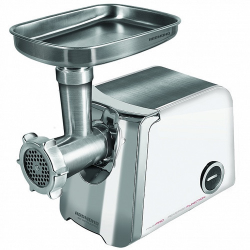
The quality of the baked bread depends on the correct operation of the thermal sensor. If the thermal relay is defective, then the bread will burn, or vice versa, will remain unbaked. This sensor regulates the temperature in the bread maker during the baking program. The figure below shows, for example, what the Kenwood thermal sensor looks like.

Often, thermal fuses are located near the thermistor. They do not allow to exceed the temperature above a certain, when the thermal relay fails.

After disassembling the baking unit, it will not be difficult to find these parts by external signs. Also, it will be easy to replace them with new ones, having previously bought them on the Internet or a service center.
Combustion heater
It is very easy to suspect that the heater is not working: the bread will simply not be baked. In order to verify this, it is necessary to disassemble the apparatus:
- unscrew the screws on the bottom of the stove and inside it by opening the lid;
- then carefully disconnect the bottom of the case without breaking the wires;
- disconnect the wires from the terminal block;
- you will see a large metal tubular ring.
This is the heater (tubular electric heater).In some models of bread makers it may be located inside the iron container for the bucket. You can check for burnout. tester. If the burnout is confirmed, it must be replaced with a new one.

Software failure in control module
If your bread oven has started to behave strangely: some buttons have stopped turning on, a signal appears when the baking has finished, when it has just begun, this may signal that the software module has failed. Unfortunately, the repair of bread machines with such a breakdown cannot be independently made. This should be handled by qualified personnel from service center. Otherwise, unknowingly, you can aggravate the malfunction and repair the module will be more difficult and more expensive.
Motor failed
This breakdown is simply determined. If you turned on the unit, and the agitator did not start to rotate and the sound of the engine running is not audible, this means that the bread maker belt does not receive rotational movement from pulley - the electric motor is faulty. Repair of this unit assembly, as mentioned above, should be done by the master.
Slipped belt
In the case when, after turning on the apparatus, the noise of the operating motor is heard, but the paddle does not spin, or when the ingredients are filled up, they do not mix well, this may be due to wear or slipping of the toothed belt from the pulley.

The belt of the bread machine can be detected by removing the bottom of the unit. By wear degree The drive belt of the bread machine is determined whether it is necessary to replace it with a new one.
No power supply
A frequent reason when the bread maker simply does not turn on is the lack of power supply. First you need to check electrical plug and the cord itself. Next you have to check the power supply, as a rule, pulsed. He has his fuse. But do not rush and change it. If, after being connected to the circuit of a 100W light bulb, it lights up, then urgently turn off the power to further search for the circuit. When the power supply is healthy, the light should not be lit, it can only blink. The power unit usually consists of rectifier and capacitor. This is where the fault lies.
Repairing a bread machine with your own hands in this case is possible if you know a little about radio engineering.
Faulty reverse relay
In some inexpensive units, the paddle (agitator) is removed from the shaft. To do this, complete with the device is a hook to extract it from the bread. But there are models when the stirrer folds. If after baking on the product you find a paddle imprint, it means that the reverse is faulty.. Repair to eliminate this trouble bread machine should occur with the participation of a specialist.
Breaking a bucket for ingredients
Repair of the bread machine bucket due to failure bearing and gland can be produced independently. Symptoms of the fact that this is exactly the reason are as follows:
- there was a small leak from the tank;
- wedging or full seizure of the shaft.
For better understanding, repair of the bread machine is shown below. LG do-it-yourself about replacing the bearing and gland (model LG HB-155CJ).
- You need to get a bucket and remove the ring, which is a stopper to hold on the shaft of a metal washer with legs made of plastic. At this stage, the ring set for bearing fixing you can not touch.

- In the next step, you will need to pull the bearing from its landing site. It is impossible to knock on a bucket, as it is fragile and can split.It will be correct to use a special two-finger puller. The puller is fixed in position when its hooks are well secured in the slots on the bucket body.

- On the shaft of the bearing will need to put a plate of metal 1-2 mm thick.

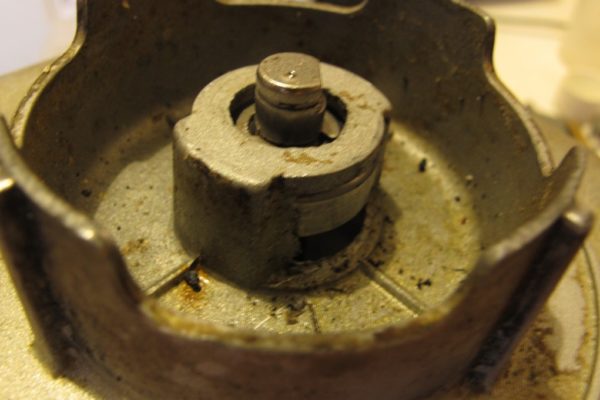
- After that, begin to screw the axis of the fixture until the seal from the bearings falls out from the inside of the bucket. The following photo clearly shows the poor condition of the parts.

- Now you can remove the fixation from the bearing.

- Next, you need to remove the defective part from the shaft using the same puller and clean it of dirt using alcohol (Do not use solvents or gasoline to clean the shaft).

To continue, you will need to purchase the necessary parts: 608th ball bearing (outer diameter - 22 mm, inner - 8 mm, height - 7 mm) and a special gland of white color.

Then in reverse order:
- Slide the bearing onto the shaft and install the retainer.

- Gently press the bearing into your seat. It should be cooled before installation. You can still heat the bucket. Pressing is not allowed.
- Now you can fix the shaft special washer stop.

- In conclusion, you will need to install the gland.Repair the bread machine bucket over!

Not all possible failures of the bread-baking machine were considered, since it is impossible to fully list them, and this depends on the features of models of different brands. However, you can fix some problems using this instruction yourself.
/rating_on.png)
/rating_off.png)