How to build an airbrush for painting
Airbrush is a device with which you can paint various small details, apply paint evenly on various surfaces, make car painting and draw pictures on the walls during interior design. For painting and drawing it is customary to use professional equipment and tools, which is expensive. Therefore, if the home craftsman has a need to paint any small details or to cover a small area with paint, paint or varnish, then it is not advisable to buy a factory airbrush. It is easier to make it yourself from improvised means, spending a minimum of time for the whole process.
Content
Choice of device design
Before proceeding with the manufacture of the device at home, it is necessary to decide what kind of airbrush design is needed - with external paint mixing or internal.
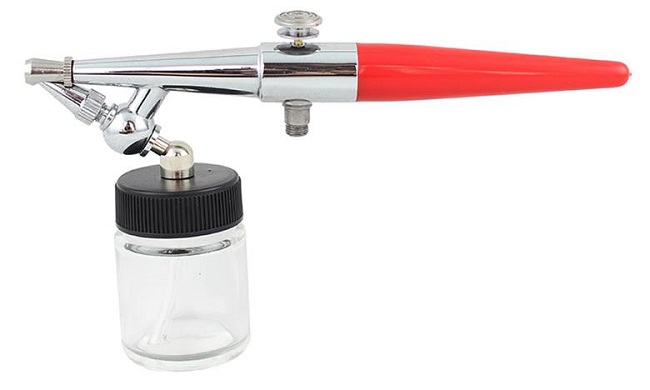
Exterior mixing airbrushes have a tank with a tube coming out of it. The latter is located opposite the tube through which air is supplied. As a result, the paint flowing out of the reservoir tube is blown away by air flow.
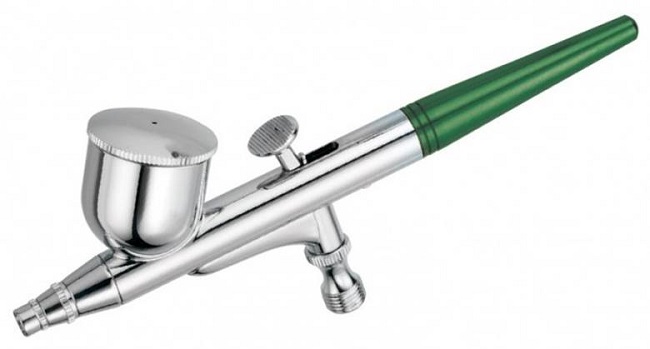
In the instruments without spray gun the dye is mixed with air inside the housing and blown through the nozzle.
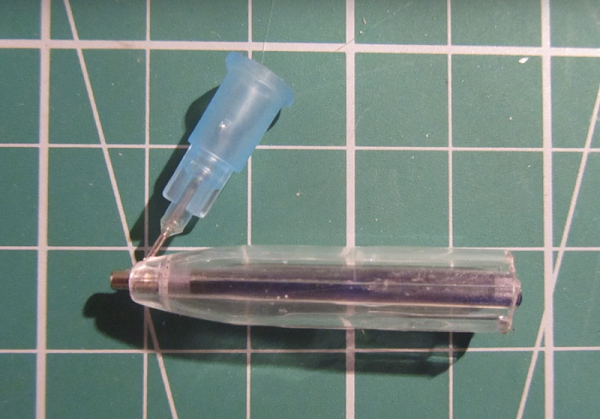
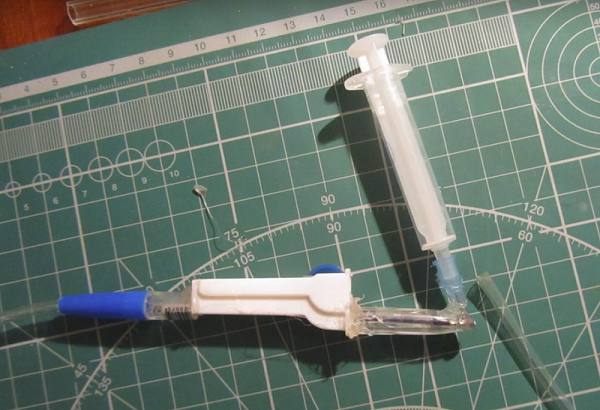
Airbrush from a syringe and pen with internal paint mixing
To make an airbrush with your own hands, you need elements such as a syringe, a ballpoint pen (with an empty rod), a system for blood transfusion and a glue gun. The process of manufacturing the device without an external paint sprayer is as follows.
- Take a ballpoint pen and remove the rod from it.
- It is required to remove the ball from the writing part (tip) of the rod. To do this, it is enough to make several movements with a tip on sandpaper, after which the ball will fall out of it. If there is ink in the rod, it is first necessary to disconnect the writing part and blow it out of the tube.It is also recommended to rinse the tube with water or solvent using a syringe.
- After the ball has healed, the tip should be well polished and the burrs removed, both from the outside and inside the hole, holding the rod in a vice.
- After polishing, disconnect the tip from the plastic tube using the pliers.
- The next step is to make a hole in the side of the tip. It is easy to make a triangular file.
- After making a hole, remove the burrs around the hole and remove the fine chips from the inside of the element formed during the grinding process.
- Insert the tip into the plastic rod.
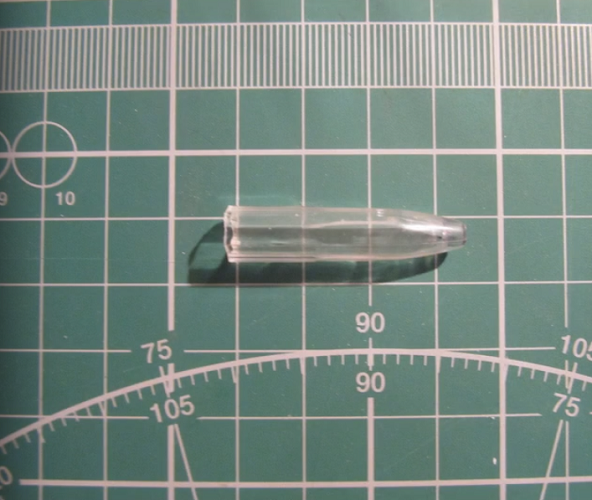
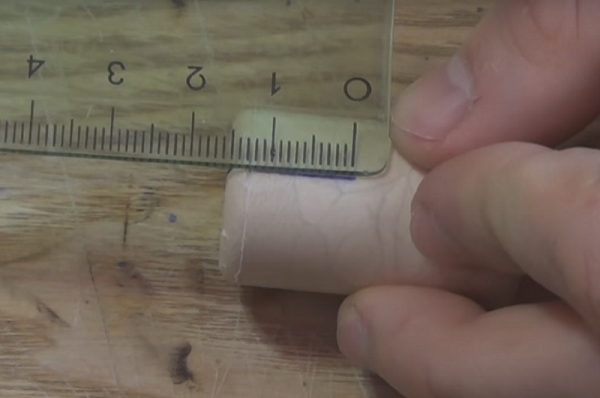
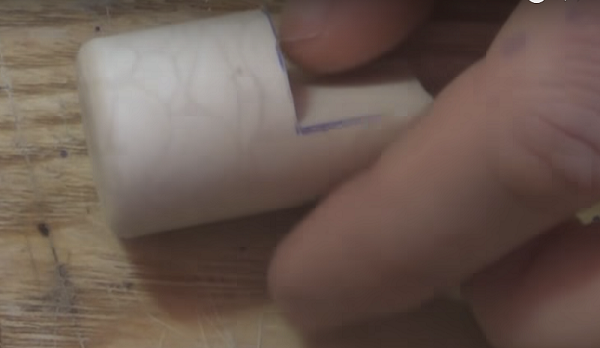
- Next, you should cut off a small part of the handle body with a length of 35 mm. Mark in the right place and cut off part of the tube with a hacksaw.
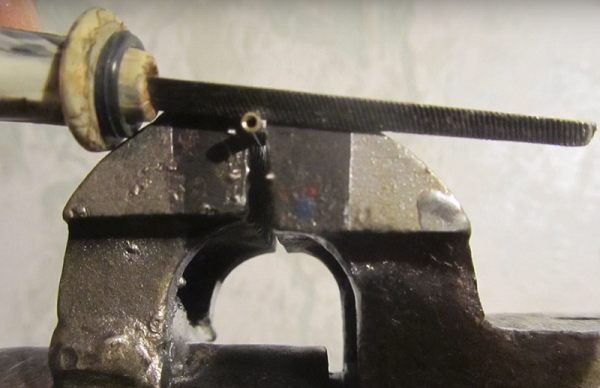
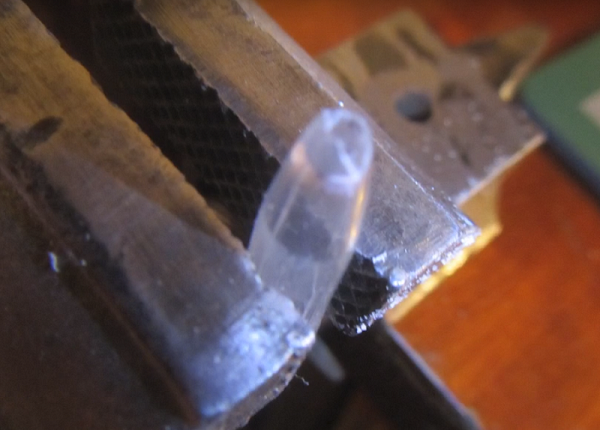
- Clamp the sawed-off part of the handle body in a vice in a vertical position.
- Using a triangular file, cut through the end of the tube, as shown in the following photo.
- Insert the rod into the tube and make sure that the cut is sufficient depth. The hole in the side of the tip must be open.
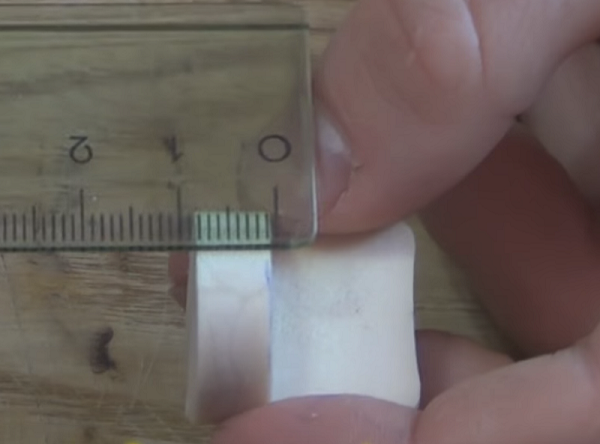
- Now the rod can be shortened so that it has a length of about 40 mm with the tip.
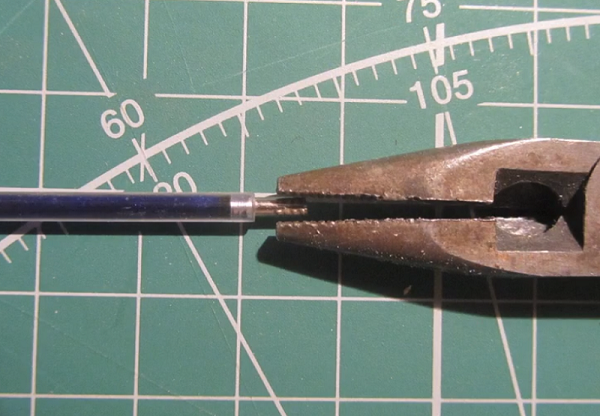
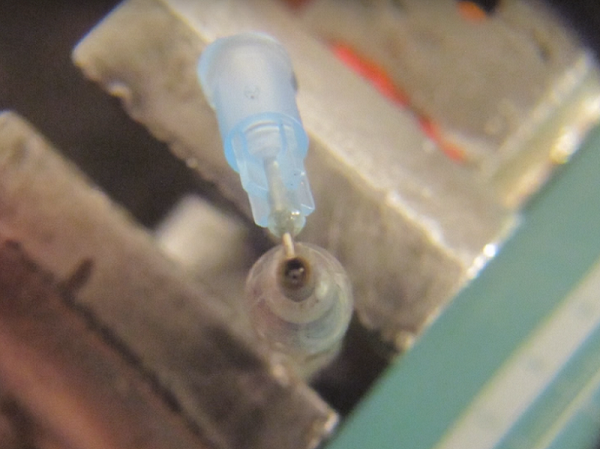
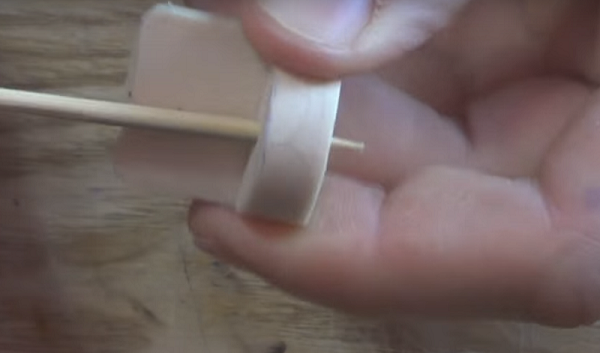
- After shortening the rod to the required length, it is necessary to insert a needle into its writing part.
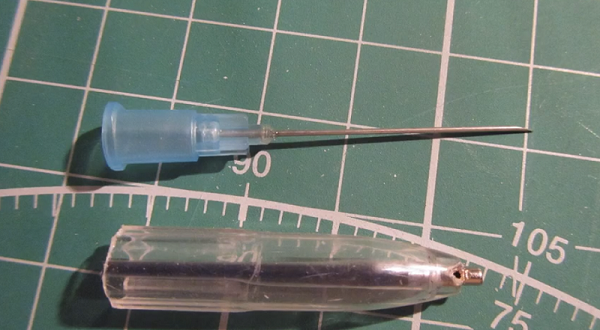
- Since the needle from the syringe is too long, it needs to be shortened. This can be done with pliers. But after shortening the cut point, it is necessary to grind off a bit so that the hole in the needle opens.
- Further, the shortened needle must be inserted into the side opening of the writing part of the rod.
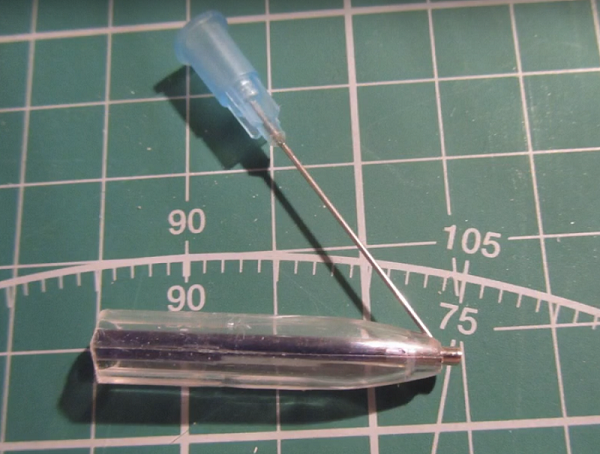
- In order for the needle to go through the entire tip, it must be bent slightly.
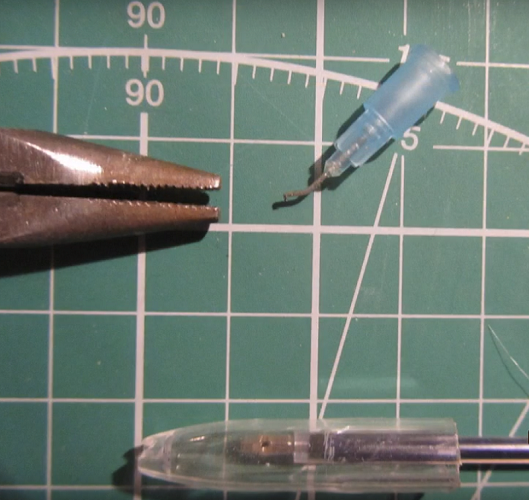
- Insert the bent needle into the side hole in such a way that it leaves the tip (nozzle) 1 mm and is exactly at its center.
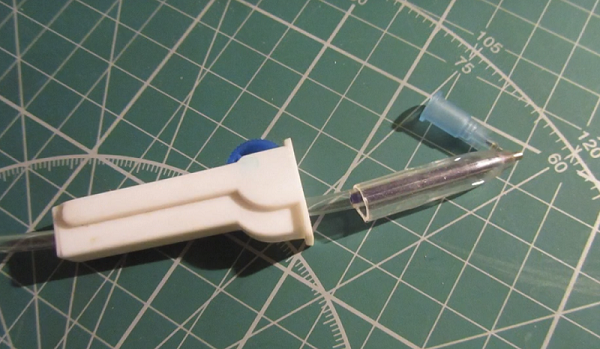
- Next, you should take the tube from the dropper and connect it to the rod.
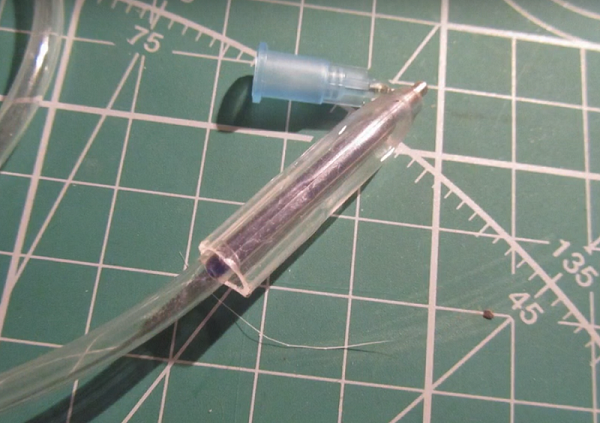
- Put a clip on the dropper by sliding it up to the body of the handle.
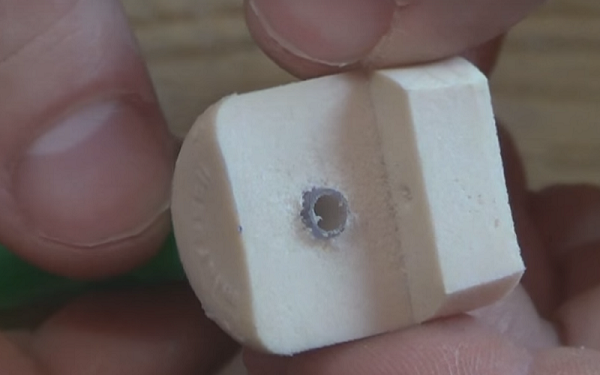
- To continue, you will need to make a small part out of the upper part of the handle body. Cut the tube where the thread is located. The part should have a length of about 20 mm.
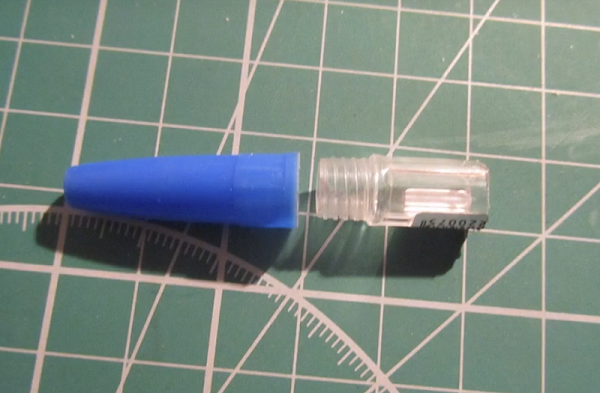
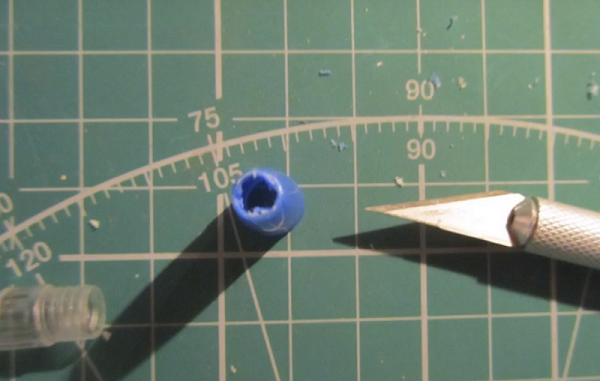
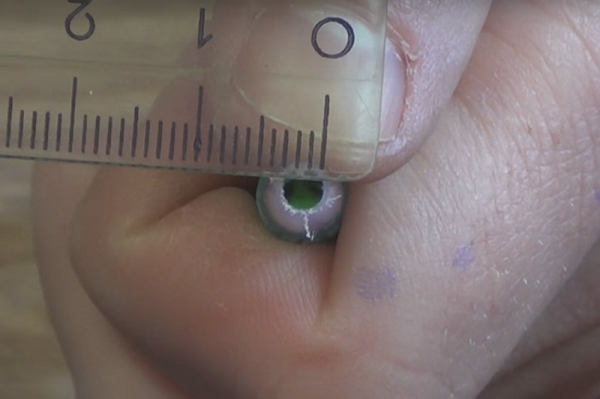
- In the cap, which has an internal thread, it is necessary to make a hole.
- Screw the cap on the tube.
- Put the collected items on the dropper and move them all the way.
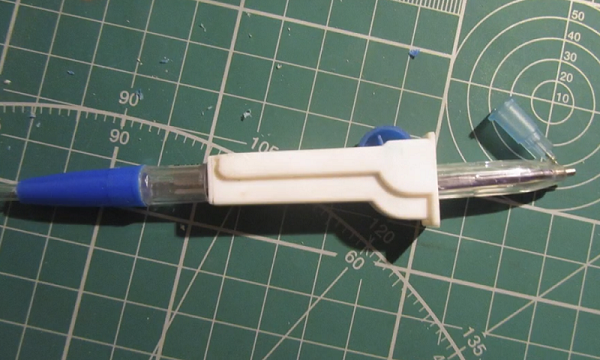
- At the next stage, all elements must be fixed with a glue gun, that is, fully assemble the airbrush.
- After the glue has hardened, connect the syringe to the needle. In this case, it will serve as a container for paint. This is the end of airbrushing.
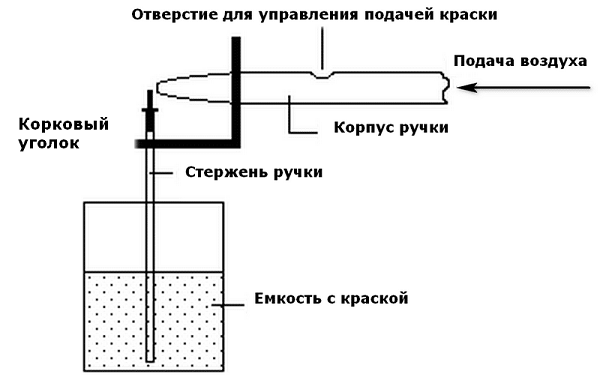
Put the paint into the syringe and place it on the resulting mini airbrush. Move the clamping wheel in the opposite direction of the syringe (until it stops), thereby pinching the dropper tube. Connect the free end of the dropper to the compressor hose and spray the paint. In order for the spraying to start, it is enough to turn the clamping wheel slightly forward so that air flows along the dropper in the direction of the nozzle. After simple experiments with system pressure and paint density, the homemade airbrush will be ready to go.
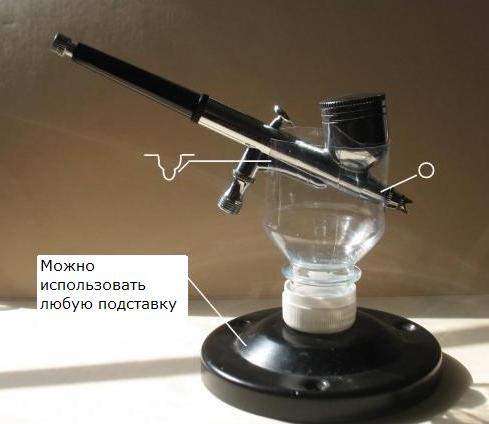
In a plastic bottle you need to make cuts corresponding to the shape of the airbrush.
Airbrush with external mixing paint from cork and ballpoint pen
The easiest way is to make an airbrush yourself, if its design implies the presence of an external spray gun, that is, when the device is operated, external mixing of air with paint will occur. Below is a drawing where you can make a device for spraying paint in just a few minutes.
Airbrush is made as follows.
- Remove the rod from the ballpoint pen and blow ink out of it, after removing the writing part.
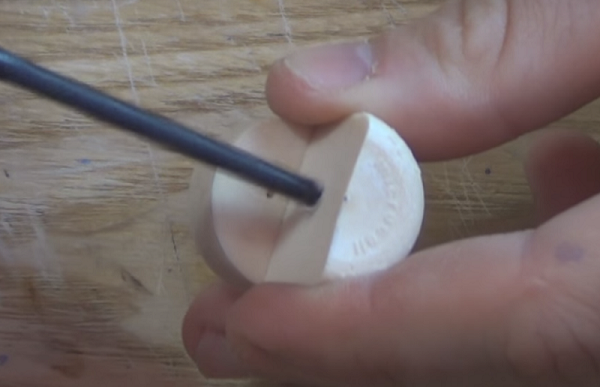
- Take the wine cork and draw a line through its center.
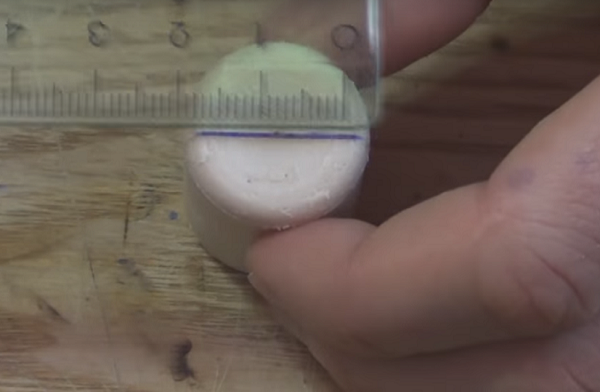
- You should also draw 2 pieces, starting from the previous line, on both sides of the cork. The length of the segments should be 15 mm.
- Connect the 2 vertical lines and cut the encircled part of the cork to form a corner.
- Next, cut off the extra part of the cork so that you get a stand height of 8-10 mm.
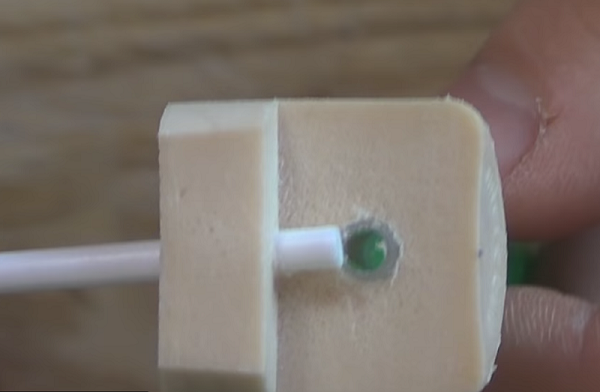
- Drill or pierce with a sharp object a hole in the stand into which the rod will be inserted.
- Also drill a hole of suitable diameter under the body of the ballpoint pen.
- Cut a small part of the stand, as shown in the following photo.
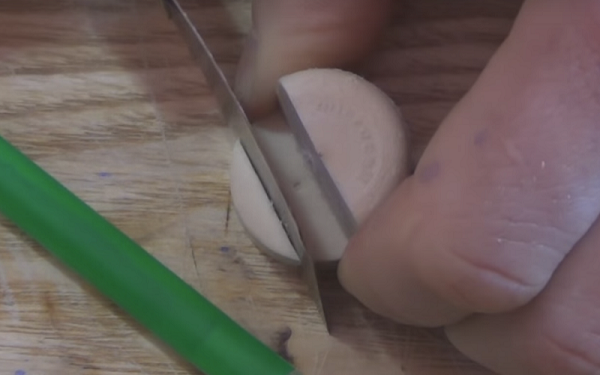
- Since the hole in the body of the pen, through which the writing part of the rod goes, has a small diameter, it must be expanded to 2-3 mm with emery paper.
- Insert the prepared handle body into the corner made of cork.
- Also in the bottom of the stand, insert the rod.
- Attaching the rod to the tank for paint, determine its length (should reach the bottom, but not touch it).
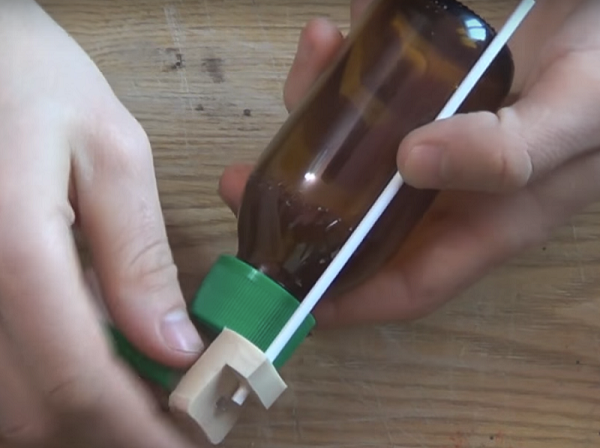
- Cut the excess part of the rod with a stationery knife.
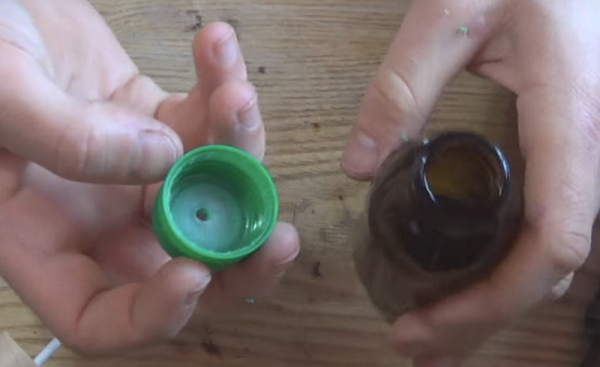
- In the lid of the paint container, drill a hole in the size corresponding to the diameter of the rod from the ballpoint pen.
- Apply glue to the cover with a glue gun, insert the rod into the hole and fix the stand in the desired position.
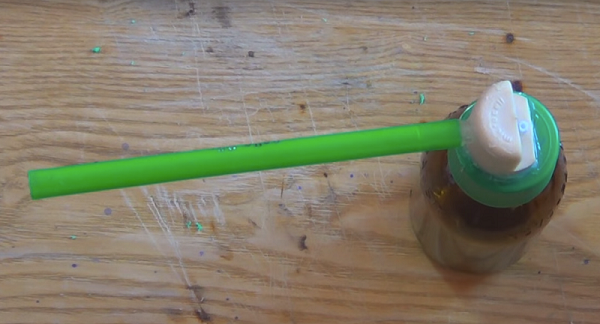
Now you can pour the paint into the container and try to paint. If the device is required for painting models and various small parts, then you can do without a compressor. Enough to get plenty of air into the lungs and blow into the tube. For applying backgrounds and painting large areas, you can connect a hose from the compressor to the tube. When painting large areas, one compressor is indispensable. Will be required to him connect the receiver to the airbrushwhich will ensure a more stable operation of the latter. The receiver can be made from a fire extinguisher, a plastic bottle or from a tire from a car.
Important! This model of airbrush can be improved if the air supply tube is made from a 5 ml syringe by inserting it in place of a ballpoint pen. In this case, a conventional blow gun can be connected to the device.
How the device works with a syringe installed instead of a body of a ball-point pen, you can learn from this video.
/rating_off.png)


