Selection and replacement of disks for the grinder
Angle grinder (angle grinder), commonly called “Bulgarian” in common people, is widely used in construction and in everyday life for repairs. With it, you can perform many different technological processes. In order to choose the right tool for performing a certain type of work, you need to familiarize yourself with what discs and attachments for angle grinders are. The tool for this device is selected by size and purpose.
Content
Typical disk sizes
When choosing a disc for the grinder, you must ensure that the external diameter of the nozzle does not exceed the maximum allowable values allowed for your angle grinder. For example, if a Bulgarian is designed to use a circle with a maximum diameter of 125 mm, then a circle cannot be set to 230 mm. And there are several explanations for this:
- the linear speed of the cutting edge will be exceeded, which is fraught with the destruction of the abrasive wheel and injury to the user;
- a small grinder does not have enough power to work with a large tool;
- installing a nozzle that exceeds the permissible dimensions requires the removal of the protective cover, and this is a violation of safety rules.
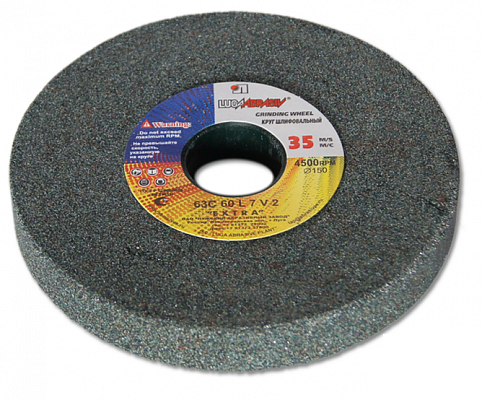
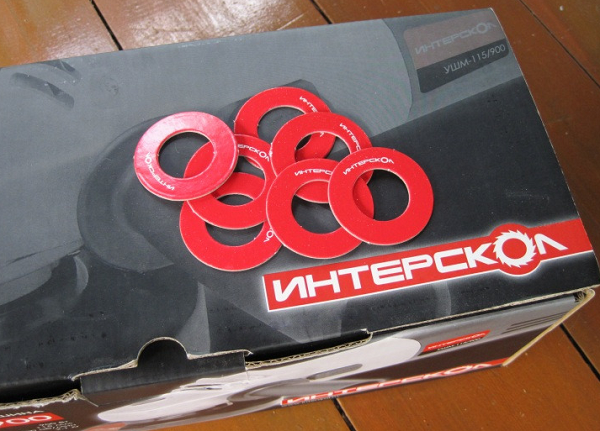
Discs for angle grinders have standard sizes: 115, 125, 150, 180 and 230 mm. In modern Bulgarians landing diameter (the diameter of the shaft on which the tool is mounted) is almost the same and is equal to 22.2 mm. If you have an “outdated” Bulgarian “lying around”, then you will need to use adapters - rings of different diameters.
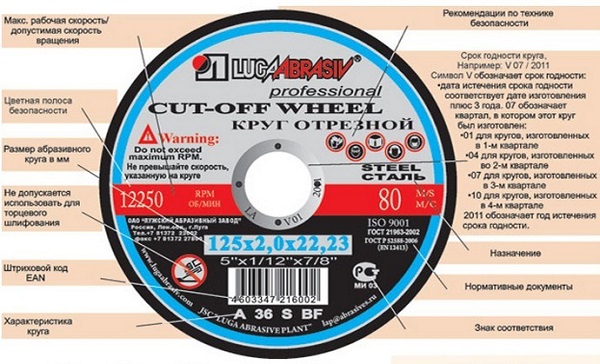
All abrasive wheels of all sizes have special labelingfrom which you can find out the following information: the diameter of the disk and its thickness,diameter of the seat, the maximum speed of rotation, as well as for the processing of what materials it is intended.
Assigning discs and nozzles
Circles for grinders differ in purpose for:
- cutting off;
- peeling
- grinding;
- sharpening.
Cutting discs
The most common task performed with the help of the grinder is cutting various materials. The choice of material of the tool depends on what material will be cut.
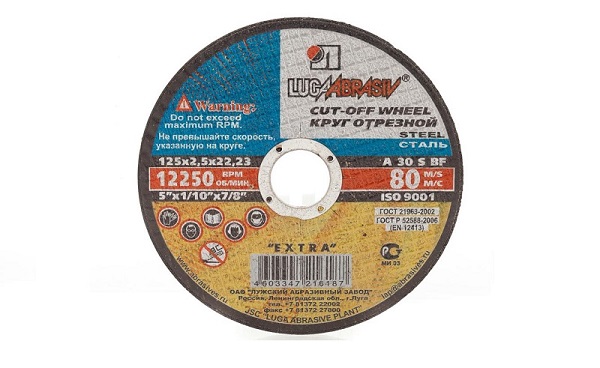
- Metal cutting. The cutting disc for metal is made of crystalline alumina corundum, as well as synthetic corundum, called electrocorundum. The main color circles for cutting metals - blue.
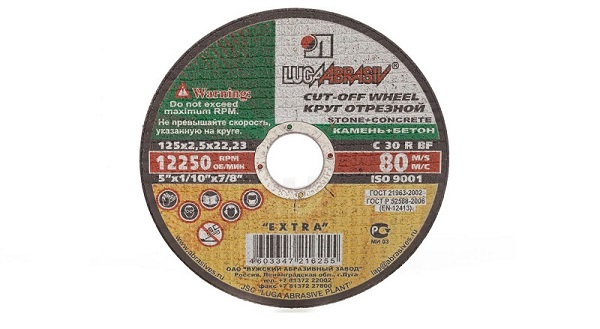
- Cutting stone and concrete. To cut the stone, you should choose a disk from another abrasive material - silicon carbide. This abrasive cuts white brick (silicate) and slate with ease. But to cut a red brick, some types of concrete or ceramic tiles, this circle material will not work. Stone discs are available in green.
- Cutting ceramic tiles, red brick, porcelain tiles and concrete. For these purposes, already using a diamond disc.
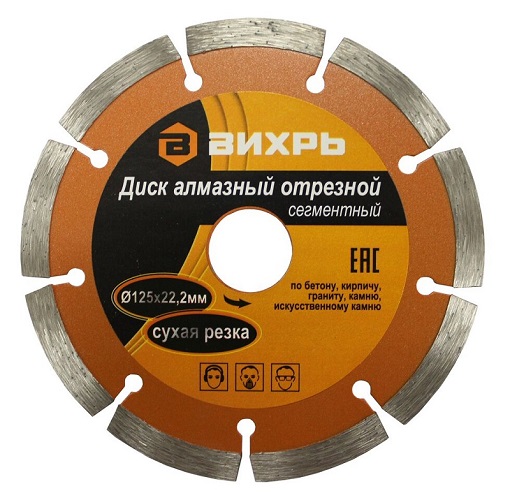
This nozzle is made of metal, on the cutting edge is applied abrasive mass with diamond grit. The figure above shows a segmented saw blade designed for dry cutting of material. All-metal discs require water cooling during operation.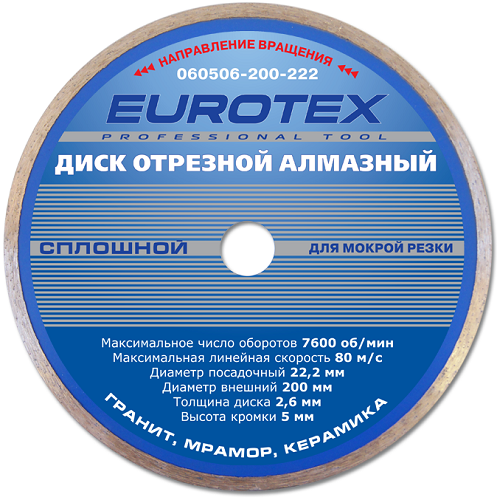
- Cutting wood. Although there are saw blades for wood that are no different from circular saw blades, it is better to stop using them for safety reasons. When working with this tool, the user often suffers severe injuries due to jamming, rebounding, accidental slipping of the tool, etc.
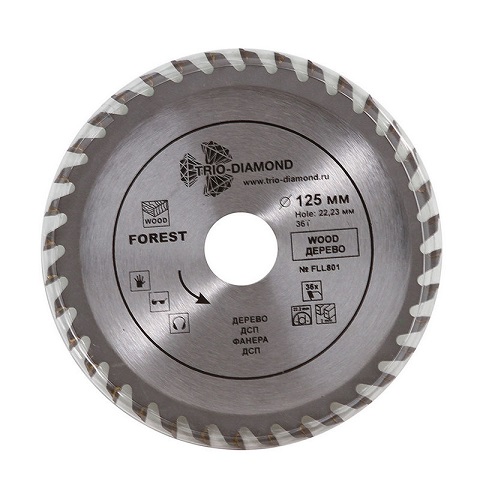
Therefore, if you are still going to use a saw blade on a tree, then you should follow safety measures. On the grinder should be installed protective casing and handle, the user must wear a protective mask or goggles. In addition, you can not cut this tool materials that are not intended for him.
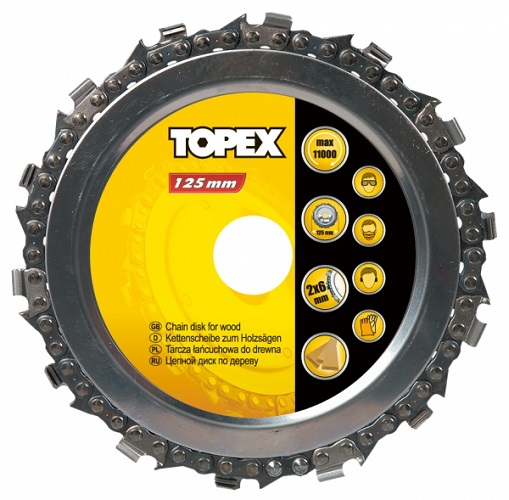
The safest discs are considered to be wood, at the end of which a chain from a chainsaw is installed. In the event of a tool jamming, the chain remains in place and the disc is idling, which reduces the chance of injury to the user.
Peeling
If you want to remove a layer of paint or other application, as well as rust from any surface, apply korshchetki. They are disk or in the form of a bowl with built-in metal wire.
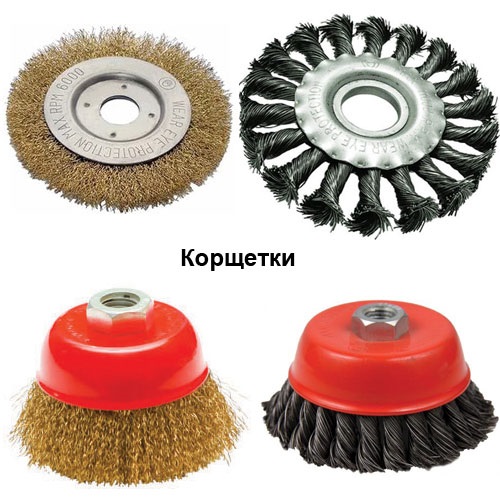
Wire in these nozzles can be twisted or uncool. Its thickness can also be different. The thicker the wire, the more rough the disc or bowl-shaped nozzle is used for coarse stripping and vice versa.
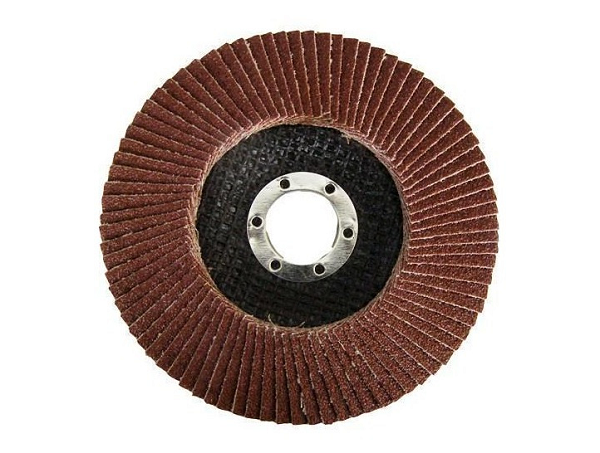
Grinding
For grinding and polishing various surfaces (metal, wood, plastic and others) grinding wheels and nozzles are used. Often used for grinding grinding wheel petal type. It consists of a multitude of “petals” made from sandpaper. Emery paper grit can be selected based on the desired type of treatment (finishing or roughing).
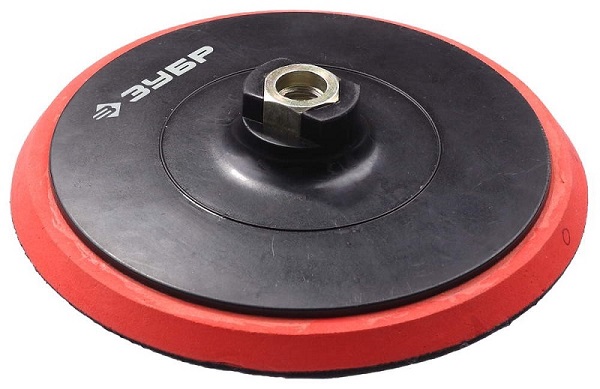
Also sandpaper can be attached to the nozzle with Velcro. Such tool is screwed on the spindle of LBM.
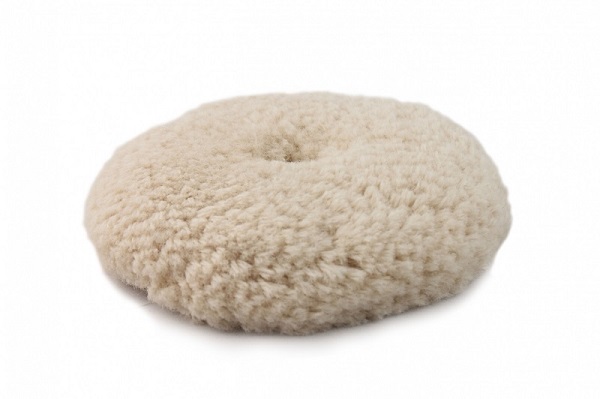
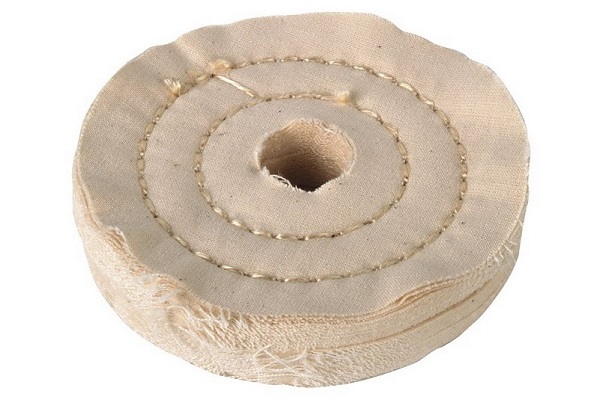
For polishing surfaces, special circles and nozzles are available, which look like pillows made of felt or like cloth discs.
Sharpening
To sharpen the tool, grinding machines (sharpeners) are commonly used.But if you do not have the latter, but there is a Bulgarian, then you can get a grinding (grinding) wheel for it, which can easily sharpen almost any cutting tool.
The main difference between grinding wheels and cutting wheels is their thickness (at least 5 mm).
How to change the drive on the Bulgarian
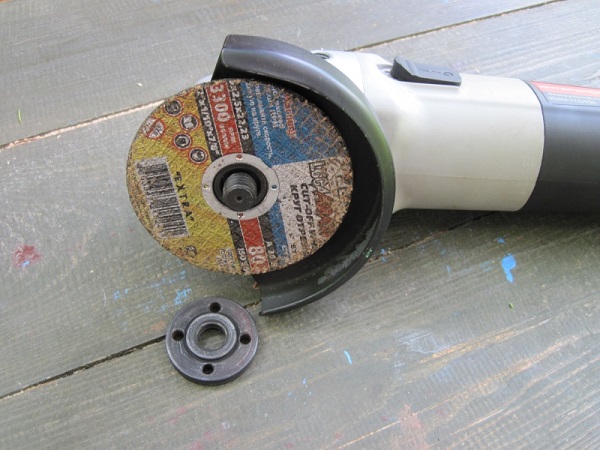
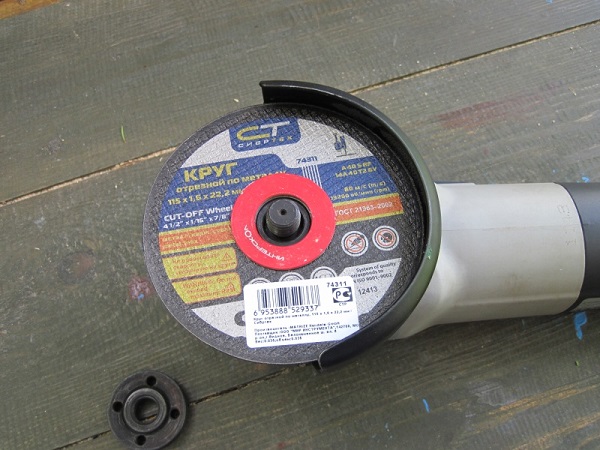
Since the circles for the grinders are a consumable material, then sooner or later they have to be changed. They are mounted on the spindle of the UShM using clamping flange (nut) with M14 thread. To unscrew it, a special must go to the configuration wrenchhaving pins on one side.
So, to replace the tool on the grinder, follow these steps.
- De-energize the machine by pulling the plug out of the socket.
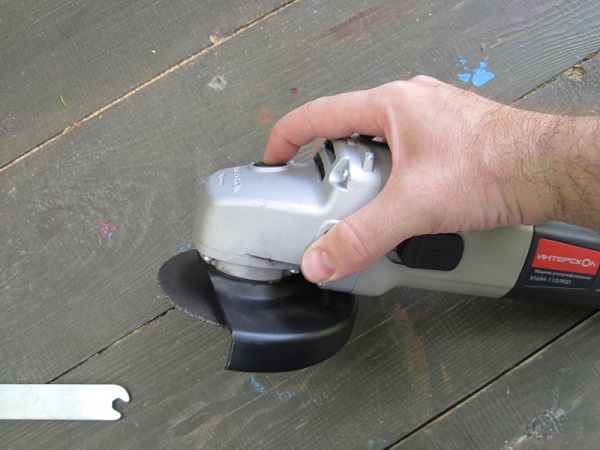
- Lock the spindle of the grinder with the button located on the front of the case. When you press the button, the stopper enters the hole in the disk installed in the gearbox, which fixes the spindle in a fixed position.
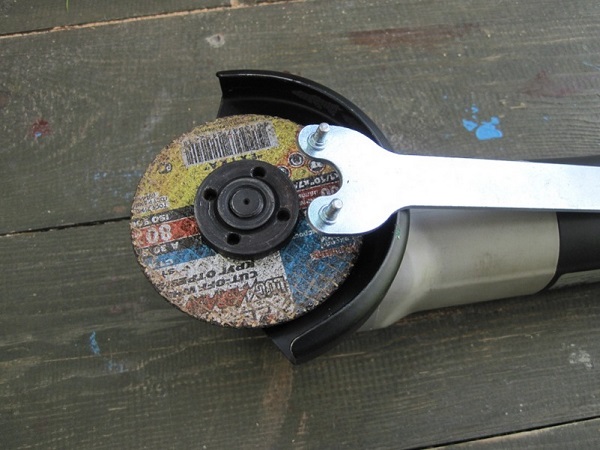
- Insert the key pins into the holes on the pressure flange.
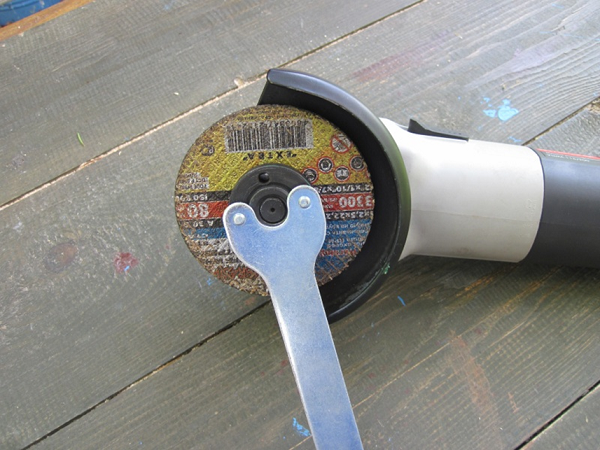
- Holding the lock with one hand, turn the key with the other hand to the left (counterclockwise) until the nut pulls away. Then you can unscrew it without a key and remove it from the shaft.
In this case, the spindle of the LBM rotates clockwise. But which way to unscrew the nut if your machine rotates the shaft counterclockwise? Remember: the clamping flange should always be unscrewed in the direction opposite to the rotation of the shaft. - Now you can change the tool, after removing the old one.
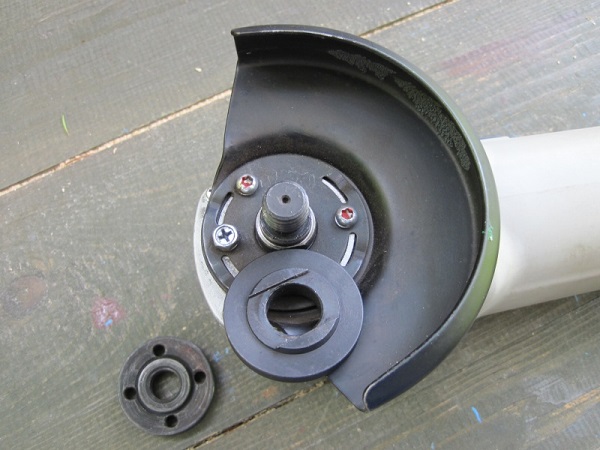
If you notice that dirt has accumulated inside the casing, you should remove the bottom flange and remove the dirt from all surfaces with a steel brush.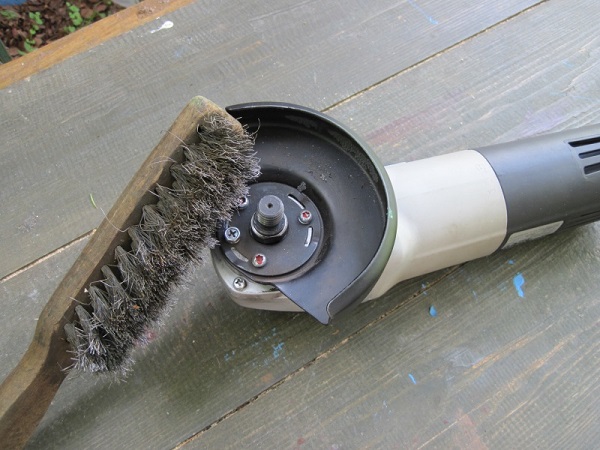
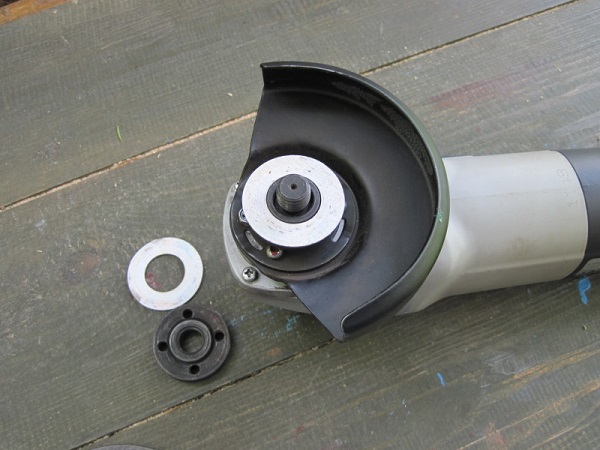
- Next, install the lower flange in place. Put it right, be sure to align the grooves on the spindle and flange.
- Lay on top of the bottom flange. gasket. It is not necessary to install it, but it is desirable, since it will provide an easy unscrewing of the clamping nut in the future if you need to change the tool.
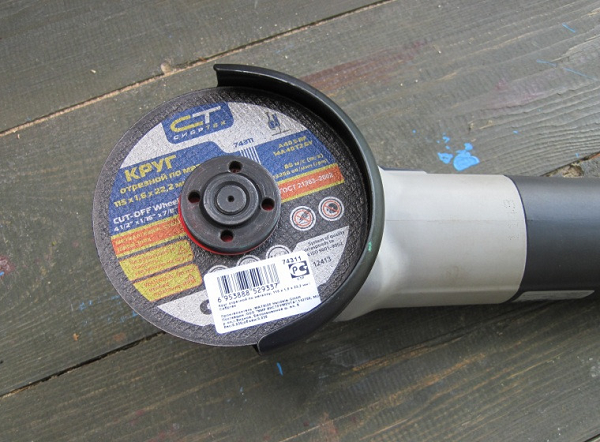
- Install a new tool. Sometimes the owners of LBM ask the question: which side to put the circle? The answer is simple: the disc is placed with the side marked on the outside.
- Put a gasket on the abrasive disc. If there were no gaskets to your Bulgarian in the kit, then they can be purchased at a specialized store, or independently cut from thin tin or cardboard.
- Screw the flange onto the shaft by hand. Tighten the nut until you can turn it without a key. After that, holding the stopper, tighten the nut with the key, but no more than a quarter of a turn, otherwise the disk will begin to deform.
After carrying out the above steps, tool replacement is considered to be completed.
Unwinding methods if the disk is stuck
What to do if the clamping flange is jammed? This trouble, when it has bitten the nut, often occurs if the tool is jammed in the workpiece while working with thick and durable materials. In this case, the abrasive wheel often breaks, and the spindle that continues to rotate tightens the clamping flange tightly. To unleash the grinder, if the disk is clamped, there are several ways.
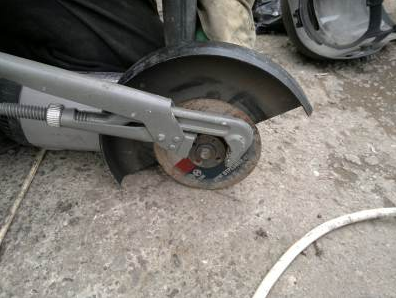
Using a gas wrench
This method is considered not entirely safe, since it is possible to break the stopper, although in most cases, it is possible to unscrew the nut. In order not to break the spindle retainer, do not apply much force to the gas key. The design of the latch is designed for the force applied by the standard key.
Unscrew the overly clamped flange using 2 gas keys. To do this, break off the protruding ends of the abrasive disc with pliers so that you can get to the bottom flange with the first gas wrench. Next, hold both flanges with keys and turn them in opposite directions (taking into account whether the thread on the spindle is right or left).
Gearbox disassembly
In the case where the retainer is broken, to remove the tool from the angle grinder, you will have to disassemble the gearbox. Use the pliers to break off the edges of the remaining abrasive wheel so that you can get close to the bolts holding the gearbox cover. After that, unscrew the fasteners and open the gearbox. The cover is removed along with the pinion shaft. Further, this shaft should be clamped in a vice, previously laying aluminum gaskets between steel jaws, and using a gas wrench to unscrew the flange (do not forget to determine the direction of loosening).
Heating nuts
The nut can be heated with a gas torch, a building dryer or a blowtorch. The heated flange is usually obtained unscrew the standard key for the grinder.
Sewing up a jammed circle
If, after applying the first 3 ways, the nut is not unscrewed, the remaining abrasive circle between the flanges can be ground off. To do this, do the following.
- To the maximum, use the pliers to remove the remnants of the circle around the edges of the nut.
- Clamp a piece of sheet iron of such thickness, as the disk itself, turn on the grinder and grind off the remains of the circle on the end of the sheet iron.
Instead of iron, a piece of abrasive wheel can be clamped in a vice. In this case, the grinding of tool residues between the flanges will occur faster, and the nut can be unscrewed by hand.
But the use of a fixed abrasive wheel requires great care, because when grinding tool remnants, you can damage the geometry of the flange. If this happens, you have to face the nut.
Use of penetrating lubricant
Liberally pour the junction of the flange to the shaft liquid WD-40. It has the ability to penetrate the inter-threaded spaces and small gaps. After applying the liquid, wait about 5 minutes and try to unscrew the fasteners with a standard key.
With the use of perforator
Some owners of Bulgarians in a situation where the clamping nut is jammed, install a nozzle in the punch “chisel or jackhammer”, Insert it into the hole of the flange at an angle and turn on the jackhammer mode without rotation. Accordingly, the stopper button must be pressed. All you need is a couple of slack presses with a punch (in order not to break the shaft retainer), and the nut will start to turn.
Cut the clamping flange with a hacksaw
This method can be called radical, because you have to buy a new fastener, and it is used if the nut is not unscrewed by any other methods. To cut the flange, hold down the stopper button so that the shaft does not rotate and, using hacksaw, cut the mounting nut.
/rating_on.png)
/rating_off.png)


