Speed controller and smooth start on the grinder do it yourself
As a rule, the budget angle grinders (LBM), popularly called grinders, do not have in their design adjustable electronic modules, which include the engine speed control and a smooth start. The owners of these Bulgarians over time begin to realize that their absence dramatically reduces the functionality of the tool. In this case, it is possible to revise the LBM by installing self-made devices on it.
Content
What is the speed control and soft start for?
When power is applied to the grinder motor occurs step increase from zero to 10 thousand and more. Those who have been working with angle grinders are well aware that it is sometimes difficult to hold it in their hands when starting, especially if a large-diameter diamond disc is installed.
It is because of such abrupt increases in engine speed most often fails the mechanics of the apparatus.
Also during startup, a huge load is applied to the rotor and stator windings of the electric motor. Since the collector engine is installed in the Bulgarian, it starts in the short circuit mode: the electromagnetic field is already “trying” to rotate the rotor, but it remains stationary for some time, since the inertia force does not allow this. As a result, the starting current in the motor coils increases dramatically. Despite the fact that the manufacturer has invested a certain margin of safety for the coils, given the overload at the start, sooner or later the insulation does not withstand, which leads to an interturn circuit.
In addition to problems with the launch, the lack of adjustment of revolutions causes some discomfort. For example, the regulator of turns of the Bulgarian can be useful with certain types of work:
- when grinding or polishing any surfaces;
- when installing a large diameter tool;
- for cutting some materials.
In addition, when peeling work with scabs, there is a high probability that the wire will jam in any gap.If the spindle revolutions were large, the grinder may simply be pulled out of the hands.
If you connect a power regulator (revolutions) with a soft-start module to the grinder, all the problems described above will disappear, the life of the device will increase and the safety of its use will increase.
Scheme homemade regulator
One of the most popular schemes for the smooth start of the engine of the Bulgarian with the possibility of adjusting the turns is presented below.
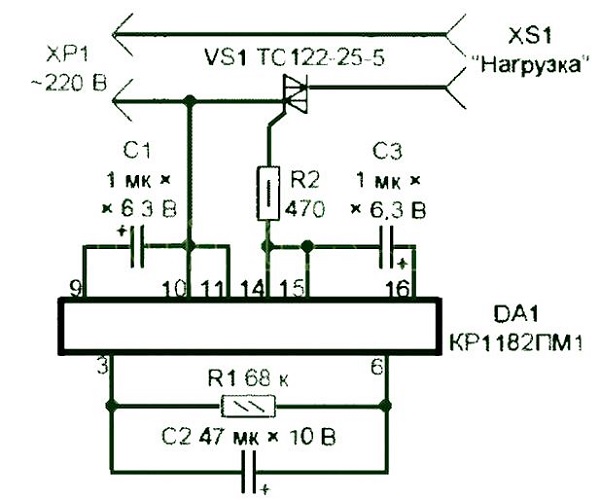
The basis of this regulator is the KR118PM1 microcircuit, as well as the triacs, which are the power part of the device. Using this scheme, you can make a power regulator with your own hands, without even having special knowledge in electronics. The main thing is that you know how to use a soldering iron.
This unit works as follows.
- After pressing the start button of the unit, the electric current begins to flow, first of all, to the microcircuit (DA1).
- The control capacitor starts to charge smoothly and after a while gains the necessary amount of voltage. Because of this, the opening of the thyristors in the chip occurs with some delay. It depends on the time it takes to fully charge the capacitor.
- Since the VS1 triac is under the control of the IC chip, it opens just as smoothly.
The above processes occur periods, which are reduced each time. Therefore, the voltage applied to the motor windings does not increase spasmodically, but slowly, as a result of which the grinder starts smoothly.
From the capacitance of the capacitor C2 depends on the time set by the electric motor full speed. The capacitor capacity of 47 microfarads allows you to start the engine in 2 seconds. When the LBM is turned off, the capacitor C1 is discharged with a resistor R1 at 60 kOhm for 3 seconds, after which the electronic module is again ready to start.
If the resistor R1 is replaced by a variable, then you get a speed controller, which will reduce the engine speed.
It is important that the VS1 triac has the following characteristics:
- the minimum current for which it is designed should be 25 A;
- the triac should be rated for a maximum voltage of 400 V.
This scheme and the regulators made according to it were repeatedly tested by many masters in grinders with power up to 2000 watts. It should be noted that this device, thanks to the chip KR118PM1, is designed for power up to 5000 watts. So he has a considerable margin of safety.
Ideally, in order to solder the rev regulator for the grinder, you will need to draw a circuit board, etch the contacts with acid and then sweep them, drill holes and solder radio components. But everything can be made easier:
- solder all the details of the scheme in weight, that is, the leg to the leg;
- attach a radiator to the triac (can be made from aluminum sheet).
The regulator welded in this way will take up less space, and it can be easily placed in the body of the grinder.
How to connect to the Bulgarian regulator
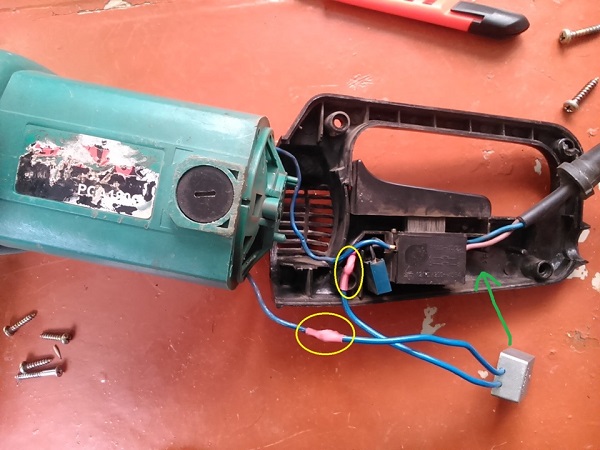
To connect a homemade power regulator does not require special knowledge, and any home wizard will cope with this task. The module is installed into a single wire breakthrough which there is a power on the Bulgarian. That is, one wire remains intact, and a regulator is soldered into the gap of the second.
In the same way, you can connect the factory power regulator worth about 150 rubles, which is often purchased by craftsmen in China.
If there is very little space in the Bulgarian, the regulator can be placed outside the instrumentas shown in the following photo.

Also, the regulator can be placed in the outlet and use it to reduce turns not only at the grinder,but also in other electrical appliances (drills, sharpeners, milling or turning machines for wood, etc.). This is done as follows.
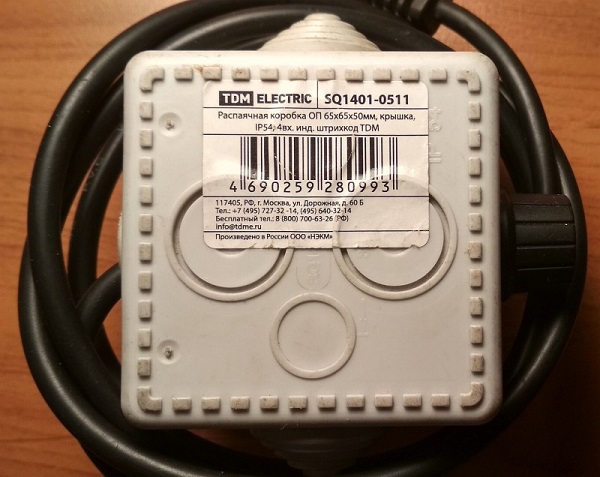
- Get in the electrical store junction box (suitable with dimensions 65x65x50 mm).
- You should also buy a small external outlet and a power cord with an electrical plug.
- In the side wall of the junction box, drill a hole to insert a variable resistor regulator into it.
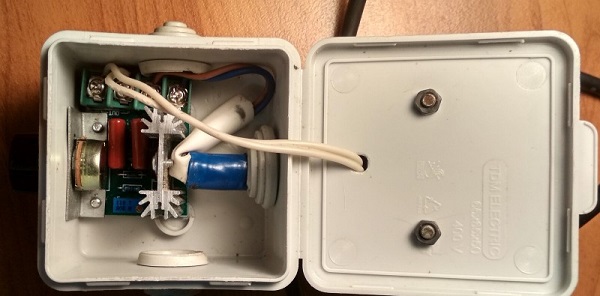
- A factory controller board or an improvised device is placed inside the junction box. All protruding parts in the box that interfere with installation can be cut off.
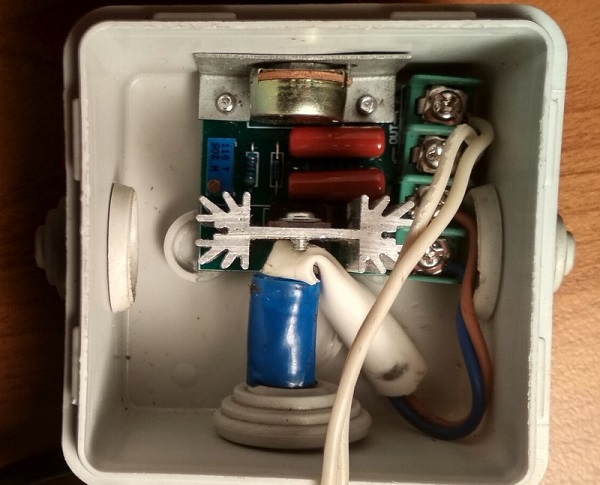
- The socket should be mounted on the lid of the junction box, after stretching the wires inside the latter.
- In the figure above, you can see that the wires of the network cable touch the radiator, which heats up during operation. Therefore, he is wearing a PVC tube. But it is better if you drill a hole in another place for the power cable to prevent it from contacting the radiator.
The regulator is connected as described above - on the break of one of the wires of the power cable.
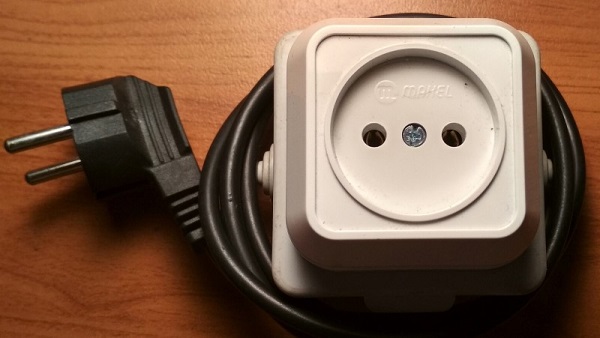
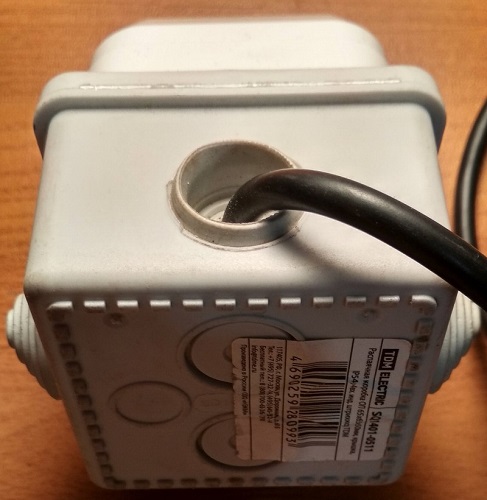
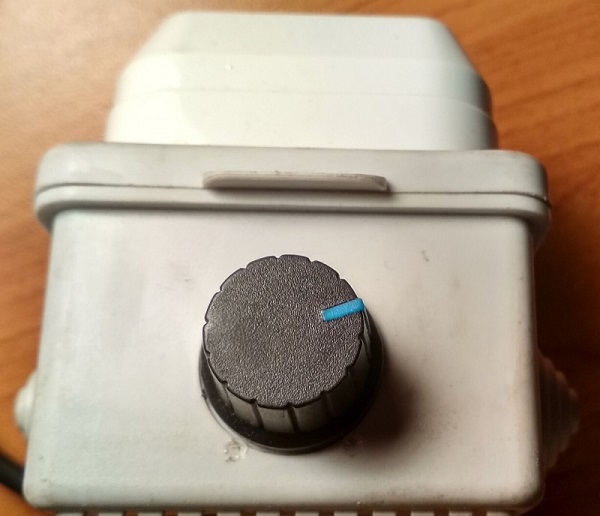
The following photos show how the finished socket will look like, having a built-in regulator of revolutions of the grinder, which can be used for other electrical appliances.
Instead of a junction box, you can use any plastic case suitable size. Also the box can be made independently, having stuck together pieces of plastic with the glue gun.
/rating_off.png)


