Homemade drilling machine and other tools from the drill
An electric drill is a universal tool, since not only drills and cutters can be clamped into its chuck, but also wooden parts, if the device is used in a lathe. The need for a drilling machine arises in the case when the home master needs to drill holes are strictly at right angles. In this case, the master is faced with a choice: buy a ready-made stand for drilling or make a machine out of a drill with your own hands. We will tell how to implement the second option.
Content
Drilling machine
In the manufacture of racks for fastening drills, it is necessary to understand the principle of its work, and to show imagination in the manufacture of its individual nodes.
Option rack number 1
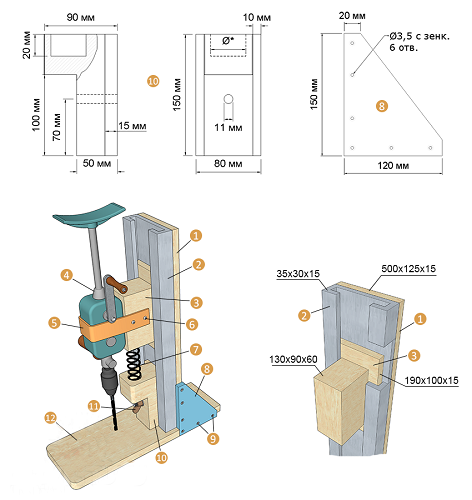
For example, below is an instruction for making a drill tool from simple scrap materials.
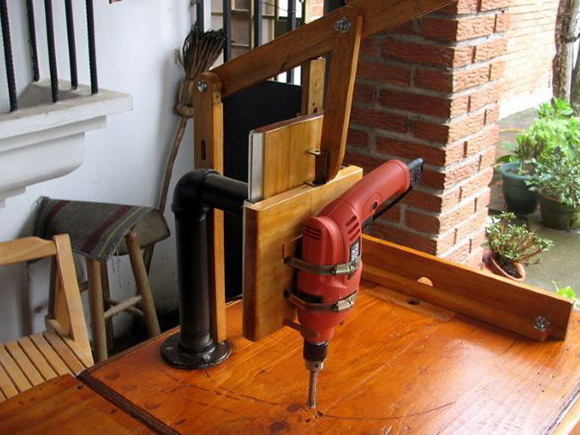
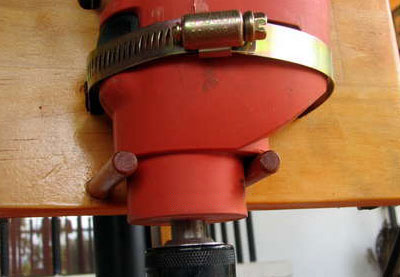
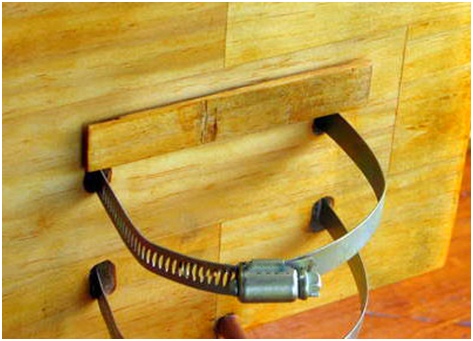
- To attach the drill to the sled, clamps are used under which a rubber gasket is enclosed.
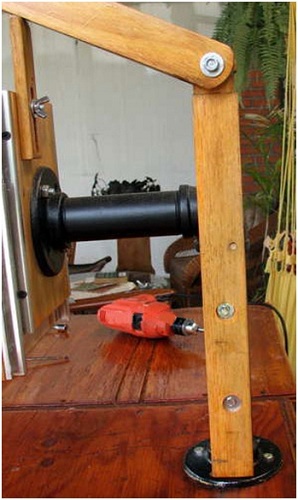
- For raising and lowering the movable part of the slide, to which the power tool is attached, a stand with a lever is used.
- To limit the depth of drilling, an adjustable stop is installed under the lever.
- The fixed part of the sled is attached to the pipe with a flange.
- The vertical and horizontal part of the pipe is connected by a square. Necessary when connecting stand right angle. The vertical pipe is fixed in the flange bolted to the frame. Instead of a pipe, you can use “kerchiefs” made of chipboard, which are attached to the frame and to the fixed part of the slide with the help of euro screws (confirmatists).
- On the mobile platform, it is necessary to make 4 holes for the clamps used to clamp the device body. Also on the side that will be turned to the fixed part of the rack, it is necessary to glue the slats. For a better slip, they are lubricated with paraffin.
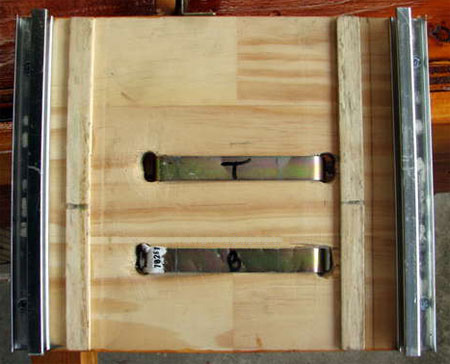
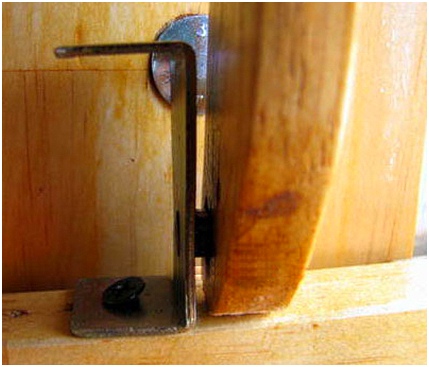
- In order to prevent the case from falling, you can install 2 stops at the bottom, as shown in the figure.
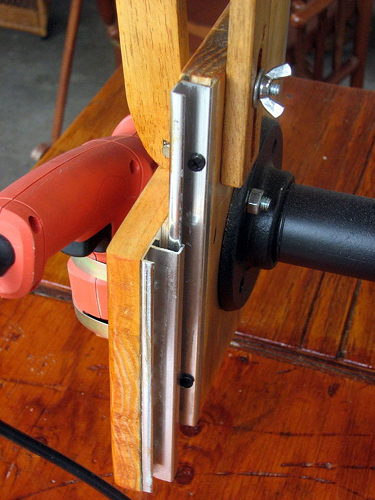
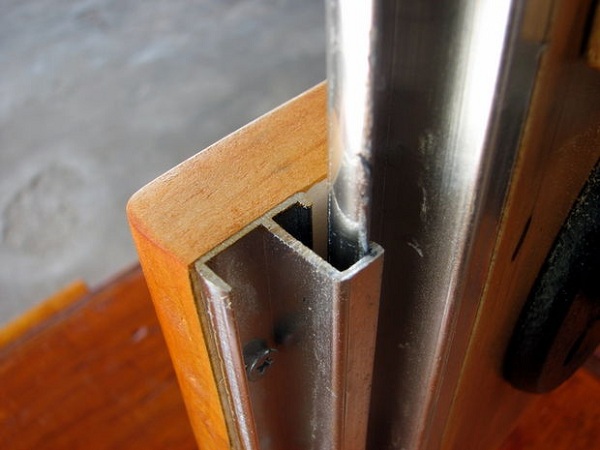
- To align the body of the unit at a right angle, you can glue the rail of the required thickness (thickness is determined by the selection method).
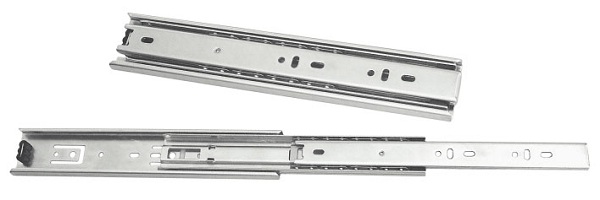
- Guides in this design are made of aluminum profile. But you can replace them with ball (telescopic) guides, which are used to install drawers in furniture. The task of the guides is rigid (without backlash) and at the same time a movable connection of the parts of the rack.

- In order to assemble the lever, and he could move at the same time, the nut should not be tightened all the way. To fix the nut and prevent it from spontaneous loosening, another one is used, which is screwed together.
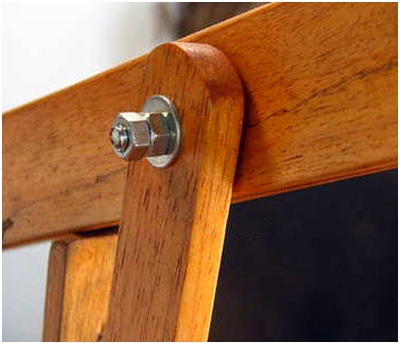
- The part of the lever attached to the moving platform must be rounded at the end.
- If you require the unit to rise to the upper position after drilling, you can install the spring by attaching one end to the moving platform and the other to the horizontal part of the pipe. If the spring is short, you can extend it with a cord.
Option rack number 2
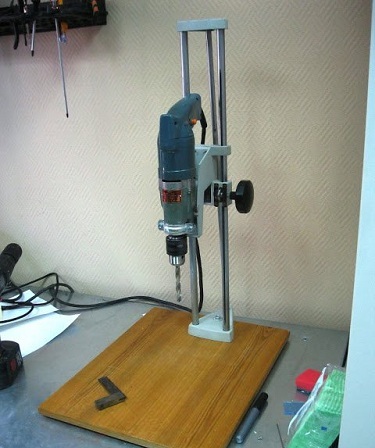
The figure below shows another homemade drilling machine, the rack for which can be made of thick plywood, and the rest of the parts - from a wooden bar.
![]()
The role of the guide in the drilling machine, made of a drill, plays an aluminum profile. But, if you do not find such a profile, you can replace it with furniture guides (telescopic).
Option rack number 3
If you have a stray in the house Soviet Enlargerthen it can serve as the basis for a drill stand. This design already has rigid guides, as well as a gear mechanism that provides vertical movement of the carriage along them.
You only need to modify the structure a little, attaching clamps to the carriage, and convenient handles to the height adjuster.

Well, if you have no desire to design tools for a drill with your own hands, or there is simply no time for this, but you still need to drill a hole strictly at a right angle, then you can buy a ready-made stand at a price of about 1,200 rubles.

Other types of machines from the drill
The drilling apparatus can serve as an engine for the construction of various woodworking tools. Consider what else you can make a machine out of a drill with your own hands.
Frazer
For the manufacture of the router with the help of a drill, you will need to take the usual clamp used for water pipes.
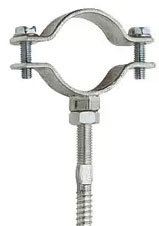
You will also need to find a little chipboard (you can use a plate of old furniture), then assemble such a structure, as in the figure below.
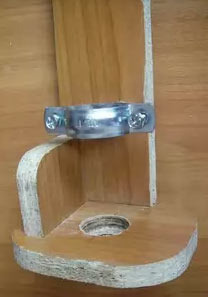
Further, it is necessary to attach the drilling unit to this improvised milling platform.
Such a milling cutter can be used, for example, for milling a groove at the end of a tabletop, for t-shaped profile stuffing, or for figured milling of the ends of wooden parts. Of course, it is difficult to achieve good quality milling in this way, since the machine will not have enough turns. For comparison: the spindle at the router can rotate at a speed of 26,000 rpm. and more, which results in high quality surface finish.
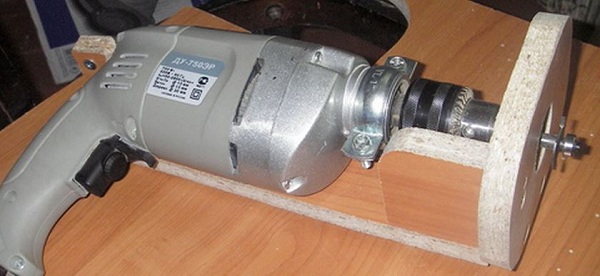
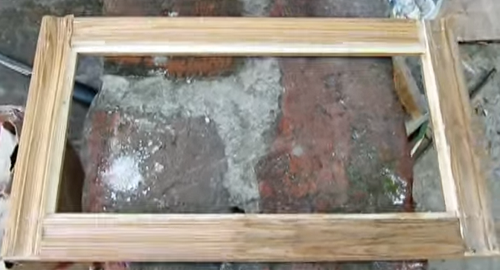
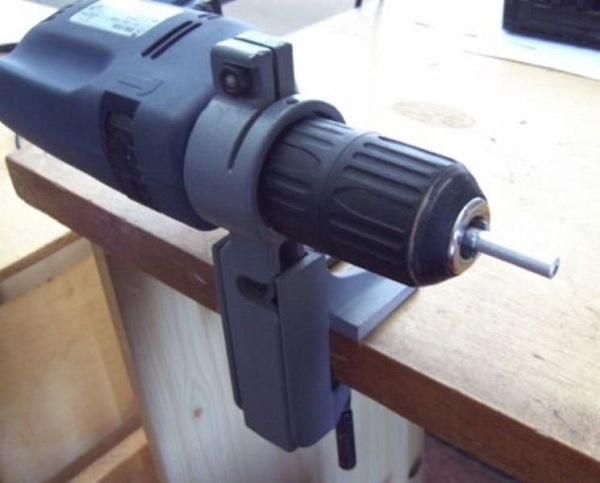
You can also make a milling machine from a drill, if you clamp it in such a way as shown in the figure below. In this way, a quarter is selected in the bar for glass insertion, for example, in the manufacture of a window leaf.

Turning tool
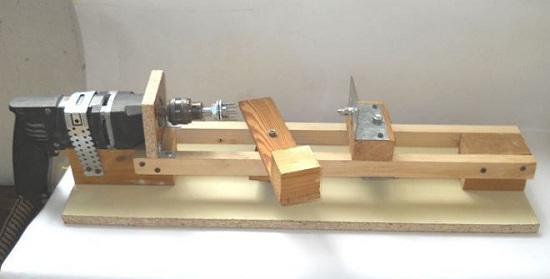
To grind small, round parts, you can make a device in which a drill is attached to the workpiece. The easiest way to perform wood turning can be called the one shown in the figure below.
This kind of wood lathe can be made in minutes. For its manufacture will require a wooden beam or board, a couple of corners, as well as a sharpened bolt.
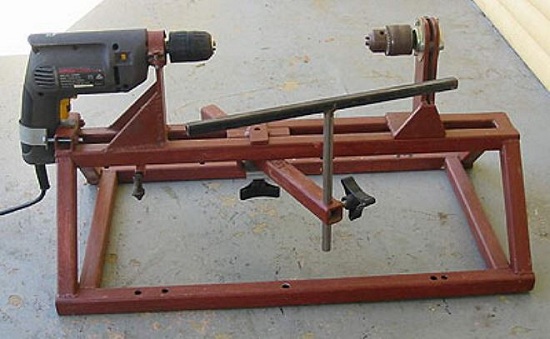
A more “advanced” drawing of a lathe, which can be made from a drill with your own hands, is presented below.
If you are not able to make such a device out of metal, as shown in the drawing, you can do without a pair of clampsattached to a workbench.
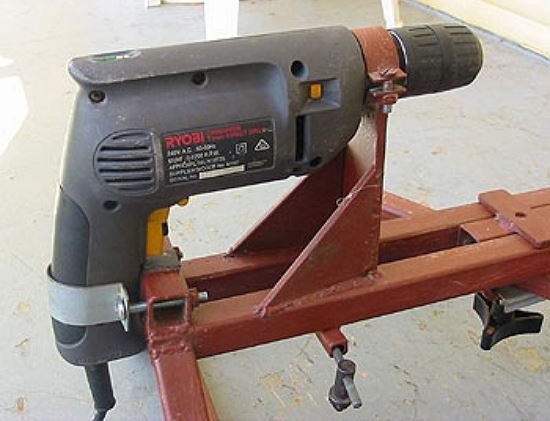
The first clamp with a clamp can attach the device to the workbench.
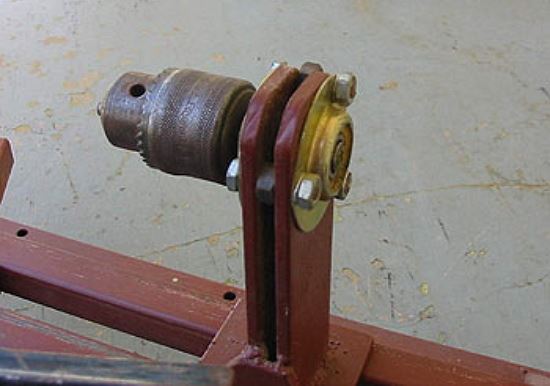
As a clamp for the drill, you can use a small vice with clamped clamp in them. The second clamp needs to clamp the self-made tailstock with the screw screwed into it, in order to center and maintain the part. The end of the screw must be cleaned under the cone.
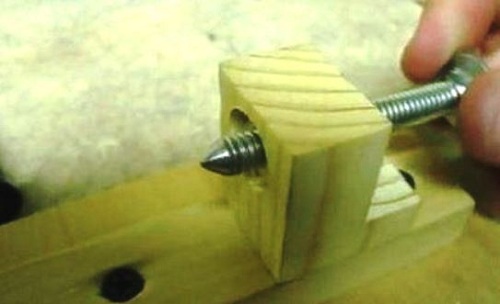
As a podruchnika to the bench a bar of the required thickness is pressed.
It is also not difficult to design a homemade lathe from wooden barsas shown in the following image.
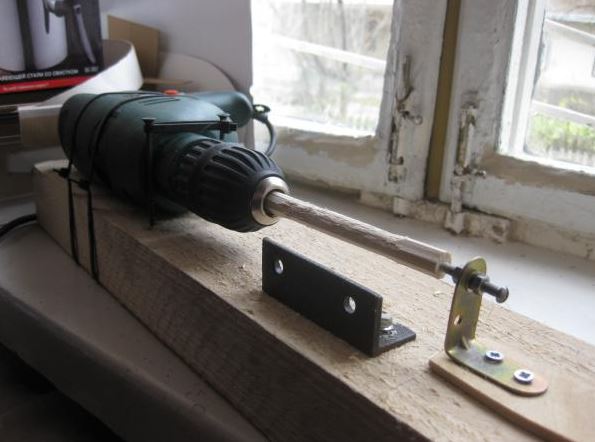
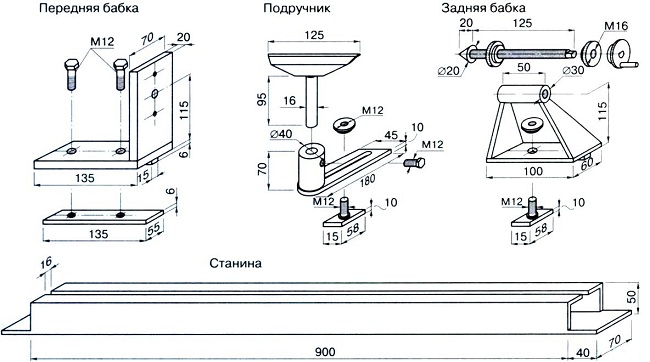
For precise turning work with long and large parts, it is recommended to make a lathe from metal profile (square).
In the manufacture of this design it is necessary to precisely maintain the alignment of the front and back headstock. The unit to the headstock can be fastened with a pair of clamps.
The tailstock must be movable in order to process parts of different lengths.
The podruchnik must also be movable and move both along the bed and across it so that it can be moved closer to the workpiece to reduce the lever. If the lever is large, the tool can be torn out of the hands, and the part from the cartridge, which is fraught with serious injuries.
It is important that the support platform is rotated, for example, when processing a part at an angle.
If you make such a machine, it can easily be converted into a universal one. It is enough to hold an emery or felt wheel in the chuck of the apparatus, and the design turns into a grinding machine from a drill. In the same way, it is possible to make a grinding unit from it.
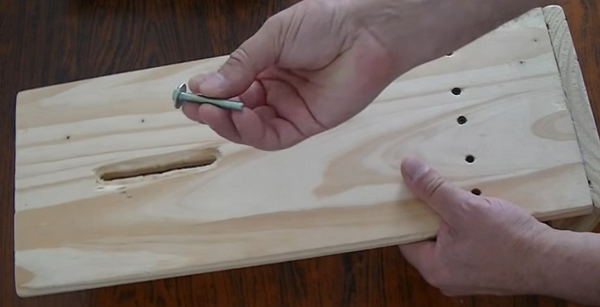
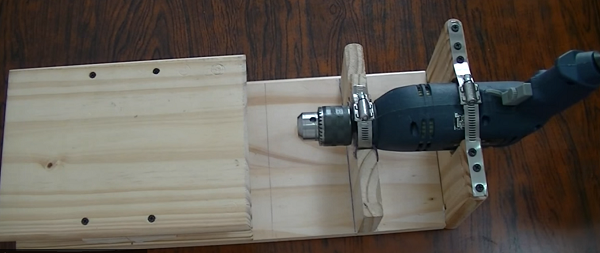
A simpler model of the universal machine is easy to make from the usual planed board. To do this, cut it into parts and assemble the structure as shown in the figure.
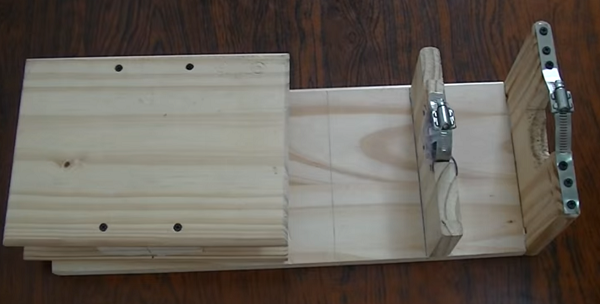
It looks like a bed, if you remove the table.
The thickness of the board used in the construction is 2 cm. The length of the product is 50 cm. The width of the device is 20 cm.
The height of the racks is 9 and 14 cm. The height can be different and depends on the diameter of the grinding wheel. The whole structure is twisted with screws. The joints of parts before assembly is recommended to glue up with glue.
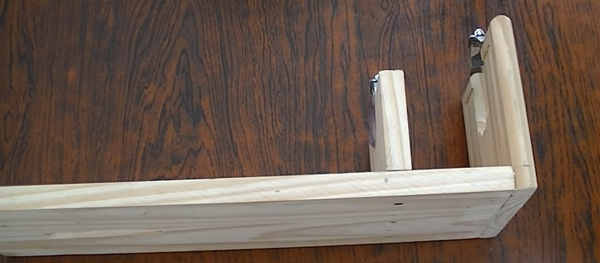
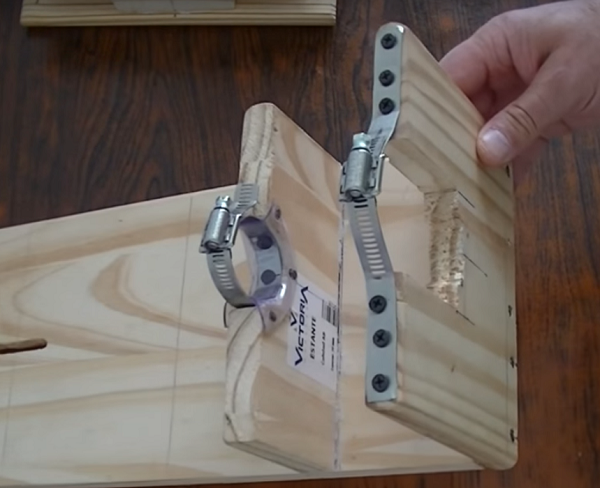
On top of the racks fixed 2 strap, one of which is cut and unfolded. As a soft strip used cut polyethylene tubenailed down by carnations.
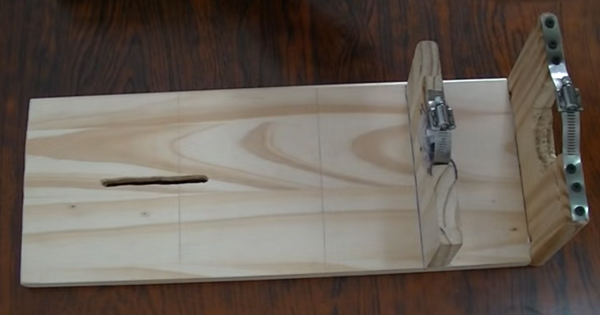
On the bed it is necessary to make a small cut (groove) and expand it from the bottom side so that the cap of the coupling bolt does not interfere.
Next, you should twist 2 planks of size 20 X 27 cm with a bar between them, the thickness of which is 4 cm (this way you will get a table). The bar is needed so that the hand can freely pass between the planes while screwing the table to the frame.
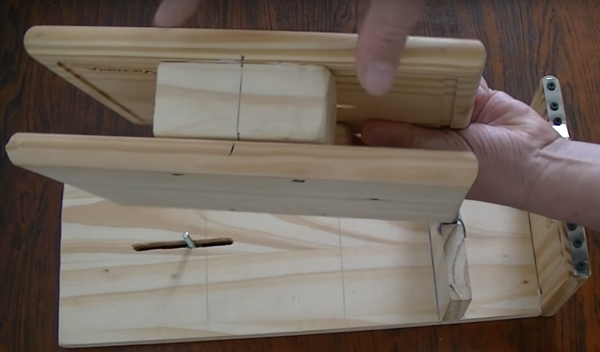
In one plank a slot is also cut to secure the table to the base. After this, the table can be attached using a screw with a washer.
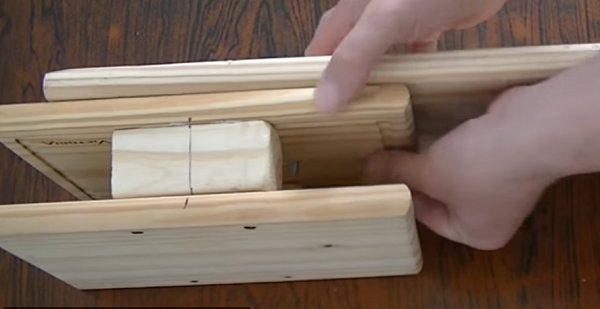
Thanks to the grooves, the table can be pushed to the required distance to the cartridge.If the table is rotated, it will be possible to move it across the machine. The distance to which the table can be moved depends on the length of the groove.
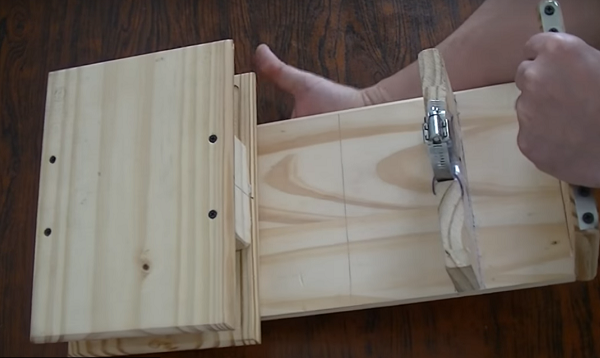
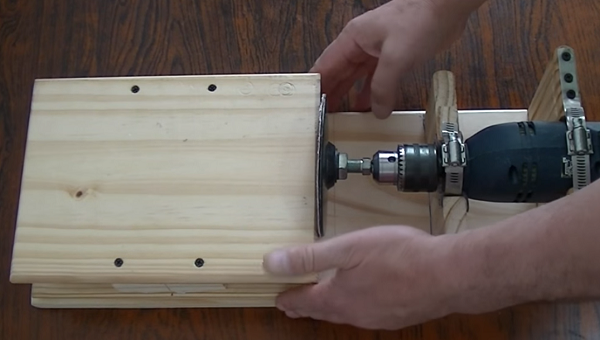
After fixing the drilling machine, you get a universal fixture.
Now, if you hold the drill chuck grinding wheel - you get a grinding unit. The presence of reverse in the unit during grinding is desirable, but not necessary.
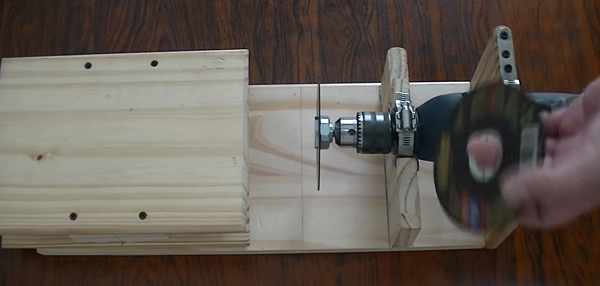
If install abrasive disc (on metal) from the grinder, then it is possible to cut metal rods. When cutting metal, be sure to wear safety glasses. You can also install a gear mill, and cut with it thin plastic.
When installing abrasive wheel - get a sharpener.
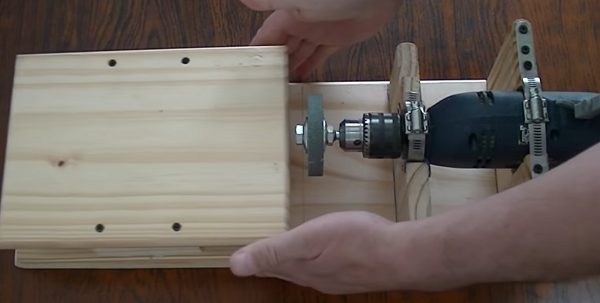
Such a unit can be used for turning knives, drills, planer knives, as well as to sharpen tools for a lathe on a tree.
If you fix the guides on the table, and install a drill in the cartridge, you get a filler machine.
Thus, the drill, thanks to the chuck, is the basis for the creation of machines of various purposes. Such an increase in the functionality of a regular drill would be very useful for a home wizard,at the disposal of which appear various technological operations.
/rating_off.png)


