How to assemble a homemade engraver at home
Engravers are widely used in various industries, not only for engraving various materials, but also for drilling miniature holes, polishing, grinding, milling. The same operations can be performed with their help at home. If this is required only occasionally, or you just need to save money on the purchase of a tool, then you can make a mini-drill yourself from unnecessary equipment, which often lies unused in garages or storerooms. With the help of self-made drills it will be possible to perform the same operations as with the factory tool of similar capacity, only you need to use the appropriate nozzles.
Content
Production of laser engraver CNC arduino
Engravers by the characteristics of its operation are divided into milling and laser. In the first material is processed by various nozzles. In laser models, all the work is done by a laser beam - this non-contact engraving method. In this case, such a device belongs to the category of high-tech equipment. But a homemade engraver can be done at home.
To create a laser engraver with your own hands, you will need the following parts, tools and materials:
- stepping motors from dvd-drive;
- Arduino computing platform;
- Proto Board with display;
- limit switches for engines;
- laser module (for example, with a power of 3 W);
- device for adjusting the value of constant voltage
- laser cooling system;
- MOSFET (transistor);
- boards for assembling motor control elements;
- housing;
- toothed pulleys and belts for them;
- various sizes of bearings;
- wood planks: 2 pieces, size 135x10x2 cm and two more - 125x10x2 cm;
- 4 round metal rods with a section of 10 mm;
- grease;
- clamps, bolts with washers and nuts;
- vice;
- locksmith tools;
- drill;
- jigsaw or circular saw;
- files or sandpaper;
- computer or laptop.
Stepper motors can be taken not only from a DVD, but also from a printer that is practically not used.
The machine is assembled according to this algorithm:
- create a foundation;
- mounted guides with movable carriages;
- collect electrical circuit;
- install the necessary programs on the computer;
- carry out the adjustment (setting) of the laser head;
- check the performance of the machine.
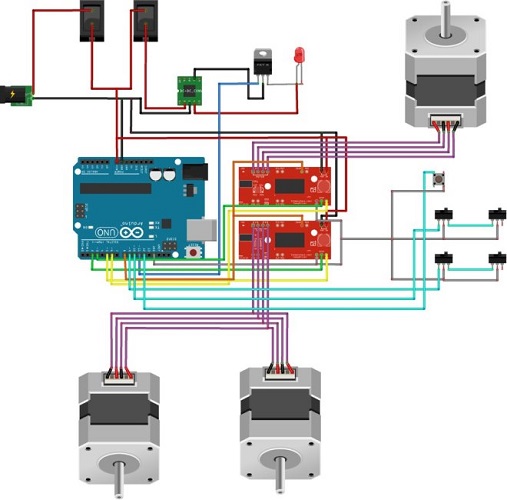
Connection scheme electric stepper motors taken from an inkjet printer or DVD, shown in the photo below.
The entire sequence of actions that allows you to assemble a laser engraver on the arduino, is shown in detail in the video below.
Created by CNC engraver will cost much cheaperthan any laser models of factory production. It can be used for the manufacture of seals, for photoresist, for working with wood, plywood, plastic, cardboard, polystyrene foam and cork sheets.It is also possible to engrave on metal.
Assembling an electric engraver with a tripod and a flexible shaft
The electric engraver is the most common home type of this type of tool. To make a functionally complete device independently, able to compete with analogs of industrial production, you will need an electric motor that runs on AC 220 V. Such electric motors can be taken from the following technology:
- Reel tape recorders of the Soviet type;
- DVD players;
- washing machines;
- angle grinders;
- electric sewing machines.
The last option is optimal, because it is possible to adjust the speed in a fairly wide range using the built-in rheostat.
For domestic use, a drill with an engine idle speed of up to 6 thousand revolutions per minute is sufficient.
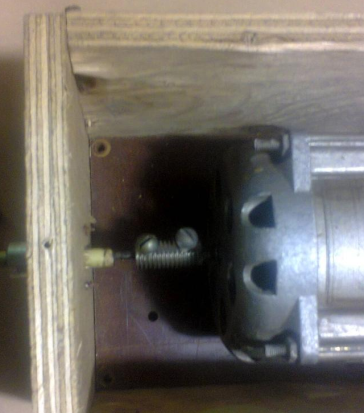
It is inconvenient to hold an electric motor from any of the listed types of equipment in one hand, and in most cases it is simply impossible. Therefore need flexible shaft for engraver. In this case, a general view of the future device will turn out approximately as in the photo below.
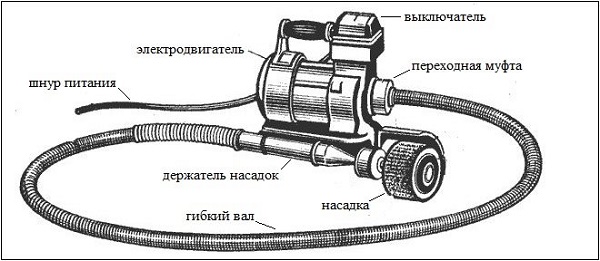
The functionality of the created device for engraving will depend on the materials and mechanisms used in the assembly. The motor can be put on the table, but it is more convenient to make tripod for engraveror rather his likeness.
Making a flexible shaft
With a flexible shaft, everything is relatively simple. It can be done in several ways:
- from the old drive shaft, for example, from a dental drill;
- using the cable of a motorcycle or car speedometer.
The shaft attachment can also be used. from the drill or make it yourself from different materials, for example, from wood, PCB, plastic pipes. From PCB a device (handle) to hold the snap do so:
- cut 2 textolite platinum (the thickness of the sheet should be about 1 cm) measuring about 2 to 10 cm;
- connect them together and grind a file or sandpaper outside to get a cylinder;
- pierce the grooves from the inside;
- metal rings fix the parts with each other;
- In the front part of the handle insert the tube, under the cartridge, consisting of two separate halves, connected with a bolt.
The result will be a handle, as in the photo below.
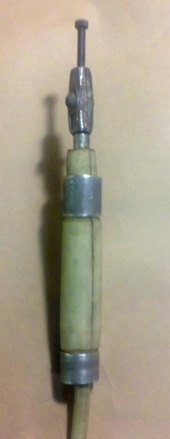
The inner hole made between textolite plates should be of such a cross section so as not to hinder the free rotation of the cable. The cartridge can be inserted nozzles with a shank diameter of 2 to 5 mm.
Assembling the engraving machine
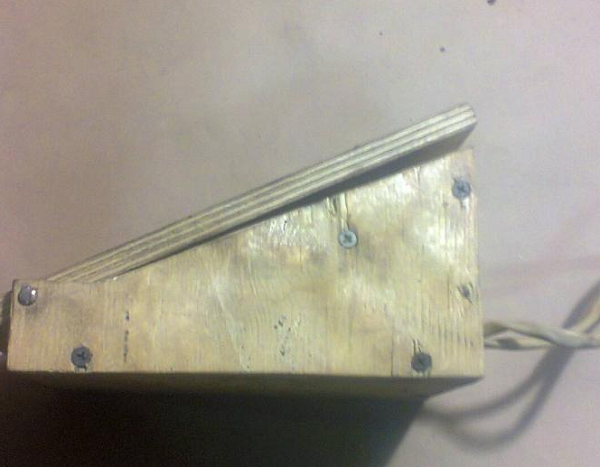
It is very easy to make a tripod (base for mounting an electric motor) out of plywood or the same PCB. To do this, do the following:
- cut out of a sheet of material a few pieces (4 is enough) corresponding to the motor size;
- motor is attached to one of the fragments using clamps;
- collect the box;
- A flexible shaft is drilled in the front section.
The created structure is hung to the wall.
Convenient to use clamp holder for the engraver, if the dimensions of the electric motor permit. Fastening connects to any table. But such a device will need to be purchased separately.
Further assembly of the engraving device is performed in the following sequence:
- using a coupling created from a drilled bolt, connect the cable with the motor shaft;
- a rubber hose of the appropriate diameter is put on the cable and a handle made there is attached to it;

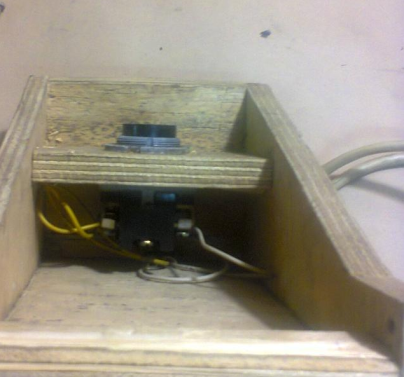
- set the start button;
- connect equipment to the network;
- check the performance of the device.
The self-made drill will allow to process wood, a bone, threw, glass, plastic, ceramic preparations, and also different metals, a natural and artificial stone.
You can also use when creating improvised straight grinders electric motors, designed for 380 V, but if they can be adapted to 220. In such cases, you will need to tinker. There is a lot of information on this issue both on the Internet and in books on electrical engineering.
We make a mini-drill from a motor
It happens that at home it is required to make small holes in the wood or plastic, while the drills from the drill are not suitable. In such cases, help homemade mini-drill from a motor. It can also be performed wood engraving. And if there is an interest in amateur radio, then using the created tool you can drill and cut the boards.
To create a self-made device, you need to take a miniature motor from an old tape recorder. Even various models of motors from children's toys will do. If you use a mini-motor from a tape recorder of 12 V as a drive, you will need the following materials and parts:
- power supply unit or several batteries (battery) with 12 V output;
- a piece of plastic pipe (about 10 cm long) in such a section that a miniature electric motor can be inserted inside;
- heat resistant glue;
- power button;
- wiring for electrical connections.
Do-it-yourself mini-drill, acting according to the following algorithm:
- using an electric drill or a knife in the tube make a hole under the switch;
- grease the motor with glue to fix it inside the future case;
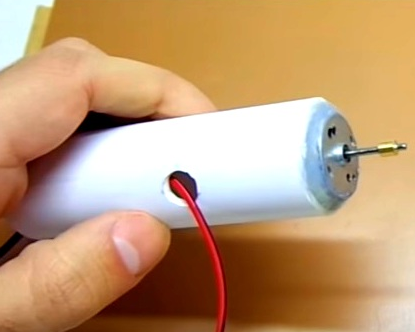
- insert the motor into the tube;
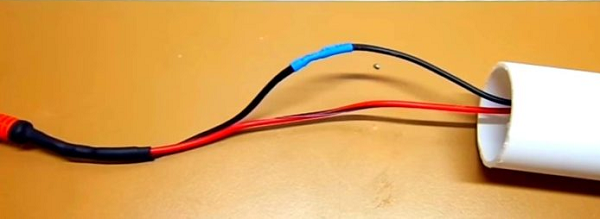
- any of the wires through which the motor is powered is protruded into the hole drilled in the case earlier, and the other end is left at the back of the case;
- In the hole under the button insert one posting from the power supply;
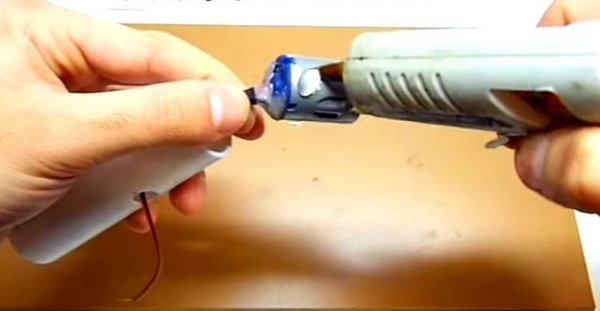
- solder with a soldering iron to the ends of the switch, carefully isolating the contacts;
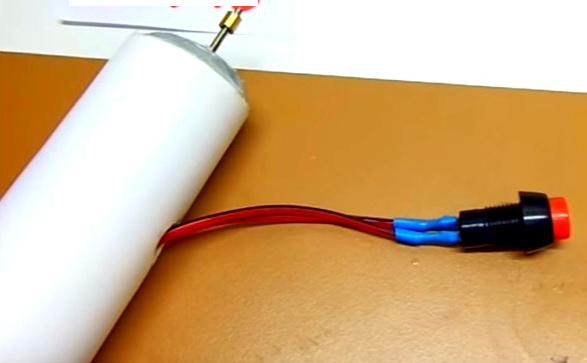
- The remaining two wires from the end of the tube (from the button and the motor) are connected to the connector for connecting the power supply;
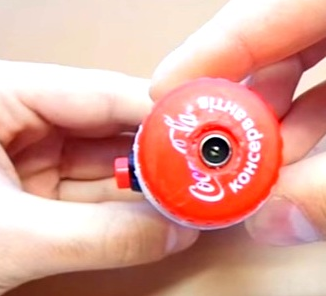
- cut off the neck of any plastic bottle;
- make in the lid in the center of the hole for the connector and glue these details;
- glue the neck to the tube;
- connect the assembled mini drill to the power supply;
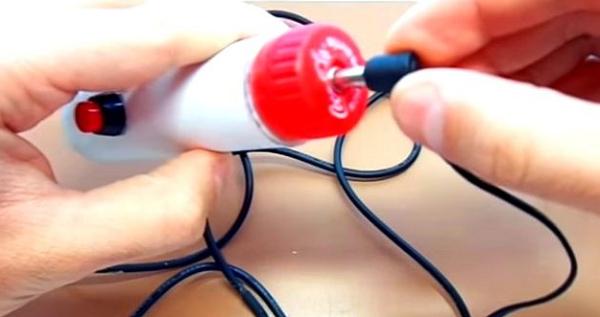
- pressing the button checks the performance of homemade.
Power supply voltage should be selected to match the operating voltage of the electric motor used.
To make the mini drill autonomous, simply adapt the batteries to it.
Homemade Dremel from the drill and blender
If you have an old or unnecessary blender, then it is also easy to make a mini-drill. This home appliance already has a convenient handle. In addition to the blender itself, you will need more such devices and additional details:
- tools to disassemble the device (screwdrivers with different tips, pliers);
- caliper or ruler;
- collet;
- soldering iron with a set for soldering;
- knife;
- file for finishing, sandpaper;
- switch.
You can do without the last part, but then you need to constantly hold the power button with your hand while you are working with a straight grinder.
The engraver of the blender is created as follows:
- carefully disassemble household appliances;
- internal parts: an electric motor and a printed circuit board, which controls the operation of the device;
- using a caliper, measure the diameter of the spindle to get a suitable collet chuck;
- if the electric motor is contaminated with something, such as rust, then it must be carefully, carefully, so as not to damage the windings;
- fix the purchased collet chuck (either made by yourself) on the spindle;
- the power button already on the blender is replaced with a switch: solder the wire contacts;
- fit in the housing of the household appliance a hole for the new switch;
- install the motor with the board in its place inside the case;
- collect tool.
Depending on the model of the blender being converted, you may need to make additional holes in its case, or expand with a file already existing. There is no problem doing this.
The whole described process of assembling Dremel from a blender is shown in detail in the video below.
You can not alter the blender, but simply connect to it a flexible shaft for a factory-made engraver. The way of joining is shown in the video below.
You can also make an engraver from a drill. The assembly of options with and without a flexible shaft is shown in the following videos.
Making an engraver from a 3D printer
An ordinary 3D printer is a good basis for creating an engraver with which it will be possible to cut various materials, make crafts and perform other operations. To upgrade your existing device, you will need an additional install fee, which will power the operational circuit of the equipment and the laser module.
The engraving machine created from a 3D printer is shown in the following video.
In addition to the simplest ways to create a homemade engraving machine from a 3D printer, a small electric motor, a small electric motor, a blender and a drill, there are other options. In this case, the basis is used as this technique, and other power tools.Craftsmen are constantly coming up with new modifications, showing a design fantasy. Realizing in practice any of the above options or self-development, it should provide security created by homemade. To do this, it is necessary to isolate the electrical contacts well and reliably assemble the equipment.
/rating_off.png)


