How to make a cordless screwdriver network
A cordless screwdriver is useful in household chores, in construction, as well as in the assembly of a wide variety of power tools. Its main advantage is the ability to work autonomously until the batteries are discharged. For various reasons, it may be necessary to rework the screwdriver to connect to the 220 V network. It is relatively easy to carry out such a modification yourself in various ways, for which no special tools are needed. Depending on the chosen option, making changes will require different time and financial costs.
Content
What are the advantages of rework
The cordless screwdriver competes with the network analogs in a worthy manner, but only while its batteries are at a sufficient level. When the battery sits down - it needs recharging from the mains. This factor is the first disadvantage of this power tool.
The second minus is considered limited number of charge cycles. At the same time, the cheaper the battery pack (battery), the faster its operational life is exhausted. The purchase of a new battery at a price is almost comparable to the purchase of a whole power tool. It also does not make sense to buy a new battery instead of the old one if the battery-type screwdriver itself is outdated and is used quite rarely. It will be more practical to adapt the power tool for mains supply 220 V.
Making changes will allow the further operation of this tool with a minimum level of financial investments. The created remake will have all advantages of network devices:
- there is no need to perform periodic charging;
- the power of the power tool (torque) will not fall during operation;
- no need to worry about proper storage of equipment during long non-working periods: it is enough to put it in a case in a dry place.
These advantages, as well as small expenses, compensate for the inconvenience associated with the presence of a cord.
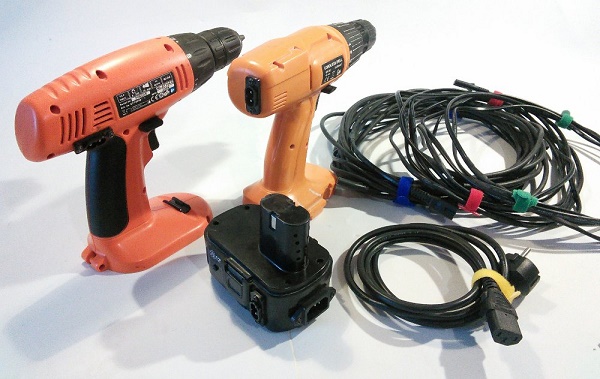
In order to make a power screwdriver from a cordless screwdriver, you need a power supply unit (PSU), which can be placed in two ways: as an external power supply unit or mounted inside an old battery case.
It should be borne in mind that the cord from the external power supply to the power tool must be, according to Ohm's law, a larger section than directly from the 220V network.
For the practical implementation of any option you need the following tool kit and materials:
- screwdrivers with different tips;
- screwdrivers with different tips;
- pliers;
- clippers;
- soldering iron with a set for soldering;
- insulating tape;
- wiring to jumpers, taken, for example, with multicore cable;
- multimeter;
- knife.
Assembling the network power supply for the screwdriver in the case from the battery
Transforming the screwdriver into a network is convenient using battery case. In this case, as an internal filling use:
- 24 V power supplies made in China;
- BP self-assembly;
- different ready-made power supplies.
Redoing the Chinese unit at 24 V
BP made in China with an output voltage of 24 V (maximum current 9 A) is not difficult to buy at points of sale of radio components. Most screwdrivers are designed to work from 12 or 18 V. For this reason, it is necessary lower output voltage Chinese products to the desired value. It is easy to do this, even with a shallow knowledge in the field of radio and electrical engineering.
The upgrade of the supply source is performed as follows:
- soldered with a soldering iron constant resistor R10 with a resistance of 2320 Ohms, which is responsible for the output voltage;
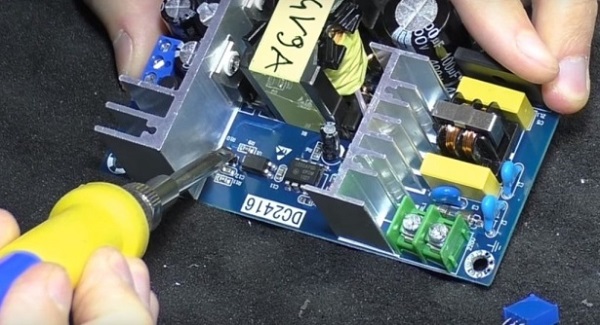
- An adjustable resistor with a maximum resistance of 10 kΩ is inserted in its place, having previously set this parameter to 2300 ohms, so that the built-in protection does not work when the device is powered on;
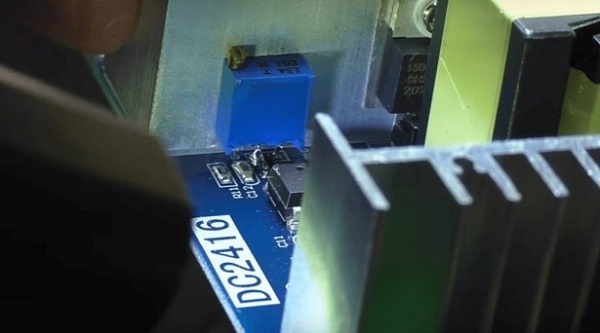
- supply power to the converted unit;
- rotation of the regulator trimmer set the desired value of the output voltage, controlling its value with a multimeter.
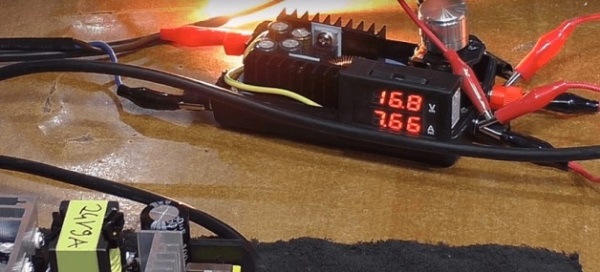
To connect a multimeter, simply touch its probes to the corresponding contacts at the output of the product being converted. In this case, the switch of the measuring device must be set to constant voltage range. If the upgraded power tool is designed to work from 12 V, then you should make sure that the current at a given voltage value does not exceed the maximum value of 9 A. Otherwise, the created device will quickly fail due to overload.
Homemade built-in power supplies
To power the screwdriver from the network, you can also assemble a homemade power source (PI). This will require electronic transformer on 60 W, for example, Taschibra or Feron. They do not need to alter. The final scheme of the power supply to be assembled is presented in the photo below. It clearly shows all the details with their markings, as well as the main parameters.
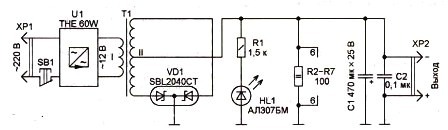
T1 transformer need to do yourself.To do this, do the following:
- acquire a ferrite ring (HM2000), measuring 28 * 16 * 9 mm;
- using a file to grind corners on it;
- insulating tape wrapped ring.
All the details of the scheme are attached to a plate made of aluminum (3 mm thick), which will simultaneously perform a conductive function. Then assembled PI is installed in the case from the battery.
Visual control over the operation of the device will be carried out by the LED light H1.
You can take finished parts also from energy saving lamp and from other devices. But then the schemes will be different, for example, as in the photo below. To solder them, you need some knowledge of radio engineering.
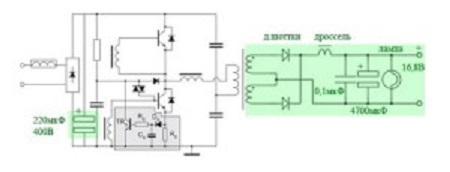
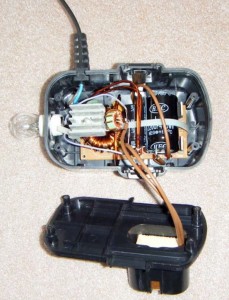
The diagram above corresponds to the PI with ballast lampThe photo of which in the assembly is presented below. At the same time, the bulb performs an additional function of illumination.
Use when reworking finished blocks
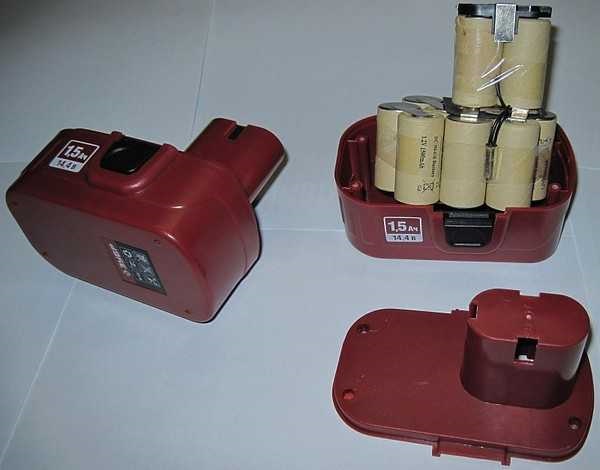
Inside the old battery case, you can put any power supply designed for 220 V, as long as it has the right dimensions and the required output voltage. BP with the desired characteristics buy on the radio market or in stores for radio amateurs.To install a purchased power supply for a screwdriver instead of a battery, proceed as follows.
- Pre-disassemble the purchased product.

- Alter it as necessary, upgrading to their own needs. If necessary, the connecting wiring extend, place the transformer and the chip separately. For better cooling of the board, its equip radiator.
- After that, the parts are mounted into the case from the battery pack, in which holes are also made, through which the air during the circulation will remove heat.

All embedded parts inside the case must be securely fixed.
Particular attention should be paid to the insulation of the conductive parts between them - this will eliminate short circuits.
The degree of modernization of the acquired power supply in each individual depends on the compliance of its initial parameters with the required values for the power tool. In order not to be mistaken with the dimensions of the power source being purchased, they take a battery pack with them and try on the selected product using it.
Various options for remote power supplies
An external power unit for a screwdriver can be made from the following devices:
- from a computer power supply unit;
- using a laptop power supply;
- from charging the car battery;
- from the invertor welding machine.
Remote power supply from the PSU from a computer or laptop
In this case, to make the power supply for the screwdriver, you need a power supply unit from an AT computer with a capacity of 300-350 watts. The current at its output voltage of 12 V will be about 16 A, which is enough to work medium power tools. The part can be removed from the old system unit or purchased, for example, in a computer store. At the same time, it is already equipped with a power button, a cooling fan, as well as overload protection.
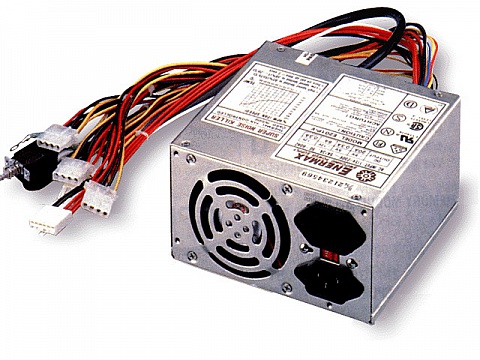
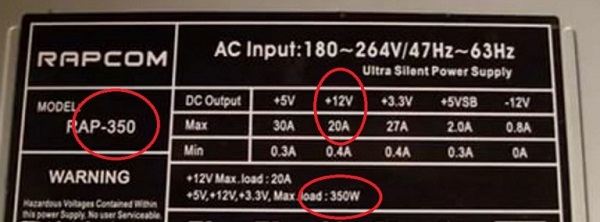
The main performance characteristics of a computer power supply are contained on the plate of its case.
Work on the adaptation of the device to work together with a screwdriver is performed in the following sequence:
- disassemble the case of a computer power supply unit;
- remove the inclusion protection by connecting the green posting for this purpose with any of the black parts of this connector;
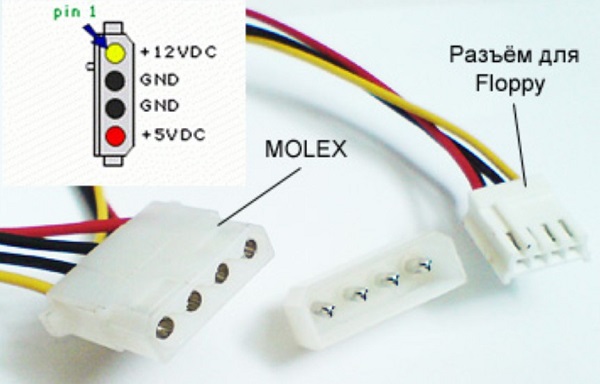
- then wires that are not needed are cut from the MOLEX connector: leaving only yellow (+12 V) with black (ground) wiring;
- solder to the yellow and black wires one end of the cord;
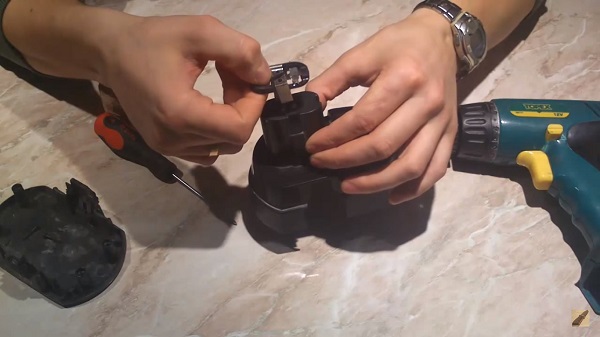
- disassemble the screwdriver;

- connect to its respective terminals the second end of the wire from the power supply;
- in the reverse order collect the tool.
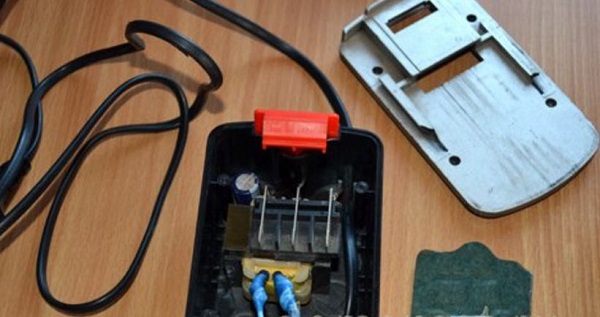
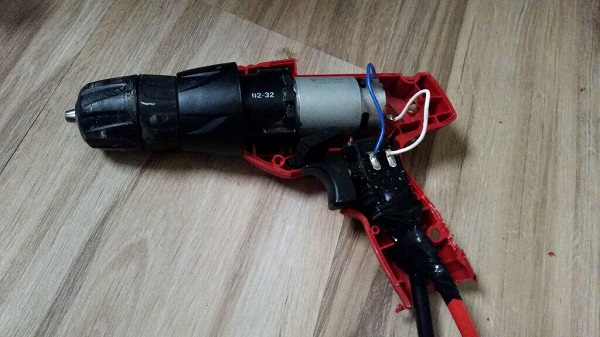
As a result, the equipment will turn out approximately as in the photo below.
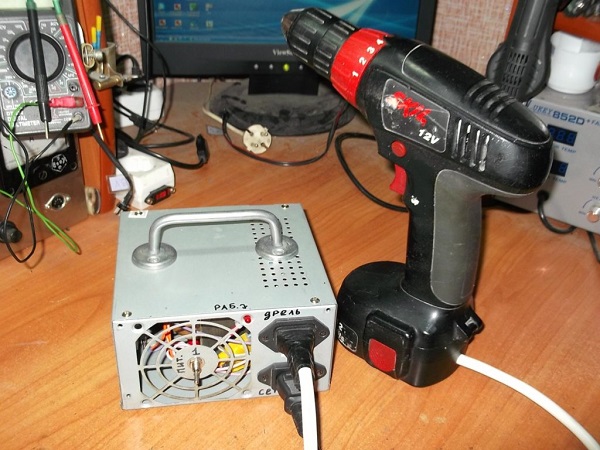
The disadvantage of the created product is that it is only suitable for use with an instrument whose operating voltage does not exceed 14 V.
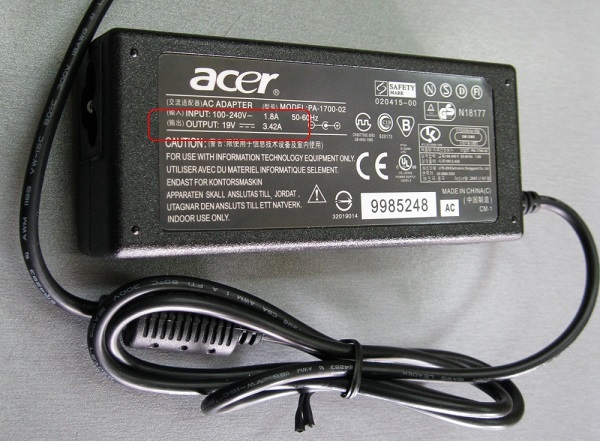
Using a laptop charger as a power source for the instrument you are using is a very simple option.. In this special alterations are not required. Charging with an output voltage from 12 to 19 V.
Finalization of the device is performed as follows:
- from the output charging cord, cut off the connector with a nipper;
- bare the ends of the wires;
- disassemble the screwdriver;
- solder charging wiring to the appropriate tool contacts;
- collect power tools;
- check its performance.
You can also connect the cord to the screwdriver through the battery. Batteries are first pulled out of it, and holes are made in the case for the power supply cable.
The ends of the cord are attached to the battery terminals.
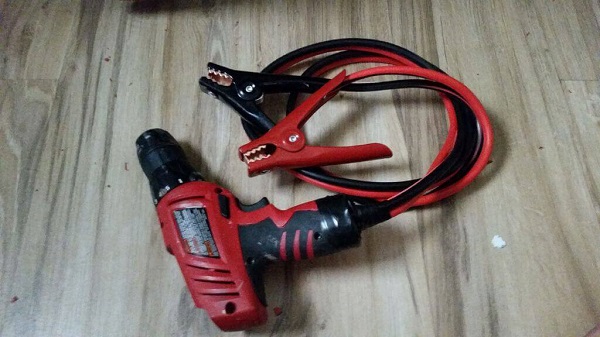
Trick Recharging Car Battery and Inverter Welding Machine
Alteration of the charger from automotive batteries in charging for the screwdriver is performed in a similar way with the modernization of the IP from the laptop. On the car market you will need to purchase not a switching power supply, but an instrument analog type (if the house is not old, which is not used) with the ability to manually adjust the amperage and voltage at the output when charging batteries. It is such a cheap device. Its appearance is presented in the photo below.

The alteration algorithm is as follows:
- pick up 2 multicore wiring of the desired cross section;
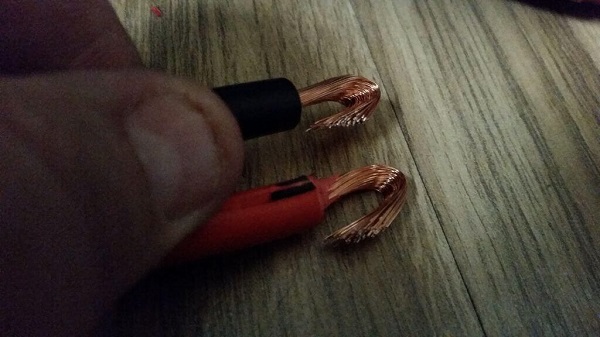
- special contact clips (“crocodiles”) are attached to one end of each of them, and 2-3 cm of insulation are removed from the rest;
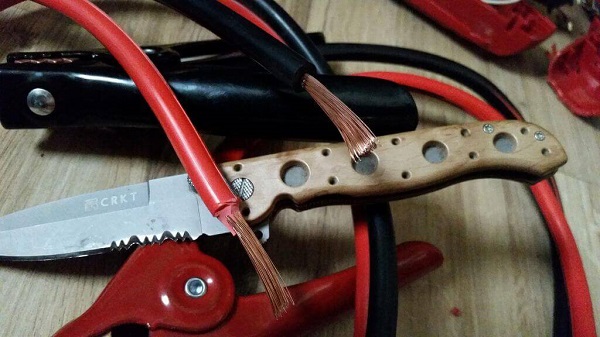
- bend the stripped ends in the form of a hook;
- disassemble the screwdriver;
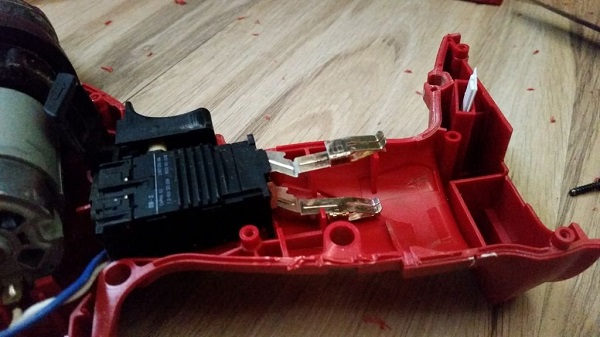
- they will connect bent ends to its contact terminals, soldering them with a soldering iron or tightening them with plastic clamps (ties);
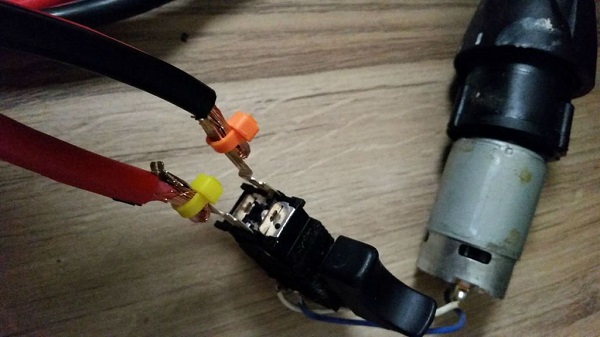
- well isolate electrical connections so that there is no short circuit;
- perform the assembly of the power tool, be sure to check its performance after.
In order to properly connect a converted instrument to charging, “crocodiles” are marked in any acceptable way, for example, in a certain color or inscription (“+”, “-”).
The ability to smoothly adjust the output voltage allows you to use the charger from the car battery with any models of screwdrivers not connected to the network.
Creating an external power supply from inverter welding machine - this is more complicated compared to the rework methods discussed above, an operation. Due to the mismatch of the output currents of the unit to the desired value, it will be necessary to change the design of the equipment. For this you need to carry out related calculations. Here, without good knowledge of electrical engineering is not enough.
Network screwdriver scheme fundamentally no different from its battery equivalent. For this reason, reworking the power tool itself consists of carefully connecting it to an external power source or upgrading the drive. In addition to the options considered, there are many other ways to remake a screwdriver to work from the network. For this purpose, even use parts from old lamp TVs.But in all cases, be aware of safety - the simplest option would be to use fuses.
/rating_off.png)


