Repair major faults screwdriver
Screwdriver - a tool often used in the professional field in the repair and construction works, as well as in everyday life. Like any electromechanical device, screwdrivers are prone to malfunctions. This unit is not a complicated device, and in the event of malfunctions, you can repair the main faults of the screwdriver with your own hands.
Content
The main malfunctions of the screwdriver and their causes
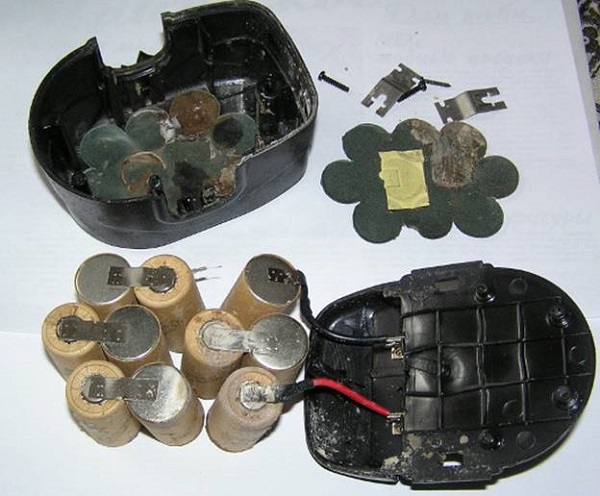
The figure below shows the internal structure of the battery.
In screwdrivers can be installed as a collector electric motors, and beskollektorny engines (do not have electric brushes).
If your screwdriver has broken, then the malfunctions of this unit may be as follows.
- Device is not working. First of all, the electrical plug or cable may be faulty, the battery (battery) may be completely discharged or the battery may be faulty. Also, this problem can cause burnout of the motor windings, a malfunction of the start button, erased brushes.
- When the machine is working, it strongly sparkles. There may be a malfunction of the armature or engine manifold, as well as problems with the brushes.
- Battery Discharges Quickly. You will need to check the batteries included in the battery pack with a tester.
- The device spontaneously turns on. Most likely, the start button is faulty.
- Motor brake does not work. In this case, you need to replace the button or transistor, since these elements are responsible for braking.
- Backlash chuck. Most often, the beating is caused by the curvature of the gear shaft.
- Ratchet does not work. Possible causes: wear of the petals of the ratchet interlock, breakage of the pins or ratchet springs.
- The cartridge is scrolling. A malfunction of the gearbox, namely its gears, may cause a situation when the cartridge slips. Also, the failure of this node is the reason that the running engine does not turn the spindle.
- The cartridge jammed, I can not unscrew and pull the drill or bit. As a rule, clamping jaws jammed due to insufficient lubrication or breakage of the internal parts of the cartridge.
All faults, except for the electric plug, can be repaired only after disassembling the device.
How to disassemble a screwdriver for repair
To disassemble the device, follow these steps:
- disconnect the battery pack from the device;
- unscrew all fasteners holding the 2 halves of the device together;
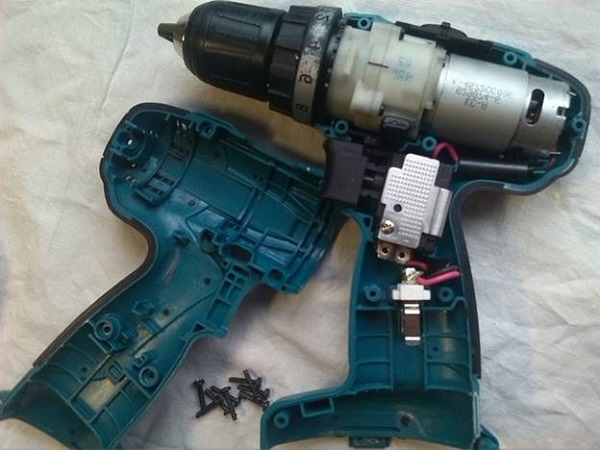
- remove the upper case;
- remove all contents from the device;
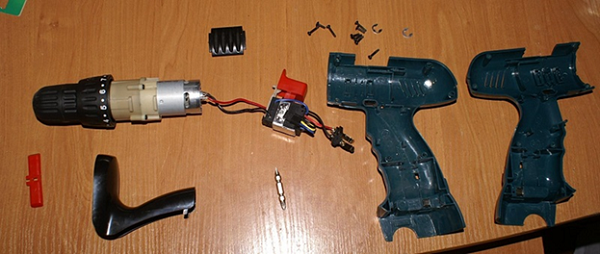
- gently disconnect the start button from the case without damaging the wires connecting it to the engine;
- remove the speed selector;
- disconnect the engine, gearbox, clutch and cartridge by unscrewing 4 screws;
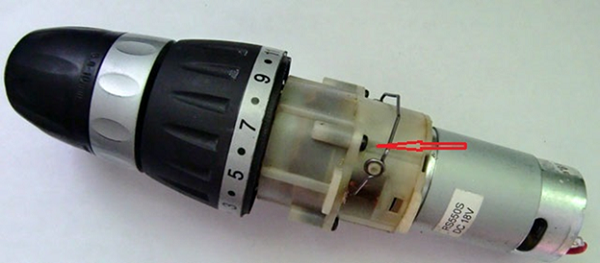
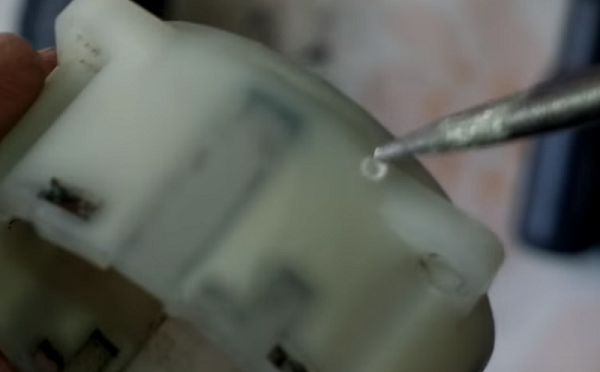
To unscrew the cartridge, you will need unscrew the screwwhich can be seen inside the mechanism with the cams released.Unscrew the screw clockwise, since the left thread is on it. After that, the cartridge must be unscrewed from the gearbox shaft, turning it to the left (right-hand thread).
Diagnostics and troubleshooting of the electric part of the screwdriver
If you have a battery, the first thing you need to check the battery in the battery pack, disassemble it. There are collapsible and non-collapsible blocks. In the second case, you will need to carefully insert a screwdriver into the gluing place of the walls of the block and, slowly, disconnect them.
Next, you need measure stress on all the “banks”. The voltage rating is indicated on the case of each battery. The voltage should be slightly lower than indicated, but the same on serviceable batteries. Defective batteries will differ significantly from the rest of the output voltage - they will need to be replaced. New batteries can be purchased online.
It is important to solder them correctly, that is, in series: plus one battery connected to the negative of the other, plus a second with the next negative, etc.
If you are the owner net screwdriver, the verification algorithm is somewhat different.First, you need to spin the body of the device and remove it one half. Take a tester and “ring out” the power cord for a break. In the case of a working cord, you need to check the start button. With the button pressed, check whether there is a circuit on its output contacts. If the button is faulty, it will need to be replaced or repaired. How to do this will be discussed further. With a good button, the problem may lie in the electric brushes or the engine.
Repair buttons
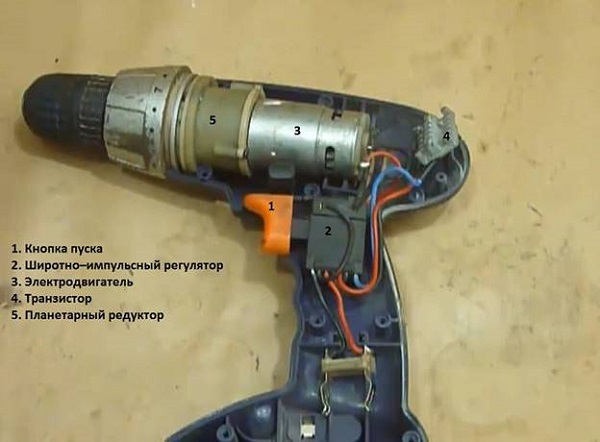
Below is the electric circuit of the cordless screwdriver.
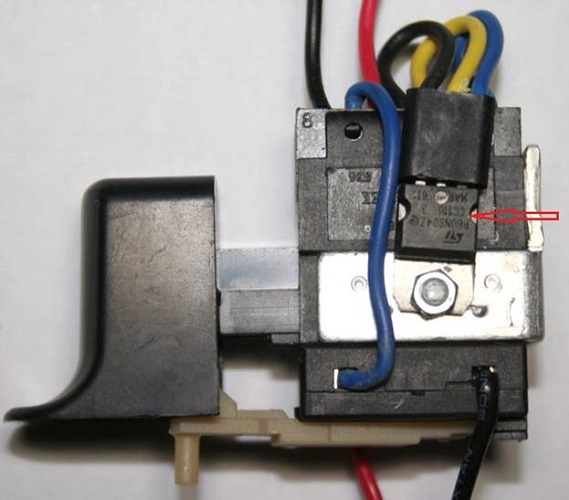
From the diagram it can be seen that 2 wires from the battery fit the button, and 2 wires go out of it to the engine. Also connected to the button 3 wires from the transistor, which is responsible for adjusting the speed. To understand the device of the screwdriver button, it is necessary to disassemble it. All wires leading to this part, and you can not unsolder. They will not interfere with disassembly.
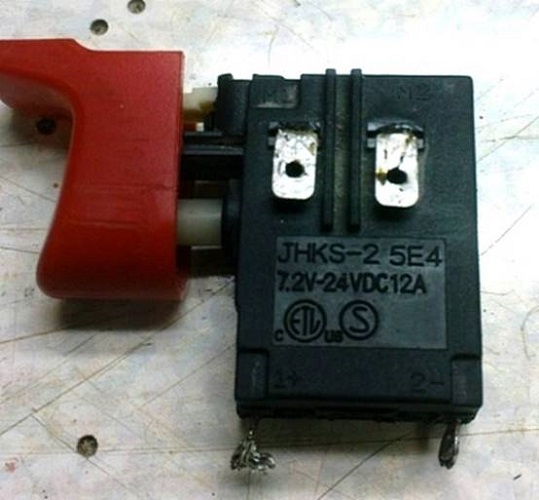
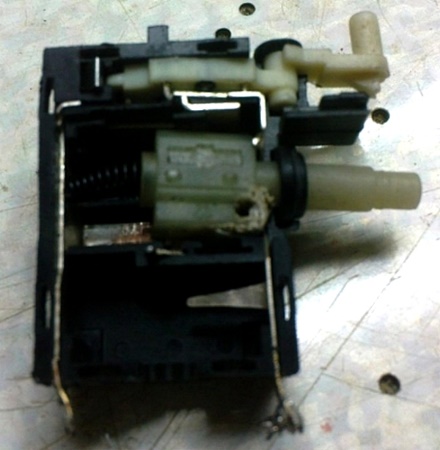
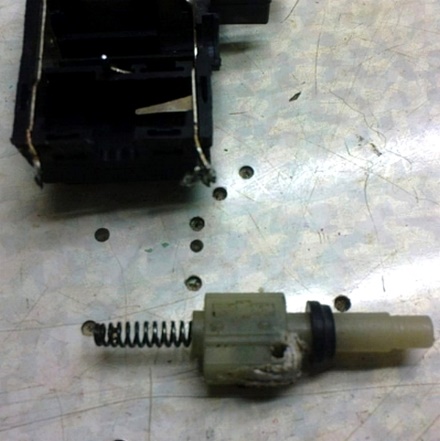
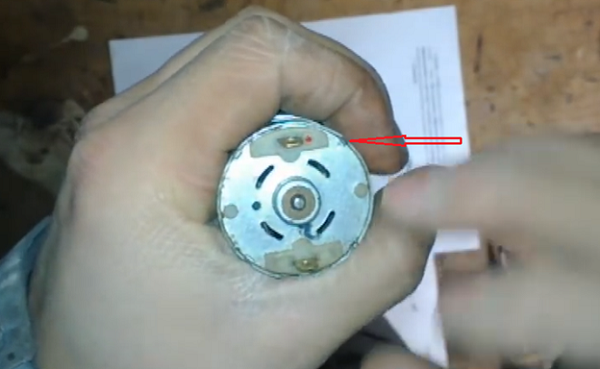
Take off pressure mechanism (red) from your seat. Do this with gentle rotational movements, at the same time pulling the part to the opposite side of the button, making sure that the jokes do not break.
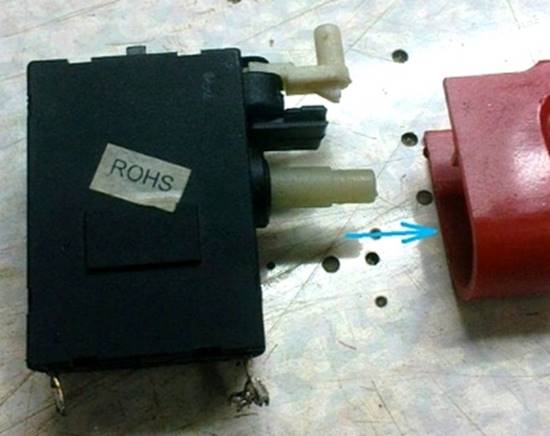
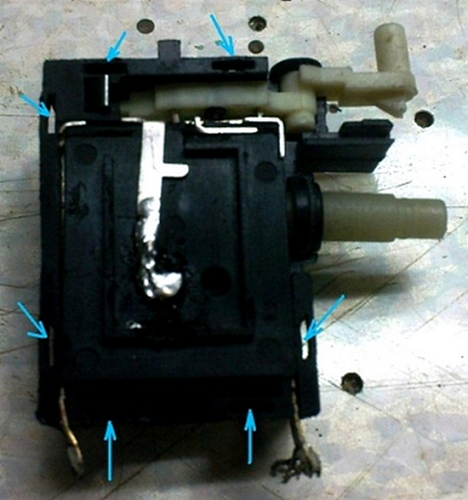
Next, remove button cover. In the places indicated in the figure by the arrows, using a knife and a screwdriver, pry and push out the latches, then remove the cover.
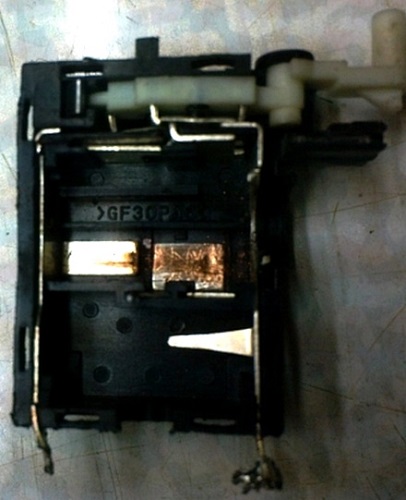
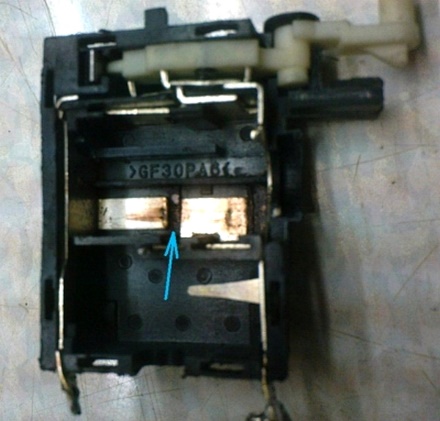
Removing the lid, you will see reverse compartment. But the button mechanism will still be unavailable. Using a soldering iron, separate the 2 elements (in the following figure indicated by the arrow).
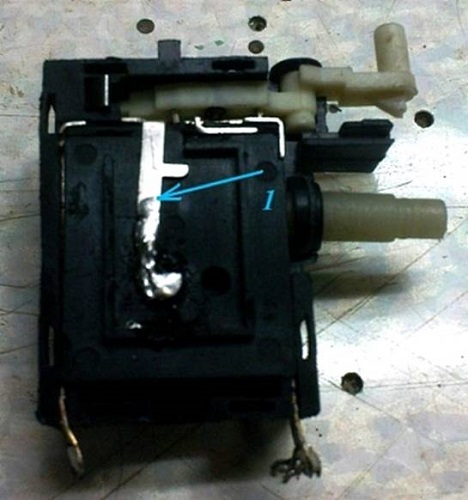
Gently pull out the element number 1, then remove the cover that covers the compartment with the mechanism to turn on the device.
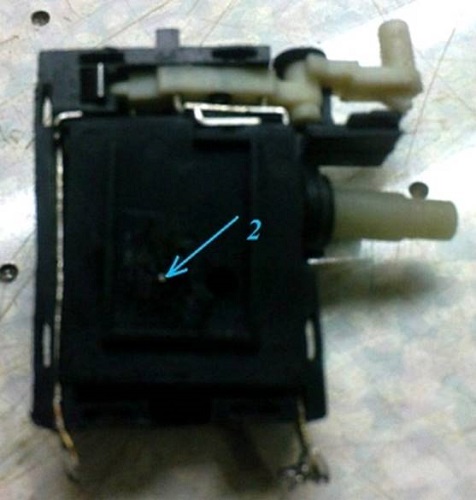
Holding the return spring, pull the mechanism out of the case.
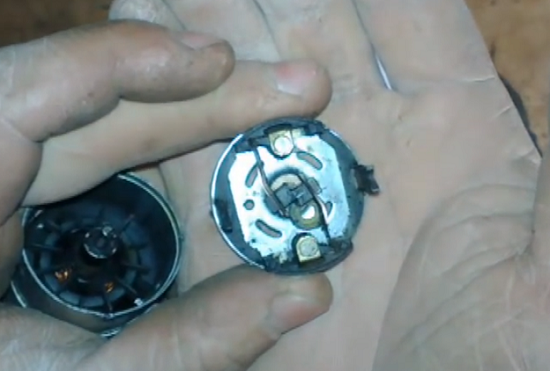
In the faulty button you will see the pads that were erased.
Contact pads wear out quickly due to poor quality metal. Fine metal dust from the worked contacts accumulates between them and closes the platforms. As a result of this, a spontaneous launch of the device occurs.
Using a cotton wool moistened with alcohol, remove metallic dust. If this fails, you can scrape it off with a knife. After these actions, the spontaneous start of the device will stop.
If the speed regulator does not work, then the transistor has blown, which needs to be replaced.
Replacing brushes
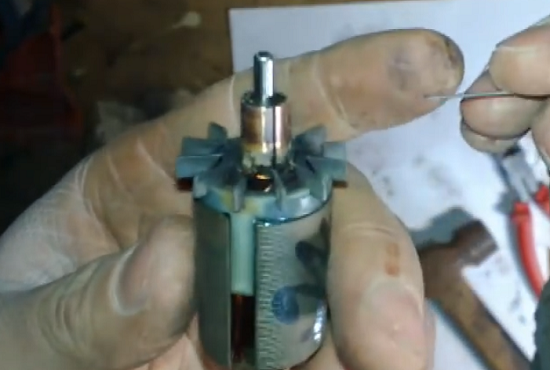
To check the condition of the brushes you need disassemble the engine, bending the "antenna", located on the end of the body.
Further, light blows of the hammer on the motor shaft, knock the rotor out of the housing.
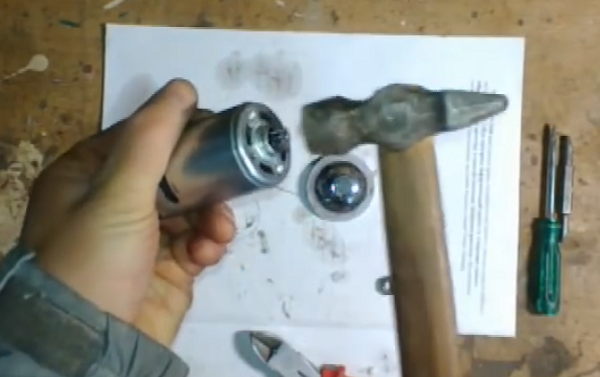
At the same time, the cover in which the electrical brushes are located is first removed.
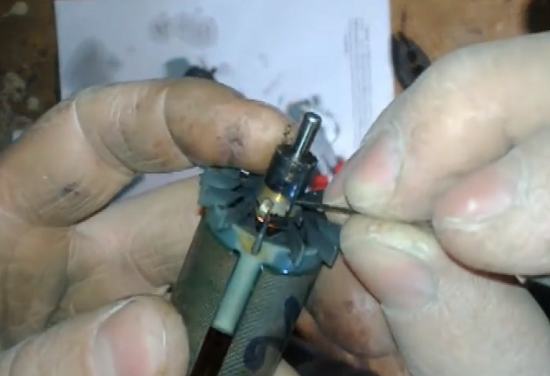
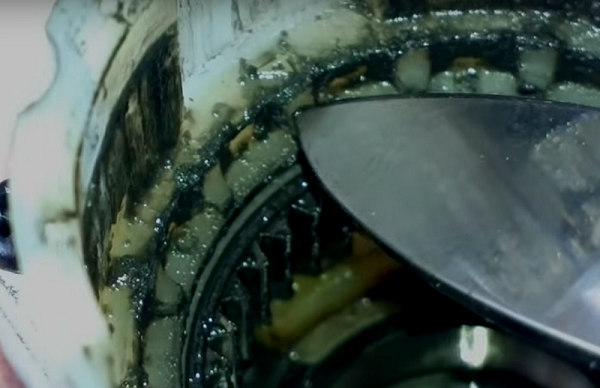
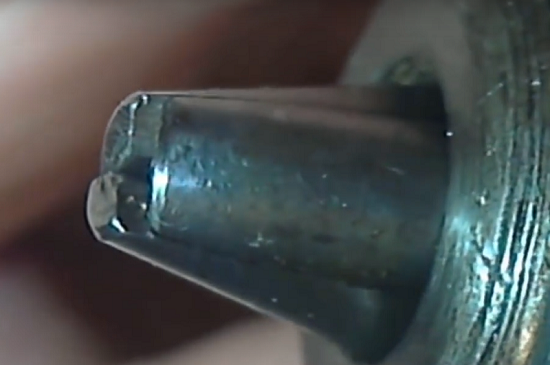
The following photo shows that the collector has black color. This means that it will contaminate the dust from the brushes. As a result of pollution of the collector, as well as the grooves between its plates, the engine power drops and sparks brushes. It is necessary to wipe the collector with cotton wool moistened with alcohol and clean the grooves with a needle.
The following photo shows what a clean collector looks like.
If the brushes are worn, they will need to be changed. On some models of screwdrivers difficult to find on sale original brushes. But you can find brushes that are suitable in size, then on a sharpening machine, trim them and connect (solder) to the brush holders.
Sometimes, to replace brushes, it is required to saw through in them a flute. It depends on how they are mounted.
To better understand how the brushes are being replaced, you can use the following video.
Engine brake repair
The engine brake is a device that stops the rotation of the armature when the start button is released.In screwdrivers, this function is implemented by closing the plus and minus of the engine when the button is released. As a result, a large self-induction occurs, and spindle lock (with great sparking from under the brushes). If engine braking does not work, then a regulating transistor or start button will need to be replaced.
Mechanical damage elimination
The mechanical breakdowns of the screwdriver include faults ratchet, gearbox and cartridge apparatus.
Ratchet Repair
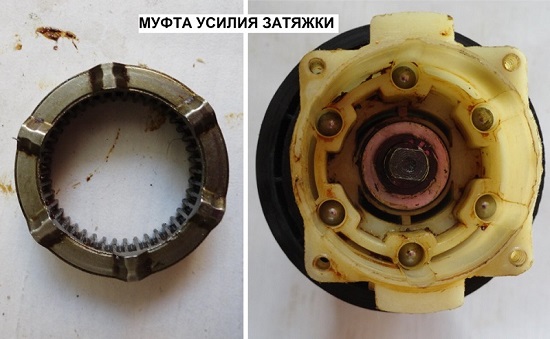
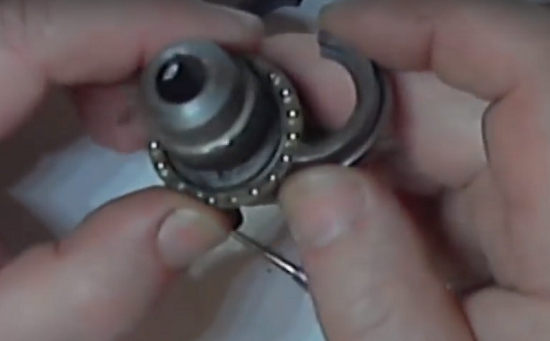
If the ratchet does not work on the screwdriver, you will need to disconnect it from the gearbox for troubleshooting. Sometimes there are special rods in the clutch, which regulate the force, and in some devices instead of the rods 2 balls are installed in each hole. They are pressed by the spring, which, when the adjusting ring is tightened, presses on the balls.
In most cases, the repair of a ratchet screwdriver is to clean its components from contamination and in applying a new lubricant.
Screwdriver gearbox repair
If in the gearbox noises unusual to him are heard, or the spindle rotates with jerks, with slipping, then the cause may be the defective gears of the mechanism, ground teeth on its body.
Gears often break if they are made of plastic (used in cheap machines). If this happens, they must be replaced.
In the next photo you can see the gearbox device.
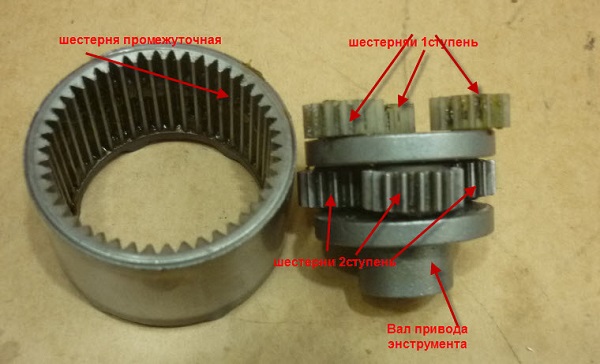
The reason that the spindle does not rotate with the engine running may be the wear of the plastic teeth inside the gear housing.
In order to restore the operability of the mechanism, it is necessary to disassemble the gearbox (it is better to photograph the disassembly process) and screw the small bolt, cut to size. The place where you will install the bolt, it is necessary to tuck. It should be directly opposite the plastic tooth located on the inside of the case.
Make this markup on the back of the case, opposite the first one.
Next, drill holes in the marked places.
Screw the bolts of the required length into these holes, prewashing them so that they are flush with the other plastic teeth. After fitting the bolts, the gearbox can be assembled with lubrication applied to the gears. This repair screwdriver gear can be considered complete.
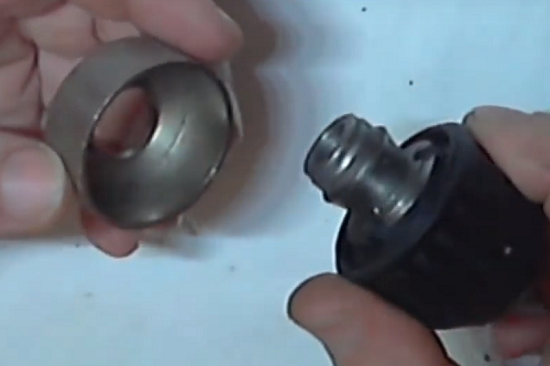
Repair of the keyless chuck
To start repairing this site, you must first remove the cartridge from the screwdriver. For this complete disassembly of the screwdriver is not required. How to unscrew the keyless chuck, described above.
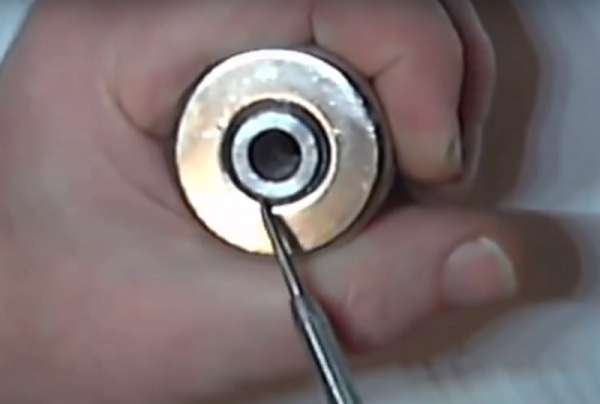
The frequent failure of the cartridge can be attributed to the incomplete output of one of the cams, as shown in the following photo.
The cause of the malfunction may be worked thread on the nut, the clamping cams, or the worked teeth on the cams themselves. To verify this, you will need to disassemble the cartridge.
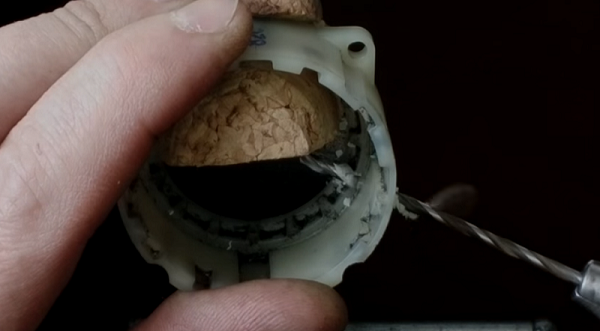
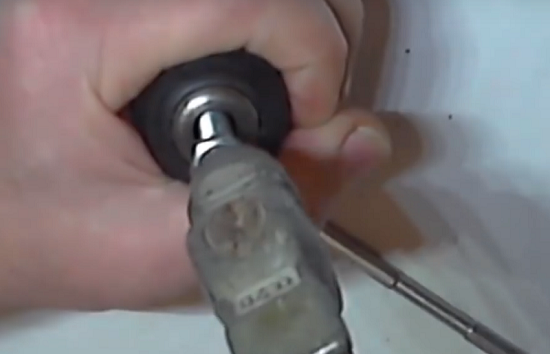
Disassembly and repair of the screwdriver cartridge is done as follows.
- It is necessary to hit a hammer on the part serving in its center. In order not to deform this detail, you can lay a small piece of wood.
- Separating the top will not be enough, and further disassembly of the cartridge will be required. To do this, slightly hold the bolt in the cams and hit it with a hammer.
- When the inside of the cartridge falls out, its analysis is considered complete. You will see nut consisting of 2 halves. Most often, faults in the cartridge arise from this part. The thread on it wears out and cams slip when twisted. Therefore, the latter is incorrectly centered.
Also, the thread can be worked on the cams, which, like the nut, must be replaced. But if you do not find the necessary details to change them, you will need full replacement of the cartridge. When assembling the chuck, the cams must be installed on the same level, in a compressed state, after which a nut consisting of 2 halves is put on, and after that the whole structure is placed in the housing. When the problem is resolved, you can assemble a screwdriver.
In practice, the search for spare parts for the cartridge - it is troublesome. It is easier to buy a new chuck, because its price is not so high, within 300 rubles.
/rating_off.png)


