How to change the line in trimmer
Trimmer is the most common unit used for cutting grass and cutting small shrubs. This unit is distinguished by its ease of maintenance, simple control during operation, and due to its low weight even women can handle it. It is no secret that for high-quality work on mowing the grass, requires the correct selection of cutting tools. As the latter, special cutting tips (discs, knives) or trim heads with a fishing line are used in trimmers. Nozzles and fishing line - it is a consumable tool, but if the knives can be sharpened, then the expenditure of fishing line requires its replacement. In this article we will tell you in as much detail as possible how to replace the fishing line correctly.
Content
Types of trim heads
The mowing head for grass is a cylindrical body in which a coil (bobbin) with a fishing line (cord) tucked into it is inserted. This design can be installed on both gasoline and electric trimmer. The heads differ in the method of filling and feeding the cord and there are 3 types.
- Automatic. Submission of the cord is performed after the user reduces the engine speed. Although the automatic feeding of the fishing line is convenient if large volumes of work are performed, such spools have one drawback - high thread consumption.
- Semi automatic. The use of this type of heads does not require the user to perform complex manipulations. The principle of their work is arranged so that the cord is extended automatically at the time when the device is working at full speed. It is enough just to knock the trimmer head against the ground (this removes the cord lock), and the fishing line is pulled out of the bobbin due to the centrifugal force, and then cut to the desired length with a knife located on the protective casing.
- Hand held. To extend the cord, it is necessary to stop the apparatus, after which the line is pulled out manually.
Based on the above, semi-automatic bobbins are the best option. It should also be borne in mind that the trimmer spools are single-stranded (used only for trimming grass) and double-stranded, which are used for mowing tall grass and small, with thin stalks of bushes.
How to remove and disassemble the coil
Before you begin the process of replacing the cord, trim users need to remove and disassemble the coil. Consider how to do this.
The mowing trimmer head consists of several parts: a casing, springs (not in all models), a bobbin with a cord and a cover.
Attention! Before proceeding with any maintenance of the electrical unit, it must be disconnected from the mains.
Trimmers often use 2 mounting options for the mowing head.
Option number 1
To remove the trimmer head, you will need it. complete disassembly.
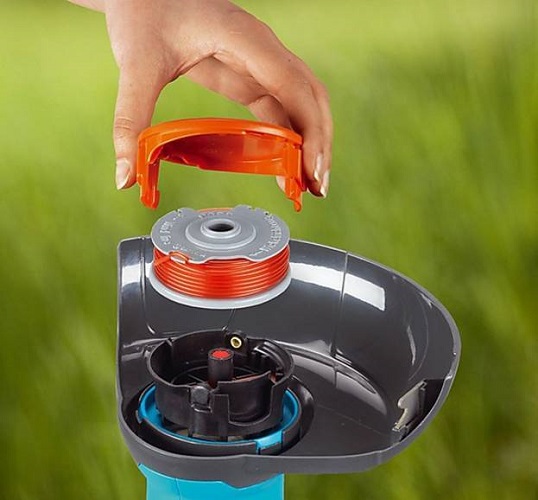
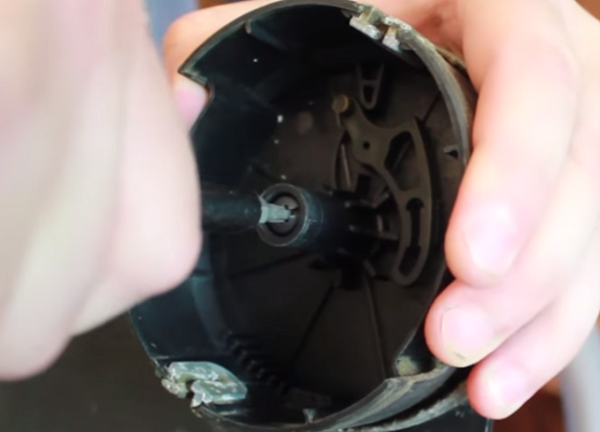
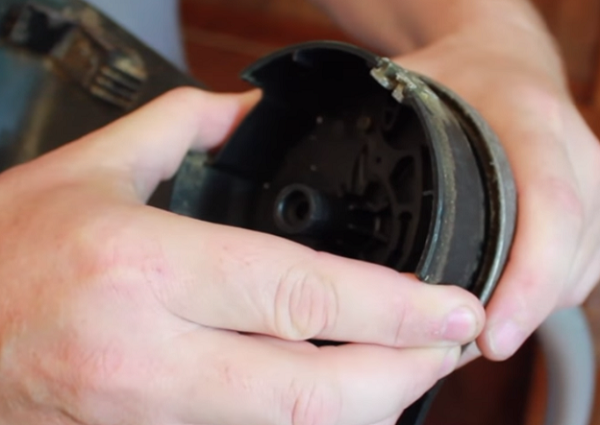
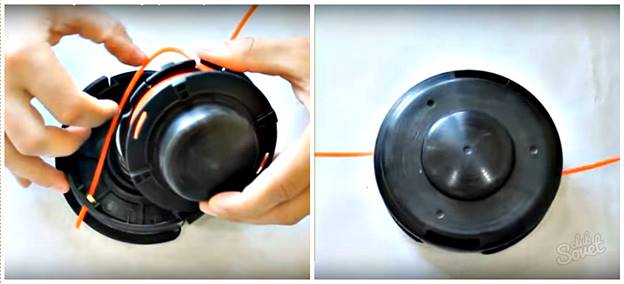
- To remove the cover that covers the inside of the head, you must press the latches (latches) located on its two sides.

- Removing the lid, you will see the spool that needs to be removed from the case. In some coils, a spring is installed under the bobbin, which must be carefully pulled out so as not to lose it in the grass.
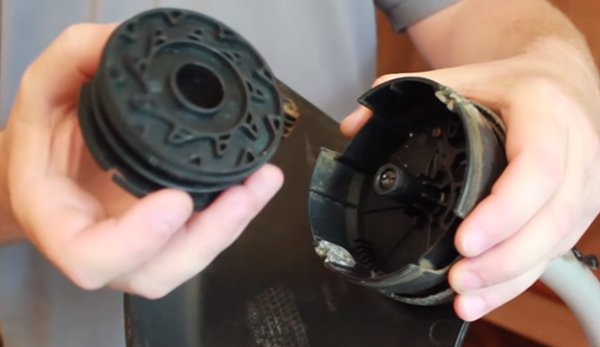
- After removing the bobbin, in the center of the case you will see a screw with a slot for a cross-head or flathead screwdriver. It is possible that there may be a hex bolt or an asterisk attachment.
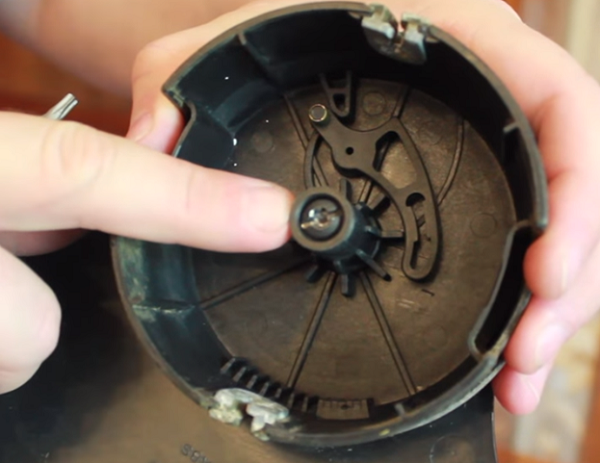
- Using a screwdriver, selecting the desired bit (nozzle), you need to unscrew the bolt (counterclockwise).
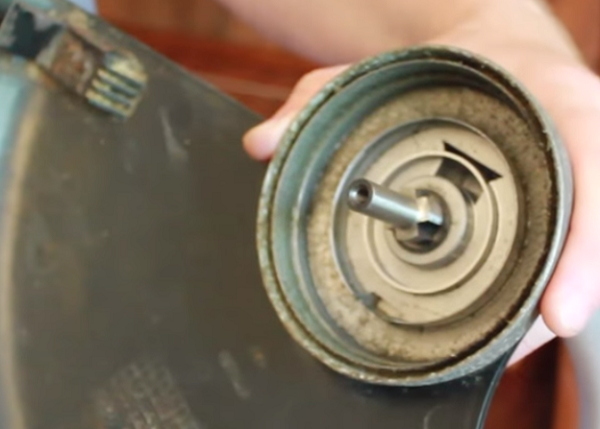
- After removing the fastener, grasp the part body and, shaking it in different directions, remove it from the gearbox shaft.
Option number 2
In this embodiment, the head is twisted on the gear shaft. To remove it, you will need this shaft lock. For this, in such trimmers, for example, in the Huter and Champion devices, there is an opening through which either a thin screwdriver or a metal rod can be inserted.
So, to remove the bobbin, do 2 simple steps.
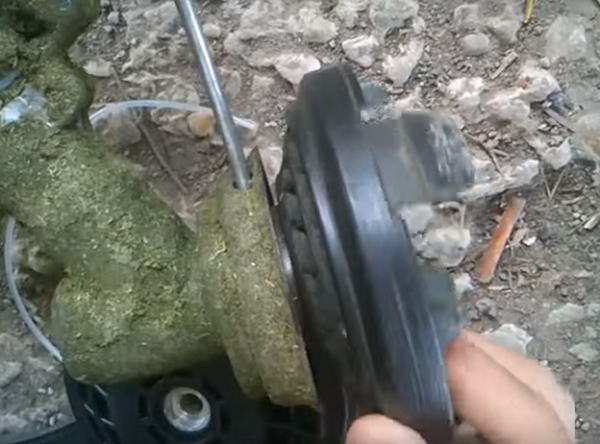
- Insert a screwdriver into the hole and lock the shaft.
- Grasp the head body and start turning it clockwise. Twist in this direction should be for the reason that the thread, cut on the shaft, left.
Algorithm winding fishing line
Depending on which trimmer model is used, the type, thickness and length of the fishing line is selected. The diameter of the cord can be from 1.2 to 4 mm. It is not difficult to guess that the thicker you fill the cord, the more hard and thick grass it is able to cut.
In most cases, use a universal fishing line with a diameter of 2 mm.
In order to find out what diameter of the line you can use on your mower, there are 3 ways.
- View information about the thickness of the cord in the instructions to the device.
- Look at the bobbin itself. It may contain information about the possible diameters of the fishing line.
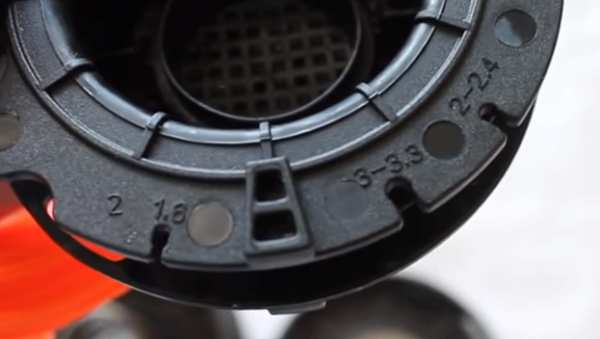
- Insert the line into the outlet. If it easily passes into it, then a cord of such diameter can be used.
The fishing line is wound onto a reel located in the mowing head. Therefore, you first need to open it (as mentioned above). There are 2 ways to wind the cord.
First way
To correctly determine how many meters of fishing line will be required for a specific reel, it is necessary to wind it onto the bobbin so that the skein does not exceed the diameter of the rim. If the line looks out over the edges of the reel, you will not be able to insert it into the casing.After you have decided on the length of the material, you need to fill it in the bobbin, so do the following.
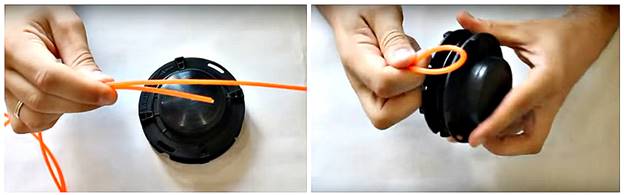
- Required fold the line twiceso that one end of it is 10-15 cm longer than the other.
- Please note that the bobbin is divided into 2 parts by a central rim from which charging begins. Find a groove on it and insert a cord into it, double folded, applying a little effort.
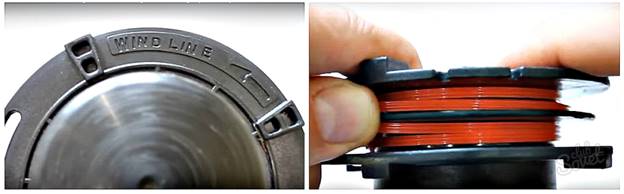
- It is very important to determinewhat direction the fishing line is wrapped on the coil. If you look closely, you can find an arrow on the bobbin or an inscription with an arrow indicating in which direction the winding should be carried out. There are cases when there is no arrow on the coil. In such a situation, you can look at the arrow drawn on the cutter head and wind the cord in the opposite direction.
- The winding should be carried out neatly, turn to the turn, with the maximum tension of the thread.
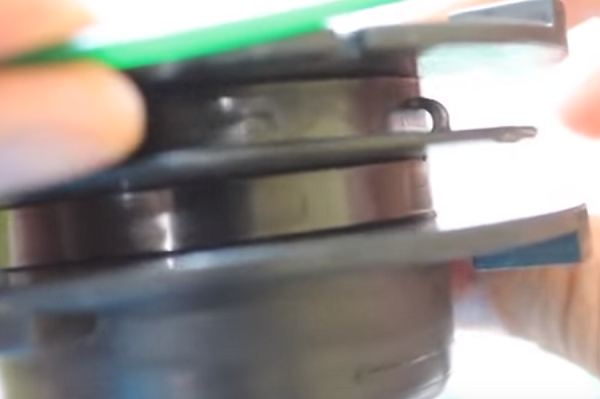
- After the laying of the cord is completed, it will be necessary to first secure the short end of the fishing line by inserting it into the slot of the coil that fits the diameter of the sidewall.
- The second end, the one that is longer, is mounted in a groove on the opposite side of the bobbin.
- After fixing the fishing line, cut off its ends, leaving allowances of about 10 cm.
- Next, you need to install the filled coil in the mowing head. To do this, alternately inserting and pulling the thread into the outlet holes of the head, place the bobbin into the casing, then, applying the required force, pull the fishing line from the locking grooves and tighten it.
- Now you can put on the cover and fix it with snaps.
Second way
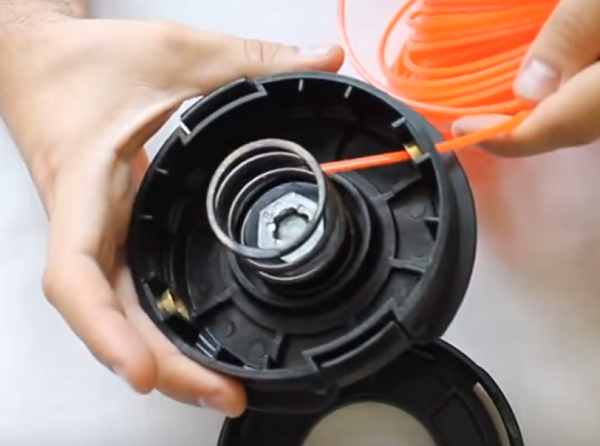
In some coils there is a second method of fastening the cord: you can charge 2 pieces of thread, instead of one folded in half. Replacing the fishing line occurs according to the following algorithm.
- Before you change or charge a new thread into a spool, determine how many meters it will need in the manner described above.
- Bend one end of the cord in the form of a hook.
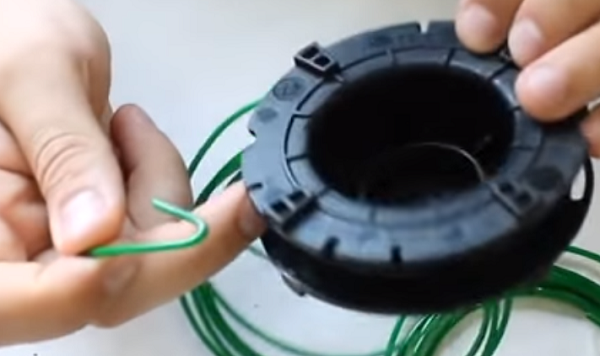
- Find a hole in the bottom of the bobbin to fix the fishing line, and insert the looped end of the thread into it.
- Winding the cord is required according to the direction of the arrow to the required level not exceeding the diameter of the coil.
- Do the same for the second bobbin cell.
- The assembly of the head is no different from the method that was given when the bobbin dressing was considered a folded double line.
For Shtil motor scythes there is a very simple and quick way to replace the fishing line without disassembling the mowing head, which you can familiarize with by looking video.
The ends of the cord protruding from the holes in the casing can be cut to the required length, even when the part is installed in the trimmer. This can be done in two ways:
- turning on the trimmer (when rotating, the ends of the fishing line will be cut off on a knife fixed for this purpose on the protective cover);
- cutting off the excess ends with scissors so that they do not touch the case of the casing.
The second method is used in case you had to put a large-diameter cord, and the trimming knife cannot shorten it.
If the thread has been charged into the mowing head, but the length of the protruding ends of the cord is insufficient, then they must be lengthened before starting the device - this applies to the head with manual adjustment. However, there are cases when using a semi-automatic mowing head, when, due to the insufficient length of the protruding ends of the cord, they are not automatically extended. In this case, it is necessary to turn off the unit (on the electric device, it is necessary to unplug the plug), manually press the button located at the bottom of the part and pull out a little fishing line.After this procedure, the cord will again be able to move out due to centrifugal force, if you put the maximum spindle speed.
Whatever thickness of the line you put, remember: in order not to constantly interrupt work and not change the cord, avoid areas where the working tool can touch hard surfaces (stones, curbs, thick dry branches, etc.).
What can be used instead of fishing line
Many users of trimmers are wondering: what can replace the cord, the default used in this kind of devices? Begin to conduct unsafe experiments, installing metal or copper wire, metal cables or strings, as well as a normal fishing line in the mowing head.
If you install instead of fishing line metal cable, then the trimmer turns into a dangerous device not only for the user, but also for others. This fact is explained by the fact that during the operation of the unit, the steel cable will gradually work, its ends will be disentangled, and small pieces of wire will fly apart in different directions with great speed.
The same thing happens when using steel or copper wire, only with the difference that the loose pieces will be larger, and can cause significant injury.
And if you accidentally hook your leg or someone’s leg, working with steel wire rope (wire), then a strong and deep tissue cut, and in some cases amputation of the toes is provided for you. The manufacturer knowingly uses nylon for these purposes, since it is fairly light and durable, and when taken away, it does not fly away and cannot cause injury.
Use fishing line in the trimmer, instead of the standard one, of course, it is possible, but this will add unnecessary trouble to you, since it quickly wears out, breaks, mows slowly and is not suitable for cutting hard grass. Moreover, during the work, a lot of time is lost in order to replace the broken tool more than once.
In practice, the installation of conventional fishing line is justified if the user is going to mow the grass near the fence, especially if it is from a chain-link mesh. In this case, in order to protect the standard and sometimes expensive cord from wear, it changes to a fishing line, which is not a pity. Usually, in order to change the cord to a fishing line, it is necessary to select the greatest thickness - 2-3 mm.
Replacing the line with a disc or knife
When refining the backyard plot, park areas and other places where it is required to mow different kinds of plants, it is often necessary to change the cutting tool in the trimmer.It is dictated by the fact that the standard cord installed in the mowing head can only cope with herbs. But when a shrub or a young growth of trees appears on the worker’s path, the fishing line cannot cope with such a task, and it needs to be replaced with a more efficient cutting tool.
Manufacturers of trimmers have foreseen such situations, and supplemented their products with a mass of nozzles in the form of knives with several “petals” or in the form of discs similar to circular saws.
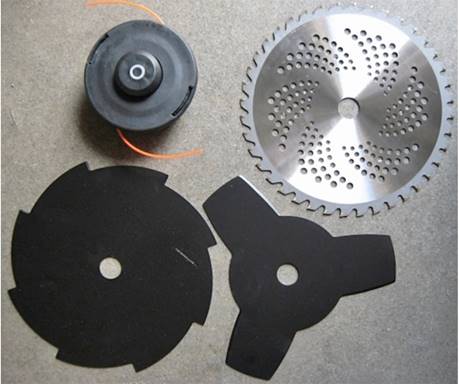
If you replace the line with a knife with several “petals”, then with such a tool you can mow both tall grass and plants with thick and dry stems. And changing the line on the disc, the user of the motokos has the opportunity to cut down shrubs or small trees.
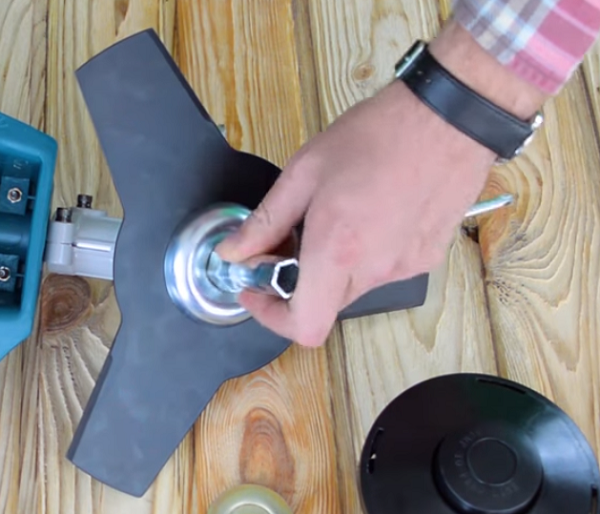
Knives and discs are set according to the following algorithm.
- The first thing you need to remove, stop the shaft, the mowing head (turn clockwise) or a nut with a boot, if the unit has not yet been used.

- Install the saw or cutting knife so that they are put on a small ledge (sleeve).
- On top of the knife, install the mounting cap and screw the nut onto the shaft (counterclockwise).
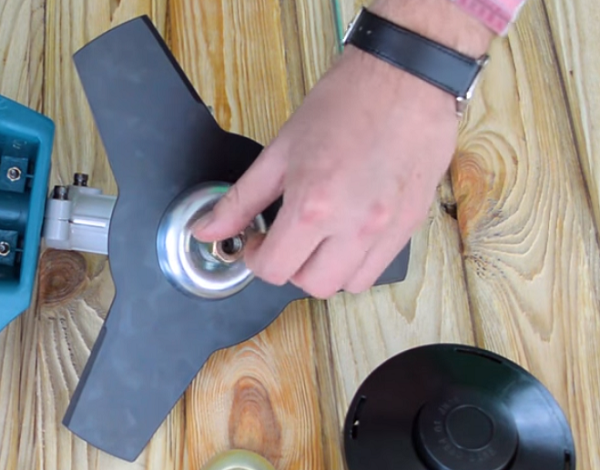
- Tighten the nut (counterclockwise) using a tubular wrench.

For a better understanding of the tool change process, you can see this. video.
Problems with fishing line
Trimmer users, both petrol and electric, sometimes have problems with the cord. The “advanced” mower owners can easily cope with the difficulties that have arisen, understanding why this is happening, and for beginners this is a problem that does not have a rational explanation. But in fact, everything is solved quite simply. The most common problems that occur with fishing line are as follows.
Cord breaks
If the line often breaks, it can be caused by the following reasons:
- stones, small branches and other solid obstacles come across in the grass;
- the user mows the grass close to the fence, and if it is reticulated, then it even more quickly cuts off the “antennae”;
- poor quality of the cord (it is recommended to get a quality one);
- worn out holes in the mowing head, because of which the line is erased on the sharp edges of the sleeves and breaks off (a complete replacement of the part is required).
High cord consumption
Basically, the cord ends quickly if often knocking on the ground with a semi-automatic head or press it hard down.The coil is unlocked, and the fishing line, lengthening, is cut off with a knife. Another reason for the rapid end of the cord is the improper operation of the device with an automatic head: the user often kills the engine speed when mowing. But as we remember, the automatic head is designed so that it is with each decrease in speed that a new portion of the fishing line is fed, so it is quickly consumed.
Thread does not hold
It happens that the thread is unwound, if in a semi-automatic head spring is loose. The line is constantly extended and trimmed with a knife mounted on the casing, which increases its consumption. To check this, remove the cover and turn on the unit. If the line “climbed”, then the need to replace the spring.
The fishing line crashes
The reason that the cord after starting the unit is unwound may also be the weakening of the spring inside the head. In addition, there are cases when, when the unit is turned on, the mowing head will fly apart and the spring installed in it will be lost. Inexperienced users do not notice the absence of a spring and assemble this node without it. Therefore, the cord does not hold, and under the influence of centrifugal force flies out.
Cord is not supplied, the coil is not spinning
An automatic or semi-automatic head should feed the line without stopping the unit. But if it does not work, then the reasons may be as follows:
- the fishing line in the reel is wound incorrectly, because of which the latter does not spin;
- the cord is wound unevenly, and the thread may get stuck between the coils (the thread must be wound neatly, the coil to the coil, without distortions);
- too short ends of the threads come out of the holes, as a result of which there is not enough centrifugal force to extract them, and the fishing line does not feed (it is recommended to always adjust the cord length before starting the unit, slightly pulling it up);
- fishing line stuck together (will be discussed below).
Thread sticks together
This trouble occurs most often due to use of low-quality cord. When the machine is working, the trimmer head is heated, and the poor-quality fishing line in it melts, gluing together. Also, the sintering of the threads occurs when a fishing line meets a solid obstacle. In this case, there is a sharp braking of the cord, after which it tightens into the head, where it joins. Some owners of the units recommend to lubricate the cord with mineral oil or to spray on it with a silicone spray after winding on the bobbin.Others advise winding less thread on a spool. But it is better to immediately buy a quality product, in the manufacture of which the manufacturer took into account the head overheating factor, and the thread will not stick together.
Prices for new trimmers in 2018
ECHO SRM-2305SI trimmer
ECHO SRM-350ES trimmer
Hitachi CG22EAS trimmer
BLACK + DECKER GL8033 trimmer
Hammer trimmer MTK25B
/rating_on.png)