Homemade trimmer: 4 production options
All owners of personal plots are faced with the problem of mowing the grass, which grows literally before our eyes, and during the season it is required to refine their plot several times. The conventional manual spit has long been replaced by gas trimmers and electric trimmers. But the price for them is not reduced and is quite noticeable for many owners of summer houses and private houses. Craftsmen nevertheless found a way out of this situation and learned how to make trimmers with their own hands literally from improvised means, using benzo and power tools not intended for these purposes.
Content
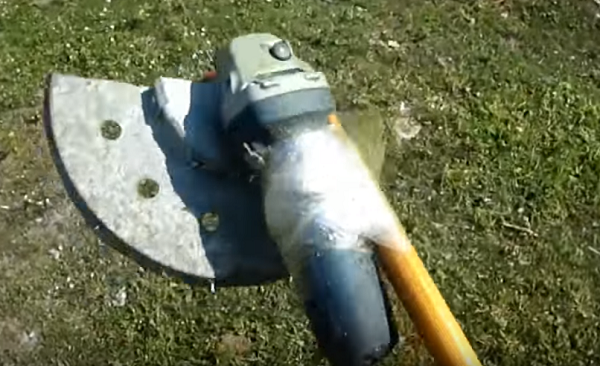
From the grinder
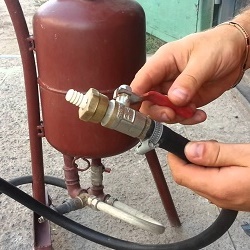
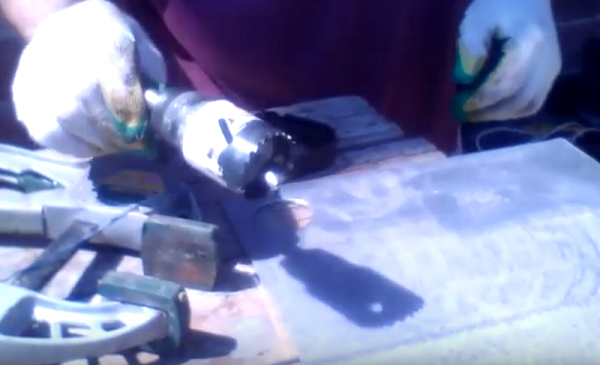
Most often, a homemade electric trimmer is made on the basis of the usual grinder, which is available from every home craftsman. This tool is almost perfect for reworking a trimmer.It has more power than the store apparatuses, and a greater number of equipment per minute. In addition, the standard nut used in the grinder to secure the discs already has holes through which the line (cord) can be easily inserted.
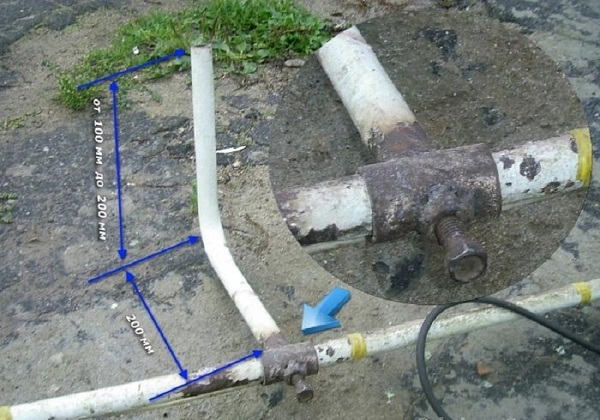
So, there are many options from which to make the bar (derzhak). The easiest one is longer than for a shovel wooden stick. By the end of it at the right angle is attached with the usual Bulgarian scotch tape. The line is inserted into the 2 holes of the nut, after which it is twisted. So in a few minutes you get a trimmer, which can be mowed without problems.
For the safety of operating a homemade device, you can improve it by making a protective casing (how to do this will be discussed later).
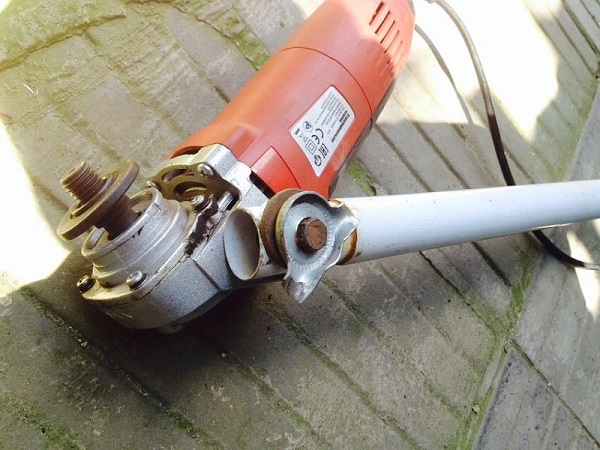
For advanced masters with a welding machine, it is possible to advise a more advanced design for fixing the grinder and protective casing. It is made aluminum tube (serves as a holder) and a metal square profile. Looking at the figure below, you can understand the principle of manufacturing the holder.
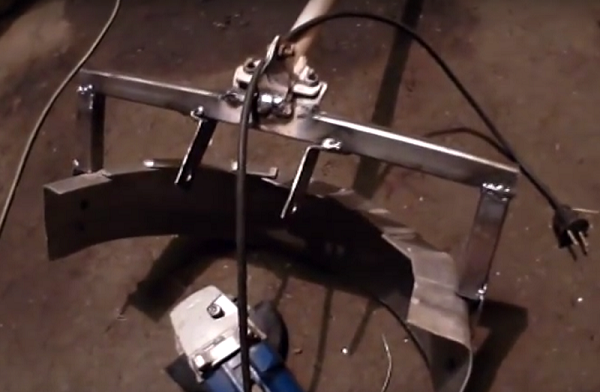
The Bulgarian is attached to the holder with bolts inserted into the holes,which are designed for attaching the handle to the device.
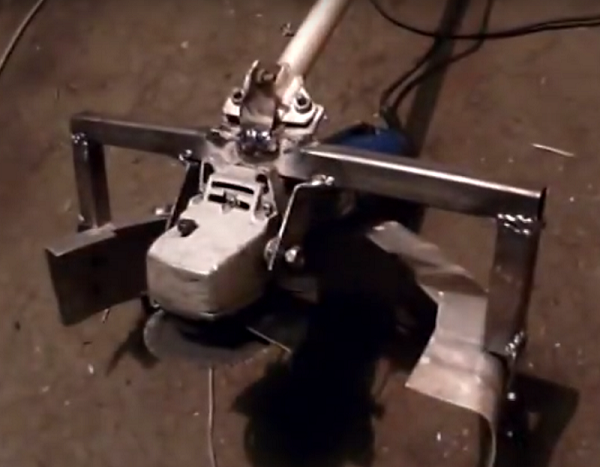
The following photo shows how this design looks from below.
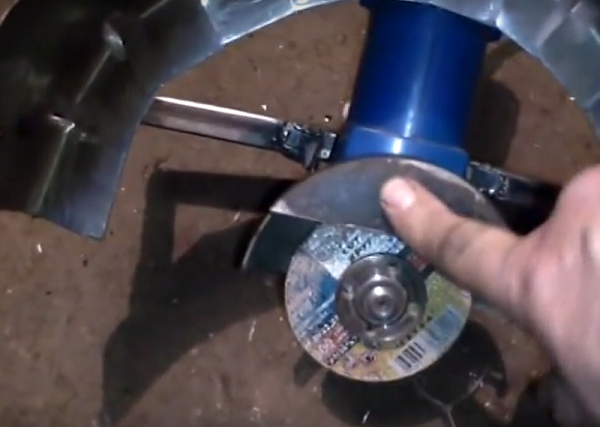
Next, the native casing of the grinder is removed, and instead of a disc, either a fishing line or a metal disc knife is installed.
By the way, it is possible to fasten the holder (bar) to the holes for fastening the handle when you want to make a simple trimmer that is easy to assemble and just as easily disassembled if you need to use the grinder for its intended purpose.
To make it easier to hold the trimmer during the work and it does not rotate around the axis of the bar, you can attach it side handlemade of bent pipe.
From vacuum cleaner
The trimmer from the engine from the vacuum cleaner is done on the same principle as from the grinder. The motor must be mounted on a rod, and either knives or a plastic or metal disc, into which the fishing line is inserted, must be fixed to the motor shaft. From above the cutting tool is closed by a protective casing.

So that the dust and small particles of mowed grass do not get into the engine, taken from the vacuum cleaner, it can also be hidden in a plastic casing made from sewer pipeas shown in the following photo.
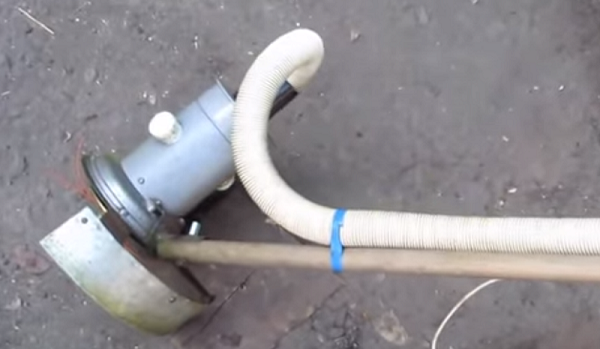
Since the motor in the vacuum cleaner is high-speed, it needs provide cooling. Therefore, under the puck into which the line is inserted, it is recommended to insert a homemade disc with slotted and curved blades, so that it acts as a fan that creates a vacuum. It is required for air to be sucked in through the hose from above and to cool the motor.
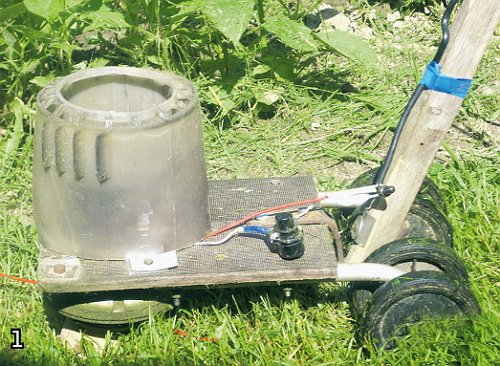
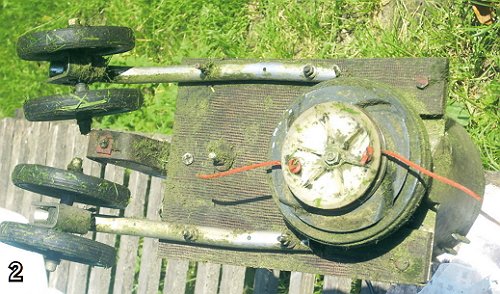
In order to ease the load on the hands of the mower operator, the unit can set on a wheelchair. In this case, you’ll have something like a lawnmower.
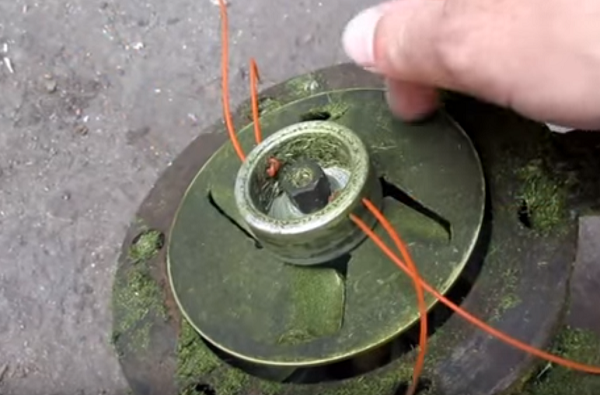
To secure the line you can also use either a pulley with a suitable bore or a plastic wheel from the cart.
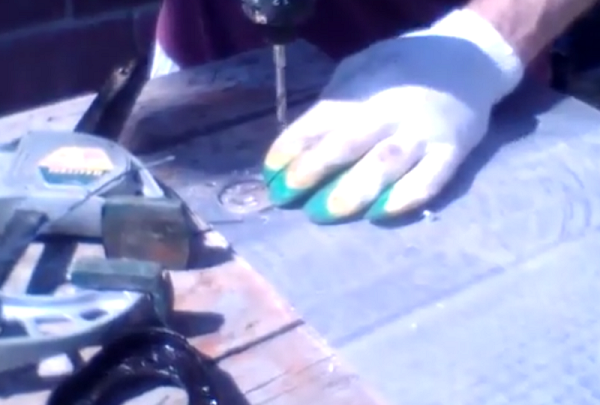
From the drill
The simplest mower in minutes is made from a drill or screwdriver. But first you must make a knife from a sharpened metal plate with a hole drilled in the center. A bolt is inserted into this hole and clamped with a nut.
Next, the bolt is clamped in the drill chuck, and the trimmer is ready.
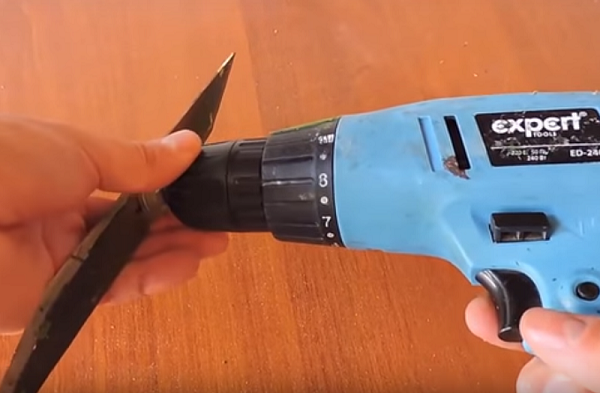
Since the drill with this nozzle does not have a protective casing, such a tool is quite dangerous for the user.To protect yourself, you can place the drill, like the grinder (as mentioned above), on a spade handle or on an aluminum pipe.
Also, to protect the user of the mower from knives, the casing can be fastened to the drill (mounted on a plastic pipe, and put on the device body).
Drill to the bar is attached with clamps.

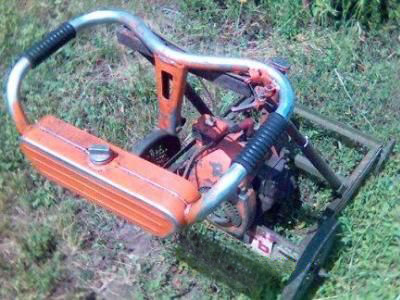
From chainsaw
For chainsaws, many different nozzles have already been invented that expand the capabilities of this unit, for example, a cultivator, a drill, a boat motor, as well as a nozzle of a scythe. How it looks, you can see in this video. In case you want to make a trimmer from a chainsaw, then the maximum that you can do is lawnmower on wheels, since the engine of the unit is rather heavy, and applying the above-described variants of manufacturing trimmers (with the lower arrangement of the drive) to it will not work.
Therefore, the cart is first manufactured. It can be welded from a 25x25 mm corner. Frame dimensions should be 500x600 mm. The wheels are mounted on the corners of the frame.
Further, it is necessary to unscrew the “steering wheel” and the tire from the unit. Handle carts can be made from water pipes. The “steering wheel” is fastened to it.It is also necessary to lengthen the fuel hose and gas cable.
When installing the trolley handle, you should pay attention to the fact that it does not overlap the windrower (starter).
The gasoline engine is installed (screwed through the holes to secure the tire) on the frame so that the gearbox is rotated 90 degrees and the shaft is at the bottom.
Now it only remains to fix on the shaft of the unit cutting tool. This is done as follows.
- A small piece of pipe, 80 mm long and 50 mm in diameter, must be welded to the “asterisk” of the apparatus. The pipe is better to cut on a lathe, so that the ends were perfectly smooth.
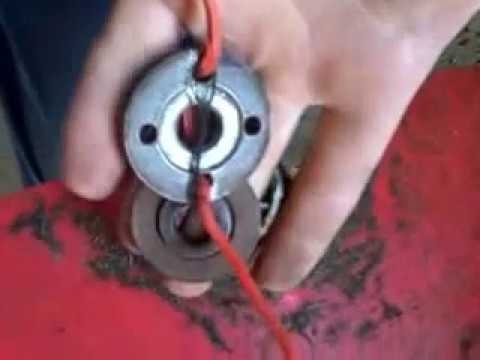
- Next, find a pipe with a slightly larger diameter - equal to 58 mm. It must also be cut to a length of 80 mm. Thus, you get a telescopic shaft, which is connected with 2 bolts (m6), located opposite each other. On the bolts must be lock nuts. Below is a diagram of how a trimmer head is made, which serves to fasten the cutting tool.
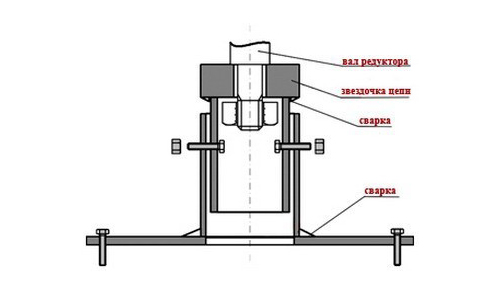
In the telescopic tubes need to make several holes so that you can adjust the height of the knives above the ground.
It is better to make a knife in such a design as in the following figure.
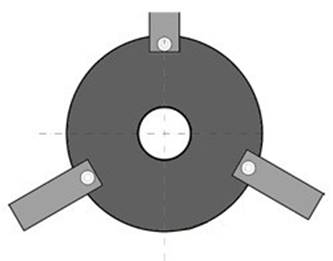
Due to the fact that movable knives on rivets are fixed on the disk, they will simply bounce when meeting a stone or a dry branch.. This will save the shaft and gearbox from damage that may occur when the tool is jammed.
The rivets that hold the knives on the disk must be metal.
The diameter of the disc (made of sheet steel 4 mm) should be 180 mm. Knives are made of strips with a width of 30 mm and a length of 120 mm, cut with a grinder from a hacksaw blade.
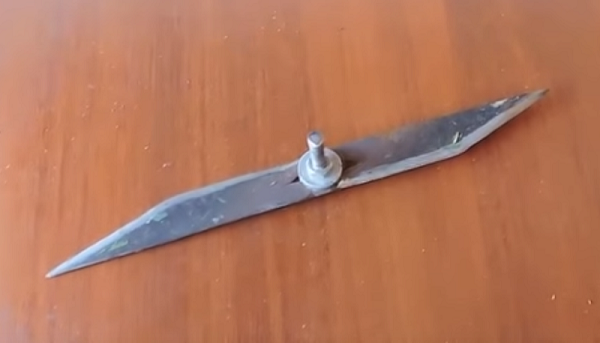
DIY trimmer knife
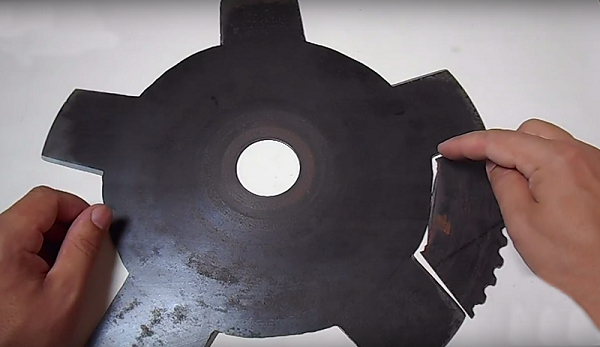
If you need to mow the plants with thick or stiff stems, the usual fishing line will not cope with this task. Therefore, you can not do without a special metal knife. Knives for the trimmer can be bought in a specialized store, and you can do it yourself, for example, from an old disk from a circular saw (without a hitch). A knife is made as follows.
- First, the markup is made on the disk. “Petals” can be made as many as you wish, for example, two, three, four or five, as in this description.
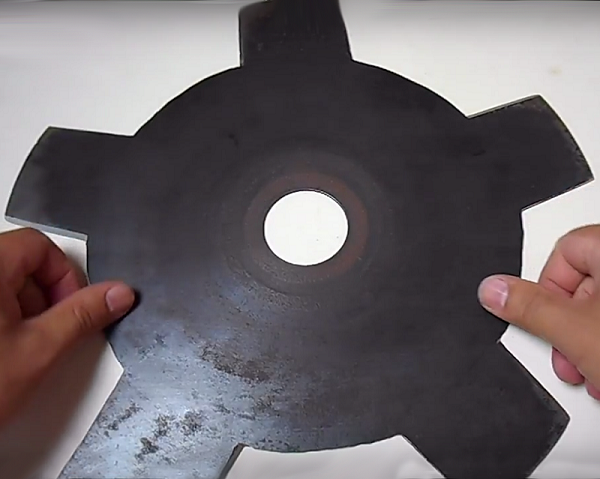
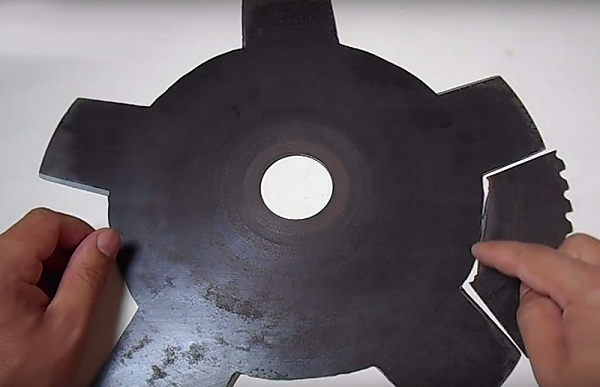
- Further, with the help of the grinder, 2 radial cuts are made on the marking.
- After radial cuts, it is necessary to connect 2 notches using the same grinder, making a longitudinal groove of sufficient depth so that you can break off the cut piece of the disk.
- Clamp the almost-cut part of the workpiece in a vice and break it off.
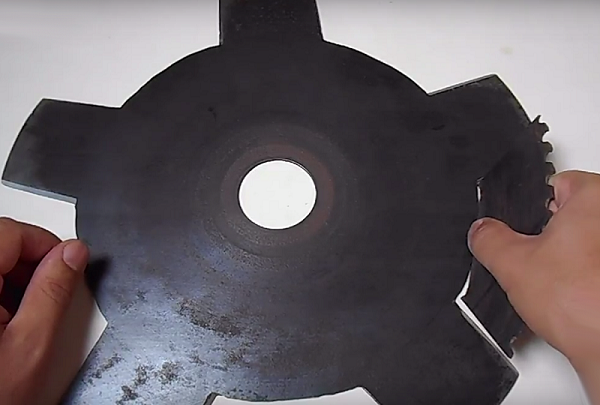
- Do this operation with all the “petals” of the future knife. All irregularities can be turned on an abrasive wheel.
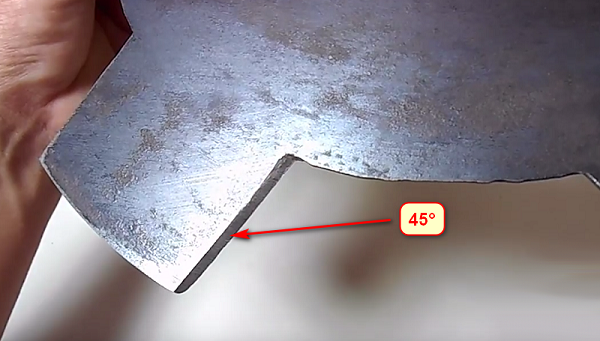
- When the workpiece is ready, sharpen one side of each “petal” at a 45 ° angle.
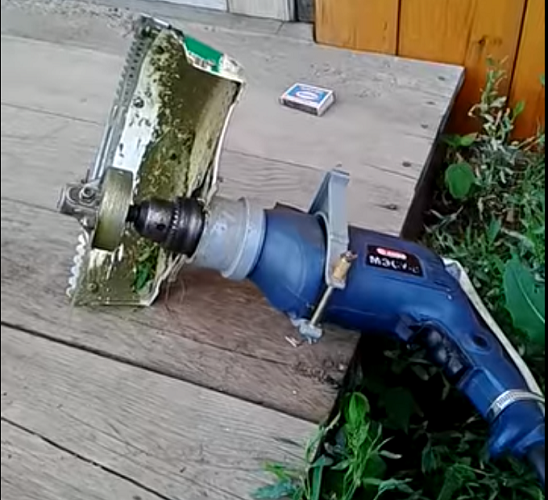
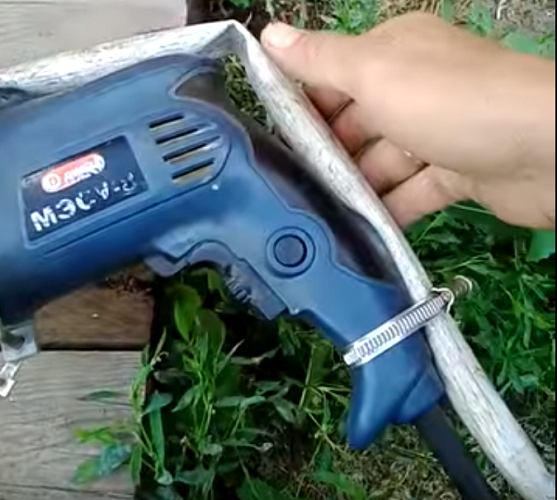
Homemade protective cover
If you make a homemade mower, then you definitely need a protective cover. It will save your eyes, body and feet from being injured by small pebbles and broken pieces of knives if they break.
The trim cover can be made from sheet of aluminum or thin tin.
- First, in the corner of a square of metal, you must drill a hole of the desired diameter (depending on the type of drive of your unit) using a crown.
- Then you need to make markup for fasteners. As a basis, which will be screwed homemade protection, you can use the standard casing from the grinder, if you make a trimmer from it.
- Clamp the workpiece with a clamp and use the tape measure and a pencil to draw the first circle. about 270 mm radius. The center of the circle will be the corner of the workpiece. It is impossible to give precise recommendations about the radius, since it will depend on the diameter of the cutting tool that you will use with the machine. Therefore, first decide which knives you will use, and which departure of the line will be optimal.
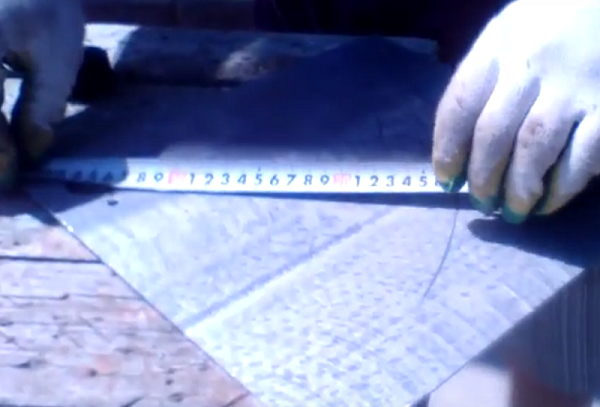
- Next, draw the second arc (it will be a bend), slightly departing from the first. In this case, centimeters by 5. Thus, you measured the height of the future shield. At all, casing height It is recommended to do this so that when you put it flat on the ground, the cutting tool does not reach it about 2 cm.
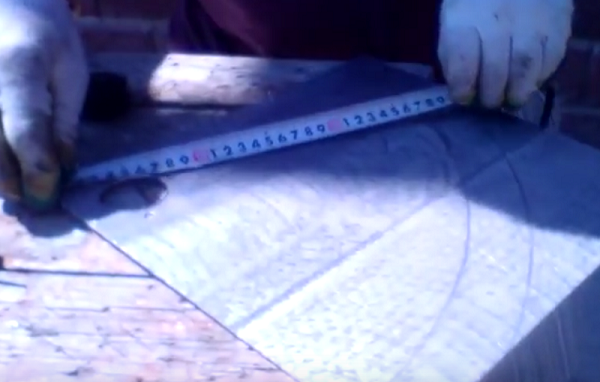
- After marking the second line, it is necessary to cut a blank along it, using a hacksaw or a jigsaw with a nail file.
- In addition, it is necessary to make radial cuts (up to the first arc) and bend the resulting parts with pliers at an angle of 90 °.

- Further, the shield is attached to the protective cover of the grinder, the cutting tool is installed, and the unit is ready for operation.
In this way, it is possible to manufacture and install a protective cover on a trimmer bought at a store if the shield has split for some reason. The guards in the factory apparatus are made of plastic and often break if it is unsuccessful to knock the trimmer head against the ground to lengthen the fishing line.

Trimmer belt
For more comfortable work with a trimmer, if you intend to process a large area covered with grass, it is advisable to use a special belt. This device removes fatigue from the hands and backs of the mower operator and greatly simplifies the process when compared with the same work, but without a belt.
Belts are shoulder and knapsack. The shoulder belt is the simplest device and consists of a loop with two or one latch (carbine), with which it is attached to the mowing unit. A plastic plate is usually attached to the second carbine, protecting the operator’s side from pressure with a trimmer bar.
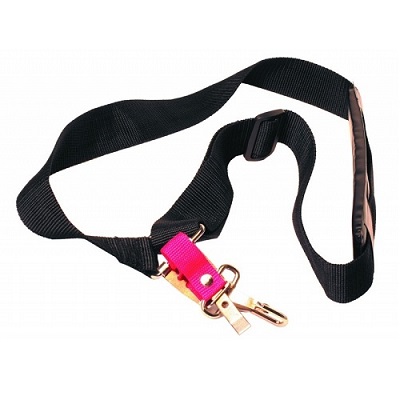
The shoulder belt is usually applied with light trimmers, weighing 3-4 kg. For heavier units it is more convenient to use a knapsack belt.
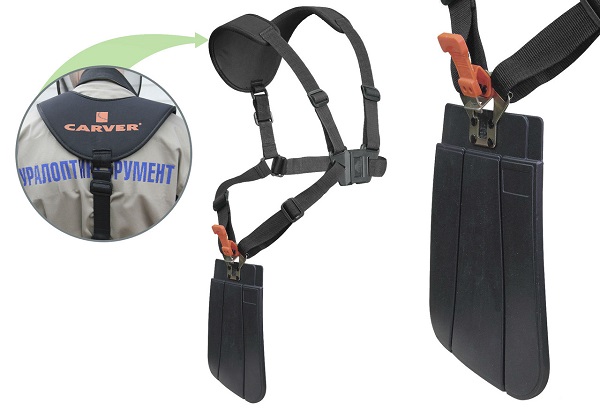
The trimmer belt can be easily ordered online or purchased at a specialty store,where these devices are sold and their components.
The price for knapsack belts starts from 250 rubles and above.

If you want to make it yourself, then any hostess, looking at this device, can easily sew it from improvised means (old belts and belts). You may have to buy buckles and carbines. But still, we recommend buying a ready-made knapsack hanger and not losing time and money on making a worse quality than a ready-made gadget.
/rating_off.png)