How to fix the trimmer yourself
Repair trimmers should be carried out as soon as possible when the first signs of breakage appear, so that minor malfunctions do not lead to more serious problems. All models are characterized by the presence of such major nodes and structural elements: drive system (engine), transmission devices, working part (knife or fishing line), belts and handles. Breakage can occur in any part, but some nodes fail much more often than others.
The gas mowers operating on gasoline or electricity (as well as different models, from different manufacturers) differ in their design and nature of problems. Some of them can be quite easily eliminated with your own hands, while others will require a major overhaul or contact the service center.
Content
The main malfunctions of gasoline trimmers
The most frequent are breakdowns of the benzocos associated with such structural elements:
- engine (in particular with a piston system);
- a carburetor;
- barbell;
- starter (rope breakage, breakage or disengagement of the spring);
- with ignition system or fuel supply;
- gear mechanism (gearbox);
- filters and silencer.
Symptoms are as follows:
- appearance when motokosy uncharacteristic sounds;
- the gas mower does not turn on, does not gain the required momentum or stalls;
- when the engine is running, the working part does not rotate or slips;
- gasoline flow;
- excessive heating of individual nodes.
It may also happen smaller breakdowns that are detected without any special diagnostics:
- dropping of the start button;
- limiter fall;
- broken line or breakage (loss of sharpness) of the knife.
Fix minor problems easily. Repairing a gas trimmer in more difficult cases will require preliminary diagnosis to find out the exact reasons. If you have the appropriate knowledge and skills of plumbing, the malfunction can be repaired by replacing the defective parts.
Disassembly of the gasoline spit, lubrication of its parts and replacement of defective elements
In order to disassemble a benzokosu for repairs, it will be necessary, in general, to include such devices:
- a set of screwdrivers (with different tips) and wrenches;
- small puller for removing bearings;
- special candle key;
- hammer.
In each case, you need to disassemble the individual nodes.
It should be borne in mind that the starter (starter) in a number of models is nonseparable - in this case, if there are problems with it, only the element can be replaced. If the knot is disassembled, it can be repaired by removing and replacing the rope and spring, or by installing the latter in place (when it leaves the gear).
Analysis and replacement of the rod
Quite often it is required to repair the trimmer bar.It is a construction of such parts:
- a drive shaft made of steel having polyhedral or square splines at the upper and lower ends;
- aluminum tubes;
- a plastic sleeve designed to maintain the centralized position of the drive shaft in the tube (so that there is no vibration);
- rubber shock absorber needed to connect the rod to the motor;
- a steering wheel with a handle used for steering and a strut.
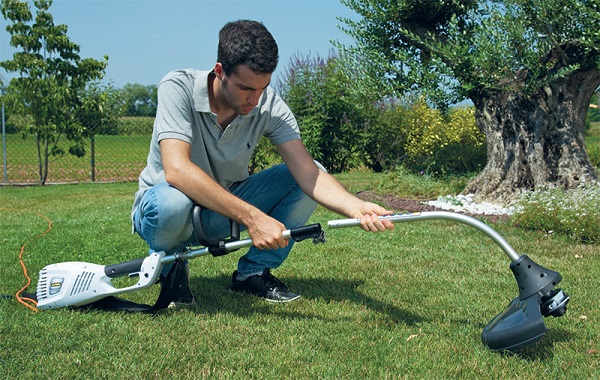
In some models, there is a shock absorber between the steering rack and the rod. Everything control elements (lock lever, ignition switch, gas button) are located on the handle.
A conical bevel gear is connected to the lower end of the boom, but some lightweight models are available without it. This is due to the fact that the bar has a curved shape, and the shaft is a flexible cable.
How to disassemble the rod and then assemble it for lubrication of the shaft or its replacement, detailed in the video below. In the same way they change a broken bar to a new one.
Often it happens that the multi-faceted or square splines of the drive shaft "lick", while the working mechanism does not rotate or does it with perobuvskoy. Then the shaft is changed.
When appears knock on the tube, it is necessary to disassemble the bar and check the condition of the sleeve, and if necessary, replace it. How to properly assemble the throttle stick on the trimmer is described in the video below.
If there is no bar suitable for installation, then it is possible to pull off the place of break with a yoke or to impose a semblance of a tire. Such a measure is temporary, so it should be replaced as soon as possible.
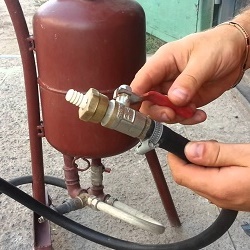
Clutch repair
When the knife or fishing line when the engine is idling is almost constantly spinning, and uncharacteristic sounds are coming from the front of the motor, this indicates a breakdown of the clutch. The cause is a broken spring. In this technique mows normally.
If slip occurs, then the pads are worn out as well.
The trimmer clutch is repaired as follows:
- remove the cover from the muffler;
- remove the metal stand;
- after removing the caps of the cylinder and the starter to gain access to the clutch;
- unscrew the side screws to remove the shock absorber cover;
- take out a tube from it, previously having allowed tightening bolts;
- unwind the clutch (shown in the photo below);
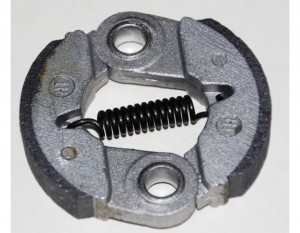
- inspect the condition of the spring pads and bearings;
- A new spring is hooked by threading the hooks into the corresponding holes;
- to replace the pads, you need to remove the spring, and then unscrew the bolts on them.
If necessary lock the crankshaft using, for example, a rope.
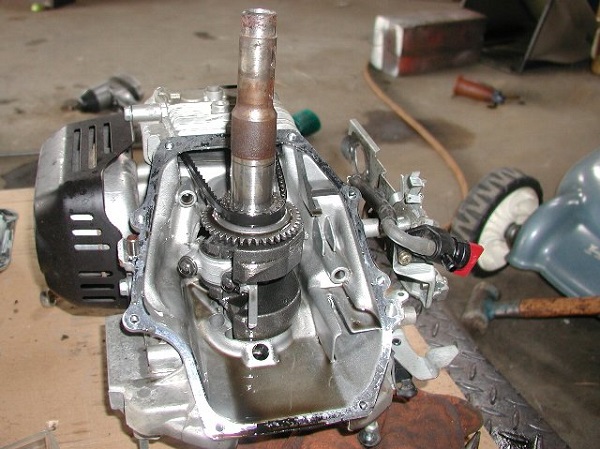
Repair of gasoline engine, carburetor and gearbox
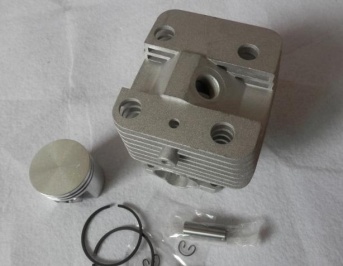
Problems with the engine can be caused by problems with the piston system, seals, rings. To eliminate them, you must remove the drive motor.
Determining exactly what caused the breakdown is not easy. If there is a guarantee, the mechanism should be referred to a service center for diagnostics and repair. If you turn to specialists for help there is no possibility, then it should be borne in mind that the most frequently required replacement piston rings. To do this, you need to disassemble the engine, get the piston. Do it in the following sequence:
- remove the cover of the plastic case, unscrewing the screws or pressing the clips;
- disconnect the crankshaft barbell;
- remove the cylinder head;
- take out the piston and rings;
- replace them if necessary;
- perform the assembly in reverse order.
Rings should be installed carefully, because they are quite fragile.
How to put the piston and happens replacement of glands when carrying out repair of the engine, it is visually shown in videos further:
With regular use, the mowers can break down gear. It wear gears, bearings (they can also break). To make this happen infrequently, you should regularly lubricate this site. Frequency is almost always indicated in the operating instructions for the model used (at least once per season). As a repair instructions can serve as a movie below.
To lubricate the gearbox, unscrew the plug and simply squeeze the right lubricant into the assembly by rotating the shaft.
The carburetor itself can only be removed and cleaned, and the gasket between it and the engine replaced. The tightness of the node in the home to determine quite problematic. The main thing is to properly assemble the equipment after the repair so that the trimmer works without problems.
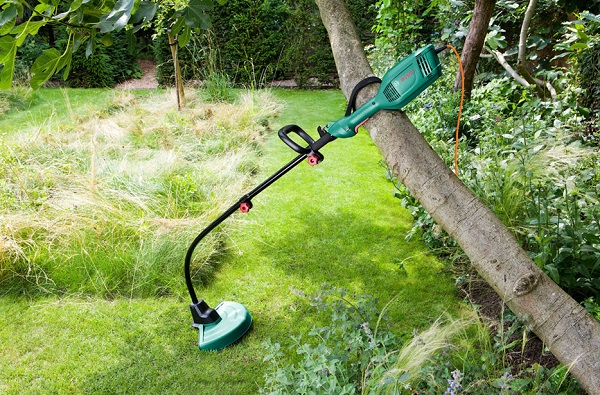
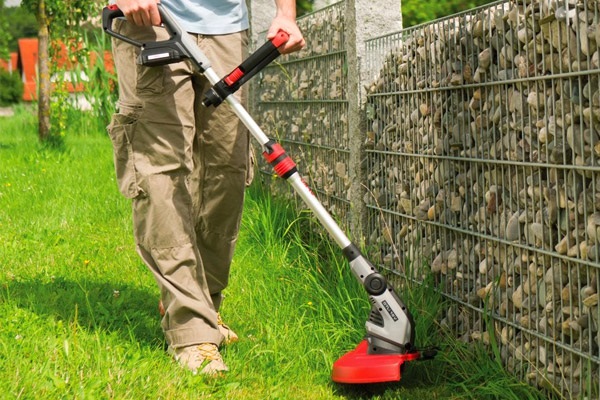
Common electric trimmer problems
Electric trimmers differ from petrol devices in a more simplified design.Conventionally, the electric braid is divided into mechanical and electrical part. Accordingly, there are the same groups of problems that occur with this equipment.
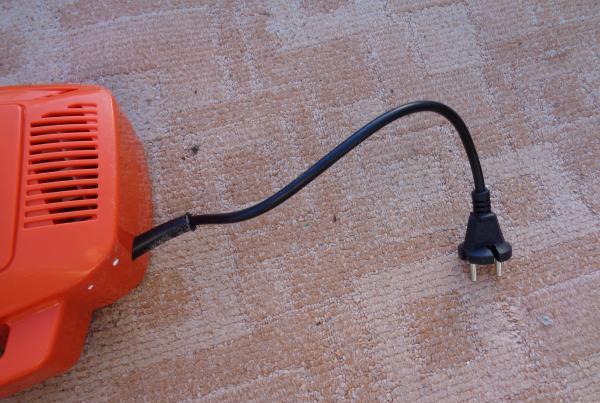
Most damage can not be visually identify. For this you need to use a variety of devices. Visually, you can determine the following:
- the integrity of the power cable is broken (the insulation has been torn off, or it is clearly interrupted);
- sticking or jamming of the start button;
- mechanical external damage to motokosa;
- problems with the cutting part;
- stop braids when driving grass;
- fork damage.
To find out which part has broken in the remaining cases, it will be necessary to disassemble the electroos and consistently check the most likely options. At the same time pay attention to the external manifestations of deviations from the normal operation of the device. They contribute to establishing the cause.
Repairing an electric trimmer will require the following instruments and tools:
- indicator screwdriver;
- multimeter or tester;
- soldering iron;
- a set of keys;
- screwdrivers with different nozzles.
Electric braids often do not work due to reasons not directly related to them, but caused by a decrease in the supply voltage in the network or the inoperative state of the outlet used.
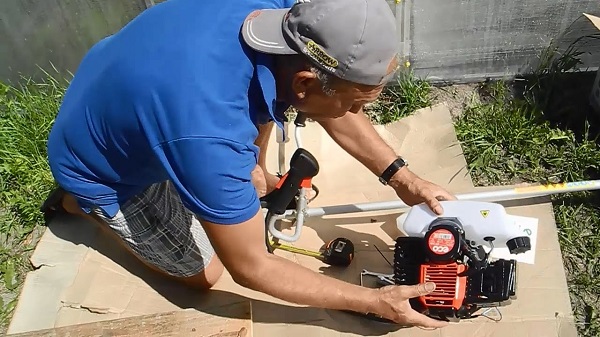
How to independently disassemble and repair an electric braid
Before you disassemble and repair the electric braid, you should check the status of the outlet and the voltage in the network. If its value deviates from the norms specified in the instruction manual, then you should not even try to operate the device without stabilizerdesigned for the appropriate power. Otherwise, the motor may fail. Only after determining that the cause of the failure of the trimmer is directly connected with it, one can begin to analyze the mechanism with a repair purpose.
Disassembly and repair of electrical parts
The dismantling of electric scissors for the purpose of repairing its electrical part is carried out in the following sequence.
- Lay the trimmer on a flat surface (for example, a table) that does not contain unnecessary items.
- Unscrew the covers on one side.
- They remove the unscrewed half of the body, gaining access to the start button, the electric motor, the brush unit, bearings, and electrical connections (these elements are depicted in the photo below).

Disassembled Electric Trimmer
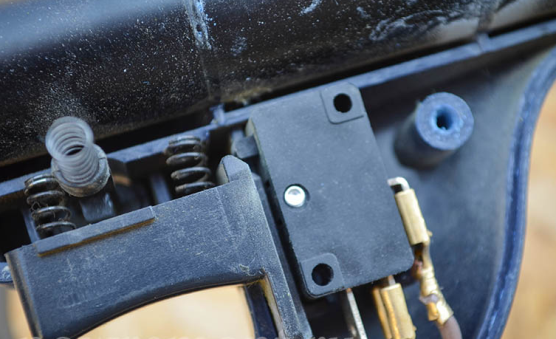
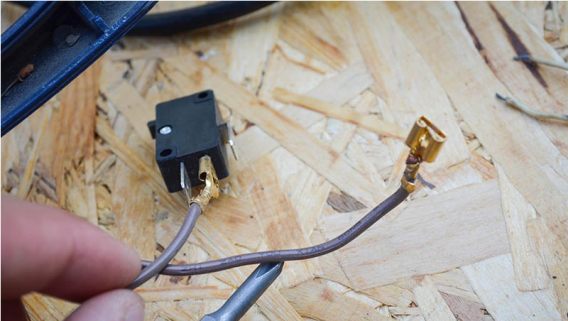
Start Button
- Check availability external signs of damage: smell of burning, dangling (detached, fused) wiring, melted parts.
- When everything looks fine, they start by checking the integrity of the power cord with a multimeter set to test resistance.
- Then, if everything is in order with the wire, check the button: when it does not close the circuit, then install a new one (good) by simply re-connecting the contacts and inserting the part into the corresponding grooves.
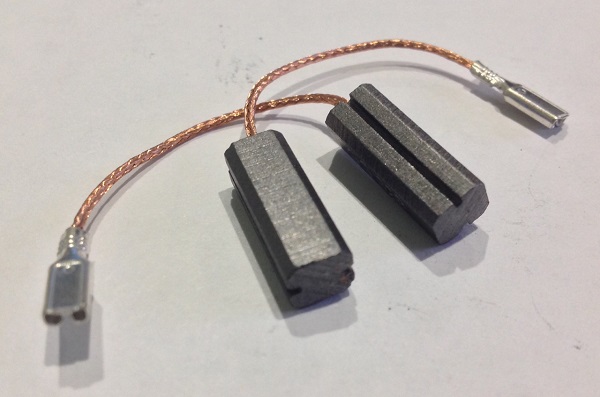
- After you check the brush assembly and collector, cleaning them with emery paper from soot.
- By unscrewing the fastening screws, take out the engine (they also disconnect the supply wiring).
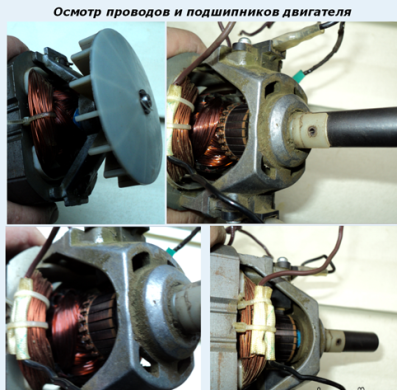
- A multimeter checks the rotor and stator windings: their resistance should be insignificant and correspond to the passport data.
- Along the way, inspect the bearing assemblies (front and rear) on the motor shaft. If their mechanical destruction is visible or there is a strong backlash, then they unscrew the bolts, remove the fan and part of the bed, gently tighten the old bearings, install new ones.
- If the engine is operational, then check the temperature control relay. To do this, bypass its jumper or incoming and outgoing wiring is disconnected after connectingtogether.
Brush and bearing units are presented in the photo below.
The spit will work and without thermostat, you only need to constantly check the temperature of the electric motor, periodically letting it cool down. You can also install a new similar sensor.
The motor start button can be checked by shorting its contacts with a jumper.. If the trimmer works, then the problem is clear. But this option is unsafe. Everything should be done carefully so as not to get an electric shock. To change a button, you should use a screwdriver to remove it from the seat and attach the wiring from the old to the new. After the replacement, you need to assemble the electrocosm, and then check its operation.
Replacing brushes required if they collapsed. At the same time, old ones should be pulled out from the grooves, and new ones should be installed in their place.
The connecting terminals on different models of trimmers are almost identical, so the connection-disconnection of the wires is the same.
Bearing replacement is quite a complicated operation, because it can stick and not be removed from the motor shaft.Be careful not to damage the rotor or the seat.
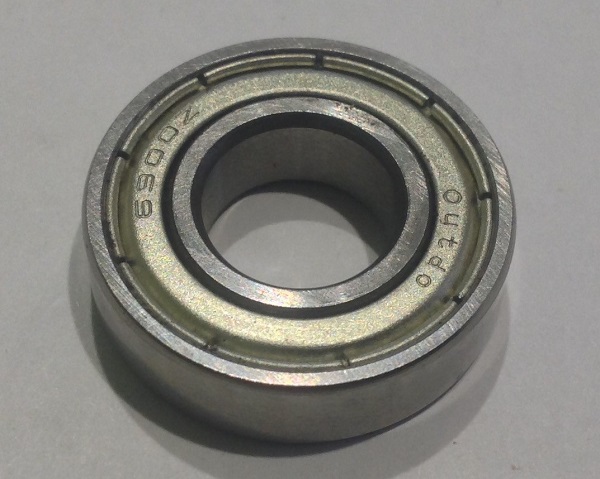
Bearing for trimmer ET1003A
When the trimmer motor fails, and you need to replace it with a new one, you should carefully remove the fan and bearings, and then install them in their original place. In terms of costs, replacement is almost comparable to the acquisition of a new mechanism. It is better to entrust its implementation in the absence of experience with electric motors to specialists.
Assembling electric scythes
Instructions for assembling the electric part of the mowers are as follows:
- install the engine, tightening the fastening screws;
- connect the electrical circuit;
- lay the wires neatly between the individual compartments in the existing recesses;
- close the top cover, locking the locks and fastening it with screws.
After assembly, check the performance of the device.
Possible failures in gasoline and electric trimmers quite a lot. For the device to be operational for a long time, it should be kept clean, in a dry place. The important point is regular preventive measures (for example, lubrication of the gearbox) and compliance with the rules of operation set forth in the instructions for the device. Acquire better quality equipment from reputable manufacturers.
Analyzing the mechanism, it is recommended to photograph the process in stages, so as not to forget anything, and not to miss any detail during assembly. When replacing parts should pay attention to the selection of suitable components: it is better to use original spare parts.
In some models, the bar consists of two parts - they use a coupling to connect them. Such devices are convenient during transportation.
/rating_off.png)