DIY trimmer coil repair
The trimmer, whether it is petrol or electric, is the only right way to mow grass in hard-to-reach places that the wheeled lawn mower cannot cope with. As a cutting tool in the trimmers are used metal knives or a special fishing line, which is tucked into the trimmer reel. But, unfortunately, trimming heads in the process of operation over time become unusable. Some faults can be fixed with your own hands, and for some you will need a complete replacement of the mowing head.
Content
Trim coil device
The trimming heads for trimmers come in various designs - both simple and complex. The figure below shows semi-automatic trimmer head from motokosy Husqvarna (Huskvarna) in unassembled form.
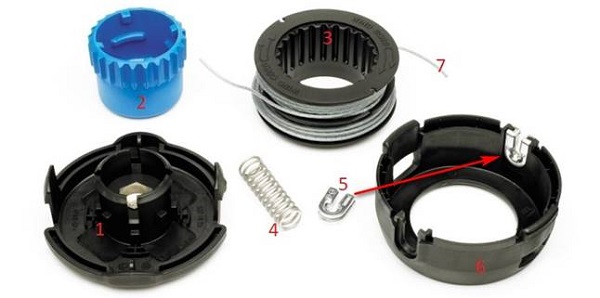
This type of head is present in the configuration of most benzokosilok and electric trimmers, such as Stihl (Stiel), Patriot (Patriot), Champion (Champion), Bosch (Bosch), Huter (Huter) and others. The device of the mowing head is quite simple. It consists of the following parts:
- the base of the mowing head;
- button for semi-automatic feeding of the cord;
- a bobbin (coil) into which the fishing line is tucked;
- spring;
- eyes - through them the line comes out;
- trimmer head cover;
- fishing line (cord).
There are also simpler trimmer heads shown in the following photo.
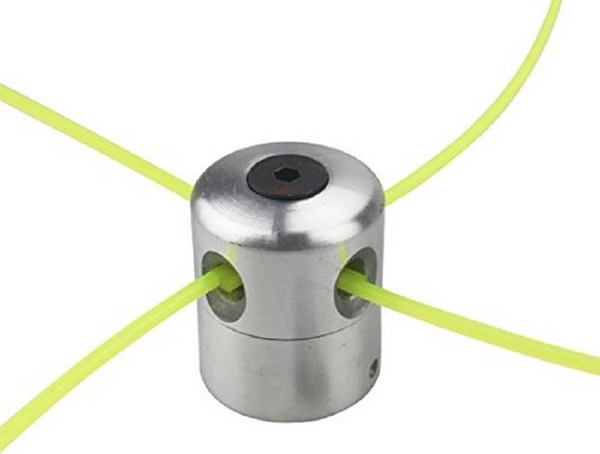
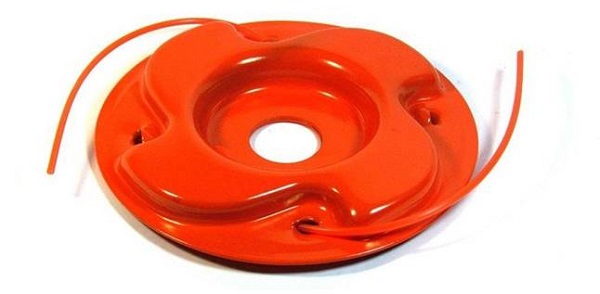
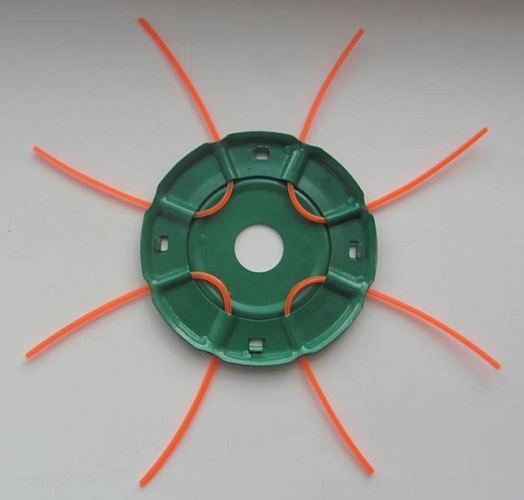
All these tips do not allow changing the length of the fishing line in semi-automatic mode (after pressing a button). In the event of a cord break, you have to stop the mower and change it manually.
Major coil faults
Electric trimmer users and gas cutters often face the problem of a semi-automatic mowing head. Coil faults may be as follows:
- fishing line does not automatically lengthen;
- the cord spontaneously comes out of the coil.
The fishing line does not automatically lengthen
If the trimmer coil does not lengthen the line when the button is lightly hit, the reasons for this may be the following.
Option 1 - there was a bite, i.e. clamping the cord between the turns. This problem usually appears if the user has wound the line on the reel unevenly, with the intersection of the coils, or winding it with insufficient tension. In the latter case, when the mowing head rotates at high speeds under the influence of centrifugal force, the cord begins to tighten, as a result of which inter-turn clamping of the fishing line is possible. To eliminate the problem, you will have to disassemble the coil on the trimmer and rewind the cord correctly, that is, in smooth turns with good tension.
Option 2 - too short ends protrude from the head. The line may not come out when hitting the ground if its ends protruding from the head are of insufficient length (short). In this case, the centrifugal force is not enough to stretch the line. Therefore, it is required to stop the unit (turn off the engine or disconnect the electric trimmer from the mains) and pull out the fishing line manually by pressing the button.
Option 3 - fishing line soldered inside the mowing head. This leads to the fact that the coil stops and does not spin when the button is pressed. Basically, this happens for several reasons: poor quality of the cord, overheating of the coil during prolonged operation of the unit, impact of the fishing line on hard objects.
- In the first case, third-party cords can be made of low-quality and low-melting materials that do not withstand mechanical and thermal stress. Therefore, preference should be given to “branded” fishing lines.
- But, if you still purchased a line of unknown quality, and it is often soldered during operation, then you can follow the example of some users who, after refilling the cord into a reel, wet it or silicone grease (from a barrel), or mineral oil. This procedure greatly reduces the likelihood of soldering the coils between the lines.
- Also the fishing line can be brazed if during mowing it hits a hard object (stone, fence, dry branch, etc.). As a result, it is slightly stretched and retracts back into the head with great speed. The cord heats up from friction, and its coils stick together. The only thing that can be done to eliminate this fault is to open the trimmer reel and rewind the line.
Cord spontaneously lengthens
There are situations when the trimmer user notices very fast consumption of fishing line. At the same time he never hit the button on the ground to lengthen the fishing line. The reason that the line spontaneously lengthens, cutting off a special knife on the casing of the apparatus, can serve no spring in the mowing head. Often, novice users of mowers, trying to charge the fishing line in the reel, forget to install a hold-down spring in the head, or lose it altogether when opening the cover, and in the future, they are not even aware of its existence.
Also the fishing line can be extended without using the button if the spring is weakened. If the spring test has confirmed this fact, then it is necessary to put a few washers under it in order to enhance its clamping properties.
How to remove the coil and replace the fishing line
Trim owners, mostly newbies, are confused, bordering on panic, when there is a need to change a cutting tool or fishing line in a reel. Very often, when trying to unscrew the mowing head, users simply invalidate it, unaware that it is unscrewed in the opposite direction.. To avoid this, if you need to replace the tool, it is recommended that you read the step-by-step instructions below.
- Before filling the line into the reel, stop the motor of the mowers or de-energize the electric trimmer to avoid injuries that may occur if the cutting tool rotates accidentally.
- Unscrew the nozzle attached to gear shaft. To do this, the shaft must be fixed by aligning the holes on the washer and on the axis, and inserting a metal rod or screwdriver into them.
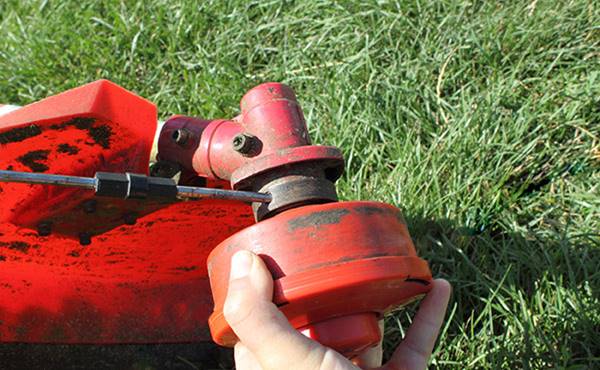
- Unscrew the nozzle. You should know that the thread on the shaft is left. Therefore, turn the trimmer spool to the right, that is, clockwise.
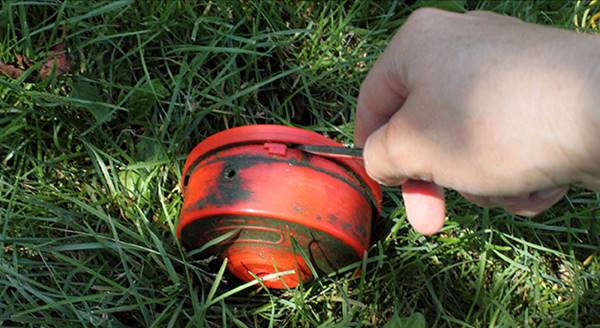
- Disassemble the mowing head. Most often, the head cover is attached on retainers. To remove it, you will need to drown these clips into the case, pressing the edges of the cover. In case a semi-automatic mowing head with a button on the bottom is installed on your trimmer, the nozzle must be disassembled carefully, because you can lose the spring, which sometimes crashes when you remove the cover.
- Cut the required amount of fishing line. Usually its length is 5 meters.Use a cord of the diameter specified in the instructions for the instrument. It is not recommended to exceed the maximum diameter of the line, as this will lead to an increased load on the engine and a greater consumption of gasoline.
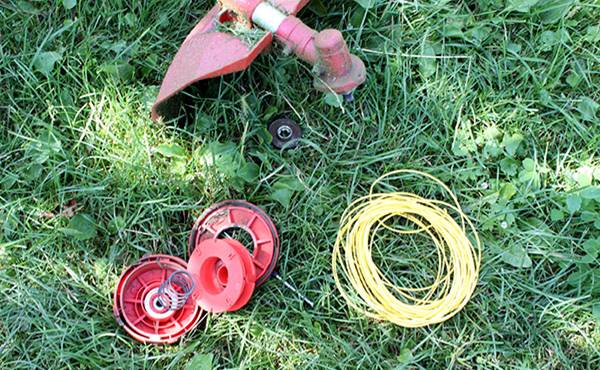
- Find the middle of the segment of the cord, folding it in half. You will have a loop.
- Inside the coil is cut through special grooves (there may be holes). Insert a loop of fishing line into this groove.
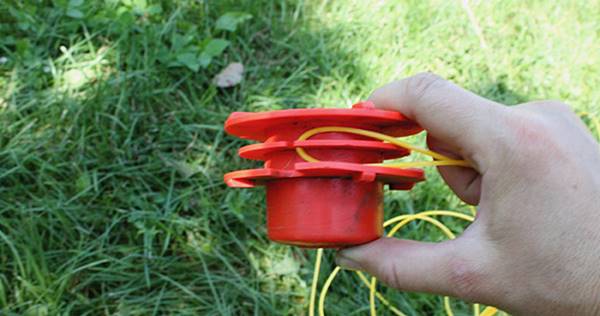
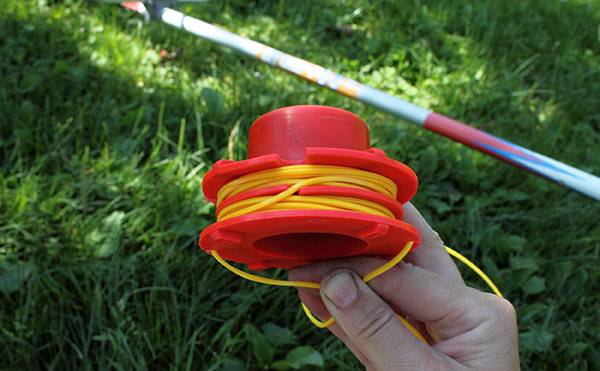
- Wind the line on the reel, turning it counterclockwise. It is necessary to fill the cord as evenly as possible, the coils should go without overlap and with good tension. When the winding is finished, leave the free ends of the fishing line about 20 cm long and fix them in the slots located on the sides of the spool.
- Assemble the mowing head. Before you finally assemble the nozzle, do not forget insert spring and washer (if available). Install the coil into the body, and pass the ends of the cord through the holes or eyelets.

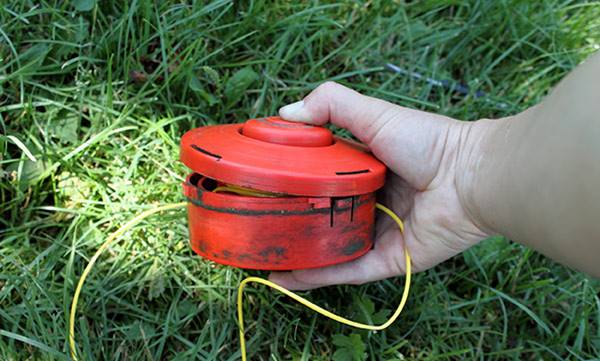
- Put the lid on and fasten it with snaps.
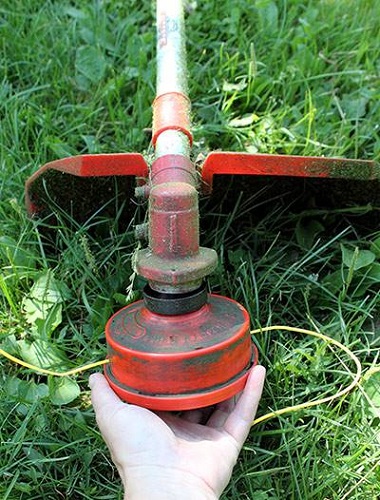
- Screw the nozzle back onto the gearbox shaft, also locking it with a screwdriver. Turn the trimmer spool to the left (opposite the arrow).
Is it possible to make a spool on the trimmer with your own hands
There is a large number of trimmer heads (not automatic), which have a low price and good quality. But sometimes situations arise, for example, in the country, when the trimmer coil has broken, and its repair is impossible, the store is far away, and it’s necessary to mow. In this case, you can quickly, in just a few minutes, make a simple trim trim nozzle for fastening fishing line from ordinary plywood with a thickness of 10-12 mm.
- Take a piece of plywood or PCB and draw on it a circle with a diameter of about 14 cm.
- Cut the disc with a jigsaw or hacksaw.
- Drill a hole in the center of the disc that fits the diameter of the gearbox shaft. Do not forget before you install the disk on the shaft, put a washer on it.
- Along the edges of the disc, you can fasten small corners or make 1-2 holes on opposite sides. They will serve to fill them with fishing line.
- To fix the line, several screws can be screwed into the plywood.
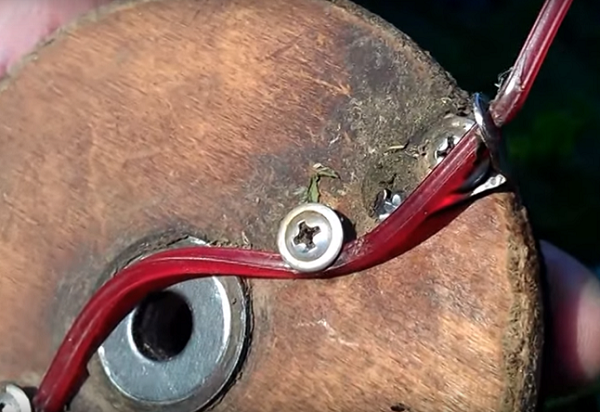
Such self-made kosilny nozzle is fixed on a shaft using a nut. Tightening or loosening the nut without fixing the shaft will not work. To replace the cord, it will be enough to release the screws, insert a piece of fishing line of the required length and press it again.
Also the mowing attachment for fixing the fishing line on it can be made from sheet metal. How to do this can be understood from the following video.
Popular trimmers in 2018
Trimmer UNION BTS-9252L
Hammer trimmer MTK33LE
PATRIOT PT 3555 ES trimmer
Huter GGT-800S trimmer
Trimmer Interskol KB-25 / 33B
/rating_off.png)