Is it realistic to assemble an air ionizer with your own hands
Ionizer - an interesting and useful thing that can make the air in the house more fresh and clean. The market presents a huge number of these devices for every taste and wallet. And if you do not consider the options of complex climate systems, which, in addition to the fundamental tasks, also perform the functions of conditioning, moistening and disinfection, then why not ask yourself a question: How to make an air ionizer with your own hands? Surely, this idea is not so difficult to bring to life.
Content
Preparation of the necessary materials
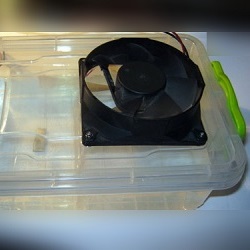
Self-made air ionizer can perform its duties no worse than the simplest factory device. Let's start with the fact that we prepare everything necessary for their future assembly.
We will need the following:
- two plastic containers;
- two wires with an approximate diameter of half a millimeter;
- insulating tape;
- plug - on request;
- scissors.
Assembly process
With the help of ordinary household needles should be made small holes in the containers. After that, you need to take the prepared wires and dissolve them. on separate veins, through the holes created (holes must be the appropriate size!).
We pay attention to the fact that in one hole the vein has a positive polarity, and in the other - negative.
Insulate the wires, connect the wires. If desired, you can connect the wiring with a folding plug, and the device is ready to use. Everything. As you can see, the scheme is simple. The disadvantage of a homemade device can be called, perhaps, only his fragility. In the rest - it is no worse than the purchased one.
Car ionizer
Cars are the same enclosed spaces as ordinary spaces. Their difference is that in addition to the microscopic dust that collects inside the cabin, the negative impact of existing electrical devices, an increased degree of influence of gasoline and oil emissions is added to the list of harmful factors. In such conditions, the ionizing device is certainly necessary. You can buy it, but you can, again, build it yourself.
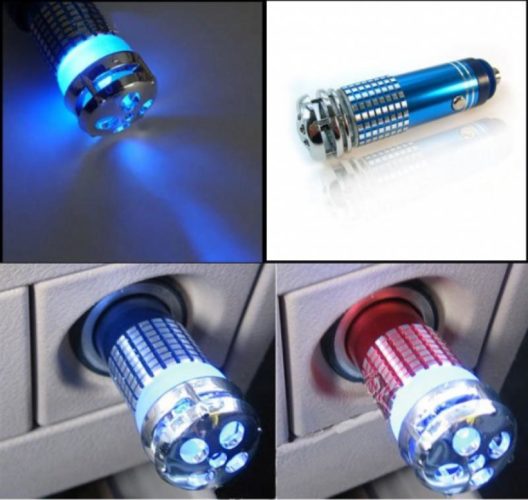
First of all, you should understand the principle of operation of such a device: it is connected with voltage converter. The converter circuit is the simplest for all those who are a little versed in technology. The active element in it is the transistor. It is best to use KT 818 or KT 819 transistors, in this case there is almost nothing to change in the circuit. We use KTS106 diodes and analogs as a voltage multiplier.
When choosing a capacitor, pay attention to its operating voltage, which should be between 3 and 6 kV, and its capacity - 600-4500 microfarad.
The winding of the finished transformer should be done in layers, each of which should consist of out of 100 turns. Each layer is subject to very careful isolation. After the done manipulations, it is desirable to fill the transformer with epoxy resin. We are waiting for the resin to dry, connect the timer, connect to the voltage multiplier, push the output wires up to 3 cm and connect to the network.
Ionizer for internal combustion engine
Such an ionizer is installed in order to save fuel. This is due to the creation of the device special ion fieldseparating the fuel molecules from each other. In this regard, a cloud is formed in the combustion chamber, contributing to the more rapid combustion of gasoline. There are different opinions about whether this process really allows you to significantly save on gasoline, someone tries the factory models, someone - made by hand.
To do this, use a contact ignition coil (for example, from VAZ), an emergency ignition unit that generates pulses, an ignition switch (everything can be from the same VAZ), a wiring harness with the appropriate connectors.
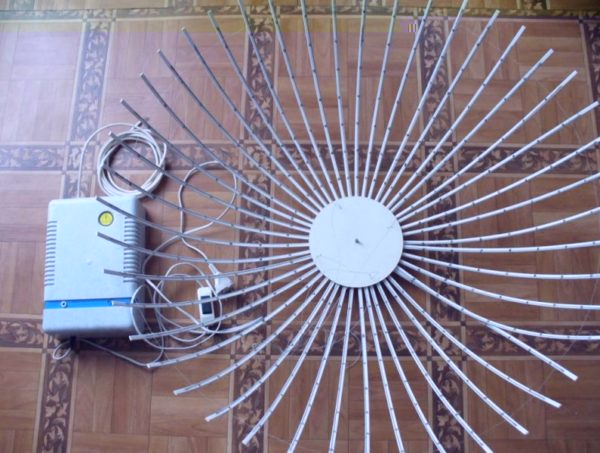
Chizhevsky chandelier
The famous Chizhevsky chandelier is also an ionizer, only in the form of a chandelier, and it can also be made independently.
To do this, copper wires with a diameter of up to 1 mm are attached to the aluminum hoop, and their location is perpendicular to each other. The grid, which turned out at the same time, should fall down by 6-9 cm. At the point of intersection of the wires, needles of metal of about 4 cm in size should be soldered.Preferably, these needles are very sharp, the effect of the chandelier depends on it. At an equal distance, three copper wires are attached to the hoop, they should be soldered over the hoop together, and then a high voltage generator should be connected. For the chandelier to work properly, the voltage must be from 25 kV.
For the chandelier, the ignition coil can be used from both the car and the motorcycle.
The required resistance can be assembled from three resistors, which are connected in parallel. Their power should be about 2 W, and the resistance - about 3 kΩ.
Installation of ionizer parts should be made in the case of appropriate sizes, this size will provide the necessary distance between the terminals of the capacitors and high-voltage diodes. After installation it is recommended to cover the findings with paraffin. If the chandelier is made correctly, it starts to function properly right away.
During the operation of the device should not be present odors. If the smell of ozone is still felt, then you need to check the wiring diagram, as well as to inspect the chandelier itself.
In this case, the output voltage can be changed through the selection of resistance or capacitance. Another reliable way of confirming the effectiveness of the Chizhevsky chandelier can be considered to be the presentation of a small piece of cotton wool. At a distance of 0.5 cm it certainly must pull to device.
From the foregoing, it can be concluded that the manufacture of an air ionizer is not such a difficult task, and it is quite possible to do it with your own hands.
/rating_off.png)