How to repair a gas column
To meet the needs of consumers in hot water, a lot of water heaters, both electric and gas, have been developed. For reliable operation, they are equipped with new monitoring and protection systems for safe and long-term operation. But no matter how reliable the water heaters are, over time they also fail. Repair of geysers, as a rule, should be carried out by professionals, but in some cases it is also possible to self-troubleshoot.
Content
Typical malfunctions of gas water heaters
Geyser - the device is quite unpretentious in operation and can work for a long time without breakdowns.But if they happen, then you can diagnose a gas column for proper repair of the device by the following signs:
- power problems;
- malfunction of the water unit;
- gas unit problems;
- wrong installation.
If there were any problems in the gas block, then the Ariston gas column repair or the Junkers gas column repair, as well as any other water heater, cannot be carried out on its own. Correct the damage should be a qualified master. In other cases, you can try to cope on their own.
Power problems
For normal operation of most of the components inside the unit, a stable power supply is required. Therefore, if there are malfunctions of the gas column in the form of failures, which are characterized by the fact that the flame does not ignite or goes out during operation of the apparatus, then the possible cause of such a malfunction may be lack of current powersupplied by batteries.
This does not apply to units without electronic components in the design. For example, you will not find it in the Neva 3208 unit, the repair of which you want to make, or when repairing the Astra gas column of the old model.
Often, users when repairing a gas column Oasis, as well as a gas column Junkers, are misled by the fact that the LCD display is lit and there are no problems with power supply. But it should be borne in mind that for ignition a sufficiently strong charge is required in order for a spark to form in the spark-plug. In addition, the power supply is also required for the electronic unit to transmit it to the solenoid valve so that it is in the “open” state. Therefore, if the batteries are already run down, then there may not be enough power to ensure the operation of these modules.
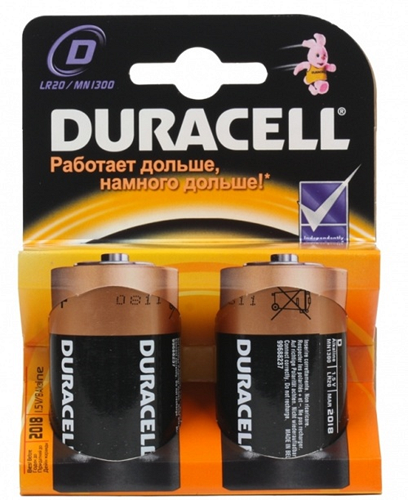
In the instructions for the water heater manufacturer indicates the time of one set of batteries. As it is not difficult to guess, this value is approximate, and it depends on the quality of the batteries used. When buying batteries should pay attention to the markings on them. For long work gas column is recommended to choose batteries labeled LR20. This means that they are alkaline, i.e. alkaline.
Cheaper, with the inscription R20, fail very quickly and can not cope with a constant load. The best option is CR20 lithium batteries.Their main difference from alkaline ones is high capacity, stable generated current, long-term operation, exceeding several times the service life of LR20 batteries. The only downside to CR20 batteries is their high price. So the purchase of LR20 alkaline batteries in terms of efficiency and profitability will be the right choice.
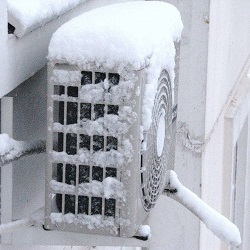
It should be remembered: never buy batteries in street kiosks, and even more so in the market with trays. Especially this recommendation refers to the winter period, as from cold the batteries lose their charge.
Removing the column liner
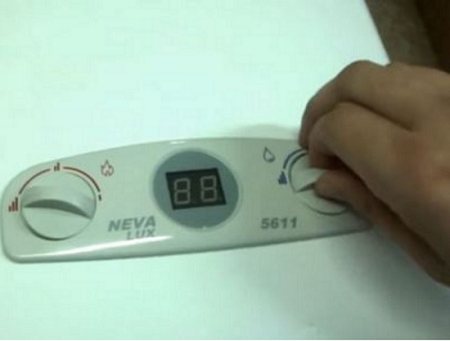
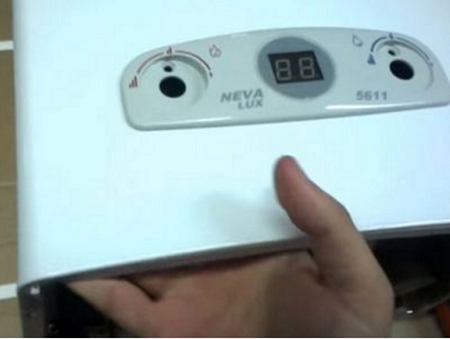
Such a repair of the geyser with their own hands, like the replacement of batteries, is the only way of troubleshooting that does not require removing the outer casing of the unit. For the repair of gas columns Vector, Oasis and any other with other faults will require the opening of the device. In order to start removing the casing from the water heater, it is necessary to shut off all the water and gas supply valves, and then do the following (for example, the Neva 5611 water heater is taken, which we disassemble on the table).
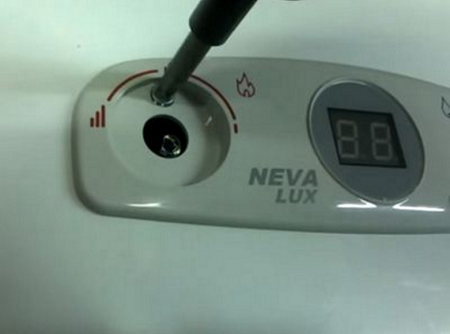
- At the very beginning you want to remove control knobs from the panel of the unit.They are not fixed in any way, therefore it is enough to pull them towards yourself. If you cannot pull out the handle freely, you can use a flat object by gently prying it underneath to prevent it from breaking. The geyser Oasis (Turbo series) also has a third handle “winter-summer” located in the center.
- Under one of the handles of the water heater are 1 screw that must be unscrewed. The presence of a screw under the handle is observed only in the Neva 5611 model, while in the Neva 4510 and the Neva 4610 it is not.
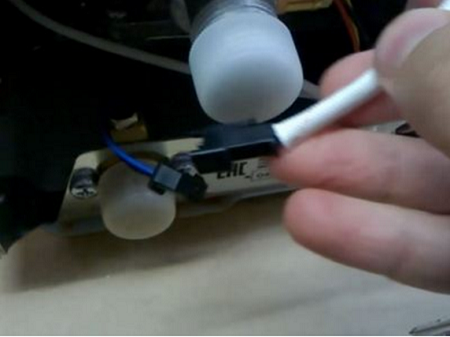
- A display is attached to the casing of the device, to which 4 wires are connected. The pair of red and black conductors is connected to the control module, and the black and blue pair is connected to the temperature sensor. For easy disconnection at the ends of the wires provided by the presence of connecting pads, which are easily opened. Unplug all 4 wires by clicking on the small latch lock (if this is not done, the block may break).
- Next, you need to unscrew the screws from the body, holding the lining.
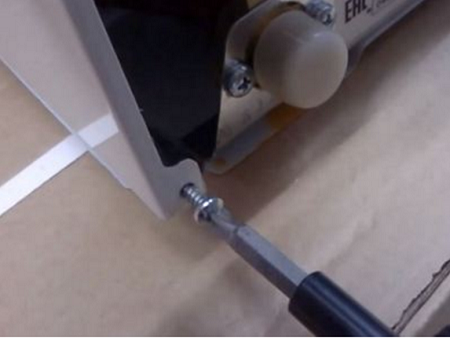
- After that, put your fingers under the cladding (use caution, you can cut yourself) and slightly pull it towards you, so that the guide studs located on the unit body come out of the slots.
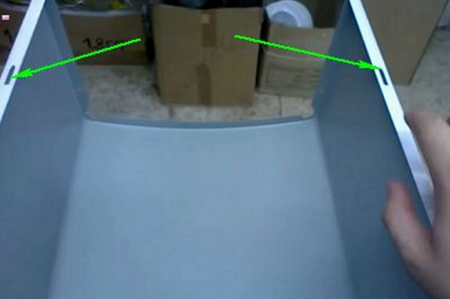
- Then the casing is fed up, after which it should be removed from the hooks.The figure below shows the holes for the hooks.
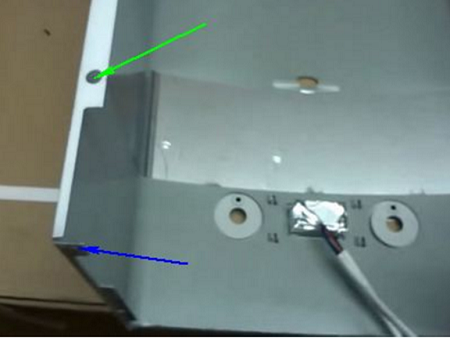
- The following figure shows the holes for the alignment studs and the space for the mounting screws (blue arrow).
- Installation of the cladding to the original place occurs in the reverse order.
Water knot malfunction
Most often, the repair of geysers is made due to a malfunction of the water unit. His job is that, under the influence of fluid pressure, the membrane inside it, arching, transmits motion to the rod, and already it moves the pusher of the gas unit. As a result, the spring valve opens, and the power supply to the control module is turned on. Therefore, if the water node is faulty, the device will not start.
Water blockage can be identified by external signs.
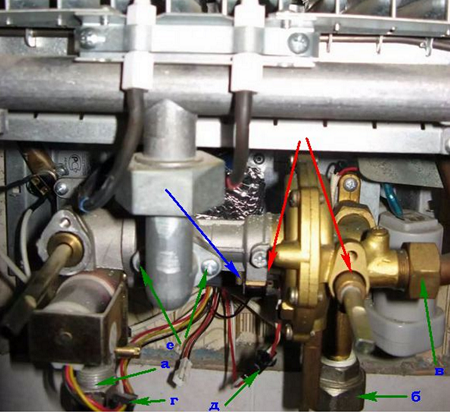
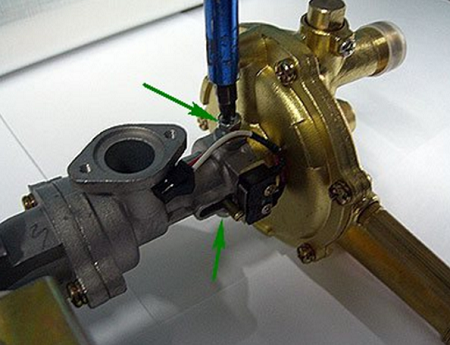
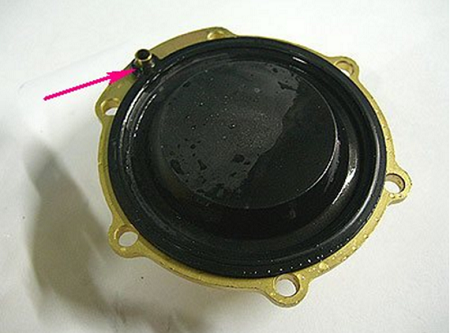
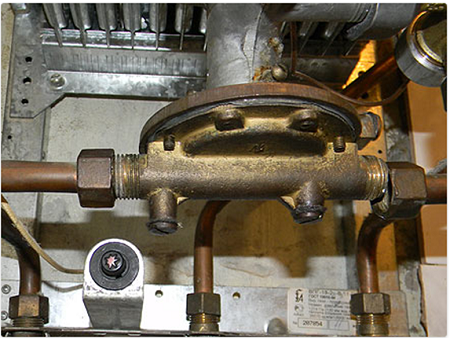
- If you opened the water supply, and the stem that presses the switch plate, remained stationary (shown in the figure with a blue arrow), this means that the membrane located inside the main component of the water assembly, the frog, is damaged.
- Stuck stem may be due to its sticking.
- Leakage is possible in the place where the gas and water units are connected to each other, or fluid seepage from under the adjustment valve (indicated by red arrows).
If you notice at least one sign, then the node will need to be removed and repaired. The water unit is removed only with the gas module, since they represent a single structure. This can be done in the following way:
- after you have verified that the gas valve on the pipe is in the closed state, you can disconnect the supply hose (a);
- similarly, when the water supply is turned off, the nut on the water unit pipe (b) is unscrewed;
- then with a wrench, it is necessary to unscrew the nut that connects the water block to the heat exchanger (c);
- disconnect the terminal block (g) on the conductors connecting the solenoid valve with the control module;
- in the same way, the wires (d) to the switch are disconnected;
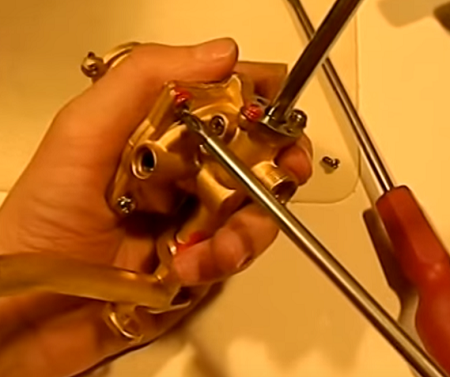
- using a screwdriver, unscrew the 2 screws (e) that attach the nozzle to the water-gas unit through which fuel is supplied to the burner manifold;
- after unscrewing fasteners, the entire assembly is easily removed from the apparatus.
Next you need to disassemble the gas-water module.
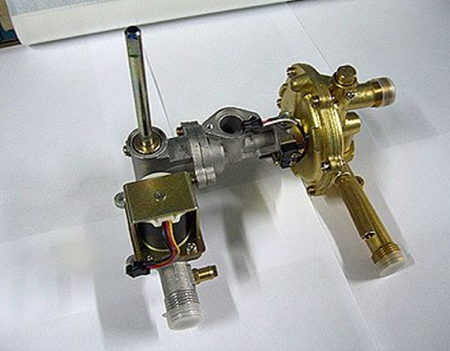
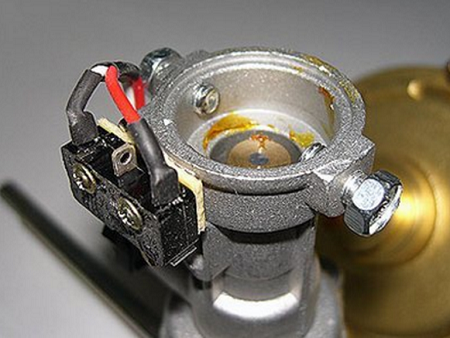
- After removing the device, it is required to separate the water node. To do this, remove the 2 screws (indicated by arrows).Unscrewing them completely is not necessary. With the help of a clamp, they fix the “frog” in the gas unit. The fastening of the “frog” to the latter in different models may differ, for example, in the gas column Neva 3208.
- It looks like a gas module with the water disconnected.
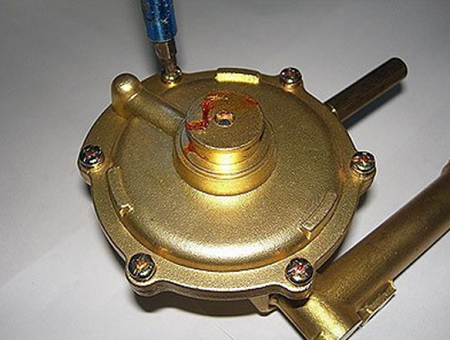
- Next, you will need to disassemble the “frog” itself by unscrewing the 6 screws. They can stick together and get out tightly or even “lick” a screwdriver, if you make a lot of effort. To avoid this, you can pre-drop on them with a special liquid WD-40, after which they are easily unscrewed, and none of them break.
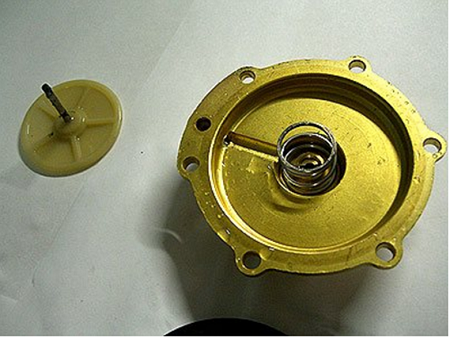
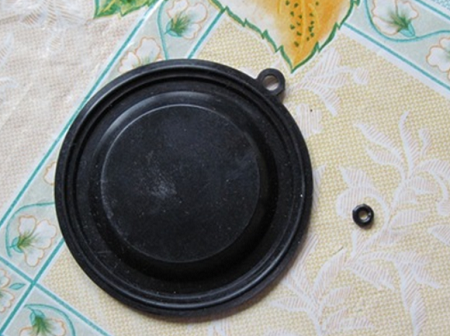
- After successful unscrewing of the screws, the module opens into two halves, and you will see rubber membrane.
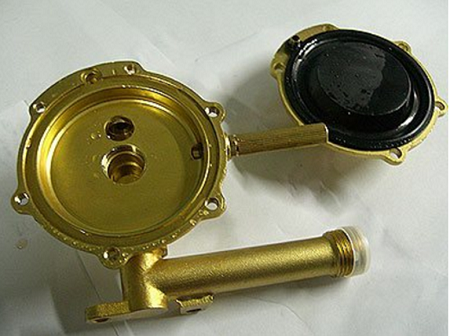
- The membrane must be carefully inspected, and when it is found that it has strongly stretched, or it has impulses, it is necessary to change it to a new one.
- To get to the spring plate, you need to remove the membrane. If it is whole, it is necessary to do this carefully so as not to damage the ringlet that it puts on the nipple (indicated by the red arrow in the figure above).
- After removing the membrane, you will see a plate with a spring.
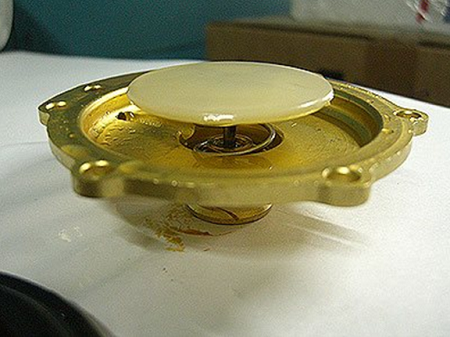
- That you once again did not disassemble the unit, spend inspection of the gland. To do this, carefully remove the plate with the stem.
- Take out a spring, and you will see a cork with a kerf for a screwdriver. Under it is a sealing ring. The plug must be unscrewed from time to time to lubricate and replace the rubber gland.
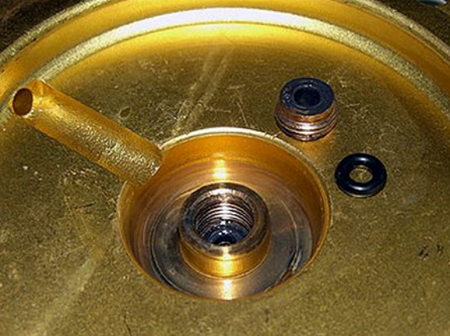
- Before purchasing the repair kit for the frog, change the damaged gland and membrane. When you install the gland back, do not forget to lubricate it with silicone grease, and also lubricate its location.
- The water column is assembled in the reverse order. The plug must be tightened so that the stem passes through it effortlessly. When you have fully assembled the frog, repair of the water block can be considered complete.
Repair of the gas column Neva 3208 about the malfunction of the “frog” is similar and intuitive, although the internal appearance of the unit is slightly different. It also understands the gas column Neva 4511, the repair of which is quite feasible.
When repairs are made chinese gas column, always surprised by the size of the water node.It is small enough in size, and in order to disassemble the “frog”, you only need to unscrew the 4 screws.
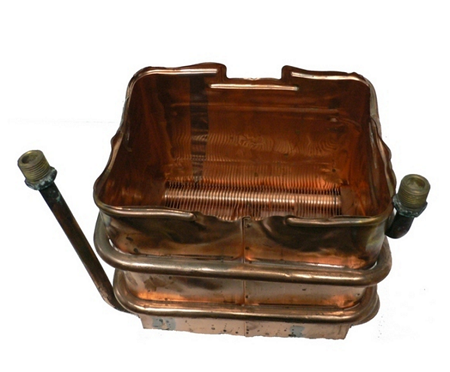
Heat exchanger repair
Repair of the gas column heat exchanger will be required in case of:
- if at the outlet of the gas column an insufficient water pressure is noticed;
- low fluid heating;
- noise is heard when the unit is running.
The reason for all this can be scumformed on the inner surface of copper tubes. Therefore, reduced heat transfer and capacity of the latter. In addition, if the unit has not been serviced for a long time, it may accumulate between the plates of the heat exchanger dust and sootwhich also interferes with the process of heating water. The heat exchanger is removed simply.
- Before repairing the unit, it must be disconnected from the main water supply system and drained from the heat exchanger by unscrewing the plug under the water section.
- Then you need to disconnect the water supply and drain pipes (shown in the figure with green arrows).
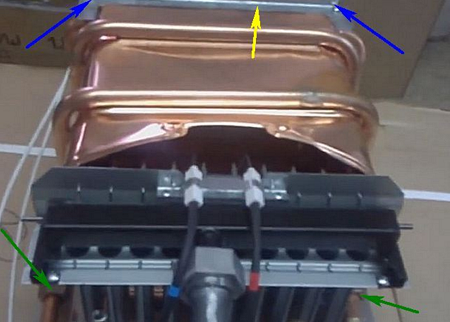
- Loosen the screws (blue arrows) and remove the fixing plate (yellow pointer).
Repair of heat exchangers of any gas columns begins with flushing them under a strong stream of water to remove dust and other contaminants. After that, it is recommended to lower it for half an hour into water with the addition of detergent, for example, for dishes.
Cleaning of the unit continues with a small, non-rigid brush, after which it is washed again under running water. Scorched tubes of water heaters are cleaned with a strong flow of water in the opposite direction. If the scale is not completely removed, you will have to fill in the tube special acid solution. For its preparation, you can use the usual citric acid. It is necessary to take 100 g of acid and dilute it in 1 liter of water heated to 40C. This solution is poured into the tube of the heat exchanger until it appears from the other. The reaction will be immediately visible in the form of escaping foam. Flooded solution is left for 15 minutes, after which all the channels of the site are well rinsed under water pressure.
If the result does not suit you, the dissolution of scale can be repeated.
In this way, the Neva Lux, Dion, OIG, Selene gas column heat exchanger and the Neva transit gas column are washed.
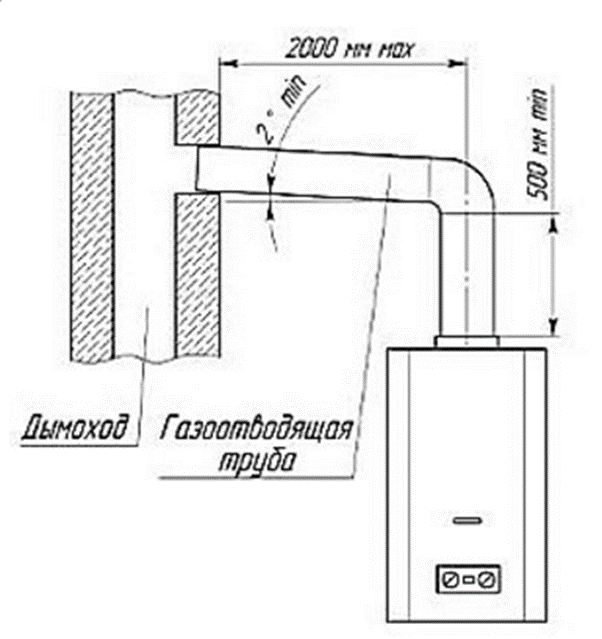
Incorrect installation
The reason that the water heater is turned off after start-up may be its incorrect installation.The diagram below shows how to install the unit.
The following figures show common errors when installing a water heater.
- The chimney is inserted so that it closes the ventilation shaft.
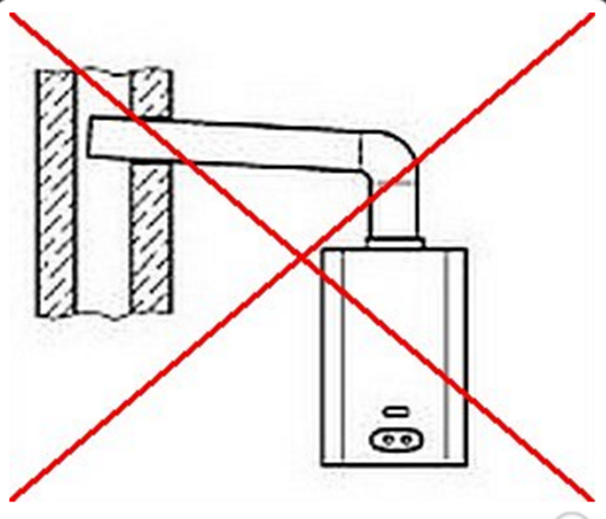
- At the same level as the chimney, there is another ventilation hole.
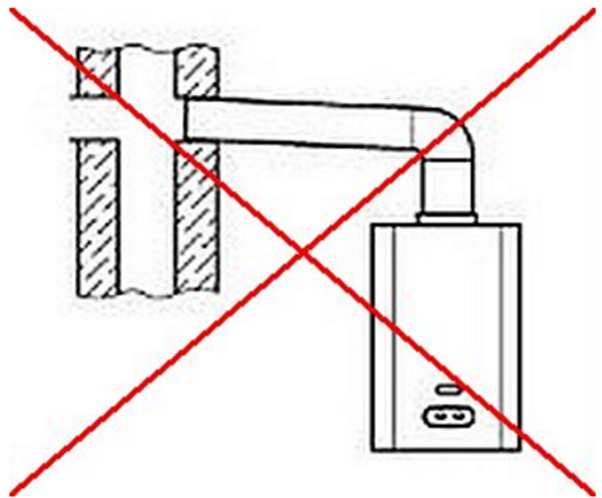
- A kitchen extractor is built into the channel for the gadfly of combustion products.
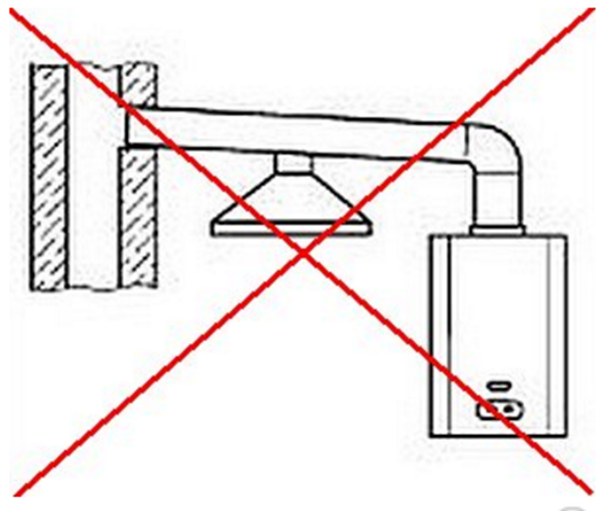
Such methods of installation violate the normal draft, as a result of which the operation of the water heater becomes irregular and in some cases impossible.
/rating_on.png)
/rating_off.png)