When the LCD TV needs repair
LCD TVs are now almost supplanted television receivers with a beam tube. LCD panels are characterized by high picture quality, smaller dimensions (thin body), which allows them to be hung on the wall, and less power consumption. But, despite all these advantages over the old TV models, the breakdowns of LCD TVs have not decreased. Therefore, if your LCD TV is out of order, you have 3 choices:
- repair the service center;
- call the master to the house;
- repair the equipment yourself.
But first you need to decide what kind of problem appeared in your TV. Should I contact a specialist or you can repair the LCD TV with your own hands?
Content
Typical malfunctions of LCD TVs
To find the cause of the breakdown, the master often has to use special equipment. But sometimes a malfunction on an electronic board can be identified visually, for example, if capacitors are swollen. In any case, the one who undertakes the repair should have the necessary skills and knowledge, without which it is possible to “kill” the TV completely. Below we list the main blocks included in the design of LCD / LCD TVs, which are most often exposed to breakdowns.
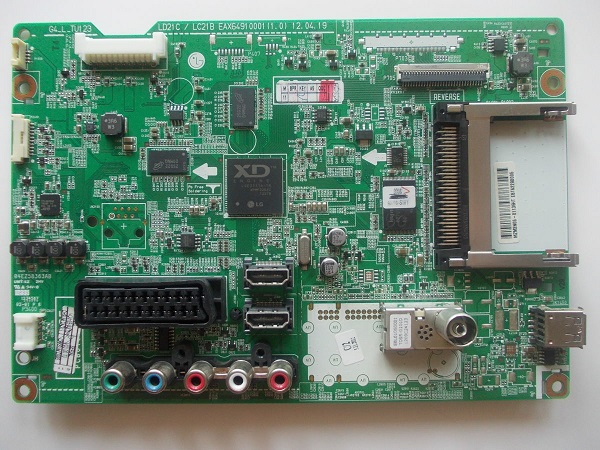
Main board
Under the control of the motherboard are all the main components of the device: an inverter, a timing controller, a power supply. Motherboard contains a processor, memory, tuner, converters, etc. In case of any malfunctions related to the main board, the following symptoms may occur:
- unable to configure the device,
- inputs do not work,
- the picture on the screen is displayed with noise,
- there are difficulties with management.
Power Supply (PSU)
This node gives food to all TV receiver modules, including the motherboard. Although BP has different types of protection, in some cases they are ineffective.
If the power supply unit burns out, or some of its elements fail, then the following symptoms appear:
- TV does not turn on;
- the indicator blinks or does not light up at all;
- the device spontaneously turns off;
- when turned on, the indicator lights up and immediately goes out;
- while the TV is on, the screen turns black, but the sound does not disappear.
Matrix (screen)
Most often, the screen is either broken or flooded with liquid (tea, juice, coffee, etc.).
In case of mechanical damage (and in some cases chemical), the matrix is beyond repair and changes to a new one.
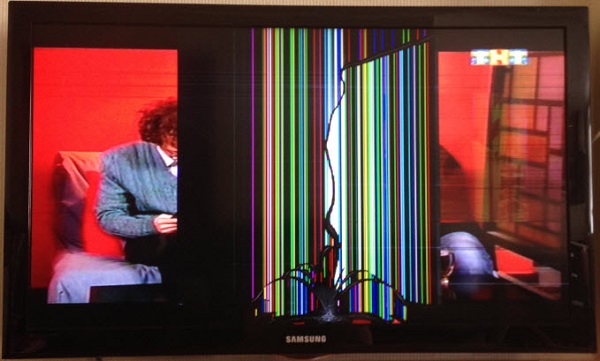
But if in her one or more lamps burned out, then the screen recovery is possible. The following problems with the matrix are subject to repair:
- gray screen;
- foggy image (as if poured with milk);
- the appearance of vertical stripes;
- image braking;
- moving objects forked.
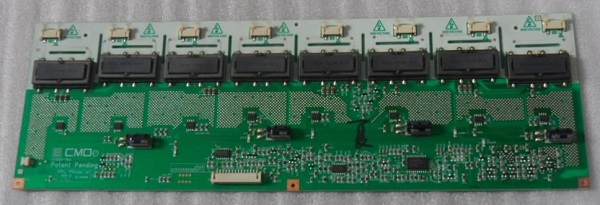
Inverter (backlight unit)
The task of the inverter is the conversion of low voltage (12-24V), which comes from the power supply unit, to the high voltage required for the operation of the backlight lamps.If the inverter is faulty, you can observe the following:
- after turning on the device, only the sound works, but there is no image;
- When you turn on the TV, the picture appears for a moment, after which it disappears completely.
It is worth noting that the picture has not disappeared anywhere. If you turn on an ordinary flashlight and point it at the screen, you can see the moving shadows on it. This fact confirms the lack of illumination due to failure of the inverter.
May also work protection BPif the backlight unit fails. In this case, all attempts to turn on the device become unsuccessful, since it is immediately disabled (sometimes you hear a click).
T-Con (timing controller)
This node converts the signals from the motherboard into signals that the matrix can recognize, and thus form an image. A T-Con breakdown causes the following symptoms:
- the color scale is broken;
- "goosebumps" and various stripes appear;
- the screen turns white or gray.

What can be repaired by yourself
Since the LCD TV is a rather complicated electronic device, you can fix only some problems yourself, and then, provided that you have minimal knowledge and skills in electronics. So you can do it yourself:
- troubleshoot problems with the remote control or lack of a TV signal;
- repair power supply;
- replace the backlight.
Replacing the matrix itself, if it is damaged, from a financial point of view is not always justified, since its price equals approximately 80% of the cost of the apparatus.
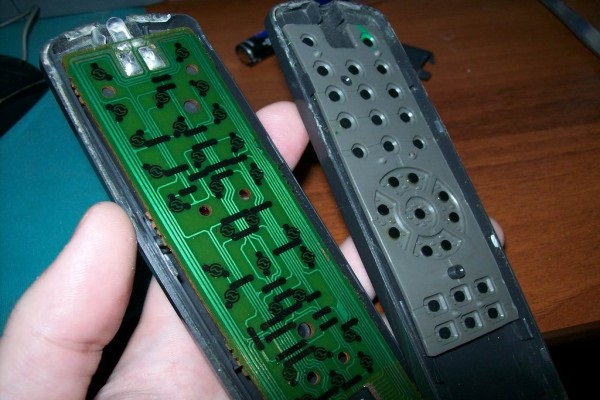
Problems with the remote control
If you try to turn on the device from the remote, but it does not respond to your actions, then first of all, you should check battery life. Dead batteries should be replaced. If dirt has accumulated under the buttons of the console, then you will not be able to use it either. Disassemble it and clean all dirt from the contacts. Another reason for the remote to stop working is its fall, causing damaged quartz radiatorthat need to be replaced. In the case when the console was filled with liquid, and the drying did not help bring it back to “life” - then you have to throw it away and buy a new one.
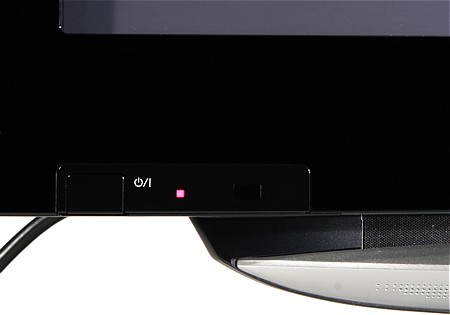
No broadcast signal
Often there is a situation when the serviceable TV refuses to turn on. But not everyone immediately guesses that this behavior of the device can be caused by the banal absence of a TV signal.This fact is explained by the fact that in modern TVs noise reduction function is used. If there is no TV signal, the protection is triggered and the TV switches to standby mode.. Therefore, if your TV receiver has stopped turning on, first check for a TV signal, and then look for other causes of equipment failure.
Power supply repair
In order to understand in general how to find and fix faults in a power supply unit, the whole process can be traced by the example of repairing a DAEWOO TV.
Before you start repairing, make sure that the device is disconnected from the outlet.
Next, do the following.
- Remove the screws holding the back panel and remove it (if the panel is held on the latches, try not to break them).
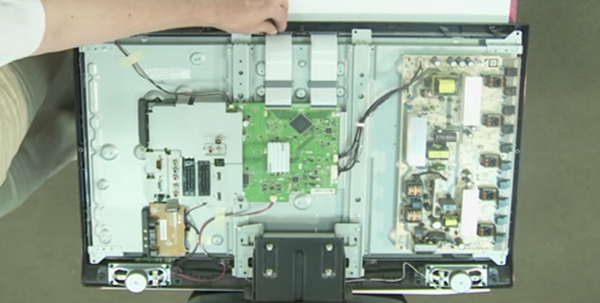
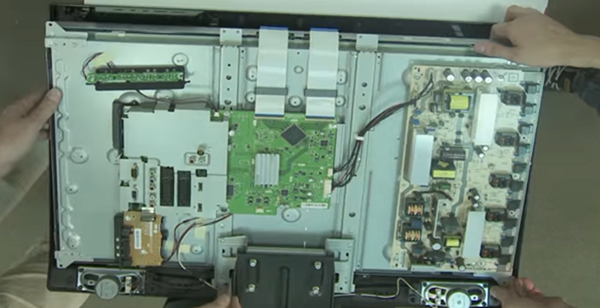
- After removing the cover, you will see the power supply unit on the left, and the motherboard - on the right.

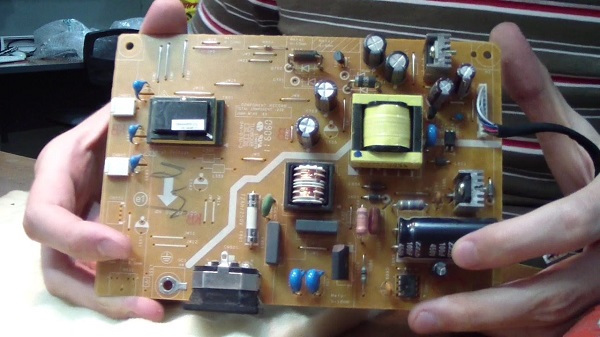
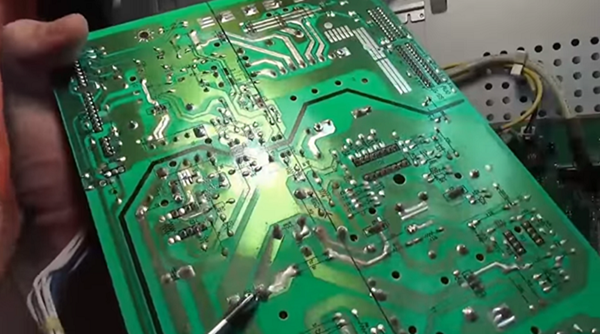
- If you look closely at the power supply board, you can see 3 transformers on it. The one below is the choke of the mains rectifier, the top one (large) supplies power to the inverter, to the right (from a large transformer) there is a BP transformer used in standby mode. Diagnostics should begin with the latter, since it is thanks to him that the standby mode is activated.
- Usually this transformer during normal operation at the output should give a voltage of 5V. To find the desired contact, you can use the scheme. But if you look closely at the board, you will notice that opposite to the required contact will be marking 5B.
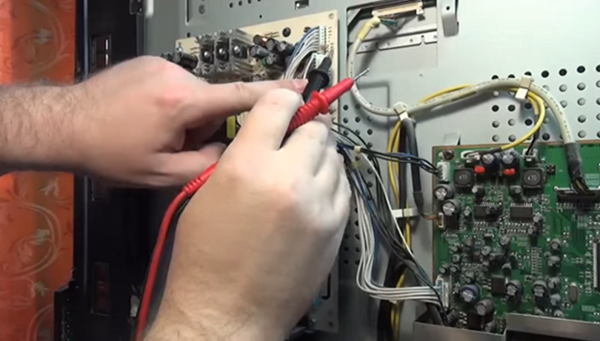
- First, it is required to exclude an open circuit. Touch the probe of the device contact (5V), and the other probe touch the cathode of the diode located on the radiator. The next photo shows that there is no open circuit.
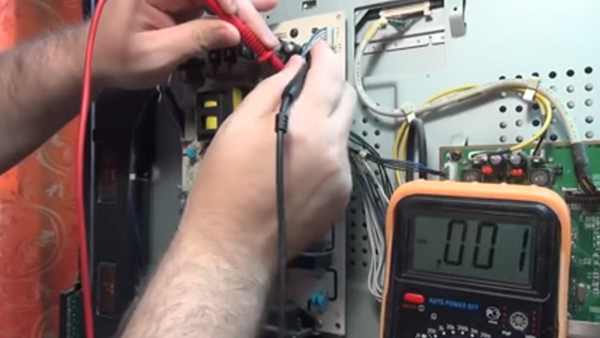
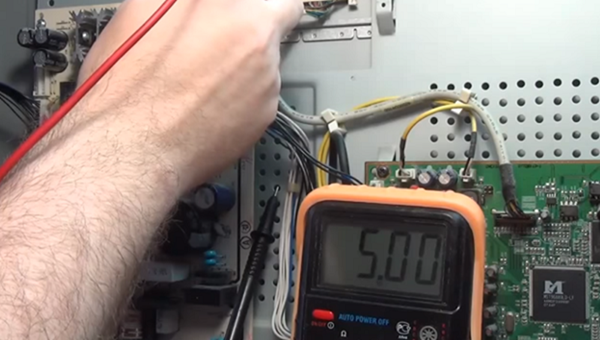
- After that, fix one probe on the metal case, and the other touch the same contact (5V) to measure the voltage (the TV must be plugged in). If the device shows a value less than 5V, then it can be concluded that the transformer is not operating at full capacity. Undervoltage may cause swollen or dried capacitorsthat need to be removed for replacement.
- Before replacing the capacitors you will need to remove the board. But first, carefully pull out the cables that go to the PSU from the main board, and also disconnect all the wires connecting the board to the other TV nodes. In order not to get confused when assembling with connecting loops, it is recommended to photograph their initial placement.
- Unscrew the screws holding the power supply board and remove it. Be careful: since the capacitors on the board are in a charged state, you can get a strong electric shock. Therefore, removing the card, you need to discharge them, for example, using a screwdriver.
- Next, it is necessary to evaporate parts with a defect, and solder with respect for polarity new capacitors.
- Make the assembly (in accordance with the photos taken earlier).
- Measure the voltage after assembly again (by turning on the machine). Now it is within 5V, which is the norm.
Replacing capacitors is the easiest operation a home wizard can do. In other cases, you cannot do without special knowledge, and it is better to entrust the elimination of a malfunction to a specialist, since your wrong actions may cause a burnout of the motherboard.
Replacing backlight
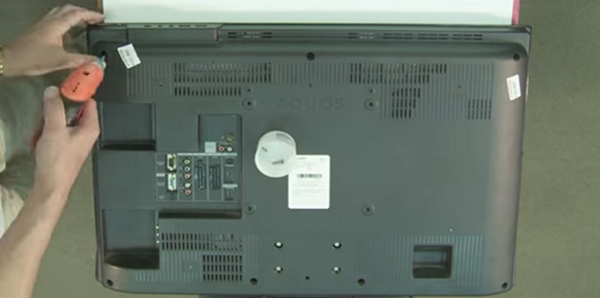
You can also replace burnt out backlights installed in the matrix by yourself. The lamp replacement process will be demonstrated using the Sharp machine. Using this description, you can change the lamp in the LCD matrix of TVs of other brands.
- Unplug the TV and remove the back cover of the unit.
- Observing maximum care, disconnect all cables connected to the matrix.
- Next you should disconnect the control panel. You do not need to remove it completely, since you will have to use the panel to turn on the lamps.

- Check that all loops are disconnected, then remove the case with the boards screwed on it. It is recommended to take all actions during the disassembly of the TV to take pictures so that there are no difficulties when reassembling and connecting all units.
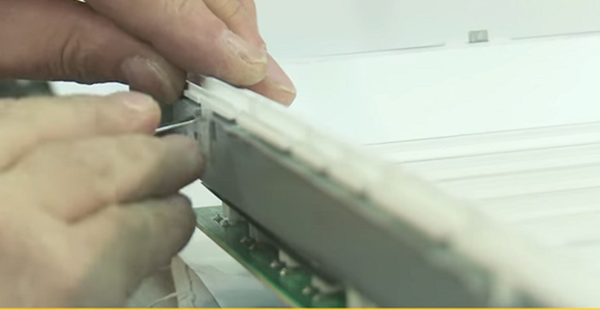
- Unscrew the front frame before removing the die. Carefully loosen the fasteners, remove the filters and the matrix.
- Turn on the device in the network and click on the control unit a few keys to enter service menu. These actions will help turn on the lamp.
- The next photo shows that the fifth lamp above is not lit and needs to be replaced.

- Replace the lamp and reassemble.
- When the build is finished, you need to reset lamp error counter. To do this, you need to find the required line in the TV service menu, then perform the reset by selecting “OK”.
When to contact the service center
In most cases, when a malfunction appears on the TV, you will need to contact the service center. Below is a list of problems that require the mandatory intervention of specialists.
- All breakdowns listed at the beginning of this article. (repair of power supply and replacement of lamps, if you can cope with this, you can exclude from the list).
- HDMI input does not work. A breakdown occurs when devices are connected to this input while the TV is running. Users often forget that this should be done when the device is turned off.
- Missing image. Before calling the wizard, check the settings of the equipment, the presence of a TV signal. If the problem persists, turn off the machine and call a specialist.
- Screen interference. First check the TV signal, antenna cable and all connections. If this does not help, ask your service provider if preventive work is being done. Check which electrical appliances in your house are turned on at the moment and which ones may cause interference. In other cases, this trouble may be caused by internal breakdowns in the nodes of the TV receiver, and to get rid of them, you will need to call the wizard.
- I can’t set up and save channels. This indicates the failure of memory chips.
- Stripes on screen. Anything can be the reason for this: poor contact of loops at the junctions, problems with the matrix and the motherboard, etc.
- Lost sound. The motherboard may be faulty, the loop contact is broken, the speakers themselves are broken. But first, check to see if the button on the remote is accidentally pressed to mute the sound (meaning the one-click mute button with the speaker crossed out).
- The device has stopped turning on. If the socket, plug and power cord are intact, the power supply is not disconnected, it is better not to tempt fate, but disconnect the device from the network and call the wizard. If this is not done and continue to “conjure” over the appliance, then the main components of the TV may fail, after which more serious repairs will be required.
/rating_off.png)


