Repair washing machine Candy do it yourself
It is not that difficult to repair the Kandy washing machine with your own hands. To do this, you need to know its common faults and have some knowledge of electrical engineering. Just watch a video on this topic (presented below) and much will become simple and clear.

Preparation for repair
In order to repair the washing machine yourself, you need to carefully prepare for the repair. The tool, accessories and workplace are prepared first. For disassembly will need:
- set of screwdrivers;
- wrenches for 8, 10, 17 and 19;
- pliers and side cutters;
- pliers for self-locking clamps;
- awl and small hammer.
The best place to disassemble is the garage. The main thing is to have space and good lighting. At the workplace, you need to carefully lay out the tool, clean rags, sealant, WD-40 liquid, and a brush.It remains to prepare a soldering iron and an electrical measuring device, for example, a tester.
For those who will do the repair for the first time, it is desirable to have a camera for photographing the sequence of disassembly. Pictures will be of great help in assembling the machine.
Main malfunctions
Before you start repairing a washing machine, you need to find a malfunction, because of which the device does not work. They are few. The most laborious of them is bearing replacement. Immediately it is necessary to determine which tank is installed in the car. If non-separable, self-repair is better to postpone. Of course, you can rely on your experience, but it is better to entrust this work to specialists from the service. We'll have to cut the tank to get to the bearings, and then it will need to be glued together again. It is much easier to carry out repairs on a machine with a collapsible tank.

To replace the bearing you need to disassemble the machine. To this end, the top and rear panels are first removed. The detergent dispenser is immediately removed along with the tray mount. Now nothing interferes with the detachment of the front decorative panel. It remains to gently pull the tank.Here you need to be extremely attentive. The fact is that a mass of hoses, wires and other parts are attached to the tank. All of them need to gently detach, fix, remove the loading door and only then remove the tank. Moreover, this operation is practically impossible for one person; you will need a second pair of hands.
To remove the bearings, we disassemble the tank, remove the pulley from the shaft, take out the shaft and carefully begin to remove the bearings (there are two of them in the machine). Best to do it special puller. In extreme cases, you can knock out with a hammer.

The next stage is the installation of new bearings. Here, as a rule, difficulties do not arise. We assemble the car in reverse order using photos.
Important. Before installing new bearings, their seats must be well cleaned and lubricated with grease, for example, Litol-24.
The next common problem is wear of shock absorbers. This is a fairly simple operation. If during washing or spinning the machine vibrates very strongly, then it’s time to replace the shock absorbers. They are at the bottom of the tank. Given their design feature - indiscriminate, it must be remembered that the shock absorbers are not repaired, but replaced.

To remove them, you must first unscrew the lower mounting bolt (in the place where the shock absorber is attached to the body of the machine), and then the upper one. Instead of bolts, depending on the model, there may be plastic pins with snaps. In this case, you need to press the latch and push the pin from your seat. For example, a screwdriver. After detaching the fasteners, the shock absorber is removed and replaced with a new one.
Council When buying new shock absorbers, the seller must show a sample of the old.
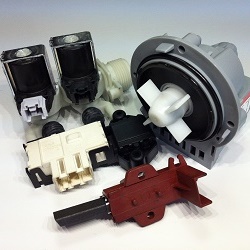
Sometimes in order to repair Kandy’s car, it’s enough replace in it TEN (heating element). Access to it is carried out with the rear cover removed. The process of removing the complexity is not. First of all, all wires are disconnected from the heating element. Then the fastening nut is loosened and the screw is pressed inwards. After these operations, the heating element with a slotted screwdriver is carefully removed from its seat. When installing a new heating element is very important not to allow distortions and not to use brute force. Immediately after installation, without assembling the machine completely, it is necessary to check its operation by heating the water to 60 °.If such a wash passes without water leaking, you can assemble the car to the end and install it in its place.

Important. When disassembling, try to remember the points of connection of the wires so that they are not mixed up in places during assembly.
A complete disassembly of the Candy washing machine will be needed in case motor brush replacements. The repair itself is not difficult, but without its implementation the device will not work. The brush unit of the electric motor is quite stable in operation. Without replacing it, the machine usually works for 5 years. There are cases when this period is more than doubled. It all depends on the intensity of the load on the car. Replacing the brush unit is very simple. The only problem is getting to the electric motor. When this is done, there will be no barriers to repair.
Repair of all washing machines, including Kandy, is not very complex. Especially when there is knowledge in electrical engineering and plumbing. And, of course, experience in repair work.
/rating_off.png)