How to calibrate a projector
The projector is calibrated immediately after it has been purchased and installed. This is due to the fact that the standard image settings are usually far from ideal. Calibrated device allows you to view videos, photos, pictures in better than the original, quality. The purpose of the whole process is to achieve the visual parameters, the most close to reality. Adjustment will require special instruments and suitable software. To avoid unnecessary costs, the work can be done using the computer yourself.
Content
What parameters need to be configured
Projectors – these are special devices designed to project the image transmitted to them on the screen. Between themselves, they differ in the principle of action and in the quality of the output image. Manufacturers produce models that have different standard and custom settings for the displayed image. To achieve the maximum quality visual effects, before starting operation, you will need to calibrate the device.
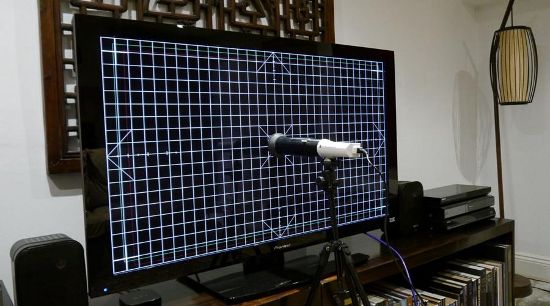
High-precision tuning can be compared with laboratory work, requiring the use of a whole set of research tools, such as:
- spectrophotometer;
- colorimeter;
- reference images;
- free (paid) software set.
Adjustment of parameters according to the full program is recommended in the following sequence:
- Sharpness (characteristic definition of the outline of the displayed object);
- purity (is an indicator of the absence of interference and other defects on frames);
- color accuracy;
- contrast level;
- resolution value.
Color is governed by the manipulation of the following sequence of indicators:
- the level of white and black;
- gray range;
- color (shades);
- Color palette.
To perform a full-scale setup of the projector with your own hands, you need to stock up on specialized knowledge and purchase expensive equipment. It is better to use paid programs with wide capabilities. But for a one-time setup at home, it is enough to use computer with built-in tools.
Principles of device setup
Adjustment works are called upon to provide approximation of color characteristics to reference indicators. The latter are taken from special tables, or the graphs contained in the software database or used adjustment equipment. According to the principle of fitting the parameters, 2 approaches to the calibration process are distinguished. They are discussed in the following table.
| Way | Essence | Merits | disadvantages |
| hardware | option is carried out by changing the parameters of the device itself | allows you to calibrate different devices: a projector, a TV | the result is determined by the technical capabilities of the device |
| causes less defects in the picture than the software method | difficult method: when changing one indicator - other parameters change | ||
| program | implies for a particular model the creation of an optimal profile (color) associated with a specific monitor | in most cases, the process runs automatically. | When setting up, you must have a computer or another device with an operating system compatible with the existing model that allows you to work with color |
Practically, the adjustment by specialists is carried out using both principles and additional equipment.
DIY do-it-yourself calibration
At home It is easiest to set up the projector for the best image quality using two methods:
- setting the parameter values manually on the projector and comparing the result obtained with the selected standard;
- connecting to a computer and using the standard calibration program in the settings screen.
If you often see photos (slides, presentations) in the family circle, then you can use the tools built into the Power Point program on your computer to improve the picture.
Simple parameter fitting method
This method allows you to adjust the saturation, brightness, sharpness, contrast, color gamut manually.Uses a test image from a DVD player or computer.
The work should begin with the creation of conditions that are most appropriate in terms of illumination to ordinary movie views (photo). It is better to turn off sources of artificial lighting and reduce the natural, closing the blinds (curtains). It is required on the projector to select a custom mode.
Besides the lighting, the result is also affected by:
- distance from the screen;
- number of viewers;
- individual preferences;
- screen quality.
The process of determining preferred parameters will be carried out as follows:
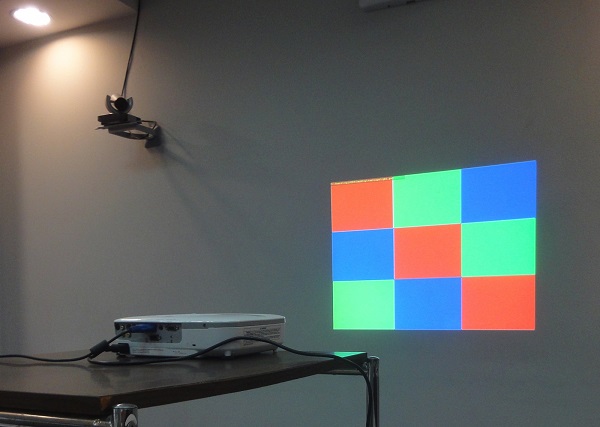
- is chosen test picture: The best option is a black and white photo containing texture fragments and small details;
- set the lowest values of adjustable parameters;
- gradually, changing them in a big way, compare the standard with the resulting image;
- each characteristic is adjusted to achieve the level that creates the most favorable visual impression;
- on completion - save the result.
The following criteria can serve as a criterion for the correctness of the selected settings:
- when playing the rest of the reference fragments, a high-quality image is obtained;
- eyes while watching do not get tired;
- broadcast footage is not blind.
The result obtained is the personal visual preference of the calibrating individual. Work is done on the "eye".
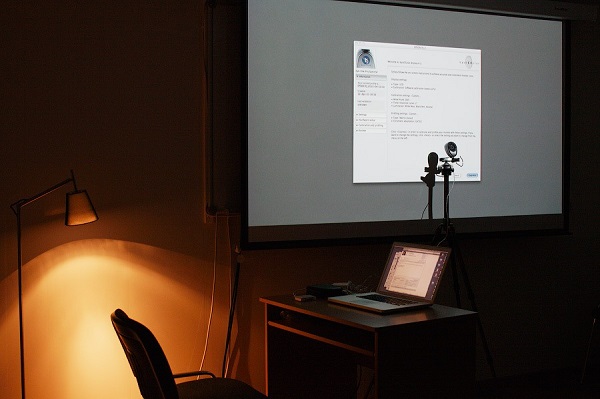
Calibrating the projector using a computer
The projector can either replace the computer monitor or be used with it as a second screen. By connecting the device to a personal computer, you can calibrate it using a mouse and a regular keyboard.
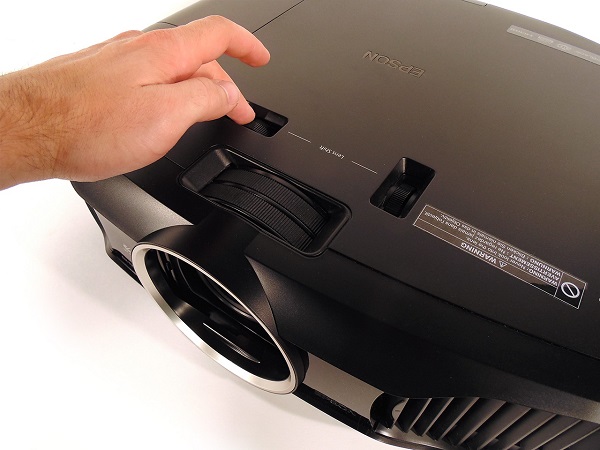
Quite often, to connect 2 devices, VGA-DVI cable and various adapters are required (their type depends on the connectors on the model used).
After the projector is connected to the computer through the corresponding ports, the latter should issue a message with the new equipment setup wizard. Next will be required install driversbundled with the device or downloaded from the Internet.
The interaction of the computer with the projector and monitor is formed as follows:
- go through "Start" in the control panel menu;
- there, in the “Design” subsection, find the item “Screen”;
- then go to its parameters;
- when the computer has identified an additional device, then 2 “desktops” and a list indicating the presence of several screens are displayed;
- You can select the main display, and then switch, or the option "Duplicate" or screen expansion;
- The menu item "Orientation" allows you to immediately indicate how the projector will display incoming information.
When duplicating, the image produced by the output devices connected to the PC will be the same. And with the expansion - it complements each other.
If, after connecting the device, an error has appeared on it, indicating that it is impossible to recognize the signal, then change permission to PC. The appropriate value for the projector being used is taken from its instruction manual.
Calibration is performed as follows:
- open the menu item "Screen" from the control panel;
- then select the section "Calibration";
- The menu that appears is transferred to the screen of the device being configured;
- perform step-by-step instructions;
- in the end, choose from the presented gamma options suitable, click "Next";
- similar actions are performed when adjusting the brightness and contrast.
Using a PC allows you to perform all the adjustment quickly and automatically. The result of all manipulations will be the achievement of the most acceptable display of video material.
Improving the quality of pictures through Power Point
Power Point's built-in tools allow calibrate presentations from photos and pictures. The procedure is as follows:
- in the “Slideshow” tab find the play item on the projector;
- using the menu section "Resolution" change the quality of frames.
The result achieved will be a reflection of personal tastes. To take into account the interests of all family members, it is recommended that calibration be carried out jointly.
Calibration is preferably done every six months. This will make it possible to correct software failures on time, to maintain the quality of the output video at a high level.
Projector calibration is the only means that can bring the visible image to reality, and the film to what the director wanted to show. A high degree of detail, the play of colors will bring an indescribable pleasure while watching. The use of equipment (if you need to buy it in addition) is not quite advisable to configure only your home device. In the process, you can also do without the involvement of specialists.Doing your own work will help to perform a regular computer and the use of free software.
/rating_off.png)


