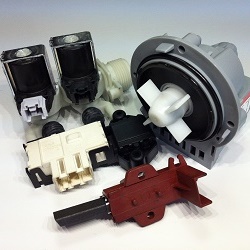
Self disassembly of the motor vacuum cleaner
Before you disassemble your own motor vacuum cleaner, you must carefully evaluate their capabilities. To a person who is not very well versed in technology, this procedure may not be up to the task. Disassembling will take time, certain tools and skillful hands. Independent intervention in the equipment often leads to irreversible consequences and in the final one has to buy a new motor, or even the entire vacuum cleaner. Replacing or repairing an engine in a workshop is relatively expensive, but it guarantees the end result. And if you disassemble and restore the vacuum cleaner engine yourself, you can save money without disturbing your home budget.

Content
Reasons for disassembling the motor vacuum cleaner
Motor - main node vacuum cleaner. Its failure leads to a complete inoperability of the device.Among the faults that require disassembly of the electric motor, the most frequent:
- Quick wipe brushes, sparking.
- Excessive noise and vibration.
- Excessive heat.
- Uneven work, falling speed.
- Full stop of the unit.
The reasons for what is happening are standard and are characteristic not only of LG vacuum cleaners, but also of any other models.
No sign of life engine signals a malfunction in the power scheme. If the entire electrical circuit is in normal condition, the brushes correspond to the required sizes and shapes, and the rotor can be freely rotated by hand — one of the motor windings may have burned.
Abnormal operation, vibration, increased noise will indicate faulty bearings holding the armature of the electric motor. Sparking is usually caused by damage to the current collectors or worn brushes.
Sequence and disassembly methods
To find out and fix the problem, it is necessary to dismantle the motor of the vacuum cleaner. Before you disassemble the model LG, you need to carefully read with location fastener elements. As a rule, this household appliances understands quite simplywithout effort that could cause damage to the case. Reaching the motor, the conductor wires are disconnected and dismantled.
Note: Despite the large number of brands and a variety of vacuum cleaners, they are all equipped with similar electric motors. Differences are expressed in power, size and mount. Repair is carried out on one principle.

First of all, brushes and brush holders are removed. Their fastening is carried out with screws or spring clips. The operation is performed with a thin screwdriver. Then the cover is removed, covering the impeller. In some models of lg, it is seamed and its release is carried out by bending the curved sides, in others it is easily released by gently tapping the hammer.
After it is necessary to unscrew the nut that secures the impeller. It - the most difficult moment in the whole procedure. The anchor nut is hard to reach. The situation is aggravated by the fact that the rotor is difficult to fix, access to this part of the engine is much more difficult.
There are several ways to solve the problem.
Note: the nut (usually 12), the impeller mounting, has a reverse thread and spins clockwise.
Before the procedure, it is necessary to arm with a cap wrench for 12, which, as a last resort, is replaced with an open-end wrench or pliers.

Wedging
In order to make the anchor still, you can use the holes located in the end of the motor. They are hidden under a rubber damper that is easily removed. A thin screwdriver is gently inserted into the hole, and inserted into the gap between the rotor and the stator until it is wedged. This method is simple, but fraught with winding damageif you have to make significant efforts to unscrew the nut.
Bars
Here will need a vice. Bars are made of wood. Approximate dimensions - 1x1x4 cm. For fidelity, a semicircular recess is made from one end of each bar using a round file. This will allow to press them more tightly to the anchor and will provide a reliable grip. The rods are inserted into the holes for the brush holders and rest against the copper current collector of the rotor. The whole structure is clamped with a vice and provides sure fixation of the shaft.
Caution: When tightening the vice it is necessary to be extremely careful not to damage the current collector. Efforts should be minimal..
After carrying out this procedure, the nut without problems is unwound using a wrench or pliers.

Wire
The most effective and safe method. It will take 20 centimeters of soft, insulated wire with a cross section of up to 2.5 mm. With it, the back of the anchor is covered. A loop is made. Slowly turning the rotor clockwise, it is necessary to achieve a uniform laying of the wire on the current collector, as if on a drum or a coil. After a few turns, the wire will fill the space between the shaft and the fixed part of the motor. Throwing the key on the nut, unscrewing is performed, which is accompanied by a more dense wedging of the anchor. After removing the nut, the wire is removed.
Similarly, instead of wire, you can use strips of matter. They also wound on the rotor gradually until complete fixation occurs.

Propyl
The method is more labor intensive and requires certain skills. At the end of the shaft, where the nut is located, a slot is made under a screwdriver. A neat cut can be obtained with the help of an engraver or even an ordinary drill, holding a diamond disc in its jaws.
Attention: At the end of the work it is necessary to thoroughly purge the motor from metal filings,which could damage rotating parts or cause a short circuit.
After that, the shaft is fixed with a screwdriver inserted into the slot, and the fixing nut can be easily unscrewed with an open-end wrench.

Next steps
After unscrewing the nut, the washer is released, and the impeller is easily removed. Following it, the air separator is removed and access to the attachment of the upper armature bearing is opened. The retaining plate is fixed with four screws. Having unscrewed them, it is enough to knock lightly on the shaft from the back side (for this you will need a prefix made of soft metal and a hammer) and take out the rotor.

Defective bearings are determined visually and by scrolling. Used to replace the puller. Usually the whole procedure is not a big problem. Trouble may occur with the complete destruction of the bearing when it loses the balls. If the inner race has become attached to the shaft, it can be loosened by gently swiping one side. Actions must be neatso that the stone sharpened does not damage the rotor shaft.
For a person who knows how to properly disassemble the motor vacuum cleaner lg, the assembly is not difficult.Making this procedure it is necessary not to forget about thorough cleaning of the whole unit.
Having learned household vacuum cleaner, you will be able to do without the help of masters.
/rating_on.png)