Making a coffee grinder with your own hands
Homemade coffee grinder – task for those who are not looking for easy ways and have basic engineering skills. In addition to fantasy, to build the device with your own hands you will need the ability to work with a soldering iron, as well as knowledge of the basic laws of working with electricity. If this prospect does not deter you, then we suggest that you consider step-by-step instructions on how to assemble a coffee grinder.
We assemble a mechanical coffee grinder
To create a coffee grinder you need the following set of tools:
- electric motor (new or previously used);
- tin sheet (medium thickness);
- drilling machine;
- grinding machine (for corners);
- "Skin";
- chisel;
- strong vice;
- file;
- fastening and fixing elements;
- board;
- wooden bars.
Electric coffee grinder
Assembly steps:
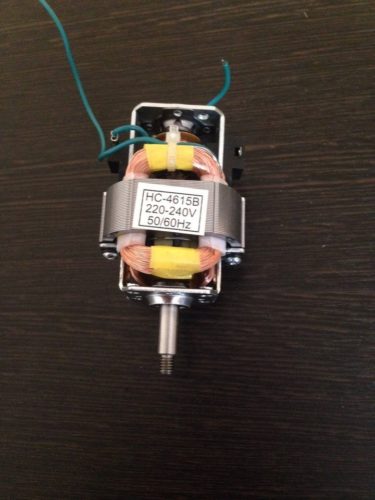
- We take the electric motor (the smaller it will be, the better) with a power of 300-700 watts.We disassemble it, and separate the stator and the rotor from each other.
- Inside the rotor we drill a hole with a diameter of 8-10 mm with a depth of 7 mm. The distance should not exceed 9-16 mm. Separate holes must be positioned longitudinally, along the rotor axis (inclined lines running from top to bottom).
- Holes are connected using grooves (4-5 mm), the depth of which is not more than 5 mm. The grooves are best done using a grinder for corners, before this is carefully fixed in a vice. The grooves at the bottom of the rotor (where the ground coffee will come from) must be handled with extreme care.
- We remove the chamfer from the top of the rotor (this is done quite simply).
- The rotor is inserted into the stator of the engine. We drill small holes in its covers, coffee beans will be poured into them.
- A loading container is made of tin sheet. Its value depends on the size of the engine. It will be fastened on top.
- A handle is installed on the motor shaft, which will give the rotor the effect of rotation. The appearance of the handle can be anything, you can experiment. Fixation takes place with a pin and bolt.
- The device is fixed on the board.
- Next, the finished device is tested to calibrate the grinding mode. For greater confidence, you can make a few turns clockwise, and the same amount - counterclockwise. For the rest - the mechanical coffee grinder is ready for operation.
Assembling a manual coffee grinder
Manual coffee grinder can serve as a decoration of the kitchen interior, if you assemble and decorate it properly. To create it we need the following tools:
- high density cardboard;
- a sheet of plywood or ordinary inexpensive chipboard;
- heated silicone glue;
- knife;
- furniture handles;
- medium spatula;
- wine corks;
- a glass of yogurt;
- stainless steel cap;
- coffee beans;
- paint (preferably acrylic).
Phased assembly:
- As a stand, we will use a piece of chipboard of square shape, 14 by 14 cm in size (conventionally, you can use any size, depending on preferences).
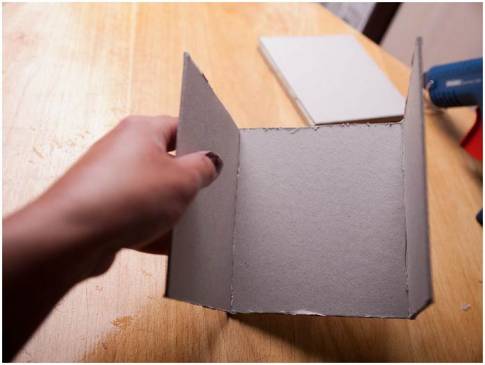
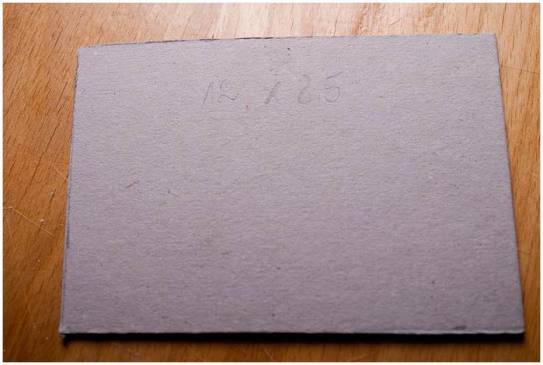
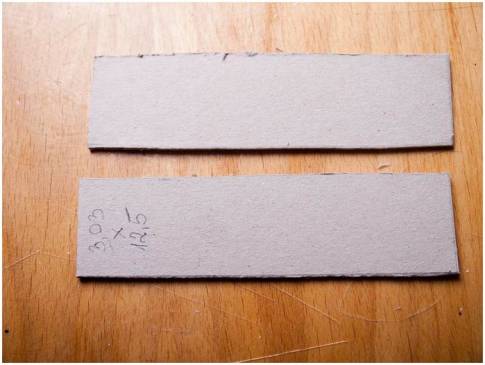
- Carefully cut out 4 rectangles 12.5-13 cm from the cardboard.
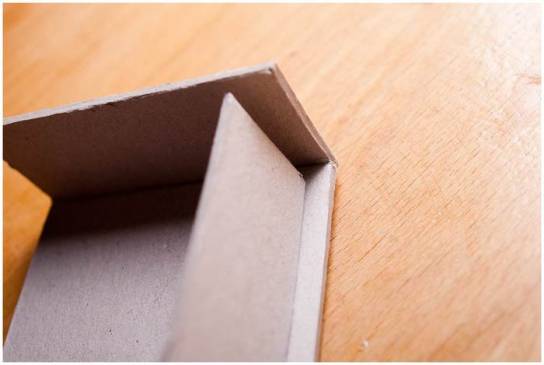
- Next, glue three of these sides with glue.
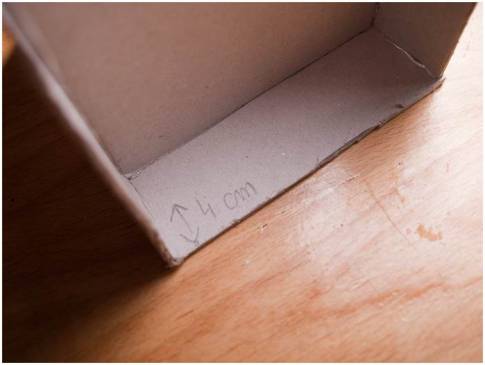
- Carefully measure the size for the shelf.The cardboard shelf is glued at a height of about 3-4 cm from the bottom of the structure.
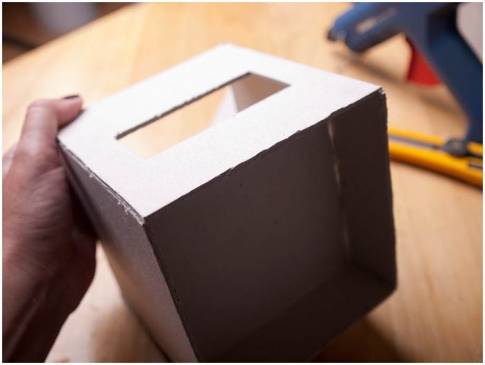
- The last rectangle with a cutout for the drawer is glued on (the cutout is on the same level as the cardboard shelf).
- Then we cut out the details for the box. The size is chosen depending on the dimensions described above (for example, 2.5 by 12 cm, and 11.5 by 2 cm). After that, you need to glue the resulting structure.
- The front side of the box is (approximately) 3 by 7.5 cm, and 9 by 4 cm.
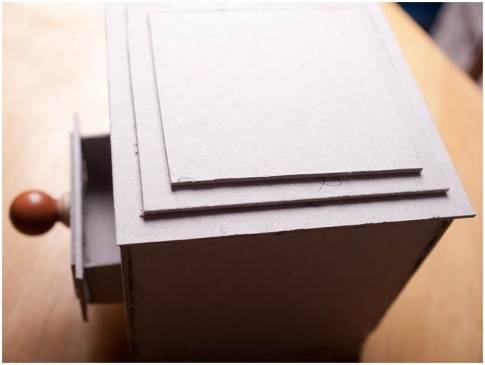
- Cut out the parts for the cover and fix the handle on them.
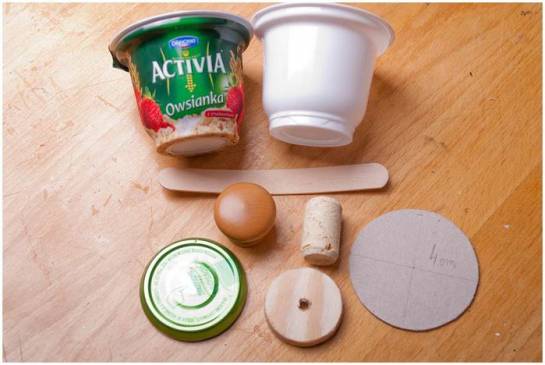
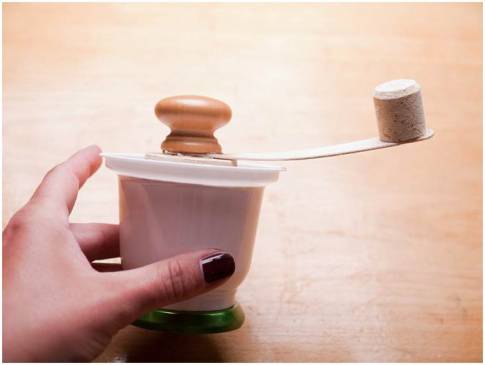
- In order to make a coffee grinder with your own hands, you will need: a container from under the yogurt, a wooden stick from the ice cream, a furniture handle, a cork from a wine bottle, a plate and a cardboard circle.
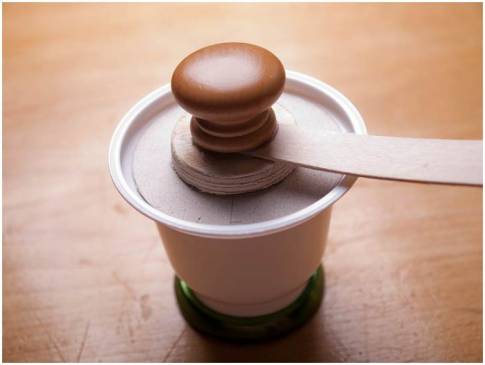
- The cover is glued to the box, and on top - a cardboard and a plate. Further the furniture handle and a stick, and in the last turn a plate are fixed.
- The box is put on heated silicone glue.
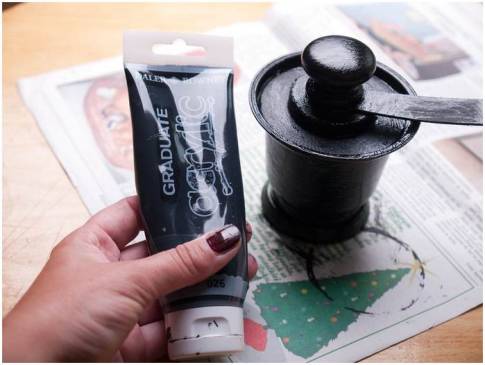
- The device is painted with black acrylic paint. We are waiting for the top layer to dry. After drying, cover with a white layer. After, at will, in gold and copper color, making it step by step, let each layer dry.
- At will it is possible to glue decorative elements, in the form of coffee beans, etc.

- We make decoupage with a napkin. Manual coffee grinder assembled and ready for use.

Conclusion
We made out how to make a coffee grinder at home. With an adequate level of technical and everyday skills, this process is not very difficult if you show patience and pay attention to the smallest nuances. The assembly of both mechanical and manual coffee grinders, although they differ in the content of the work, in fact, they are going to be equally simple, the main thing is to follow the instructions clearly and not be afraid to experiment.
/rating_off.png)