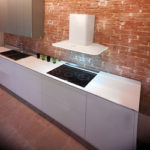
Rules for installing the hood in the kitchen
During cooking from the stove to the ceiling rises ashes and various fumes. After some time, it becomes difficult to breathe indoors, which means that polluted air is not drawn out well through the vent. Therefore, the installation of a kitchen hood is required for forced air circulation. But first you need to decide what mode of operation of the unit is required in your case, and then - how to install the hood in the kitchen correctly.
Content
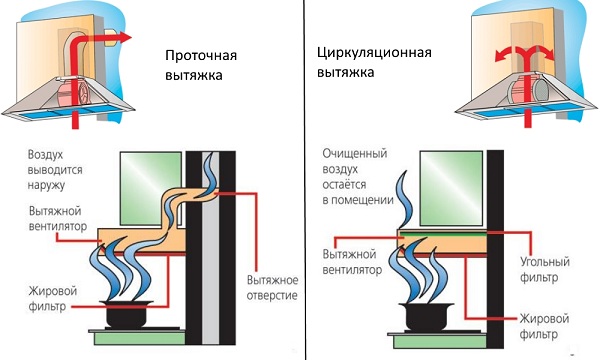
Modes of operation hoods
Forced ventilation devices for the kitchen differ in the mode of operation. Aggregates are:
- Recirculating polluted air is pumped through a block of filters consisting of preliminary (for coarse cleaning) and coal (for cleaning odors from air).For such a unit is not required to connect to the ventilation duct, so in this case, the installation will be the easiest. But, in terms of the quality of air purification in a room, this type of apparatus loses by flow.
- Flow through effectively evacuate the polluted air from the room to the ventilation shaft or duct, which is output to the outside (if you install the hood in a private house).
Required machine power
Machine power - an important parameter. If it is calculated correctly, there will be no problems with the indoor climate. The power is calculated by the formula: Q = S * H * 12, where Q is the device performance (power), measured in m3/ h, S is the area of the room, H is the height of the room, 12 is the coefficient (by standards, the air in the kitchen should change 12 times over the course of an hour).
Calculation example:
- floor area is 12 m2;
- room height - 2.7 m.
So: Q = 12 * 2.7 * 12 = 388.8 m3/ h Based on the calculation, the performance of the unit must be at least 388.8 m3/ h But it is recommended to buy the installation with power reserve, approximately 30% more.
Such a reserve will allow the device to work effectively at an average power, and in case of severe air pollution, it can switch on at full capacity.
Installation of hoods by type
Technique of installation of the device, directly depends on the type of the selected unit. There are such types:
- suspended (they are also called standard, visor or flat) - they are fixed above the hob under the cabinet;
- we builds - are mounted inside the wall cabinet (the cabinet is made specifically, based on the size of the device), thus becoming invisible in the interior;
- wall mounted (fireplace or dome) - to install such a kitchen hood can be on the wall, directly above the hob;
- sloping (a variety of wall-mounted devices - have an inclined panel);
- corner - this kind of devices are mounted in the corner of the room;
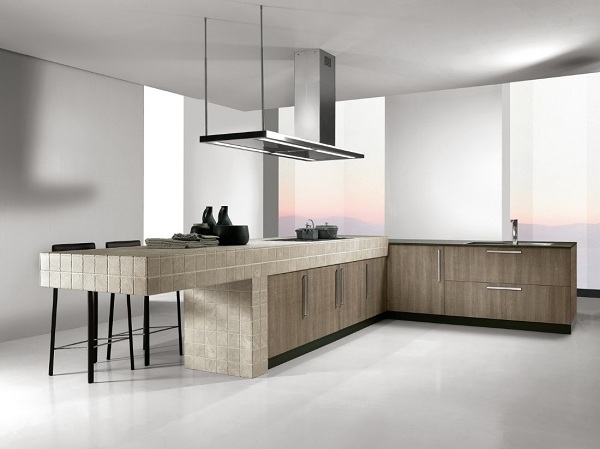
- island - can be fixed to the ceiling in any place where a plate (island) is installed.
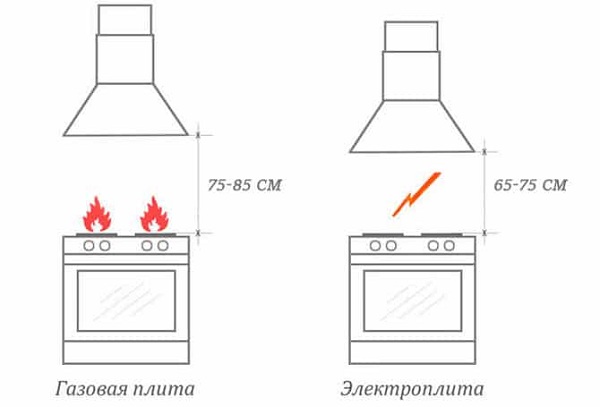
It does not matter what type of unit you acquire, height of installation hood must meet the standards: 65-75 cm - for electric ovens and 75-85 cm - for gas.
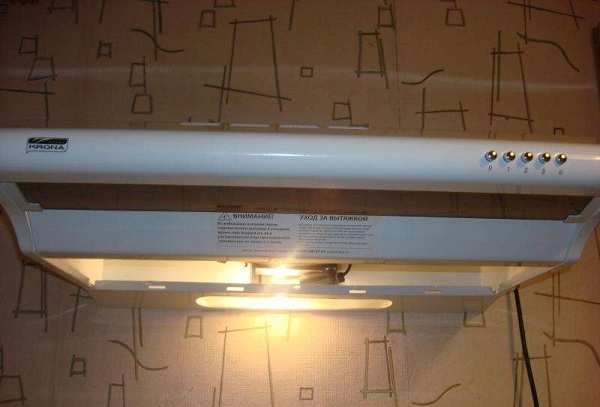
Suspended
To establish this type of device, you need to decide whether you want to hide a plastic or corrugated channel (in the case of a flow-type apparatus).

If you want to hide it, then, as in the situation with the embedded model, you will need the help of furniture makers.
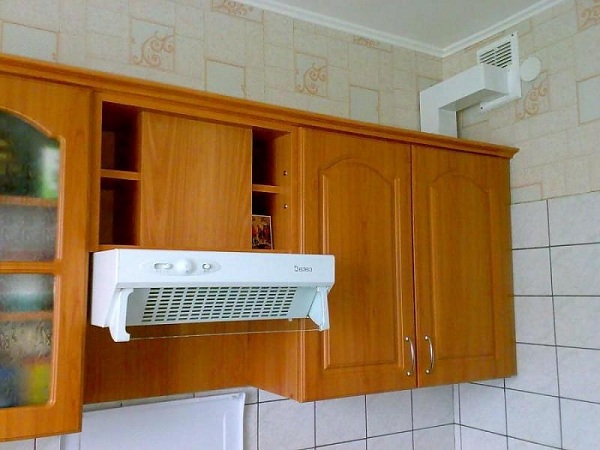
If you choose a recirculation type appliance, then you can fix it in any place where the stove is installed and not focus on the outlet, adhering to the recommendations on how to install the hood over a gas stove or electric hob.
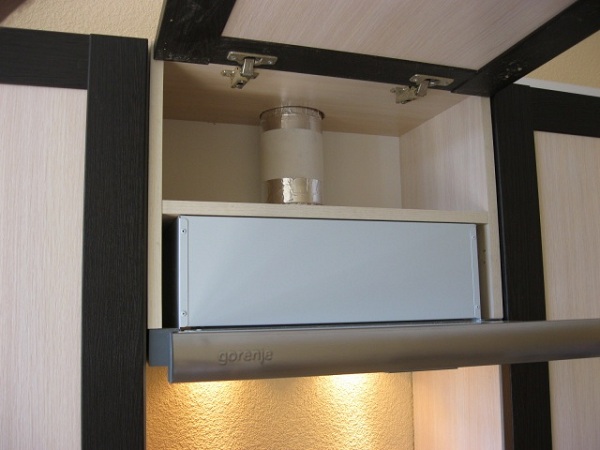
Embedded
Installation of hoods in the kitchen begins with choosing the right place for its location relative to the mine for ventilation. If you want to install built-in hood, then you have to redo it a bit (shorten the cabinet). It is better on this issue to contact the furniture makers so that they gently (on a format-cut machine) cut the side walls and drill a “crown” into two large holes under corrugation. Or you can order from them ready lockermanufactured to the size of the unit, which will be considered hood installation height. They will fix the device inside the cabinet, closing it with a facade. At home, you cannot make a cupboard under the hood in the kitchen with your own hands. When the cabinet is ready, all you need to do is hang it on the wall.
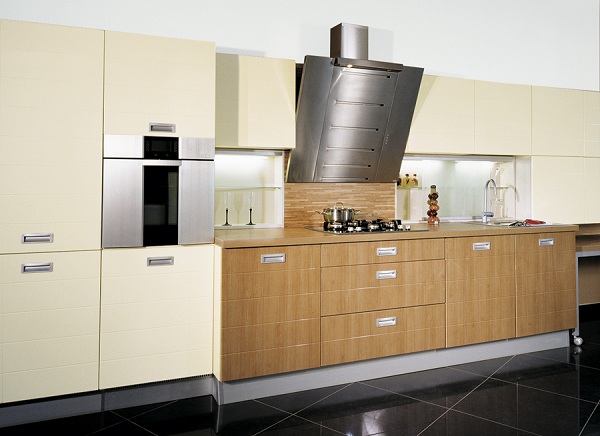
Wall mounted
Dome (fireplace) type of units, the most common version of the devices installed in the kitchen.Since the device is large in size, in contrast to the embedded version, it is not necessary to install the hood in the cabinet.
Installing the hood in the kitchen with his own hands has the following algorithm:
- With a tape measure, mark the desired distance from the stove up (how to install the hood above the gas stove was mentioned above).
- Use a level to draw a horizontal line. This line will serve as a restriction, and the lower part of the body should be at this height. Then find the center of the segment and draw a vertical line from it, applying the same level.
- Next, you need to measure the height of the device - if its upper part (pipe) will rest against the ceiling, it should be shortened, because the body should not fall below the mark.
- Measure from the lower edge of the apparatus the distance to the last pair of fasteners on its case, and transfer this size to the vertical on the wall. You need to start from the bottom of the horizontal, and then draw a line parallel to the bottom.
- On the upper horizontal, count from the center the distance at which the mounts will be located.
- With a perforator or a drill, holes are drilled in the wall under the dowels into which the screws will be screwed.
- Installation is recommended to start in the upper part of the apparatus, after which it should be aligned horizontally and finally fixed.
- Finally, attach corrugated or plastic channel to the outlet on the one hand, and to the ventilation shaft - on the other.
Inclined
For slant hood installation differs only tall its location above the hob. According to the instructions, it can be installed at altitudes:
- 35-45 cm above the electric hob (bottom);
- 55-65 cm above the gas stove (lower part).
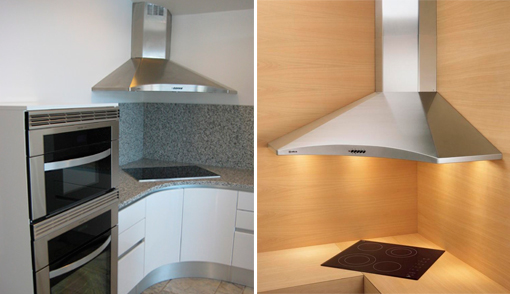
Corner
Corner hood - This is a kind of dome (fireplace). Installation of the hood over the gas stove takes place on the same principle, with the help of: level, perforator (drill), dowels and screws. The only difference is that the device is not placed on a flat wall, but in the corner. When marking the corner of the room serves as a center and at the same time a vertical on which points are marked for drawing the lower horizontal line and the upper one. The bottom line, as already mentioned, will mean at what distance from the hob is installed hood.
Island
All communications to this unit are carried out on top, and are hidden suspended or stretch ceiling. Fastening to the ceiling using studs with collet.
There are also options to mount the hood with the help of cablesattached to the ceiling if this is a recycle type of cleaning installation.
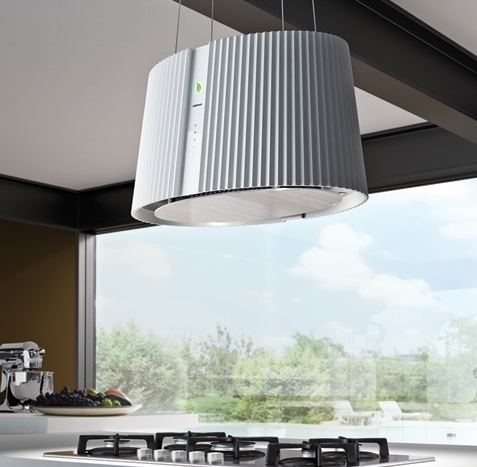
There may be a combination of two types of fastening the hood over the stove, in flow-type devices.
Electrical connection
Due to the ingress of fat and the accumulation of moisture inside the device, there is a chance of receiving an electric shock if the unit is connected incorrectly (how to do it correctly - read here). The hood in the kitchen should be connected to the electrical network using three wires (phase, zero and earth). By standards, the ground wire must be yellow with a green stripe printed on it. Before installing the device, you need to worry about grounding.
If the apartment or house is already laid ground cable and euro sockets are installed, this simplifies the task with the correct connection: you just need to connect the wire to the grounding terminal, which can be indicated by strips of different lengths or letters GND (Ground). If the kitchen hood is not provided for grounding, make it yourself by connecting the wire to the body (metal).
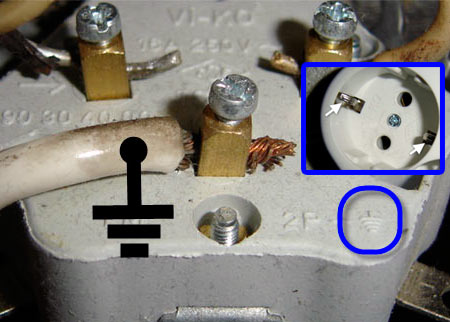
Built-in euro-sockets with a connected ground cable can be found only in apartments of new buildings.
If your sockets are not grounded, then you will have to carry it out yourself. But, if you are not confident in your abilities, it is better to ask an electrician to do this. Never connect a neutral conductor for grounding to pipes or a battery. It should be fixed on a deaf neutral. It can be found in the electrical panel, and it looks like a normal pipe, walled in a wall, or as a plate on the wall. Wires will be connected to it. Read more about conducting independent grounding work in this article.
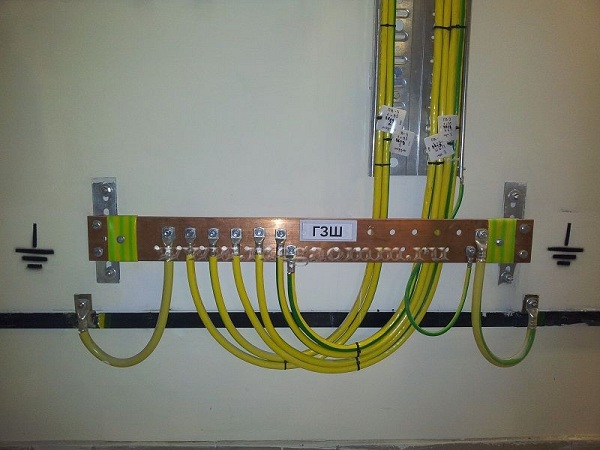
Connecting the neutral wire to a deaf neutral
Installation of the ventilation duct
There are several types of air ducts for household ventilation:
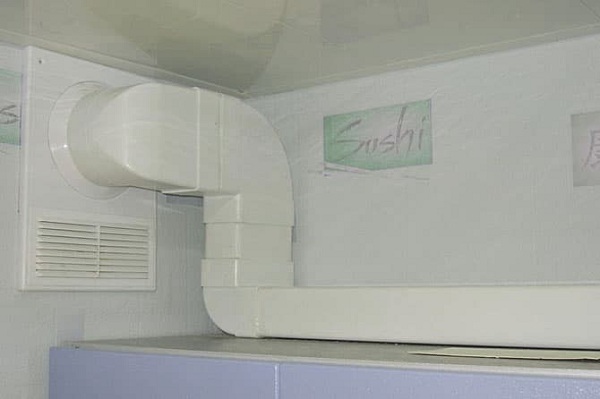
- PVC (plastic) air ducts. Have good strength and light weight. Due to the smooth coating, they do not create noise when streams are moving along them.
- Aluminum corrugated air duct - freely bends, stretches and is easily adjusted to any size. It does not create vibrations and hum, but has an unaesthetic appearance, therefore, it usually hides in a closet, a special box or is hidden by a false ceiling.
Before you install the hood in the kitchen, make sure that you do not close the only outlet in the room with a pipe. In the case of one vent, it is often punched another outlet from the shaft and put a check valve that will close the flow into it when the device is turned on.
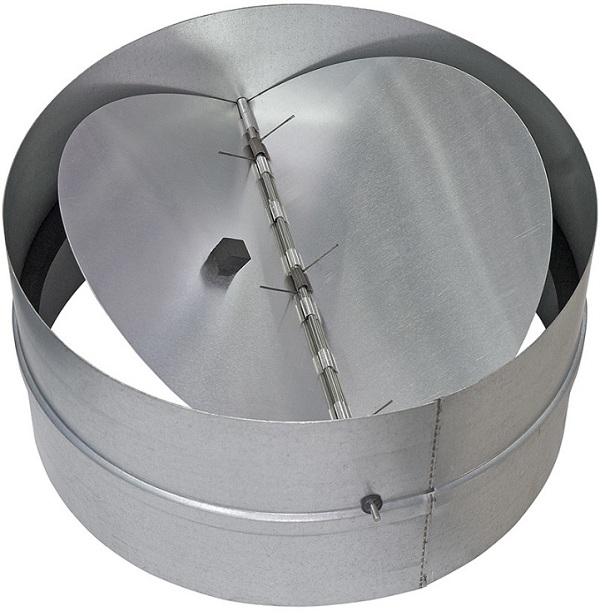
There is also the option of using a special box with a flapper valve.
In the figure, the installed valve is red. When the fans are off, it lies horizontally, and the air can flow freely through the box naturally. When you turn on the fans, the valve rises and blocks the air outlet back into the room, thereby directing it to the mine. The material can be any lightweight material, such as plastic or aluminum. But this option is not suitable if produced installation of built-in hoodas it is mounted in a wall cabinet.
For private houses, the best option would be to pierce an additional hole in the wall for the channel and not affect the existing vertical one. In the additional hole you need to withdraw the air duct from the device. But the output must be installed check valvepreventing the ingress of air outside.
Check valve
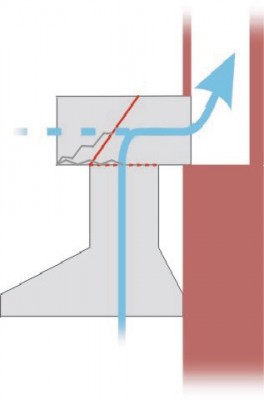
If in an ordinary apartment there is no additional channel, and it is not possible to pierce a hole in the outer wall, then this channel can be expanded and a special adapter, having two holes.
Through the lower grille the air from the room enters the mine due to natural thrust. At the same time, there is a visor in the upper opening, which prevents the flow of air from the unit to exit through the grill back into the room. Although of course there is a reverse leak, it is minimal compared to the outgoing flow.
The figure below clearly shows how the air duct is connected to the adapter, and at the same time natural thrust is preserved.
Thus, the installation of a kitchen hood with his own hands on the shoulder only home craftsmen. Performing a task requires accuracy and care. Well, for those who do not have skills in handling tools, or not free time, the best option would be to invite a specialist to resolve this issue.
/rating_off.png)