How to repair the headphone plug yourself
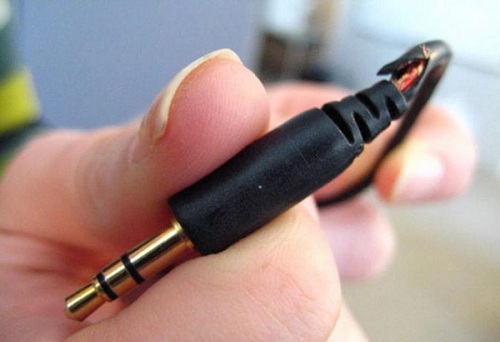
Quite often on the headset occurs wire breakAccording to experts, this is the most common defect that occurs due to frequent bends and various mechanical damage.
Inside the cable there are several very thin and delicate wires that can easily be torn from strong tension or jerk. Can I repair the headphone plug on my own, and what do I need for this?
Content
Preparation for work
To repair the headphones yourself, we need:
- non-conductive adhesive or epoxy resin;
- special shrink tube is an alternative to electrical tape;
- old fountain pen;
- tester (multimeter);
- soldering iron with a thin sting and all related components (tin, rosin);
- side cutters;
- assembly knife;
- lighter.
It is better to use glue for fabrics if you have not found an epoxy resin, which will need only a few drops.
Repair algorithm
You can repair a lot yourself - here the main desire and ability to work with various tools. Consider the whole process in stages.
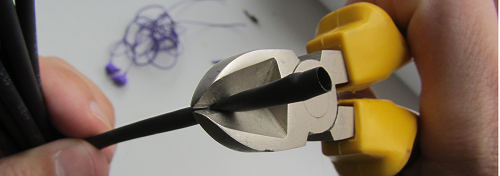
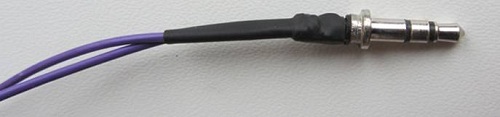
- With a side cutter we bite off the plug, retreating from it by 2-3 cm.
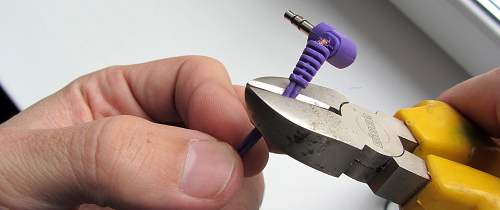
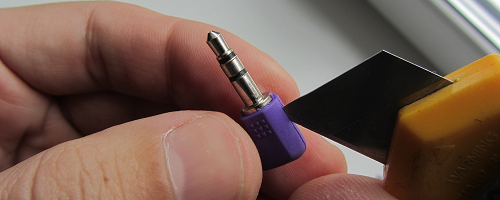
- We take out the plug of headphones and a piece of old wire from the sealed connector - for this we simply cut the shell along the seam with a sharp mounting knife.
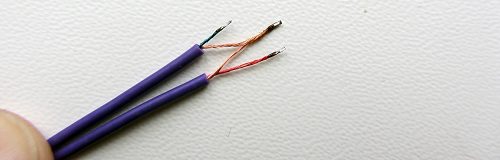
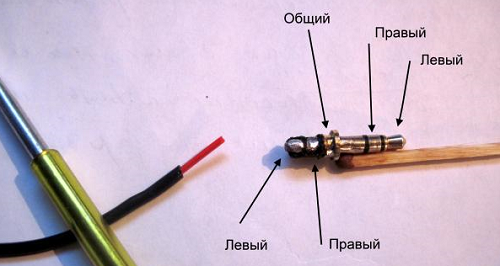
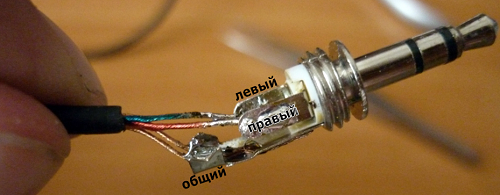
Now we can see where the wiring to the plug is soldered - we take a photo for memory, so that we don’t confuse anything. However, there is standard wire wiringfrom headphones: copper (yellow) color - common, green - left earphone, red - right.

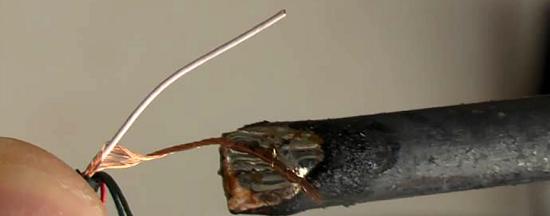
- Cut the wire leading to the headphones, free from the lacquer coating, we clean and pound the ends of the wire, connect the grounding of each channel.
We check the plug for the absence of a short circuit, after removing the remnants of tin. The channel layout is shown in the photo:
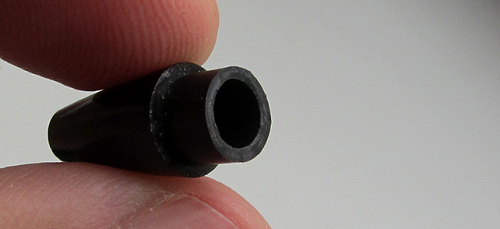
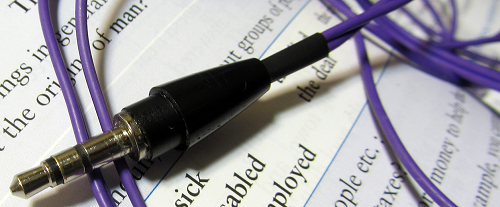
- We take the old handle, disassemble it and use only the tip - from it we will make a new case for the plug we have disassembled.
- Bite off with side cutters of the desired length heat shrink tube, which instead of tape will protect the wires from sharp bending at the very exit of the new plug.
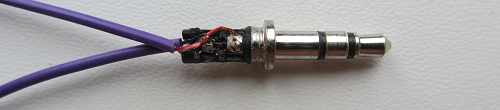
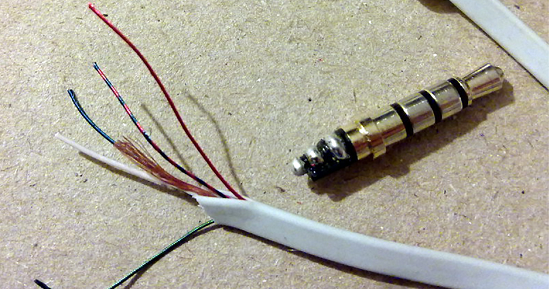
- On the wire we dress the future case, then the tube, proceed to the final installation. How to solder the wires to not confuse anything? For this there is a photo taken earlier.
- Before you pack everything into a tube with heat shrinkage, we make a check - we put on the headphones, alternately touch the contacts of different channels with the probes of the multimeter, while there should be rustling or clicks. You can try to stick the unfinished construction in phone jack and turn on the radio. If you connect to the MP3 player to listen to music, you can check, using the balance, how each channel works.
- In case of a positive result of the test, we put the tube on the place of soldering and “compress” it with the help of an open flame of the lighter so that it firmly covers the open part of the plug, as shown in the photo.
- Dilute a few drops of epoxy, put it on the tube, put on the case, and set aside for a few hours to fully cure the components.
That's the whole process, how to fix the headphones from a mobile phone or laptop headset.
Wiring schemes with more than two wires
Users are often interested in whether it is possible to repair headphones of a more complex design, when there are more wires inside? A different amount of wiring may be suitable for one plug - it depends on headphone class:
- mono - 2 wires, it is difficult to confuse something here;
- stereo and mono - three wiring and different wiring diagrams;
- Stereo headset - 4 pcs .;
- Headsets or headphones with a microphone - 5-6 pcs.
Now about each class, except the first, we will tell more.
Three cores
From each headphone there are necessarily two wires in one sheath or in different - this is plus and minus. Sometimes at the end, when connected to a plug, the designers combine the negative into one harness and it turns out 3 pieces at the output. To make it clear to all users, we give a detailed wiring diagram for the plug, where you can see exactly where you need to solder the wiring according to their color scheme.
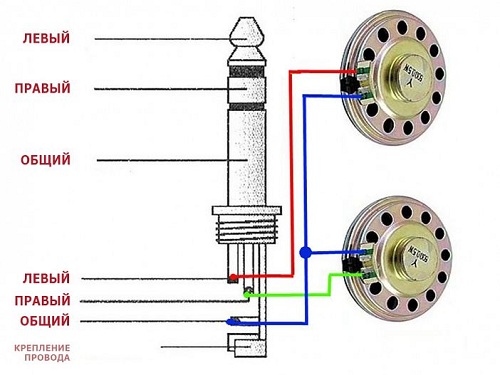
There is no hard standard for varnishing. For example, the wires of the left channel can be blue, white or green.
Four cores
There are two different options here.
- Ordinary headphones without a microphone and control buttons.4 wiring are supplied to the plug: minus from each speaker is copper-colored and plus (blue with red or green with red). For convenience, the minuses are twisted into one bundle and as a result there are three veins that need to be soldered to their specific places.
- Headset with microphone. Here, the plug has 4 types of contacts: one from each speaker, one for the microphone, and there is a place for soldering the common wire or ground. Schematically, this soldering is as follows:
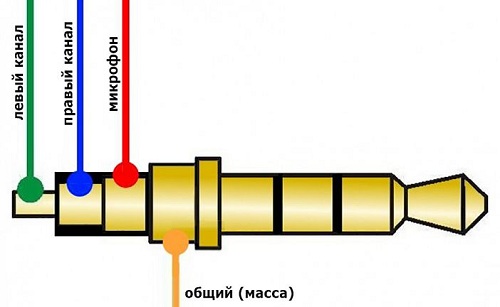
Important! At first glance, the microphone wire looks like one lived, but in fact there are two of them: a very thin vein in a PVC jacket wrapped on top with a copper wire with colorless enamel for protection.
5 lived and more
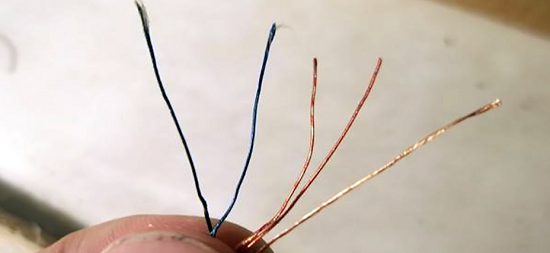
Different types of headsets of the last class can show up from 5 to 10 separate veins, so it will be much more difficult to navigate. The signal core of the microphone is always braided in the same color, and the rest are of various shades. No specialist will tell you exactly which wire to solder. How to replace the wire from the plug on the headphones in this case? Only such a technique works here: we check each vein with a multimeter to determine whether it goes to the left or right dynamics, then we find the common, we merge into one flagellum.
Solder to the plug is necessary according to the schemes that we showed, or find on the Internet a separate scheme that is suitable for your case.
Repair this method with your headset or headphones for a mobile phone and save money from your home budget.
/rating_on.png)
/rating_half.png)
/rating_off.png)


