Zeroing the counter on various Brother printer models
It’s no secret that all Brother printers, especially laser printers, have installed protection in the form of a chip, which in some models is placed on the cartridge. Thus, manufacturers of printing equipment are trying to deal with companies that provide users with cartridge refilling with toner. Indeed, due to the availability of such a service, the sale of original (new) cartridges is significantly reduced. But, if you look at the situation from the user's point of view, it doesn't make sense to pay big money for a new cartridge, which costs almost half the price of a new printer. Therefore, owners of Brother lasers often resort to such a procedure as calculating or zeroing the counter, which can be done independently.
Content
Why do I need to reset the counter
Unchaining is called a procedure change equipment settings. The protection itself operates according to the following principle:
- the manufacturer installs a special counter into the system;
- the chip, during printing, counts the number of sheets used, and, after the exhaustion of the cartridge life, signals this to the user, blocking the device.
Each cartridge has its own resource. There are capacities for toner, calculated on 2500 sheets, and there are - on 1000 sheets. In accordance with the number of sheets, the chip is also programmed. When the print limit is exceeded, the message “Replace consumables”, “No toner” appears, or the indicator just flashes. But, although you can fill up the new toner, the chip will still assume that the cartridge is empty and will not allow the machine to work. To get rid of this problem, a method was set up to reset the counter.
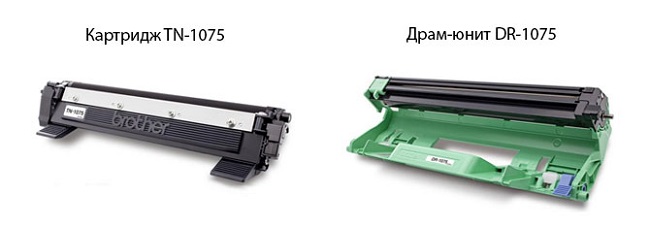
Reset Cartridge TN-1075
The TN-1075 cartridge is fairly common in Brother laser printers. It is installed, for example, in such models of devices as: DCP 1510r, dcp 1512r, MFC-1810R (1815R), HL-1110R (1112R).
The module for printing consists of 2 parts: a cartridge TN-1075 and a drum unit DR-1075.
To reset the counter on the TN-1075 cartridge, there are 2 ways that apply depending on whether you have a starter model that does not have a crescent-shaped gear, or has already been purchased.
Starter cartridge
So, if brother appeared in the printer: "Replace the toner", then proceed as described below.
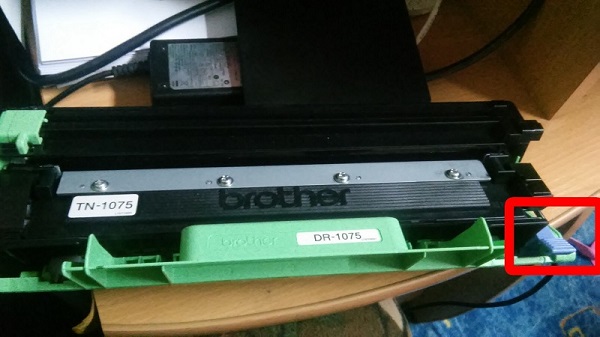
- Empty the tray from the paper and remove the module from the machine.
- Separate the cartridge from the drum unit by pressing the blue key on the right.
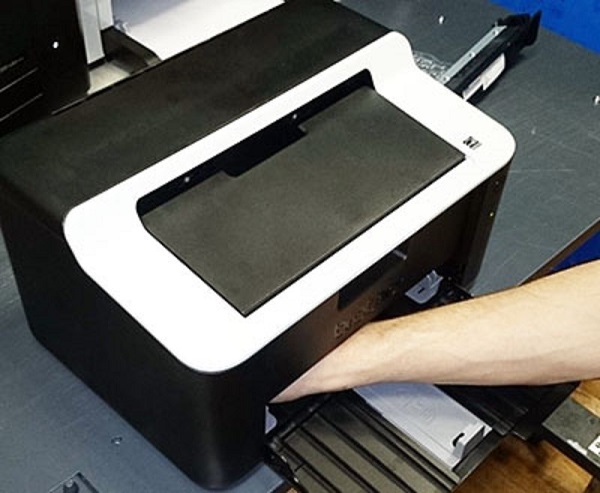
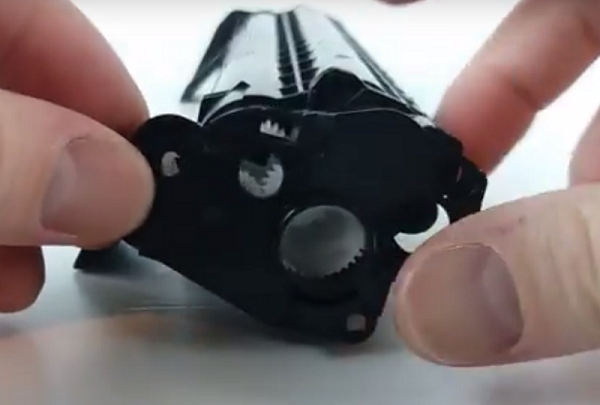
- Insert the drum unit back into the brother printer. In the left part of it you can see a hole from which you can see reset button.
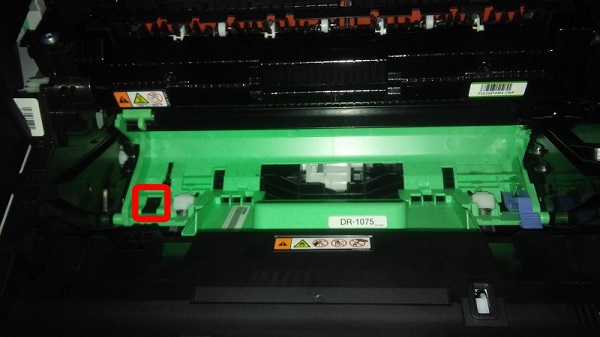
- To click on this checkbox, there is only one way. Reaching it will be possible only through the tray in which the paper is inserted. You must remember where the checkbox is located, since the reset will occur with the lid closed.
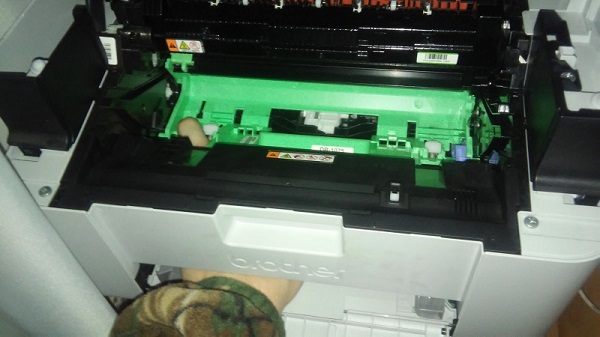
- Knowing where the button is, press it and close the unit cover. Do not be afraid that something will happen to your finger - there are no moving parts in this place. So, after closing the lid, the engine will turn on. As soon as you hear his work, immediately release the button and after 1 second press it again.Wait in this position until the engine stops.
- The fact that the operation was successful, you can determine by flashing green LED. If this does not happen, then repeat all over again.
- Insert the cartridge into the drum unit. This completes the reset of the counter in the brother printer.
Purchase cartridge TN-1075
Besides the fact that the meter can be dropped using a button, there is another simple way to reset the brother printer.
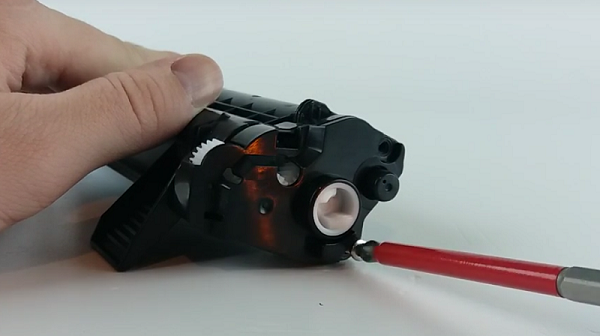
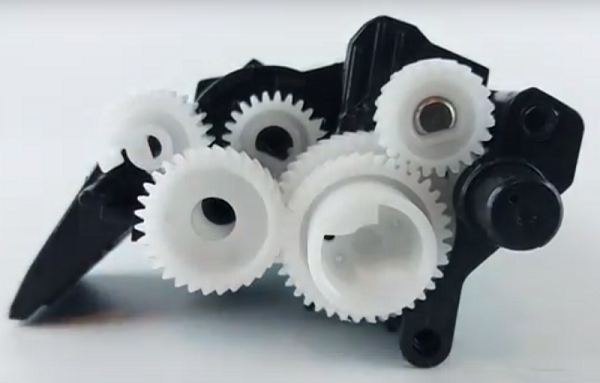
- Remove the cartridge from the drum unit and unscrew the side cover from the side where the gears can be seen.
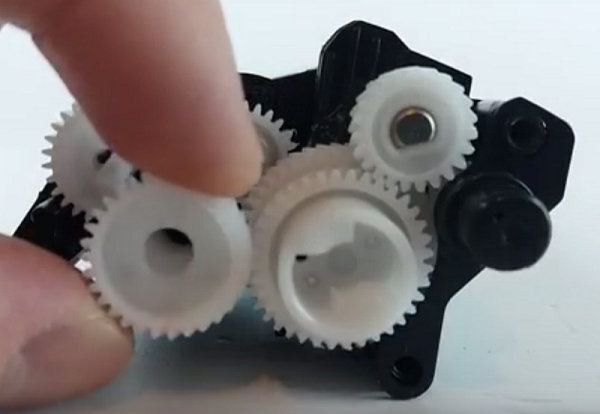
- Carefully remove the cover so that the gears do not spill out. You will need to pull out just one gear, as shown in the following figure.
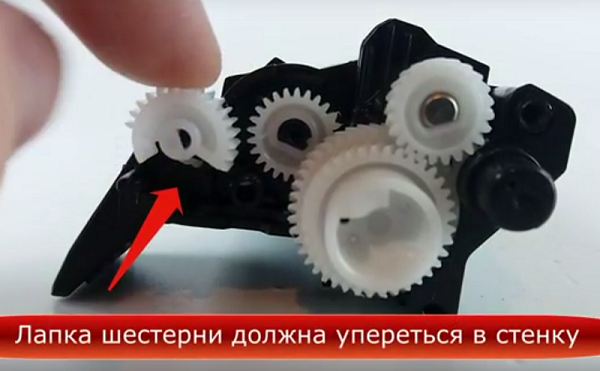
- Next, you will see crescent-shaped gearwhich needs to be turned against the stop, as shown in a photo below.
- Now you can insert in place the gear previously extracted.
- Gently close the lid so that the crescent-shaped gear does not move.
- Screw the cap on and insert the cartridge into the drum unit.
After all these steps, place the module in the printer.
Zeroing Algorithm for HL-2130R, HL-2132R, DCP 7055r and DCP 7057r lazer models
To reset the page counter in the models of lasers HL-2130R (hl 2132R) and DCP 7055r (7057r) there are also 2 ways: software and hardware.
Software method of resetting the printer HL-2130R (2132R)
To do a soft reset in the brother printer, do the following:
- turn on the device (after switching on you will hear the drive noise);
- after the noise disappears, open the cover located on the front of the unit;
- turn off the device;
- press the “Go” key and do not release it until the unit turns on again (the “ready” indicator should not light up);
- lower the “Go” key;
- press the “Go” key twice again;
- click on “Go” 5 times in a row;
- close the cover (front).
Now the “ready” indicator lights up evenly. After these manipulations and rebooting of the device, the Brother laser hl 2130r (2132) can be considered zeroed and ready to work.
Software method of resetting the DCP 7055r MFP
To reset the counter programmatically in the dcp 7055r MFP, go through the following points:
- press the “Menu” key;
- then you should select “General settings”, then click on “OK”;
- in the next step, select “Replace toner” and again “OK”;
- use the arrows on the control panel to select “Continue” and click “OK”;
- To exit this menu, click “Clear”;
- reset counter occurred.
In this way, you can reset the counter only once.For the next reset you will need to apply the hardware method.
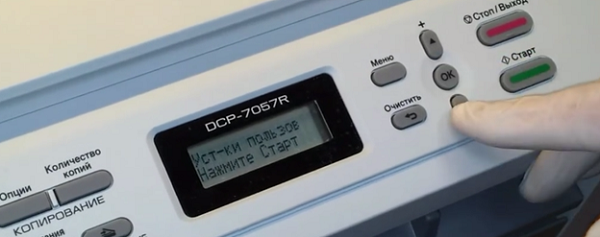
Software method of resetting DCP 7057r
Resetting the MFC DCP 7057r is slightly different from the DCP 7055r:
- turn on the MFP and wait until the mechanics subside;
- then open the lid located on the front of the device;
- press the “Cancel” button (“Back” or “Stop”);
- press the “Start” button;
- press the up arrow button, then several times on the down arrow key until you see 2 zeros (00) on the display;
- Click “OK” and the front cover can be closed.
In the case when these 2 methods did not help, you can reset through the system menu of the MFP.
- First check that your MFP is turned off.
- Press and hold the “Menu” key.
- Turn on the machine while holding the key.
- After you see the blinking inscription on the device screen, release the “Menu” key.
- Wait a while until the word “MAINTENANCE” appears on the small screen.
- Use the arrow keys to find item 81, and then confirm your choice by clicking on “OK”.
- “RESET DRUM COUNT” is displayed on the screen. After pressing the “Start” button, the message will change to “RESET LIFE COUNT”. Click “Start” again.
- Using the arrow keys, you must select point 96 and confirm with “OK”.
- Reboot the unit. To do this, you need to turn it off and off again. On this counter reset is complete.
Hardware method of zeroing
You can reset the MFP and hardware. To do this, proceed as follows.
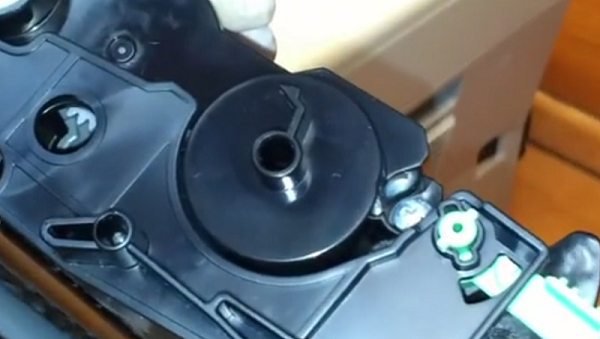
- After the “Replace Toner” message appears on the MFP display, remove the cartridge from the device.
- On the starting cartridge you will see black cap with a slight emphasisthat need to be cut with a knife.
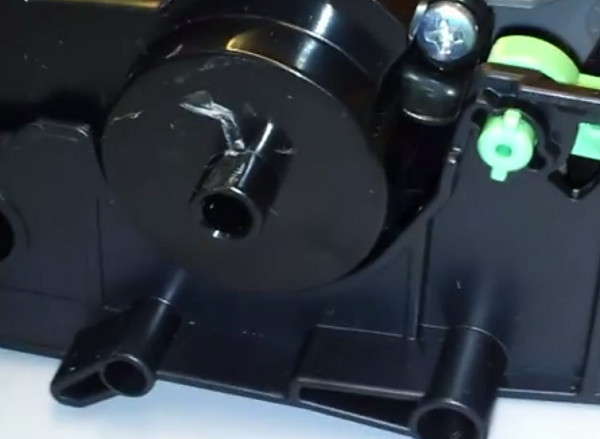
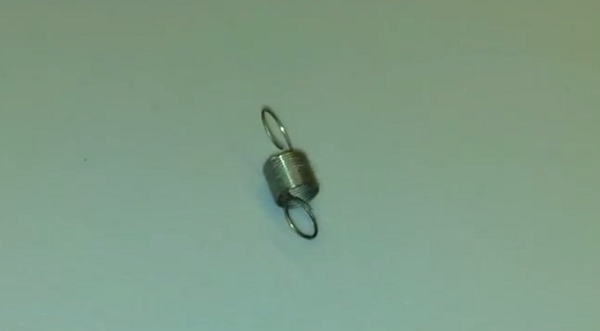
- In the next step, you must remove the spring from the box.
- Spring should not be thrown away. You will install it if you want to change the starter cartridge to the purchase one.
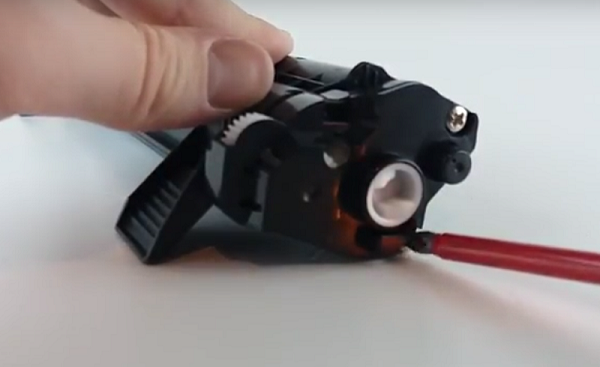
- Next, insert the cartridge into the machine, unhook the lever and hide it (drown) in the case of the MFP.
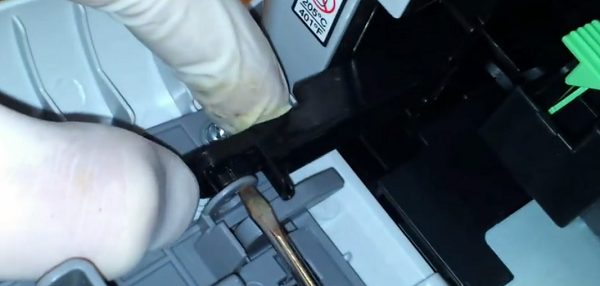
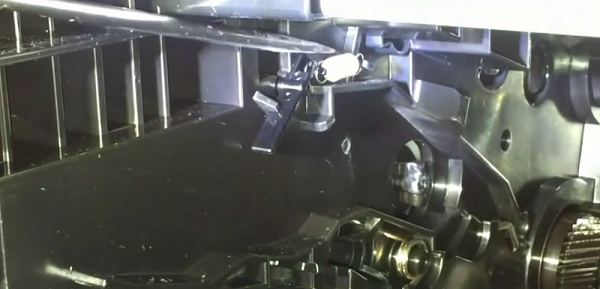
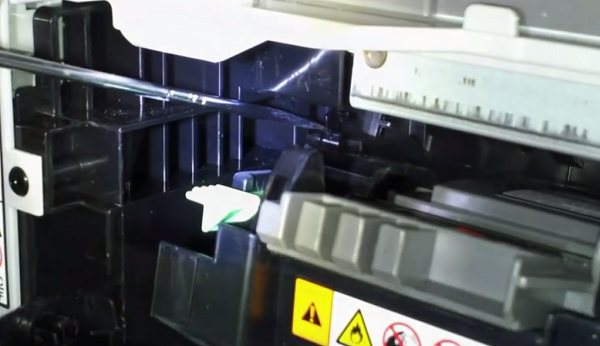
- Using a match or a screwdriver, you need to click on the sensor located on the right, which is responsible for the closed cover.
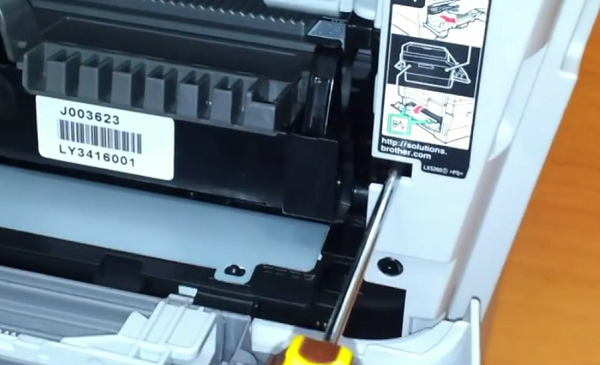
- When you hear the mechanics work, push the flag 2 times with a screwdriver. You must press so that you can make 2 clicks within 4 seconds. In case of failure, you can try again.
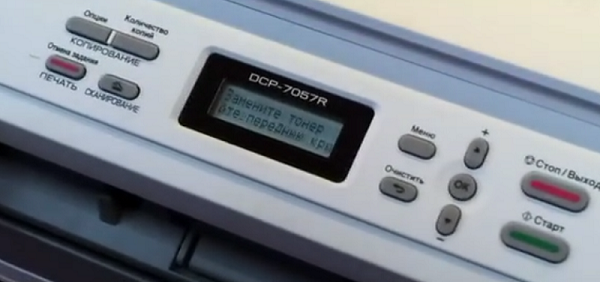
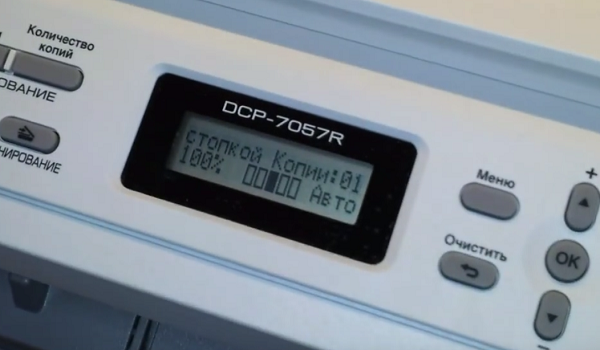
- After the counter has been successfully reset, you will see an inscription on the screen (see photo below).
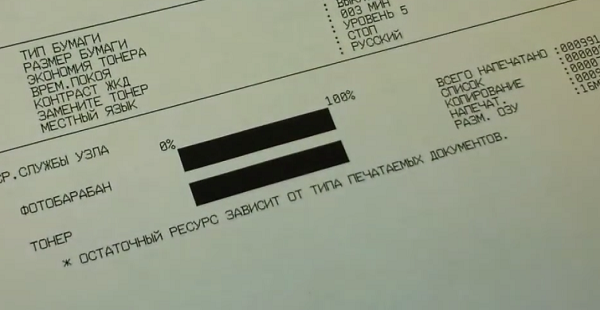
- Now you need to print test pagecontaining information on the status of the toner and photodrum. To do this, press the “Menu” button, select “Device Information” and “User Settings”. Confirm your choice by clicking on the “Start” button.
- If you did everything correctly, a test page will print out.
At this stage, the MFP can be considered completely ready for work.
/rating_off.png)


