DIY printer head cleaning
The print head is cleaned when ink and dust clogs the nozzles from where the ink comes from. As a rule, this happens after a long inactivity of the device - toners are covered with dust and dry up slowly, after which the user gets incorrect prints with various defects. Solving the problem of dry ink - manual washing of the printhead with special liquids. The procedure is not the most difficult, but will require accuracy and attention. With the right approach and compliance with all rules, the result will be the cleaned elements in the printer and high-quality printing.
Content
When to clean the print head
When should the print head be cleaned?
- When the ink nozzles of one or more cartridges become dirty, the correct toner supply is disrupted. Fault is indicated by print defects of the test nozzle when the printer prints with stripes, incorrectly conveys color (one color is missing when the cartridge is full) or smears the picture.
- After a long idle time It is also recommended to make a test nozzle, and if distortions are detected, then make cleaning with regular software, and then clean the print head of the printer with a special tool manually, if necessary.
- When changing ink. Toners may differ in their characteristics and composition, respectively, they are forbidden to mix. To replace one type of dye with another, cartridges and CISS should be washed from residues. When changing ink from different manufacturers, it is also necessary to clean the cartridges and the installed CISS.

Canon service technicians claim flushing is an extreme measure of printer maintenance.. Incorrect printing may have other reasons: air bubbles entering, print head misalignment, excessive pressure (when the CISC tanks are installed above the head level) or contamination from adhering dirt, dust. Another cause of a defect in a print is the failure of piezocrystals when the device is overloaded (Epson technique) or burned-out heating elements (HP technique). With intensive use of technology, the print head is cleaned once a quarter or less.
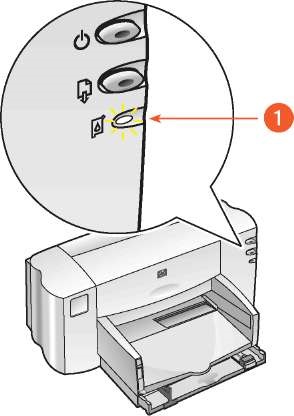
Cleaning does not take place when the printer’s LCD shows system errors indicating the end of the toner or the cartridge icon is flashing.
Software head cleaning
Before proceeding with mechanical cleaning, you should test the system and run a regular cleaning program. The start of the program may be in the PC menu or the printer itself, depending on the model. If you use a computer, you need to go to the control panel, find the active printer and go to the "service" section, where nozzle check and software print head cleaning are available. Then you need to run the software.
Experts recommend no more than 2 - 3 system cleanings.If the operation does not bring positive results, manual mechanical cleaning is necessary.
At the end of the program cleaning you need to reapply test nozzles. It is possible to draw conclusions from the imprint whether a mechanical purification procedure is required or not. As a rule, this operation solves the problem of low pollution of nozzles; if the ink is dried up, the program teams will not help.
Mechanical printer cleaning
Printer maintenance begins with the preparation and testing of all nodes. Initially held visual inspection to assess the work ahead, dust often accumulates in the printer, particles of dried ink, and particles of paper.
You can manually rinse all types of cartridges, except models with a filler. Such items can be cleaned only with the help of specialized devices - a centrifuge or a vacuum apparatus.
Then check the ciss on the subject of a fracture of the paint supply hoses, tightness of the joints of the gateway and the cartridge. If there are air bubbles in the gateway, first of all debug and balance the CISS are performed. Donor containers or cartridges should be filled, if necessary - refill the printer and print a test nozzle check page.

Paint hose inspection
Not so long ago, the network actively discussed such a service device, as ultrasonic bath. The use of the device is not proven for sure (and it does not matter, this is medical equipment or a device for gentle cleaning of small parts). If you consult with experts, the opinions are not straightforward, but most often - negative. The facts of successful use of ultrasonic baths among masters are difficult to detect, but observations indicate a negative impact on the print head of the printer (failure during the day or during first use).
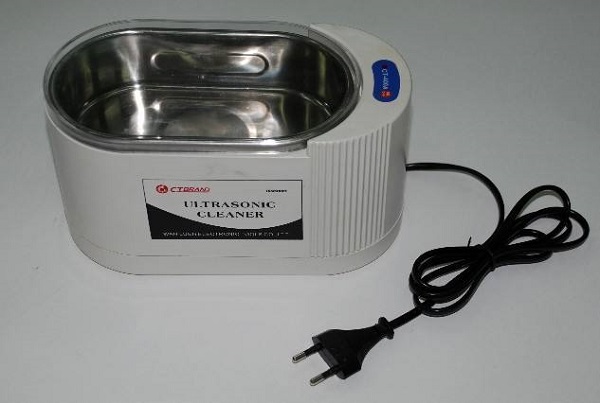
Use of ultrasound baths
Everything you need to know about flushing fluids
Perhaps one of the most useful recommendations is to use the same brand of ink as the ink. No one knows better than the manufacturer the exact composition of the dye, therefore, only the manufacturer knows how to remove it effectively and safely. Special flushing formulations are safe for printers and their components. As a rule, there are several of them: for external cleaning, for removing water-soluble ink, pigment dyes, aggressive liquids for splitting dried toners and strong clogs.
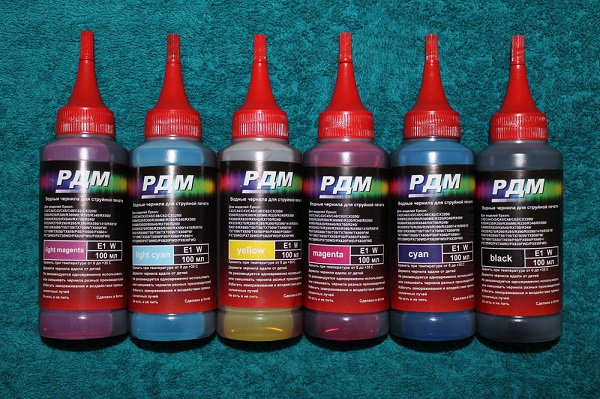
Washing liquid universal РДМ №1 for inkjet printers and MFP
To remove water soluble ink The following fluids are suitable.
- Demineralized water (specialized liquid WWM W01).
- Distilled water.
- A solution from a mixture of distilled water and 5 - 10% ammonia (not to be confused with ammonia) in proportions of 1-10: 1 (exact proportions are calculated empirically). The finished solution based on liquid ammonia must be filtered through a 0.01 micron mesh.
Pigment dyes dissolved by other compounds:
- isopropyl alcohol;
- various specialized fluids.
In addition to branded cleaners, there are companies that carry a variety of liquids for specific purposes. For example, WWM company boasts a good line of wedges.
- Desalted water W01.
- CL-10 Reinforced Cleaner.
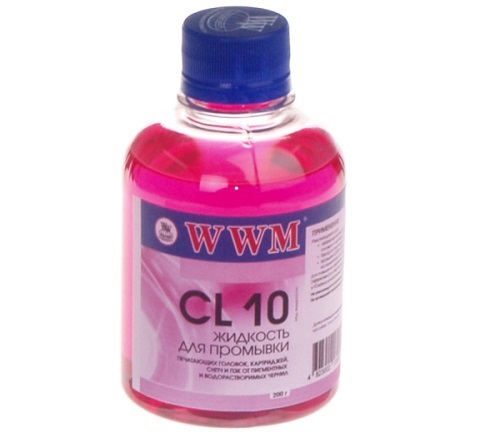
Flushing fluid CL10
- Cleaner for water-soluble inks, the top surfaces of printer parts by Epson CL-04.
- Liquid for removing black or colored pigment dyes CL-06.
- Special solution CL-08 for washing or soaking, suitable for Epson Quick Dry inks.
You can also choose an analogue, for example, not for the first year the specialists of the workshops use the usual liquid for glasses Mr. Muscle. The main thing is to choose the right liquid for the ink: water-soluble dyes are green and pink based on ammonia (liquid ammonia), pigment removes blue and orange, based on isopropyl alcohol.
To enhance the effectiveness of any solution, heat it to a temperature of 30-60 ° C.
If you do not know which ink was used, do not rush to start washing. Incorrectly selected composition is able to quickly and permanently disable the print head. Take some ink and dissolve it in different formulations (or in one, for choice). After a couple of hours, analyze the result. When exposed to distilled water on pigment dyes, a precipitate is released. The transition of the liquid into a jelly-like consistency also indicates that the cleaning liquid is incorrectly chosen, the correct solution dilutes the ink and loosens clots of the dried dye.
Step-by-step washing instructions
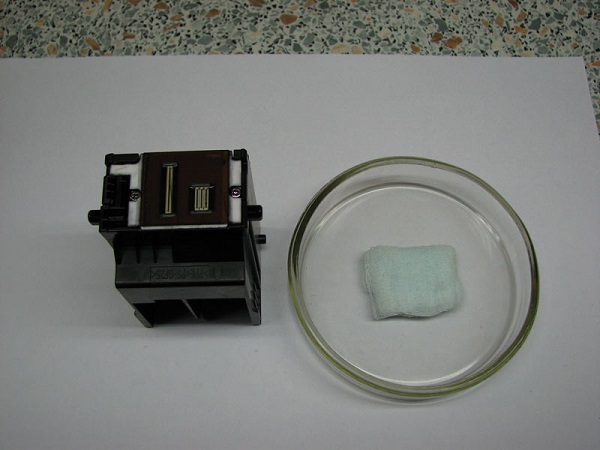
After preparation and testing, you can proceed to the very procedure of cleaning the print head of the printer. To do this, you need a technical flushing fluid, two syringes (preferably 10 ml), several transparent tubes made of soft plastic or rubber, capacity, bandage.
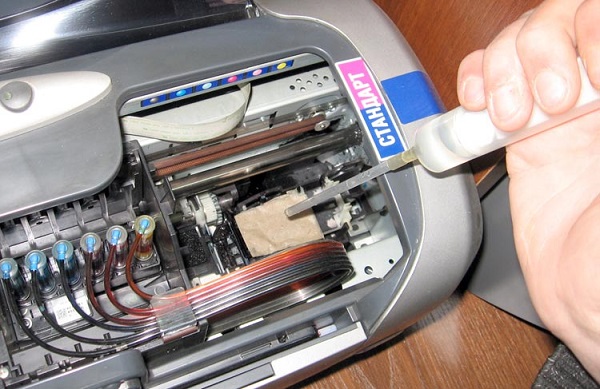
Cleaning the mouth guard and knife
Specialists in maintenance of printers are advised to first clean the mouthpiece and rubber knife. Dust and dirt accumulated here depressurize the system, air enters it, which results in printing with defects.
- Unlock the carriage - this can be done through the software, or turn off the printer immediately after turning it on, when the carriage begins to move.
- Disconnect the printer from the network and PC.
- Using a syringe, pour the cliner into the mouthpiece, leave for 10 minutes, then drain.
- A rubber knife for cleaning is wiped with a napkin or a bandage dipped in a special liquid.
- Kapu is washed until the cliner ceases to be painted. Liquid is better to drain on the diaper, but you can remove the syringe.
Sometimes a rubber knife can be in the printer, inside the case. It will not be superfluous to print the detailing of the device with the decoding of the details.
Inkjet printer device
The first option head cleaning
The print head of the printer should be removed only before flushing. At the bottom, remove the accumulated dirt with a bandage moistened with a cleaner. If the contamination is severe, use several pieces of the bandage and repeat the procedure until the blockage is removed.

Remove the cartridge from the printhead, underneath it ink inlets. Gently wipe the grilles of all colors. To flush the head, you need a syringe filled with flushing fluid. The syringe tip should fit tightly onto the nozzle, if the size does not match - increase the diameter of the syringe (for example, with a heated thin screwdriver). As a rule, the diameter difference does not exceed 1 mm.

After releasing air from the syringe, pump the washing into the nozzle with slow and smooth movements, avoiding contact of the cleaner with the head. If by negligence the liquid still spills, quickly remove it with a second syringe or napkin, do not turn on the device in the network until the moisture has completely evaporated.
In the same way, rinse all colors, watch carefully. pressure on the syringe stem and "reaction" fittings for flushing. If one or several flowers are heavily clogged or have large clots of dried toner, the clinic will be poured slowly and unstable, in some cases - not to go at all. To eliminate overdried ink elements will require a tougher, more aggressive cleaning.
Upon completion, remove all moisture, wiping dry PG, body and all available items.Install the cartridge in the carriage, take it to the parking space.
Please note: if the clinic is compatible with water-soluble inks, and new pigment dyes, you should rinse the system well with desalted water (distilled is not recommended, a precipitate may form).
Option Two - for "serious" cases
Another way of “resuscitation” of PG is not much different from the first one, but it will help with moderate blockages. In this case, the syringe is not placed on the opening of the ink supply nipple, and the flushing fluid is slowly dug manually through the grate. Under the head should be put a clean bandage, folded in several layers, as it gets dirty, it is changed to a new one.

The procedure will take more time, about 1 to 2 hours, but the methodical impact of the clinic effectively removes accumulated ink. If the result is missing, you can strengthen the process.
- Cut a few transparent tubes that match the diameter of the holes, and put on the head fittings.
- In a tube through a syringe pour the cliner, leave for a few hours, you can overnight.
- If the technical fluid evenly passes through the PG, then the operation was successful.
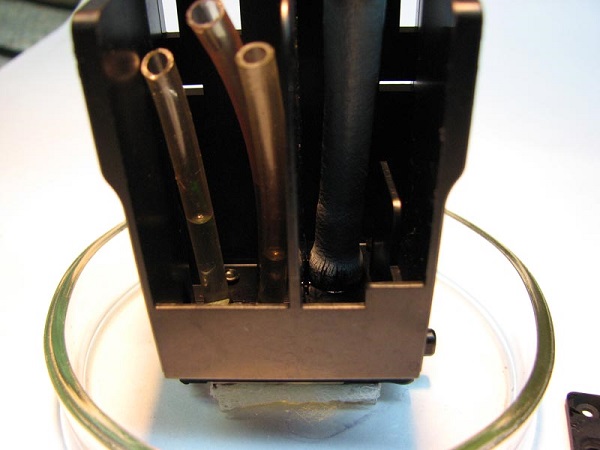
When in one or several tubes the cliner does not enter at all or goes, but more slowly than in others - this indicates strong contamination.
This cleaning procedure can be called gentle, it is allowed to repeat it several times (a week, two).
The third option - the forced broach clenera
This method is only suitable for very difficult situationswhen no method helps. The algorithm of hard washing is as follows.
- Remove all tubes, except for "problem" colors.
- Make an adapter from the tube to the syringe so that the junction is airtight.
- Vent the air out of the syringe (fold the syringe) and connect to the tube.
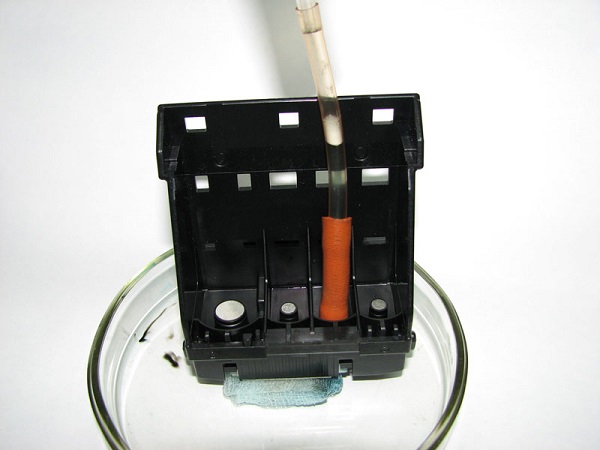
- Put the print head in a waterproof container, put a bandage under it, pour a little washing liquid on the bottom (to a level not higher than 2 - 3 mm).
- Gently press the head to the bandage and pull the clinic through the top opening with a syringe. It is important that no air gets into the head.
If forced flushing did not help, the next step for “advanced users” is a complete disassembly of the head. As practice shows, it is better to entrust a specialist. The reason is that due to inexperience it is easy to damage the nozzles or the print head board, after which it is no longer restored.
Cleaning the printhead can be a long and painstaking process, but the procedure itself is quite simple. It is important to observe accuracy and safety rules: disconnect the printer from the network and PC, protect the printhead of the printer and electronics from moisture.
/rating_off.png)


