How to change bearings on a washing machine Indesit
If your car needs repair, you probably had this question: how to replace the bearing in the washing machine with indizite? Ask for help masters or do it yourself? If you have a minimum set of tools that every home has and you have some experience in repair machines Indesitthen you can handle it replacing bearings in a washing machine.
Content
Diagnostics
First of all, it is worth holding breakdown diagnostics: Does the washing machine really need to replace the bearings? Signs of wear are:
- elevated spinning noise;
- drum beating when making manual turns.
It should be noted that the noise during the operation of the machine may occur for other reasons.First of all, you need to prevent foreign objects from getting inside the device, check drain system and a set of water. If everything is in order, then most likely the source of noise is worn bearings. Replacement does not require delay: a broken bearing can completely destroy the washing unit. The cost of this repair is quite high, since it requires almost complete disassembly of the device. However, following the step-by-step recommendations, you can independently perform costly repairs.
Stages of work
So, signs of wear of the bearings there, we proceed to repair. A step-by-step guide on how to change a bearing on an Indesit machine involves several steps.
Dismantling the pulley and engine
- Disconnect the machine from electricity and turn off the water supply. Being engaged in repair, you can still at the same time clean water strainer. Pull it out by removing the water hose.
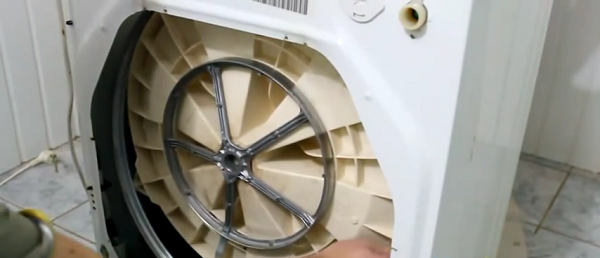
- Turn the back of the machine towards you and unscrew the screws in a circle to remove the back cover. As soon as you take it off, you will see plastic tankInside which there is a drum, and you can also see a pulley, drive belt and engine.
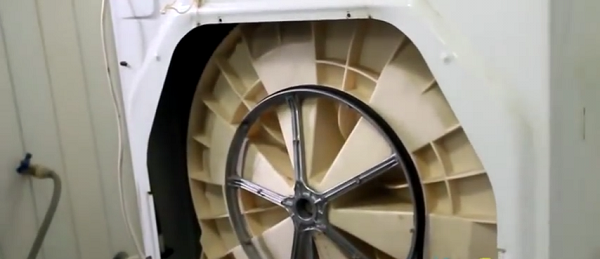
- Removing the belt, unscrew pulley Jamming method.To do this, attach to one of its axis, for example, the handle of a hammer.
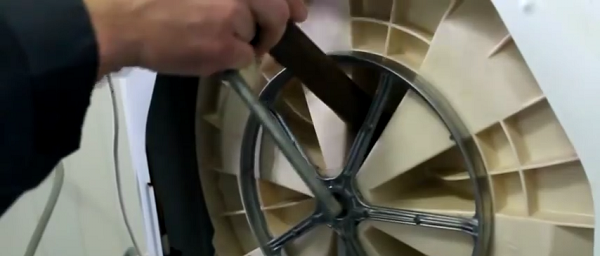
- Select the appropriate key and unscrew the center bolt.
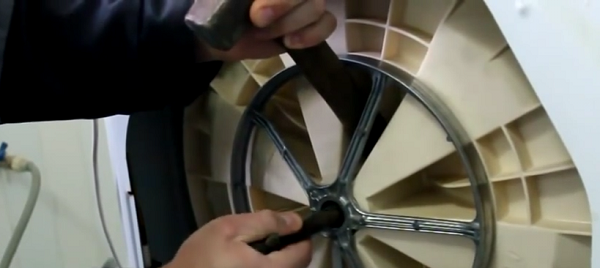
- Remove the pulley by slightly rocking it to free it from the serrated protrusions of the shaft.
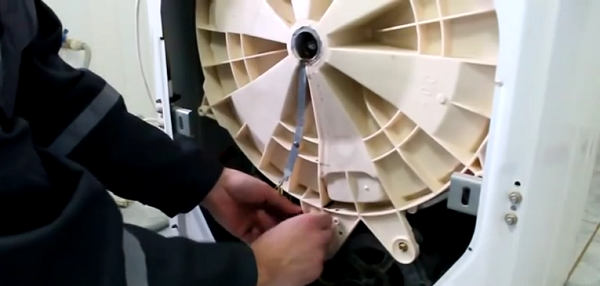
- After that, free the drum from all connected wiring, including from the ground terminal of the bearing assembly.
If you see rusty smudges on the plastic tank from the center to the bottom, this is another clear evidence that the tightness of the bearing assembly is broken.
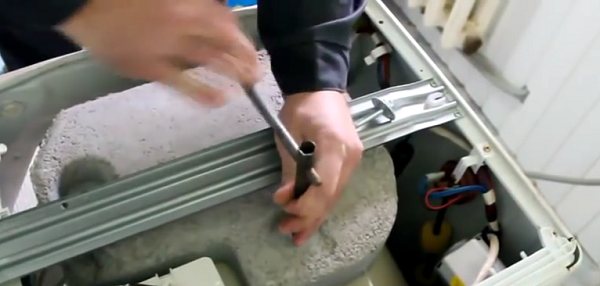
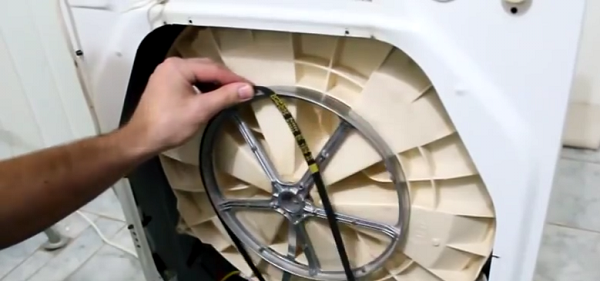
- We proceed to withdraw engine. To do this, put a stand under it, you can use a thick book. Then start to unwind the metal rim of the drum.
- When you remove the tightening screw, the rim will be completely relaxed. After that, you can unscrew the engine retaining bolts. As a result, he will remain lying on the stand.
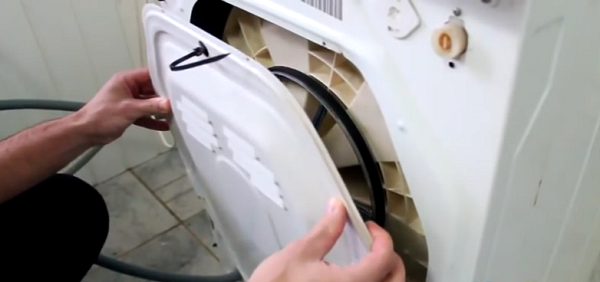
Dismantling the top cover
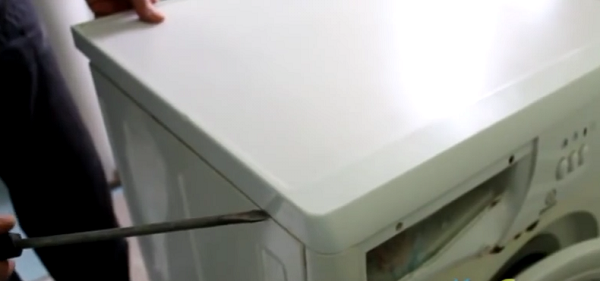
- Get down to removing the top cover of the washing machine. To do this, remove the securing it. self-tapping screws.

- Pry off the cover slightly with a screwdriver and remove completely.
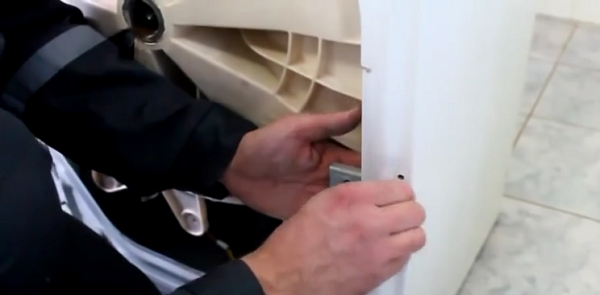
- Use a suitable key to remove the upper counterbalance mounting bolts.
- Taking off counterweight, we completely free access to the tank lid. Start to remove it, gently hooking a screwdriver.
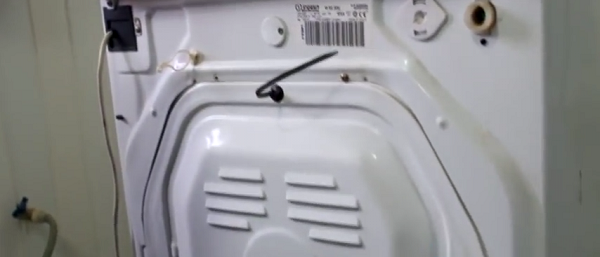
Removing the drum
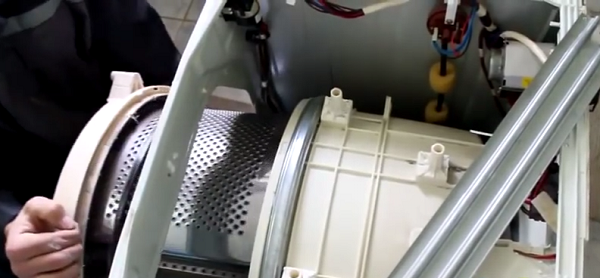
- Now you can release a little washing machine drum together with a lid.

- After that, take the dismantling transport stopsotherwise they will interfere with the extraction of the drum.
- Then slowly pull the drum out of the tank. Inspect carefully the inside of the tank for cracks, deep scratches. Notice how dirty Heating element.
- Remove the cover from the drum and position it in front of you to work with the bearing assembly.
Removing and replacing bearings
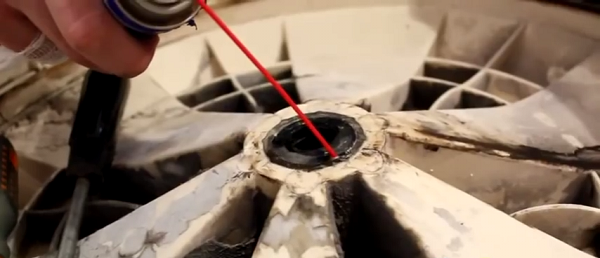
- Apply some WD 40 fluid to the rubber cuff and pry it with a screwdriver.
- After cuff will be extracted, start gently knock out bearings in a circle, using a knob or a chisel.
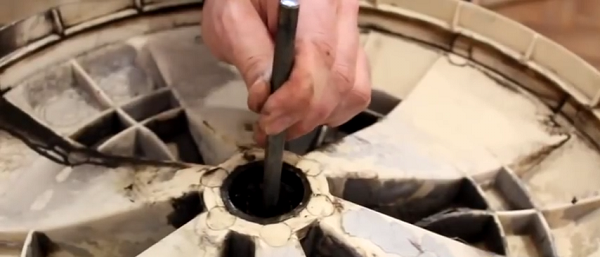
- Knock the bearing, you can read it marking for the proper selection of replacement.
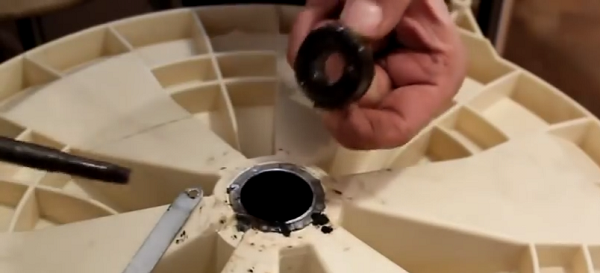
- The assembly usually has two bearings: a small outer and a large inner. It is necessary to extract both of them in the specified way. It should be noted that when washing wear and tear the most susceptible is just a big one, sometimes it is even impossible to determine its labeling.But it's not scary, because the label they are usually consistent. That is, if the small one has the number 202, then the big one will be 203 and so on.
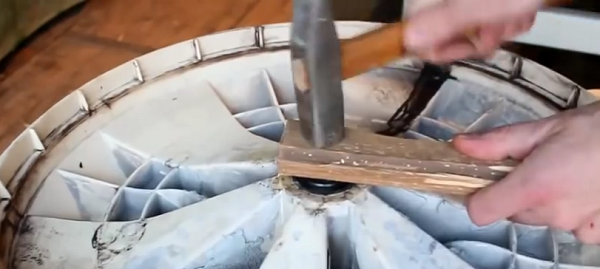
- After that, you can begin to fit the new bearings on their seats. To do this, prepare two wooden pads of suitable diameter and a hammer.
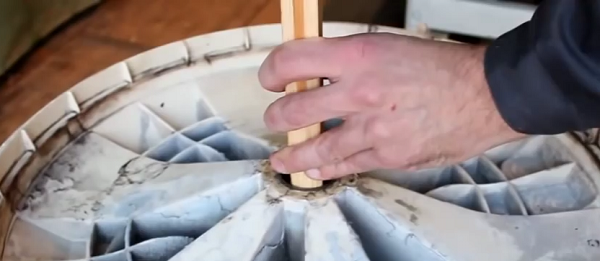
- Diameter pads is selected so that the impact falls on the edges of the bearings. Seat the bearing by making several strokes.
- Special attention should be paid landing cuff, it should fit snugly to the nest, but it should not be deformed in any way. To do this, attach a wooden lining to it and tap on it, evenly putting it in place.
- Stuff bearings with grease, for example, lithologic, should not be. And for ease of sliding, you can resort to a little trick: apply a few drops of dishwashing detergent to the inner surface of the cuff and evenly distribute them.
This is done immediately before installing the cover on the axis of the drum.
Reassembly
-
- Now you can put on the cover with a new bearing assembly on the axis of the drum.
- Before you install the drum in place, check that the heater is installed correctly: it should not interfere with the movement rotating parts. After that, you can clean the edge of the plastic tank so that the rubber gasket is fixed on it tightly.

- Install a pulley on the removed drum, then gently place it in the tank, turning it slightly, to set the desired position.
- Fix the position of the tank with rim, tightening it with the removed screw.
- Now you can connect the engine, wiring, grounding and return to the place of the counterweight. To make it easier to install the counterweight, you should ask someone to push the tank down.
- Reinstall top cover cars.
- Slip on the pulley and motor drive belt, aligning it with the inner grooves.
- Install the back cover and water filter with hose.
Thus, replacing a bearing on a washing machine, indizite will cost about 400 rubles if you make repairs yourself.
/rating_on.png)
/rating_off.png)