How to replace the bearing on the washing machine LG
Even the most expensive and high-quality equipment will need to be repaired sooner or later. So, according to statistics, after 6-7 years of operation, it will be necessary to replace the bearings in the washing machine lg: it starts buzz when washing or while draining water, and more serious damage may occur soon. This is due to the fact that from time to time or due to the impact of hard water rubber seal passes water. Water kills the bearing quickly enough, and its replacement is quite laborious.
Content
Preparation for repair
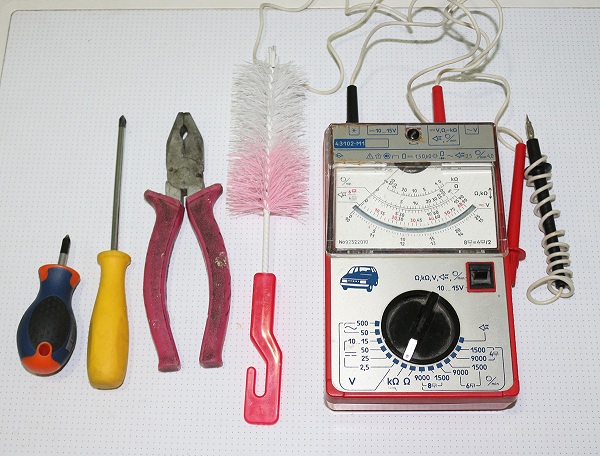
If you decide to rectify the situation yourself and replace the bearing on your own, then before work be sure to prepare everything you need. For repair you may need:
- hammer;
- set of wrenches;
- pliers;
- metal stud;
- crosshead screwdriver;
- flat screwdriver;
- bearing grease;
- silicone sealant.
Best to complement this kit. camera or a mobile phone with a high-quality camera and shoot the entire disassembly process. So you will be easier to collect household appliances, so that it remains in its original form, and worked fine after the repair.
Buy a new bearing in advance that fits your lg washing machine model.
In addition to the tool, it is worth preparing and a placewhere you will repair the machine. The most important thing is that during the repair nothing should get in the way, so free up space on all sides so that you can easily approach the walls of the washing machine.
Dismantling machine
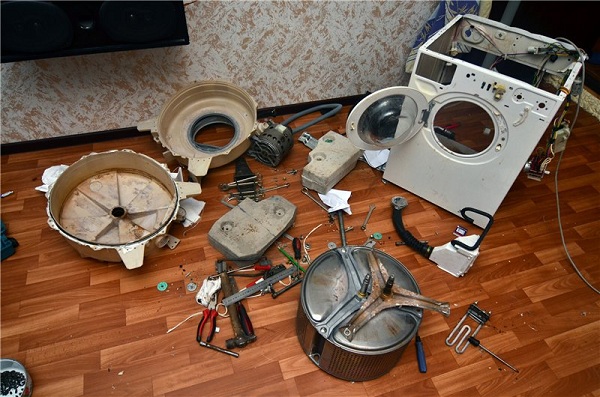
To replace the bearing, you must remove the tank, and for this you have to disassemble almost the entire machine. Disassembly should be carried out in the following order:
- remove the top cover;
- dismantle the top and bottom panel;
- detach the cuff;
- remove the front panel;
- disconnect all hoses and wires from the tank;
- dismantle the tank.
Now more about each step.
Top cover, top and bottom panels
The top cover is mounted on 2 bolts to the rear wall. They need to unscrew, slide the top cover and lift up.
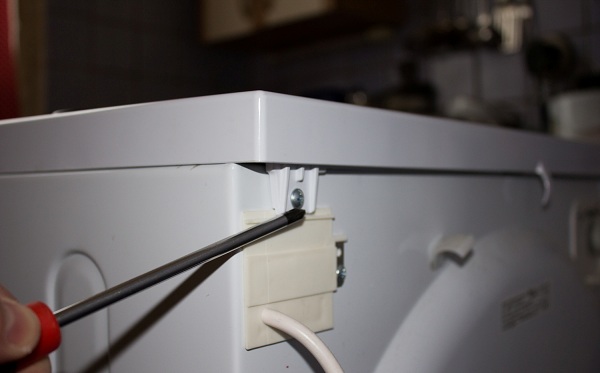
To dismantle the top and bottom panels, you need to pull out tray for washing powder. It is quite simple to pull it out: push out, press the latch and at the same time pull towards yourself. The tray should easily come out of its seat. Below him are screws that hold Control Panel. Another part of the screws is located on the other side, closer to the side wall. They need to unscrew and remove the panel.
On the control unit goes wiring harnesswhich needs to be disconnected. The connectors are located inside the machine, on the motor and other elements.
Chips are best marked with a marker, so as not to confuse them during the assembly process.
Access to the tank closes the top panel to which it is attached filling valve. The panel is attached to the rear wall, as well as to other fastenings with screws. After removing it, the drum will be fully accessible. The bottom panel is quite simple to remove: it is attached to snaps. Take a flat screwdriver and gently squeeze the latch.
Cuff, front panel, wires
The cuff is attached to the front panel and to the drum with hose clamp tightened with a special spring. It is enough to remove it with an ordinary flat screwdriver: then the cuff can be easily removed manually.
The front panel rests on the screws on the bottom and top of the machine. In addition, it blocks door lock. The lock must be removed by unscrewing the two securing its screws. The wire comes to the lock, which must be disconnected immediately after you slide the front panel.
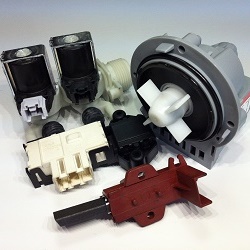
From the tank, unscrew the drain and jellied nipples, and remove the wires from the Teng and the electric motor. Check that there are no wires attached to the tank with cable ties or clamps.
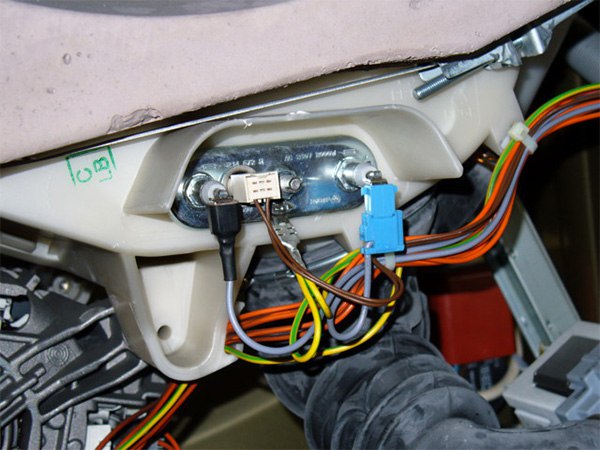
Dismantling the heater
Tank
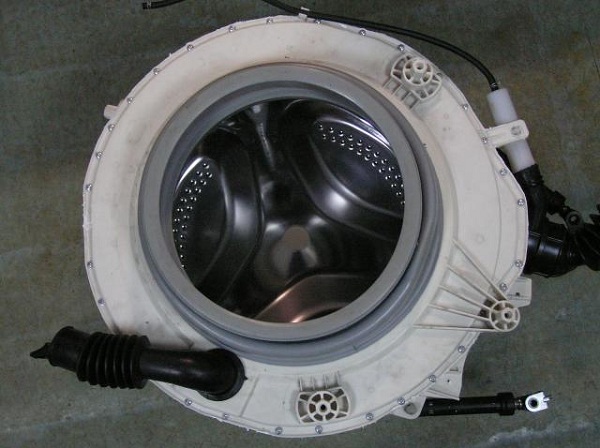
On the tank secured counterweightsthat need to be removed. This will require a wrench. Removing the counterweights, it becomes much easier to pull the drum out of the case. The tank is dismantled together with the engine and drive belt, as well as shock absorbers. All these elements must be removed later, when the tank is already removed. We turn off the excess and proceed directly to the repair of the washing machine: for this you will have to completely disassemble the tank.
Disassembling tank
The tank consists of two halves, they are fastened together with the help of bolts or special latches: it all depends on the specific model of the washing machine. Dividing the two halves of the tank, you need to unscrew the drum from pulley. To do this, unscrew the attachment.Fix the pulley, then with the help of a special star-star we unscrew the bolt. If there is no necessary head, then you can take an adjustable wrench. Shaft knocked with a hammer. The process of disassembling the tank is described in detail. here.
After disassembly, check the condition of the shaft and seals. If necessary, they are better to change, otherwise repairs will have to be repeated soon.
Bearings knock out of seats. To do this, take a stud or metal rod and beat on the bearings, moving in different directions. It is better to make strikes cross to cross, so that the bearing does not jam. After removing both, we begin the reverse assembly. Before new bearings are inserted in their place, it is necessary lubricate their special lubricant. On this replacement of bearings on the washing machine lg can be considered complete.
Reassembly
Once the new parts are installed, you can begin the assembly process of the washing machine. Do not forget to replace everything seals and lubricate the shaft with grease. Collect the washing machine is in reverse order.
Compare in the process of assembling photos of the stages that you did, then the machine will work fine after the repair.
After assembly, it is not necessary to immediately wash things, it is better to start a full cycle just with water.This will not only clean the drum of grease, but also check how well the washing machine works. When washing, there should be no extraneous sounds.
/rating_off.png)