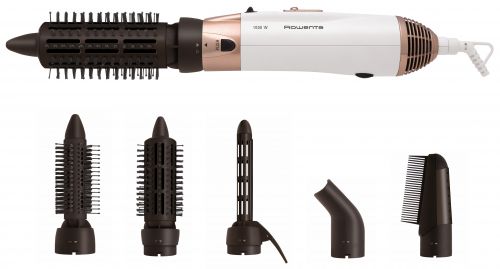
Disassembling Rowenta hairdryer for repair
Today, all women, and often men, use a hairdryer to quickly dry hair. There are many varieties of these products, but the principle of operation and design are the same, only sometimes there are small technical nuances. If you are thinking, for example, about how to disassemble a Rowenta Studio Dry 2000 hairdryer, then you should immediately be warned that its design is no different from other analogs, except for the Rowenta CF 9320 or 9000 models, which are considered hair dryers.
Content
Briefly about the design
Any model of the Rovent hair dryer has the basic elements available, without which it cannot function. These knots and parts jointly perform the main work of drying hair of any length with excellent effect, and some, with a badge ION - make air ionization for better styling.
Each product has switches, the appearance and number of which is different, but the principle of operation is identical.
According to experts, the most difficult part of the device is a thyristor, therefore, it is not difficult for users to repair the hair dryer with their own hands.
The figure below shows the main components of any hair dryer:
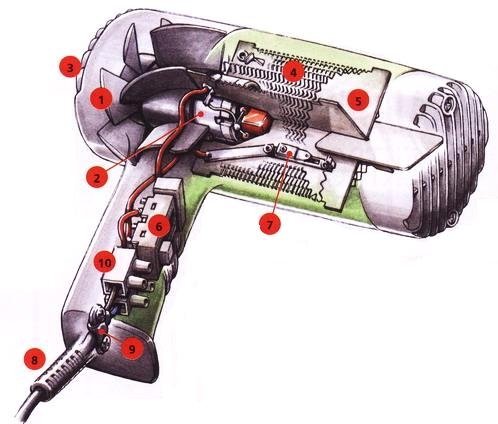
- fan;
- Electrical engine;
- air intake grille;
- hair dryer base - heating element;
- heat resistant base;
- start button;
- thermostat switch;
- power supply cord;
- handle butt lock;
- block of contacts.
Disassembly and Troubleshooting Algorithm
Repair of a hair dryer of any complexity begins with a visual inspection of the product - there is not much difference, it is made by a specialist or user who dared to do everything with his own hands. We will tell you in stages how to diagnose the product.
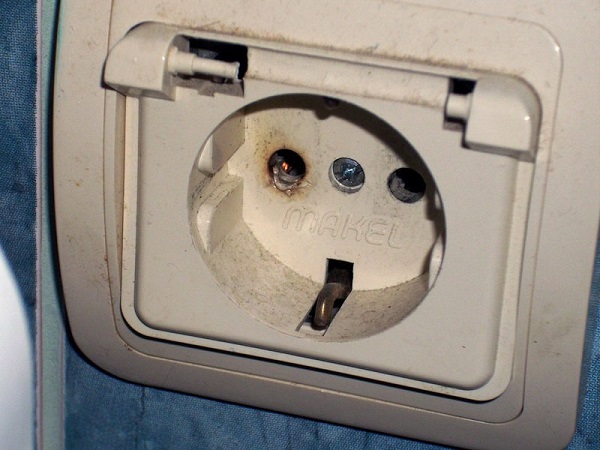
Socket
First, you should carefully inspect the outlet for burning of contacts or their laxity. If a fault is detected, the contacts should be cleaned or tightened; the plug should enter into them with some effort and not dangle.
Power wire
It is necessary to inspect it from the place of entry into the handle of the product: here it is located terminal blockand then the inspection continues up to the plug itself - it is necessary to look for damage to the insulation, internal burnings and fracture.

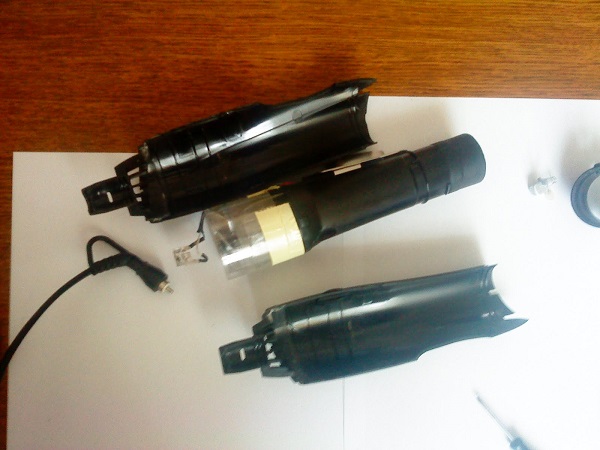
Housing
As a rule, the disassembly of the hair dryer begins with the dismantling of the body, which consists of two halves, connected with screws, and in the front part of the nozzle with special snaps. These latches can be broken, so be careful, in addition, there are hidden screws that cover the stickers, plastic inserts and removable covers.
Rowenta hairdryer models are quite similar in appearance, for example, the Rowenta Pro 2300 model is disassembled in the same way as other standard hairdryers, but hair dryers understand a little differently - they have their own design features. This should be taken into account when you are going to repair the product yourself - you need to carefully read the instructions and watch the video on disassembling your particular model.
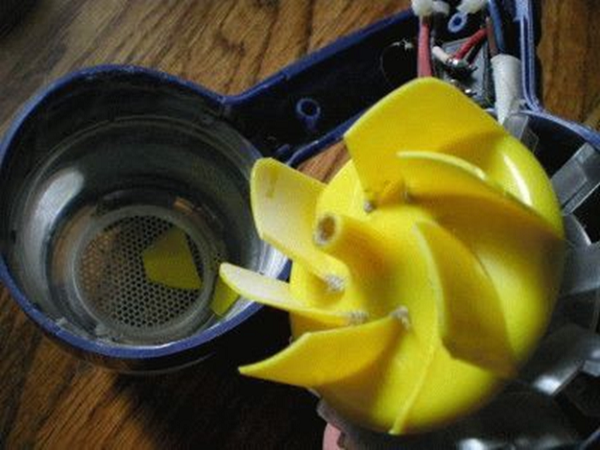
Fan
Put before him protective grid and filterwhich prevents hair and dust from getting inside. Quite often, it becomes clogged, and it should be cleaned with a small brush.In budget versions, there is only a grille, so the fan can reduce its speed due to the presence of hair and dust on the shaft. The blades of the device are cleaned with an old toothbrush, and the propeller must be carefully removed from the shaft and the wound hair must be removed.
Electric motor
If it does not work correctly, then the entire device jams, what happens when the winding is broken through or the diode bridge is blown. In some cases blades are to blame - their ultimate development has occurred.
The axis of the engine should rotate without a beating and in the free mode, after any repair, all rubbing parts should be lubricated, and problem areas should be adjusted manually.
Spiral
Many models have several spirals, with the help of which the work of different modes of heating the air flow. Their integrity is restored by soldering, and all defects can be easily detected visually. Sometimes spirals should be replaced by similar products. from nichrome thread with identical parameters.
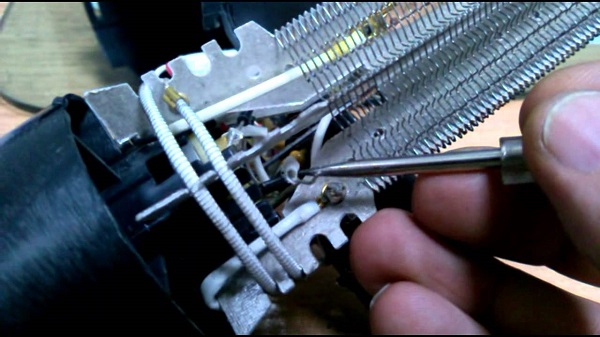
Microcircuits
Let us examine typical types of malfunction:
- the base of the getinax can crack, and the track of tin is broken, repairs are made using the following technology - to tin the damaged areas, to cover with solder;
- condensers swell - they are evaporated and installed new;
- defective resistors immediately darken - they need to be changed.
Here you will need skills for working with a soldering iron, and for those users who do not know how - we advise you to go to the masters, you should not disassemble the dryer yourself.
We briefly tried to explain how you can disassemble some models of the dryer from the German company Rowenta, but we want to warn you that the repair of these products is difficult for uninitiated users. Inside, there are such improvements as smooth action controls like the Care button, which means Care; spirals are made of special alloys, breakage is difficult to connect securely at home. In addition, manufacturers insert special airflow ionizers and other innovations.
Before you start disassembling the dryer, you need to find circuit diagram products, if it is not in the attached instructions, consult with familiar experts. Remember - it is much easier to disassemble any household appliance than to assemble and not interfere with the interaction of all major components and parts.
/rating_off.png)