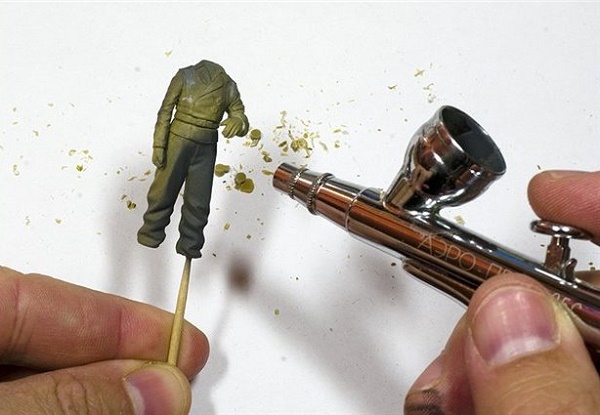
Choosing an airbrush for painting models
The master, who prefers reliable, proven tools and technology, inevitably loses to the individual, which complements them with modern technical equipment. So you can describe the growing popularity of such devices as airbrush for modeling. The effectiveness of such a tool is easily explained. Compared to working with brushes, using an airbrush for models, it is easy to achieve not just greater productivity, but also better coloring results. In addition, the master can easily create complex effects that require the highest qualifications to use the classic instrumental set.
Content
Advantages of using an airbrush in modeling over a regular brush
The first and most important advantage that an airbrush has for modeling is the ability to easily apply a very uniform layer of paint. For such a result, when working with a brush, the master must have the highest qualifications, predict the spreading of the paint mixture, in some cases, make grinding and polishing.

In order to obtain the same surface indices, acting with an airbrush for modellers, it is sufficient to master the correct technique of movement of the instrument and the method of its adjustment. This allows:
- apply thin, even layers of primer, spending several times less time to achieve the desired result in comparison with the work with a brush;
- to form very thin films of paint, which standard painting techniques cannot offer;
- get a huge time savings with almost guaranteed results - instead of one model, the master can complete several.
The next advantage of the airbrush is versatility. With one tool, with the right choice of the diameter of the nozzle and the regulation scheme, it is possible to draw thin lines, work on the area, make colors according to the mask, vary the thickness of the applied layer and much more. With a comparable qualification of the performer, the brush cannot give all the wealth of possibilities, in addition, for each kind of operations you will have to use a separate tool.
And one more, the most attractive for some users, the dignity of an airbrush - ease of creating color transitions. To get almost photographic image quality, the master of the brush needs to be extremely highly qualified, to spend a lot of time. And the performer, armed with a modern instrument, creates colorful, detailed, color-rich pictures quickly and with excellent results.
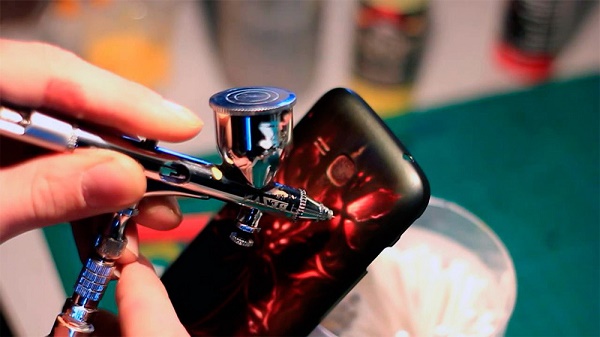
The universality of the airbrush device makes it possible to use it in related fields of activity. For example:
- performing airbrushing on mobile phones;
- painting of cakes with special paints;
- creating a unique nail design;
- coloring unique dolls, figurines;
- the creation of highly artistic Christmas decorations;
- work on exclusive souvenirs.
It is almost impossible to list all the activities where the choice of an airbrush for modeling will allow to show excellent results. Everything is limited only by the qualifications and level of imagination of the owner of such a universal device.
What are the criteria for choosing an airbrush for painting models
The choice of a tool for modeling is done most often from the perspective of a beginner. The wizard, accustomed to working with a brush, has an indicative list of requirements for an airbrush, which is formulated only by new features. Therefore, the first purchased model often changes to a more perfect one from the point of view of new criteria that have been formed in the process of using it. However, there is a list of design and other features of the devices that a beginner can orient himself on.
Nozzle diameter
Characterization of the diameter of the nozzle is responsible not only for the capabilities of the tool, but also for the level of requirements for the compressor.
- With nozzle 0.15-0.2 mm It is extremely convenient to make thin lines and draw fine details of the image.However, this figure creates some difficulties. In particular, it is rather difficult to work with acrylic paints - the size of their particles is larger than that of enamel and other types of dyes. Airbrush often clogged, requires thorough cleaning. Part of this problem solves the choice of design nozzle nozzle.
- Nozzle 0,25-0,35 is most prevalent. If the airbrush allows for double adjustment, such a nozzle can work both on fine details of the image and on the areas. It is not difficult to use the mask coloring technique to form very small elements of the picture.
- Large diameter nozzles allow you to quickly paint large areas. They are useful for priming, forming the background, and other works where it is important to quickly and evenly paint a significant part of the part or part of the image.
Adjustment
The main aspect that forms the diversity of airbrush adjustments is formed by the control system.For modeling produce models:
- with regulation of air flow only to control the torch;
- with a change only paint supply, allowing you to change the size of the spot, and the intensity of the coating;
- dual control, both in dye and in air flow.
Among modellers, the second type of tool is most common. It is easily and intuitively controlled: pressing the button turns on the air supply, and its horizontal displacement changes the flow of paint.
Double action airbrush
Individual manufacturers in the market in products of the middle and high price range offer various convenient features. For example, needle spring tension regulator, allowing you to individually select the level of effort, as well as disabling the ink supply limiter for convenient flushing the device.
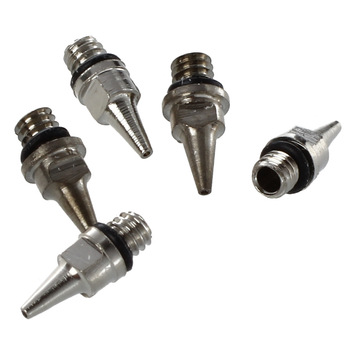
Nozzle design
Not only ease of use and durability, but also the results of the application depend on the design of the nozzle. The most common to date design - on the thread. It is a nut-pressed element, carefully centered, made from high-tech materials.
Buying a finished set of airbrushing with a compressor, you should not save on the brand. Many manufacturers involved in fakes, pay much less attention to the manufacture of the nozzle. As a result, paint leaks are possible due to poor-quality gaskets, poor alignment and other troubles. Products of well-known brands, by contrast, will offer a nozzle, for example, from wear-resistant Teflon with high quality gaskets and alignment.
Conical construction spray nozzles will offer an installation option with a minimum of parts. This nozzle is located in a special socket airbrush housing. After installation, a cap is put on it, which performs the functions of clamping and sealing, as well as centering on its opening. The tapered nozzle does not have gaskets, the danger of splitting too tight and other unpleasant design features.
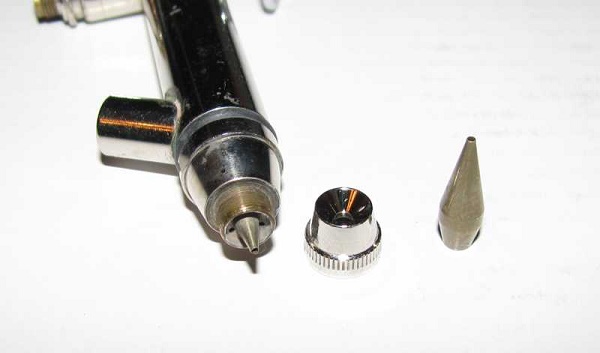
Conical nozzle airbrush
Self-centering design - one of the most technologically advanced solutions. It absorbed the best of the threaded and tapered options. At installation the cap is used, but there are also gaskets for thorough sealing. The peculiarity of the self-centering nozzle is the shaped form of the inner bore. It dramatically changes the diameter in the direction of the spout. As a result, all the large lumps of paint, various debris accumulate and do not fall into the spray area.
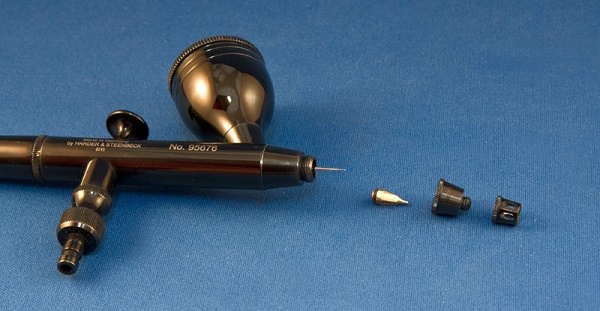
Self-centering airbrush
There are other solutions offered by individual brands. But due to their uniqueness and the possibility of using a specific airbrush system with a certain list of models of wide distribution and popularity, these nozzles did not receive.
Mix type
In the airbrush the following types of mixing are presented:
- external;
- the inner.
When the exterior paint with air mixed away from the feed area. It does not guarantee a uniform fine flow at the nozzle outlet. Therefore, this type of instrument has not received recognition and distribution. The masters of painting models in the course of airbrushing internal mixing: they allow you to smoothly and subtly control the flow of paint, provide a uniform flow for applying layers of high quality.
Internally mixed airbrush
The location of the tank with paint
Specific technology (hybrid, siphon) for small streams of paint and its sufficiently liquid consistency play almost no role for the modeller. The master is more important than the convenience of work, that is, the location of the tank with paint. Today the market presents:
- models with the lower location of the tank;
- products with the upper tank;
- airbrushes, in which the container with paint is located on the side.
All devices have their own characteristics and offer their own convenient features. Airbrush with bottom tank guarantees fast replacement of the dye. It is enough to mix separately several interchangeable containers in order to easily remove and install them in the device. This means quick work, but air brushes of this class require increased inlet air pressure.
Top Tank Models most simple. They do not need high pressure at the inlet, the paint comes under its own weight. Such an airbrush is an ideal choice for delicate work, as it can provide low consumption of the mixture. At the same time, such devices work most effectively only in a horizontal position.When tilting decreases the rate of supply of paint, on the bottom on horizontal surfaces to draw will not work.
Airbrush with side tank make some time to get used to the asymmetrical weight distribution of the tool. In return will give the widest opportunities. The tank changes as quickly as the models with the lower layout, you can paint on any surface (including the ceiling), hold the airbrush at all angles, and carry out both fine works and painting large areas.
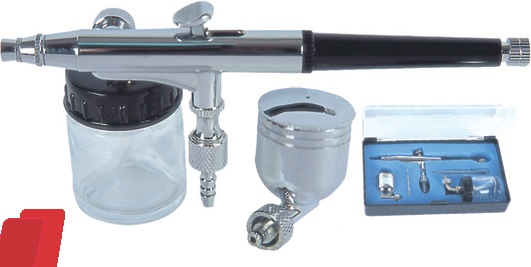
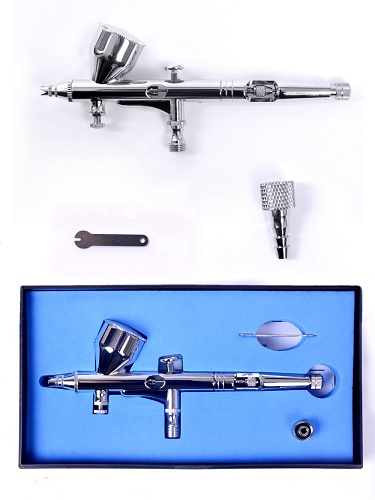
Overview of 3 popular models
Consider the entire market offered by different manufacturers of airbrushing is simply unrealistic. However, in all the variety of positions it is not difficult to distinguish products that are popular and offer a set of possibilities to meet the needs of modellers of different levels. The airbrush rating for modeling includes devices for both beginners and experienced professionals.
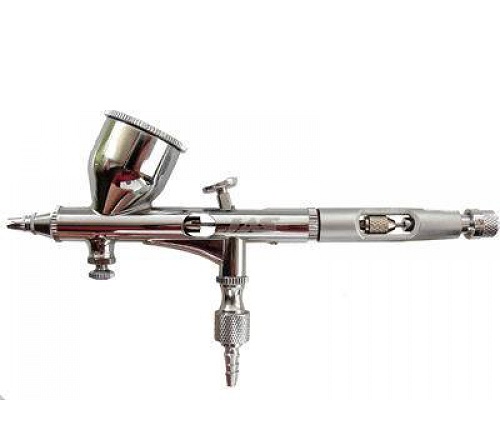
JAS 1117
JAS product family - the best airbrushes for modeling, if we consider the choice of beginners. These are extremely simple devices manufactured by a Chinese brand, distinguished by a fairly high functional fitness. Specifications:
- convenient, double independent regulation principle - a separate valve to control the flow of air;
- top paint supply, convenient large tank 9 ml;
- set nozzle diameter - 0.3 mm;
- threaded nozzle type.
The device of this model is the best choice for a beginner who wants to improve his skills. However, the products of the brand confirm the negative reputation of Chinese manufacturers. Some users talk about reliable multi-year operation of the device. Other face marriage even with multiple purchases in a row.
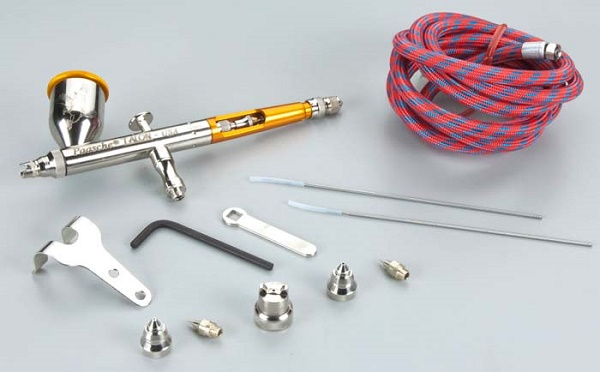
Paasche Talon Included TG-3F
Convenient and multifunctional airbrush that will appeal to modellers who are interested in how to produce fine works, and painting large areas. The device has the following characteristics:
- three nozzles in a set, from 0.25 to 0.66 mm;
- capacious paint tank in 13 ml, top feed;
- a separate head with the fan principle of spray spray for work on large areas;
- own complete hose for connection to compressors of different brands.
The device has a double separate regulation principle, offers high quality components, high service life.
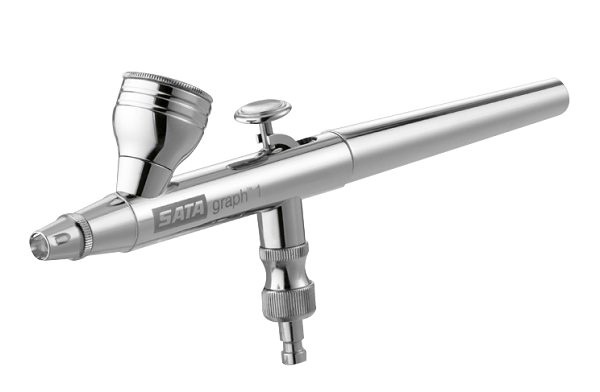
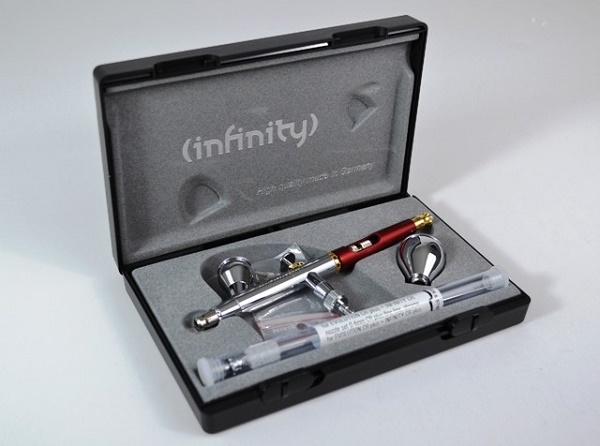
Harder & Steenbeck Infinity 2 in 1
A device for professionals that guarantees a very wide range of options. Specifications:
- self-centering nozzle type, with its own adjustment needle;
- two nozzles in the kit - 0.15 mm and 0.4 mm;
- two tanks of paint, 5 ml and 3 ml;
- top type of installation capacity;
- scale for precise setting of the feed regulator;
- double separate control of the supply of one lever: the air flow is changed by pressing force.
The model offers guaranteed high quality, it is convenient in use, executed in extremely compact and easy execution.
Nuances and tips for painting airbrushed models
Beginner modellers are often disappointed in the results of the first use of an airbrush. The reason is the lack of necessary motor skills and skills with such a tool. A short list of tips looks like this.
- Airbrushing models recommended acrylic paints. They will not burn thin plastic films, they are not dangerous for small children. This is the best choice for beginners.
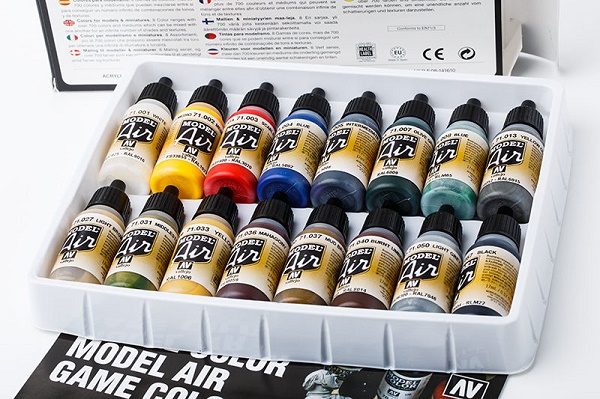
- Do not mix products with different characteristics. Airbrush paint from individual manufacturers can have not only different particle sizes, but also other characteristics. Especially not to interfere with acrylic paints and enamel.
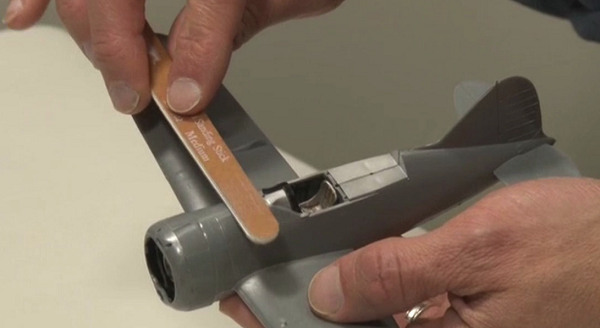
- Before assembly, each part must fine sandpaper to improve surface roughness. With the growth of experience, with the transition to enamel this can not be done. Most nitrokrasok dissolve a small layer of plastic and perfectly adhere.
- Primer - mandatory procedure. Painting poster models without this is simply impossible. A layer of primer will not let the paint fall off.
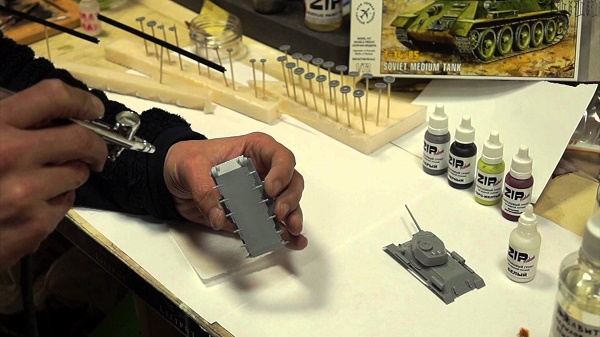
- If painting a tank model is conceived, the details of the design should be carefully considered. It is being analyzed whether it will be possible to reach them with an airbrush for high-quality paint coating. If necessary, staining is performed prior to installation on the model.
- Paint before work should be thoroughly mixed. To do this, in its capacity, you can add a few metal balls. The consistency should be like that of milk. If necessary, add the solvent recommended by the manufacturer of a paint.
- Before applying the background layer is recommended to choose the parameters of paint supply and air pressure somewhere on a separate sheet of paper or plastic. If the balance is wrong, there are spots, a coarse layer like semolina, splashing and other troubles.
This is a basic set of tips, following which, you can properly prepare for the main process. Painting airbrushed models requires special motor skills and instrument control techniques.
- Airbrush always moves. When the tool is stopped, there is necessarily an influx or thicker layer of paint. Therefore, the movement must begin by turning on the feed and turning it off until the end of the movement of the paint device.
- You can not impose multiple layers of continuous feed. In this case, the paint falls with bubbles, surges. The best tactic is to make small light strokes or to draw long lines by turning the dye supply on and off.
- It is necessary to monitor the state of the nozzle tip. Paint after stopping the supply tends to dry up in the form of a small icicle. This element adversely affects the character of spraying and overall torch uniformity. Therefore, a cotton swab with a solvent of the desired type should always be in place. After a piece of paint is removed, the airbrush is turned on idly to remove any residual cleaning agent.
Important! Modeling necessarily takes into account the visual perception of paint.The product is always located behind the air column relative to the observer, this is a kind of blue light filter. Therefore, the base layers of paint should always be lighter than desired to achieve the desired effect.
Can I make an airbrush for modeling with my own hands?
It is possible to make a sufficiently effective airbrush for painting certain models for solving certain tasks. At the same time, both the creation of a device from scrap materials and using ready-made assemblies from other products are available.
Option 1 - Zubograph
Models are called zubograf simple airbrush, for which the air source is the human lungs. In simple words - they blow into his pipe during the painting process. Although this method of supplying paint cannot be called uniform and provides good performance, in some cases such a device is useful.
To make an airbrush of this class is quite simple. You will need a syringe, a fountain pen, a straw (a medical dropper will be suitable) and a container for paint.
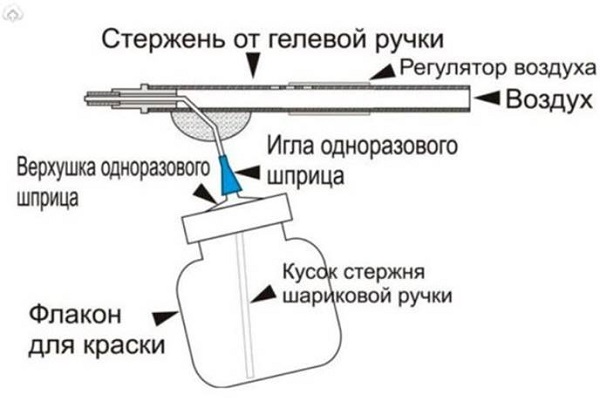
The process of creating a device looks like this.
- The pen is disassembled, ink is removed from the rod, the tube is thoroughly washed with a solvent, and dried.
- The cork from a plastic bottle is cut to half. It is mounted needle syringe. An empty rod of a pen is neatly glued to its plastic part.
- In the lid of the jar a hole is made into which the pivot of the fountain pen passes. It should be cut and positioned so that the end is on the edge at the bottom of the can. Also made another small hole for the passage of air.
- The needle of the syringe is bent as needed, after heating is held inside the body of the handle.
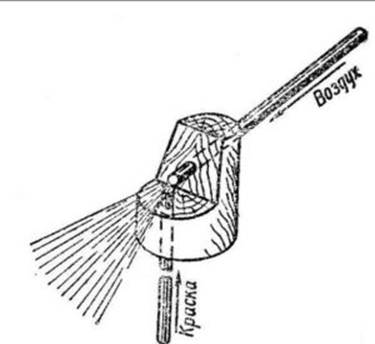
The assembly is a compound with a sealant of a cut off bottle stopper with a corresponding unscrewing lid of the can, positioning the needle inside the handle body and fixing it with polymer glue. It is easy to use such an airbrush: it is enough to pour paint into the container and blow it into the hole of the handle. The principle of operation is based on the Bernoulli effect - a sharp drop in pressure in the area of rapid movement of air.
Option 2
A more sophisticated do-it-yourself airbrush has additional features. It is made from the remnants of a can of paint and other parts of other devices. The device provides:
- smooth air supply;
- the possibility of using an external compressor or another method of delivery;
- fairly good spraying uniformity.
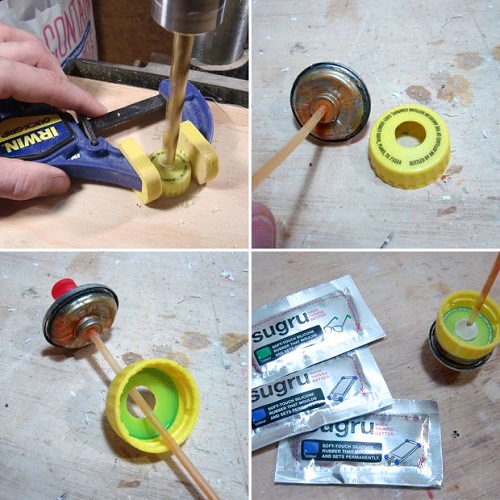
The final appearance of the product looks like this:
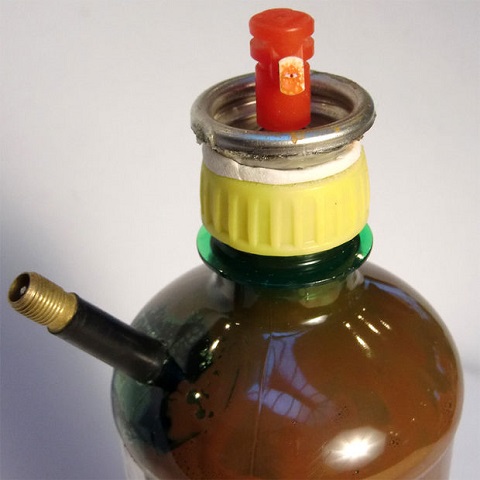
For the assembly of the structure are required:
- an old can of paint with a working spray;
- saw for metal, drills, rubber glue;
- empty plastic bottle;
- old car or bicycle camera.
The build process is as follows.
- Pressing a sprayer removes gas from an overpressure. It must be done. A pressurized container can cause injury.
- The head of the spray can is cut off with a metal saw.
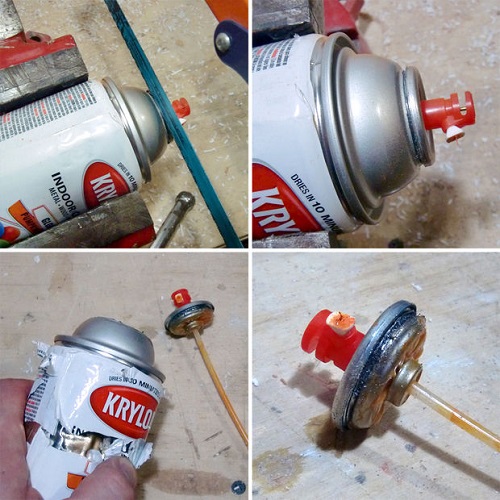
- A valve with a sufficiently large skirt is cut out of the chamber.
- Having made a hole in the bottle and having inserted the valve into it, the surfaces of rubber and plastic are lubricated through the neck with glue, pressed tightly and left to dry.
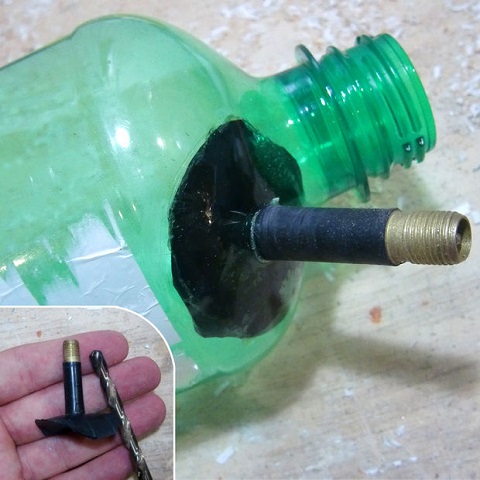
- A hole is drilled in the cork, a cylinder head is installed and filled with a sealant along the contour.
To use the device, it is enough to pour paint inside, add solvent to obtain a good consistency. Then to valve attach the bicycle pump or compressor with pressure limiting functionality.Start paint by pressing on the spray head. Such a homemade airbrush is functional enough to evenly paint large surfaces.
As a conclusion
Everyone who at least once was engaged in modeling, sooner or later came to the realization that the stickers and linings offered by the manufacturer in the kit do not allow the assembled tank or aircraft to look good. Therefore, it is worth thinking about self-coloring. The airbrush will allow, after a small practice, to achieve acceptable results and constantly improve. In comparison, brushes are a tool that requires an unacceptably long time to acquire the minimum acceptable skills.
/rating_off.png)


