How to use the airbrush
An airbrush is a tool for spraying paint or varnish by means of compressed air passing through it. Thanks to the fine adjustment of the air flow, airbrushing artists achieve the drawing of even small details of the picture. But still the quality of the picture depends not only on the skill of the artist, but also on the type and design of the airbrush.
Content
How the airbrush works
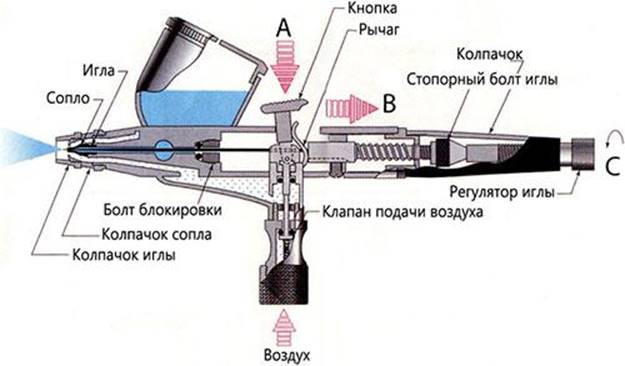
With a seemingly small size, the device for spraying paint can include more than 20 elements ensuring its high-quality performance. To understand the device airbrush, just look at the figure below,where the tool is shown in section.
There are several types of airbrushes that have differences in design. But all of them are united by the presence of basic elements common to all types of apparatus.
- Tank. It is a container in which the paint is poured. From the tank the paint enters the airbrush, where it is mixed with air. The tank for paint can be removable and non-removable, its volume reaches 100 ml. Depending on the model of the tool, the tank is attached to it in three positions: top, side or bottom.
- Trigger. This is a button (trigger lever) designed to control the device. When pressed, the trigger interacts with the needle, pushing it away. In double action tools, pressing the button opens the air flow, and the tilting of the lever - the flow of paint.
- Nozzle. It can be quick-detachable, which is tightened by the cap, and threaded. In the second case, the nozzle is wound, either manually or using a key from the kit of this device. The diameter of the nozzle affects the width of the drawn line. It is selected depending on how wide the jet of paint is required by the artist for the realization of his idea.
- Needle. It is the most fragile and significant part of the airbrush.The needle overlaps the nozzle and regulates the amount of paint that passes through it. The further the element moves away from the nozzle outlet, the more ink is sprayed, and vice versa.
- Needle guide. Fixes a needle in the device case. This fixation allows the needle to accurately fall into the nozzle orifice and move back and forth within the same plane.
- Paint control knob. Regulates needle mobility. It can be fixed in a specific position for the desired paint supply.
- Air valve. It opens when you press the trigger and passes the compressed air coming from the compressor into the airbrush.
As mentioned above, there are different types of airbrushes, which can be divided into devices of single and double action.
Single action airbrushes
In these devices, after pressing the lever, only the air flow is opened, which is mixed with paint outside the casing or inside it (devices with internal or external mixing).
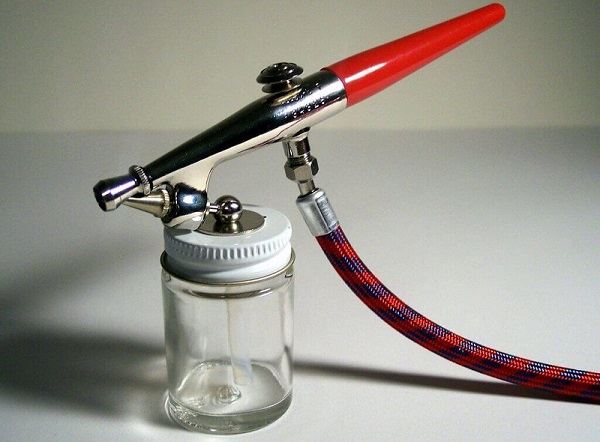
Airbrushes outdoor mixing (see photo below) have the simplest design and are used for uniform application of paint or varnish over large areas.
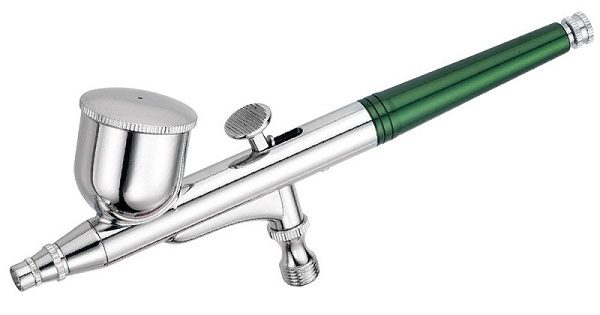
Device internal mixing (see fig. below) is arranged in such a way that the combination of paint and air occurs inside its body.
Double action devices
When you press the button (trigger) in the dual-action tool, only the air valve opens. But in order to supply paint for mixing with air, this very lever needs to be moved a little backwards. Adjusting the dye feed allows the artist to control the saturation of colors and the width of lines.
How does airbrush work
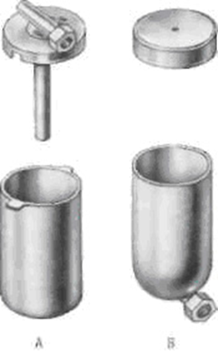
The principle of the airbrush is as follows. After pressing the trigger, the air valve opens, and pressurized air begins to flow into the device’s nozzle and out of it. Since the airbrush is operated by compressed air passing through the body of the device, the pressure of which is higher than the pressure of the external environment, the paint rises from the tank and mixes with it. But there are also overhead airbrushes. In this case, the gravitational flow of paint. The following figure shows a siphon (A) and gravity (B) type tank.
Coming out of the nozzle, a mixture of paint and air turns into a conical shaped aerosol torch.
Airbrush setup before work
Before you start using an airbrush, especially if it is just purchased, you need to prepare it for work. First of all, it is required to make adjustment of supply of paint. Normally, with a slight pressure on the trigger, only air must go out of the airbrush nozzle (applies to single-action tools). Upon further movement (pushing) of the lever, paint should appear.
If when you press the lever, the paint starts to spray immediately, or when you press the trigger all the way, it does not stand out enough, then you will need to adjust the airbrush.
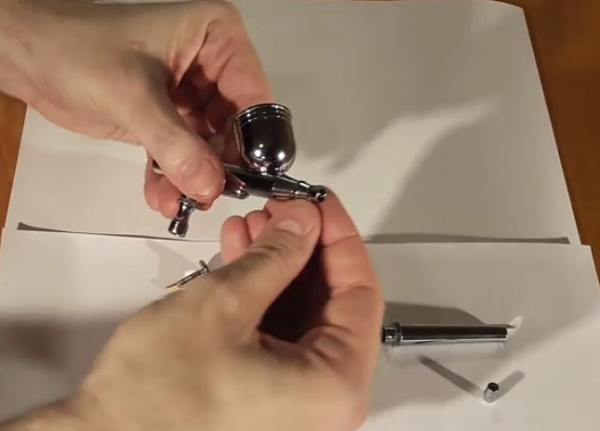
- Unscrew the plastic cap of the device, holding the device by the metal nut.
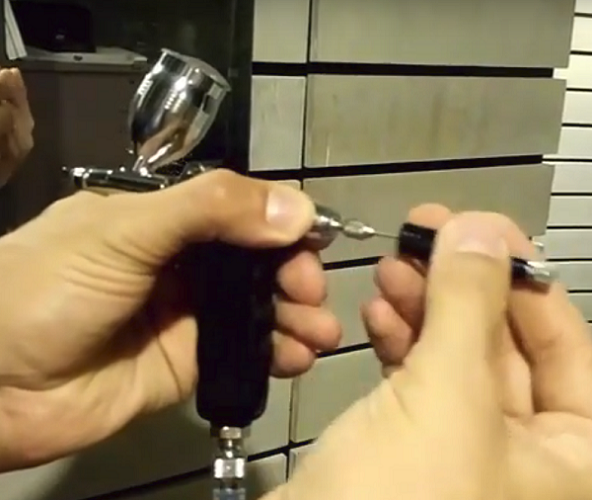
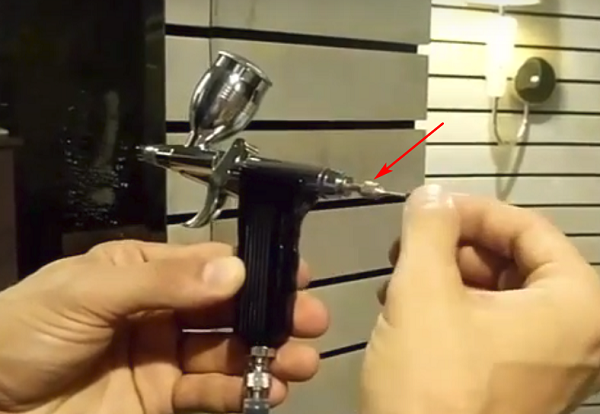
- Next, you need to unscrew the needle retainer (shown by the arrow in the next photo). Do not completely unscrew the lock. It is simply necessary to loosen it so that the needle can move in the guide. The needle should not be pulled out too much, as this will cause the ink to run out.
- If, at the slightest pull of the trigger, paint was immediately applied, then the needle, in this case, needs to be moved slightly forward. It is necessary to achieve such a setting so that the paint starts. move with the lever pressed halfway. To do this, press the lever (up to half of the stroke) and, without releasing it, tighten the needle lock.
- Next, the cap is screwed into place. But you should know that for fine adjustment of the movement of the needle on the cap provides an adjusting screw. Therefore, it is necessary to unscrew it a little, turn on the compressor and adjust the instrument accurately.
If you adjust the airbrush in this way, then when you work with the tool, you will be able to smoothly adjust the flow of fluid into the nozzle.
In addition, the above settings do not guarantee the correct operation of the device, if Wrong system pressure selectedto which it is connected. For airbrush need a pressure of 1-3 atm. If there is little pressure in the system, then the result of the work will be rude and poor quality. If the air pressure is too high, the atomization is smaller, but it becomes more difficult to control the process.
Especially problems arise if the compressor that compresses the air does not have an outlet pressure adjustment. In this case, you can self-install gearbox with pressure gauges between the receiver and the air supply hose to the device. The gearbox will allow you to accurately adjust the pressure of the air supplied to the airbrush, depending on the thickness of the paint and the required artistic techniques.
Dismantling and cleaning the airbrush after work
Most of the problems that arise when working with an airbrush are due to poor, irregular or improper cleaning of the device. Even after a short work with it or when changing the dye, the device should be washed with water (in case of using water-based paints). If special dyes are used, cleaning the airbrush consists of washing it with solvents or cleaning solutions. Do not leave any type of paint in the tank for a long time.
Disassembly of the device
To clean the airbrush paint from the quality will turn out after a complete disassembly.
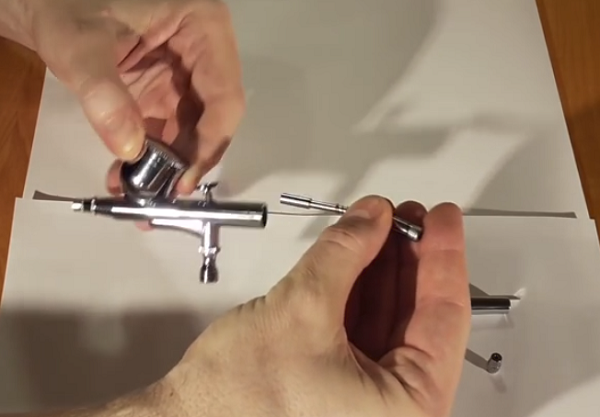
- Unscrew the cap installed in the back of the device.
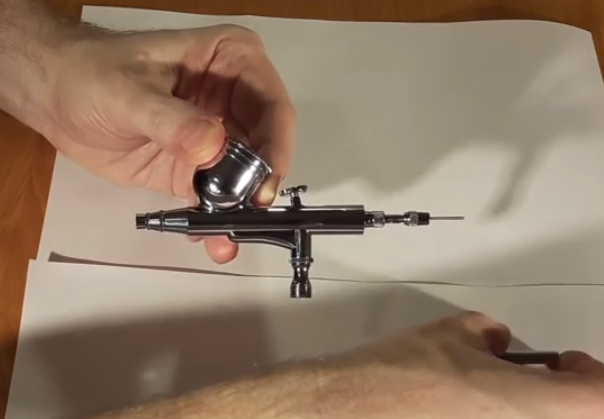
- Loosen the collet clamp holding the needle.

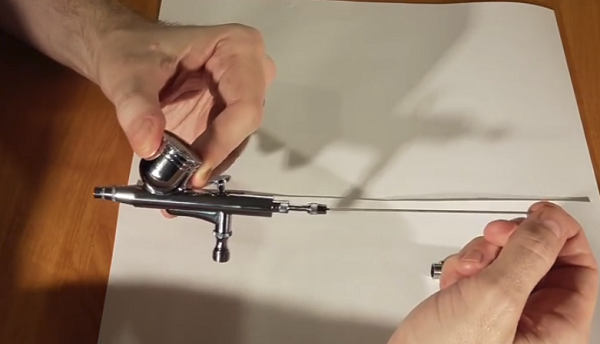
- Remove the needle from the instrument.
- Unscrew the needle feed mechanism with the collet chuck. You will see the main rubbing parts of the airbrush that you want to lubricate after cleaning.As a lubricant can use lithol.
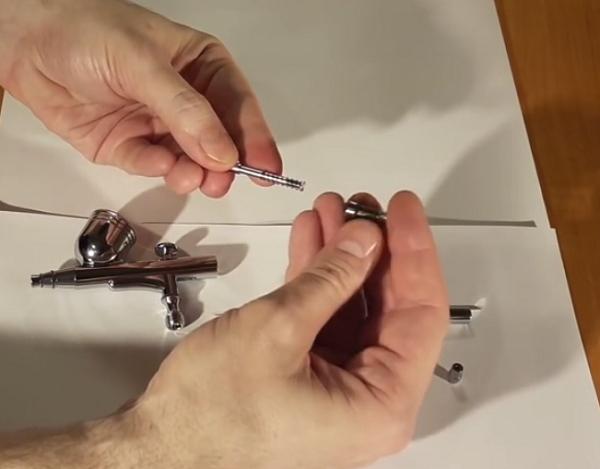
- Next, you should remove the lever, trying not to lose the bracket that falls out of the case if you turn it with the hole for the button down. The lever also needs to be lubricated with lithol.
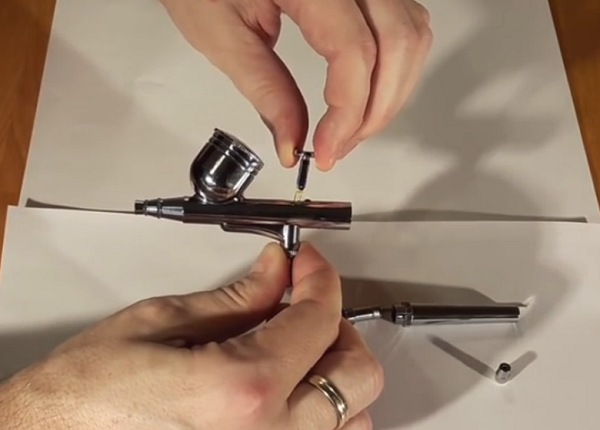
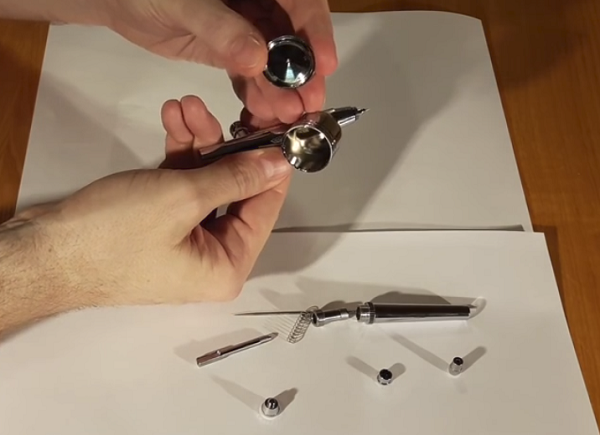
- Remove the needle shield installed on the front of the device.
- Remove the cap protecting the nozzle.
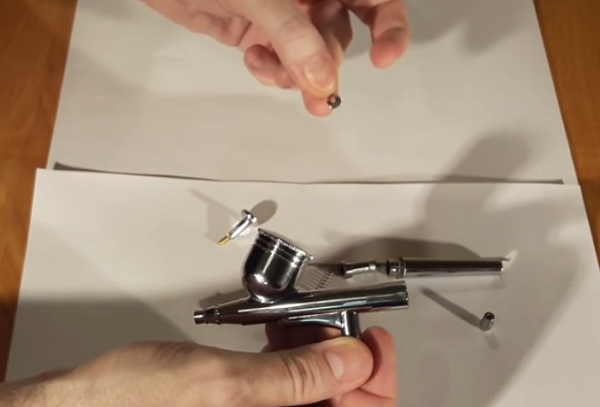
- If you need to clean the nozzle, then it is unscrewed with a key that comes with the tool.
- Next, remove the cap from the paint tank.
Important! Fully disassemble the airbrush will have only in case of interruptions in his work or to lubricate the rubbing elements. Usually, lubrication of the instrument elements is required if the lever ceases to be pressed smoothly, or it moves with difficulty.
Tool cleaning
You can clean the airbrush after finishing work or changing the dye in a simpler way, without complete disassembly of the device.
- Remove any paint residue from the device.
- Remove the needle from the tool body and wipe it from the blunt end to the sharp end. Be careful not to damage the sharp end of the needle.
- Pour a small amount of water or solvent into the container. Wash the container and wipe it with a cloth.
- Blow air through when the container is filled with detergent.
- Unscrew the protective cap of the needle and wipe it using a solvent, then put the cap back on.
- Insert the needle into the device and fix it with the collet.
- Blow airbrush back into the air.
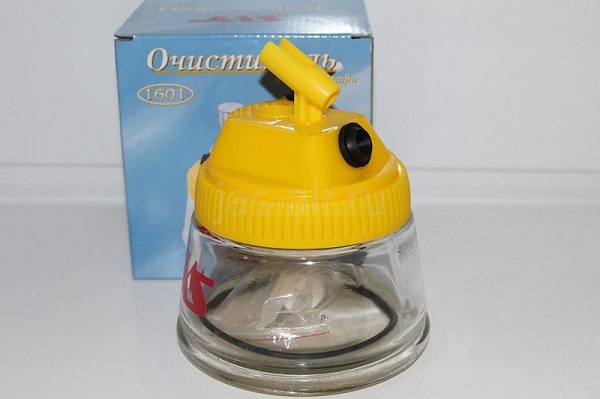
This washing station is made in the form of a container with a hole for inserting an airbrush. Convenient cleaner that protects the user from inhalation of harmful vapors of the solvent, because it sprayed inside the tank.
How to wash acrylic paint
It is rather difficult to wash the airbrush after acrylic, if it is dried up, because the paint contains film-forming substances. Methods for cleaning the airbrush from acrylic differ depending on how long the paint was in the tool.
- If you want to wash off the acrylic dye, which not dried yetthen ordinary water will do. Cleaning the device will speed up if the water is warm.
- Finding paint in the tool more than an hour (up to a day) leads to its hardening. In this case, it is not too late to soften and remove acrylic with ordinary vodka, alcohol or alcohol-containing liquids.
- In the most neglected case, if the acrylic was in the device several daysit can only be removed with gasoline, acetone, white spirit or kerosene.
Under the influence of the above substances, the softening of the acrylic paint film former takes about 30 minutes. It is necessary to pour some solvent into the tank several times and wet the rest of the airbrush elements clogged with acrylic.
Important! It is impossible to soak the device in a solvent, as rubber and plastic seals can fail. To remove the softened paint usually use special brushes.
/rating_off.png)


