Complete disassembly of the Philips blender
The device of a hand (submersible) blender is no more difficult than any toy with a motor, with which every little boy used to play in childhood, and probably made out. So, it would seem that there shouldn't be any difficulties with disassembling such a simple device as a blender, even if it is the popular Philips.
But the problem is that many "serious" manufacturers of home appliances do not want you to tinker with their creations and try to fix something there. They purposely try to impede access to the internal details of their products. And some even go so far as to make it undetectable - such devices cannot be disassembled without breaking something.
Instruments
In order to disassemble and diagnose almost any submersible blender, we will need the "standard gentleman's set" of the master:
- Flat and cross screwdrivers.
- Pen or stationery knife.
- Electrical tester.

Step-by-step instruction
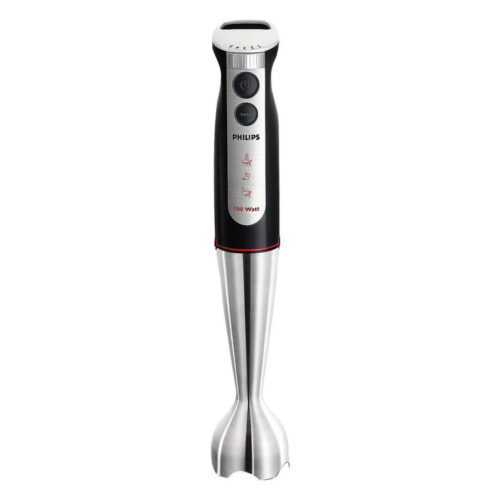
Consider disassembly using the example of a fairly common model of an immersion blender. Philips HR 1372, which is protected by the manufacturer from disassembly and repair in the home (common causes of failure are described in the article: why blender might not work). Philips immersion blenders of this type are disassembled from the attachment side of the attachment. In this part of the body are located two plastic latches, rigidly coupled with round “ears” of the part to be removed.

It is impossible to pry them with your fingers, so we use for this two small screwdrivers and a penknife with a thin blade. One screwdriver needs to raise the edge of the latch, and the other to slightly move the “eye” in the direction of the release from the engagement. We will do the same on the other side, after which it will be possible to easily remove the front black cap from the attachment side of the attachment.
Below it we will see another white plastic cap, which is attached not to the latches, but to the glue! To get it, we will have to use a penknife, but rather a stationery knife with a very thin blade, which need to cut off the glue, walking the blade along the edges of the plug adjacent to the body.
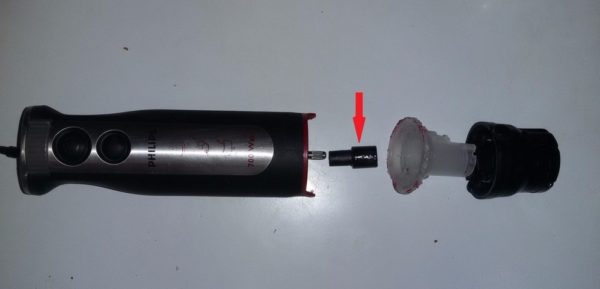
After removing this plug, we will see an electric motor with a spindle. But we will not be able to get it right away, as it is still holding something from behind. At the rear end of the Philips submersible blender there is a metal decorative cap that rests only on double-sided tape. It can be easily hooked up with a small screwdriver and removed. Under the hood we will see two non-standard screws the power cord that holds the electric motor and does not allow it to be removed from the other side.
These screws have unusual caps with two notches along the edges for a special key. Neither ordinary nor Phillips screwdrivers are suitable for them, but with some skill they can still be unscrewed with a normal screwdriver or scissors, if they are not tightly twisted. By unscrewing the rear screws, we can easily get the electric motor together with the control circuit from the case of our Philips submersible blender and see what this design is.

Philips device HR 1372
The interior of the blender is: electric motor and control circuit with buttons, which is fixed on a plastic frame of a rounded shape. In order to carry out their diagnostics and repair, you need to disconnect all the wires and free the electrical circuit from the plastic frame.After that, you can check with the tester the operability of the electric motor and the elements of the electrical control circuit.
Blender repair
Defective electrical elements on the circuit can almost always be replaced with similar ones in characteristics, and the circuit itself can be cleaned of contaminants, which can also cause malfunctions or interruptions in the work of the immersion blender.
In the case of combustion of an electric motor, it can only be sent to a landfill, since it is almost impossible to repair it at home. An electric motor can also be replaced, but only in its entirety and with exactly the same in size and electrical characteristics.
If, on the contrary, the motor is serviceable, and the control circuit could not be repaired, then it can be left for the “spare part” to be used elsewhere.
findings
As you can see, it’s not difficult to disassemble the “un-assembled” Philips Phillips blender, although the manufacturer made this task somewhat difficult by putting some plugs on the glue and making the caps of screws non-standard. Also, nothing prevents to try repair the blender on your own in the presence of at least some idea of the device electrical devices.
Much worse things are with soldered devicesthat can not be repaired even in service centers. Some manufacturers of equipment simply benefit that their products are not repaired by "artisanal" methods, and some original assemblies and parts are replaced only as a whole, in the collection. Although at the same time the failure of the device may be the combustion of one tiny fuse, which does not cost anything to replace. Instead, people are forced to throw the "broken" device in the trash and go buy a new one. An immersion blender can also do it yourself.

/rating_off.png)


