We repair heaters by ourselves
The question of how to repair household heaters of various types is asked quite often, since these devices are used everywhere and are not insured for various kinds of damage.
Modern heaters, whether convectors, infrared or oil, made according to the same principles, however, they can drastically differ in layout and engineering solutions. Consider some kind of universal scheme of dealing with problems, dwelling on the key features of individual classes of devices.
Content
Basic safety rules
It must always be remembered that home heaters are powerful high-voltage appliances. Therefore, safety regulations - the first thing to follow when conducting repairs to an electric heater:
- Be sure to disconnect the device by removing the power plug from the outlet.
- Duplicate food should be provided. In addition to the outlet in which the heater was turned on, you will need one more, or an extension cord with reliable contacts and a wire designed for the appropriate power of the device.
- Only tools with insulated handles are used.
- Do not work with a disassembled heater with wet hands.
- To check the circuits of the device you need to use special measuring devices. Handicraft "dialing" is unacceptable.
- It is necessary to provide good lighting of the working space.
And the main thing that needs to be done when repairing heaters for a house is to follow from simple to complex, not to rush, and before performing any operation, think about whether there are means to eliminate its consequences.
Elementary breakdowns
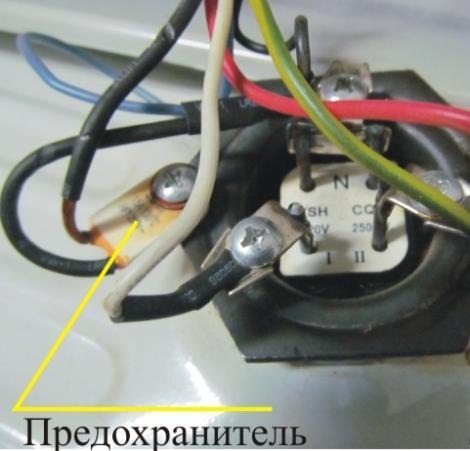
The first thing to check is fuse integrity. The cause of their combustion may be increased voltage at the outlet or a sharp reset of parameters. Therefore, check and replace the fuses if they are available - the first sensible step.
A common cause of breakage of electric heaters is described as "open circuit". Roughly speaking, the energy does not circulate along the calculated contour. There can be several reasons:
- break of contacts;
- loose or soot on fork parts;
- burning or breaking of the cord in the zone of its entrance into the plug;
- mechanical cable damage;
- Nagar, separation, breakaway of wires inside the device.
Before proceeding to disassembling the case, it is necessary to carefully check the basic things. For example, plug the device into a different outlet. If this does not help, you can proceed to further work.
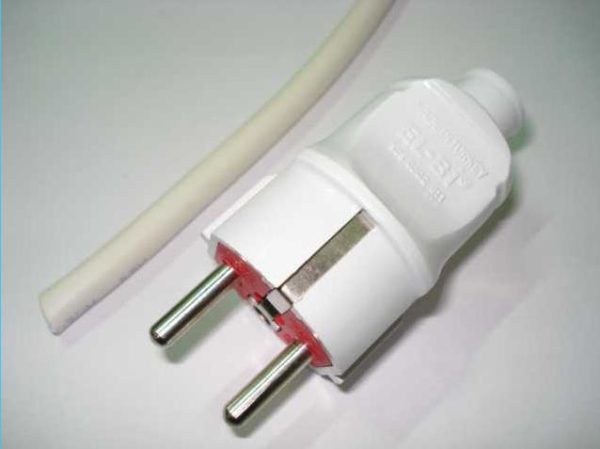
Inspection of the heater plug
Electrical plug is a very common cause of damage. Poor contact in the outlet is possible; mechanical damage, as a result of which an open circuit or short circuit occurs. The plug is disassembled, after which a visual inspection is performed. Contacts should not show signs of overheating. It is also worth checking the reliability of all mechanical connections and sweep the ends of the power cable.
Inspect and verify cable integrity
The cable exit point from the plug case is the weak side of all electric heaters. The power cable often breaks. If it is not possible to determine the breakdown of the core visually or by feeling, you will have to arm yourself with a multimeter and monitor the integrity of the wire. Before this, the latter is inspected along the entire length for the presence of mechanical damage and fractures. If there are any, the cable must be changed.
Visual inspection for problems with electrical circuits
Until the analysis of the case has begun, it is useful to look wherever possible. It is extremely useful small, but powerful flashlight.
- Through the cracks in the grate of the fan heater, it is possible to inspect the lead wires for broken contacts or paths.
- You can easily inspect the inside of the device for the presence of carbon on the contacts.
- The main place of inspection, if available, is the contacts of heaters: heating elements, spiral elements, infrared flasks.
Often, a visual inspection reveals other reasons for the breakage of the heater: the presence of foreign objects, the flow of fluid, etc.
Dismantling the heater body
Most modern electric heaters are not difficult to disassemble. The case disassembles quickly, after unscrewing several screws. But you need to carefully follow the procedure for removing parts. Many manufacturers use the case as a supporting structure, fixing on it the details of the engineering solution of the heater.
If there is no confidence in a good memory or there is no experience in disassembling electrical appliances, it is worth photographing every action in order to properly assemble the entire working structure after the repair.
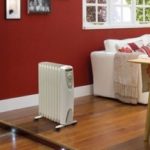
The greatest difficulties arise when disassembly oil heaters. Here the main circuits and sensors are covered with a lid. It is easily removed: to pry the retainer, you need to carefully hold a thin metal object (screwdriver, knife) around the perimeter of the lid. This should be done carefully, without scratching the part. After determining the location of the latch, press down on it and remove the cover.
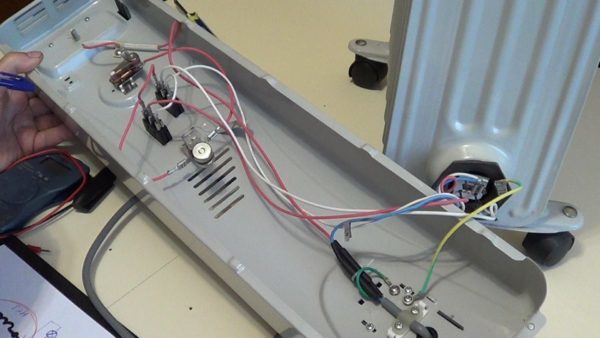
Internal Parts Check
After disassembling the heater, all structural elements are carefully inspected. If there is a deposit, it is scraped off, if cliffs are present, they are eliminated.The power supply from the 220 V cable is checked. A tester is used for this. To make sure that the cable is not broken and in good condition, during the test it is bent, moved, probed. If the tester's readings change in this case, it is better to replace the power wire.

Tester
Check the key nodes of the heater
We note immediately, heaters differ in the principle of operation and parts used. To test the performance of most of the nodes, you need skills to use a multimeter and concepts about the design of electrical circuits. Therefore, we will touch upon the simplest things available to the average user:
- Circuit breakers. The first thing that is checked is the integrity of the fuses. In some models of heaters, these elements are hidden inside; access from outside is impossible.
- Position sensor. Present in most powerful fan heaters and in some models of oil heaters. The check is simple: if the sensor is working, then when the device is tilted, it opens the circuit. In the vertical position - the resistance is almost zero. You can check any dialing. If the sensor is broken, it changes entirely.
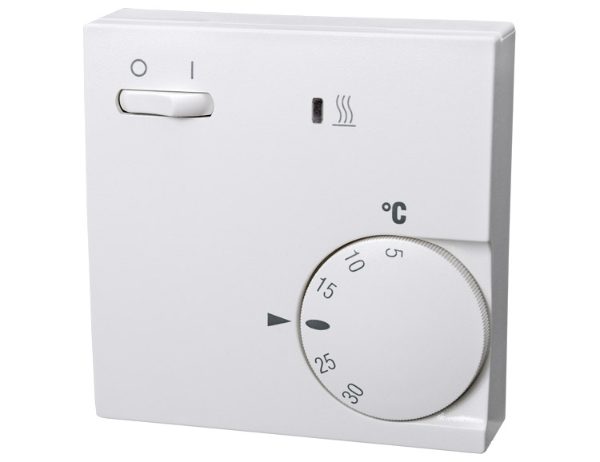
- Regulator. Nagar and oxides in temperature controllers are a common cause of heater failure. It is necessary to disassemble the elements, carefully clean everything with fine sandpaper, wipe it with alcohol.
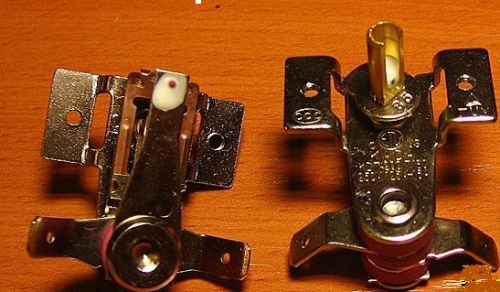
- Thermal sensor, thermostat. The device temperature sensor is quite simple. Inside the mechanical unit responsible for opening the circuit at a certain temperature, there is a bimetallic plate. It is necessary to put the regulator on a minimum, to get an element, inspect for the presence of traces of soot, cracks, delamination, any oxides and deposits. If present, the plate should be replaced.
- Quartz resonator. Present in ceramic heaters, the change of its parameters develops with time, as a result of which the device ceases to obey the regulators. The part must be replaced, other repair of the heater is not possible.

To eliminate other breakdowns, experience in electrical work, the ability to test the parameters of the heating element, motor windings, starting capacities and the condition of other components is necessary. Therefore, it is irrational to dwell in detail, especially since each class of heaters has its own characteristics.
As a conclusion
In conclusion, you can bring some more tips. When repairing oil heaters should stock up on several things:
- First, the tank for draining transformer oil, if you need to change the heating element or seal the leak.
- Secondly, a special sealant that is used to treat the gasket zone after the installation of the heating element.
- Third, the presence of a powerful soldering iron and special fluxes to eliminate small leaks at the seams. Sealants, adhesives, putties of various kinds will not do for this.
The main rule when repairing is to soberly assess your capabilities and not to do unnecessary work if it is cheaper to buy a new heater.. Also, do not take up work, if the warranty period has not expired.
/rating_off.png)