What to do if the printer stops printing
It does not matter at all from which manufacturer your printer, which model it is, and what printing method is used in it (laser or inkjet), the reasons for equipment failure can be only two types: technical and software. By technical reasons the device cannot work if there are problems in its various modules. For example, problems with the connection, mechanics, electric drive, or with a cartridge, etc. If there are software crashes, then, as a rule, they are associated with the interaction of printing equipment with a computer.
Content
The correct connection and configuration of equipment
At first glance, this sounds unbelievable, but when it is discovered,that there is no connection with the printer, it turns out that some owners of this equipment forget to do basic things. For example, connect the device to the network or connect it to a computer using a special cable.
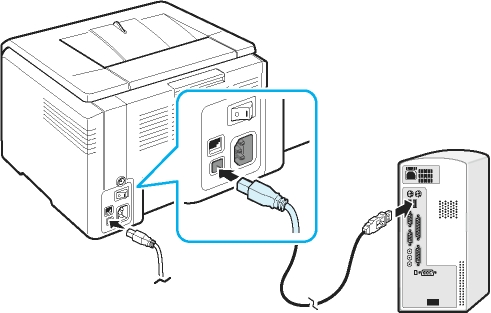
But, when the connection is made correctly, and still the device does not print, then first of all, you need to make sure health of the USB cable itself. Sometimes it fails, and a message may appear on the PC screen that the OS does not recognize the device.
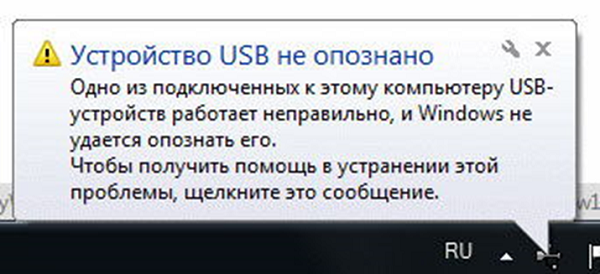
In this case, you must purchase a new cable, preferably of high quality, with protection from interference.
Also, after connecting the device to a PC, it is necessary in the system itself. select the desired printerSince in Windows (versions 7, 8 and 10) several devices can be installed for printing, and some of them are virtual.
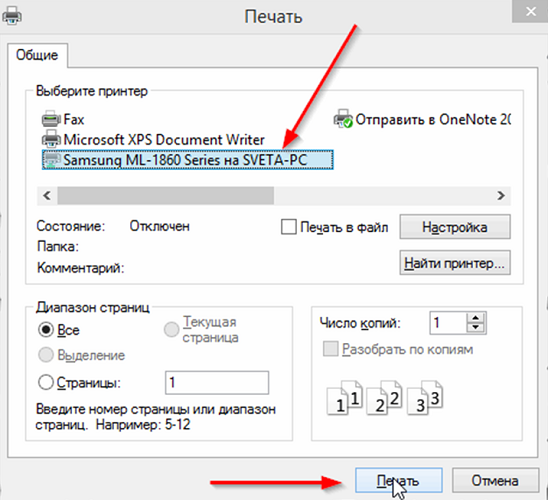
Users of printers, often because of carelessness or because of haste, do not pay attention to the choice of equipment at the moment when the document is sent for printing. The figure above shows that the Samsung device installed in the OS was selected.
Default printer It is selected in another, alternative way:
- enter the “Control Panel”;
- Click the left mouse button on the line or icon called “Devices and Printers”;
- a window will open in which all peripherals installed on the PC are displayed;
- find the required unit and right-click on it;
- A menu will appear where you need to select “Use Default”.

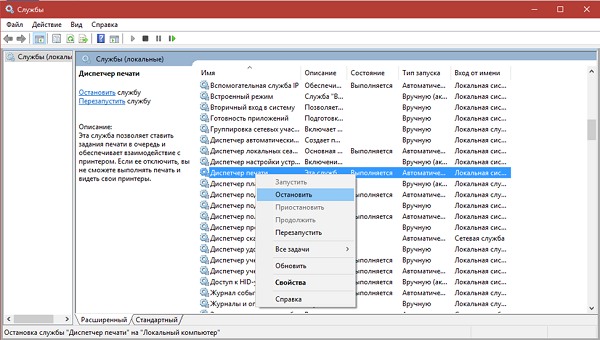
If the device does not work, you can try restart print manager. Making it restart is simple:
- unplug the cable connecting the printing device to the PC;
- go to “Control Panel” via the “Start” button on the PC screen;
- further, follow the path: “System and Security”, “Administration”, “Services”;
- in the “Services” window, find the “Print Manager” line and select it.
You can also click on the “Stop” item in the upper left corner of the window, after which the “Run” item will appear, which will also need to be clicked. Another option: right-click on the “Print Manager” and select “Stop” and then “Start”, or select “Restart” at once.
Driver check
The problem with the drivers - special programs that control the equipment connected to the PC - may be the reason why the device stopped working normally.
The problem with the drivers occurs after:
- reinstall or update the OS;
- software failure of an unexplained cause;
- virus attack;
- Connecting to the PC of new peripherals that interfere with the connected equipment for printing.
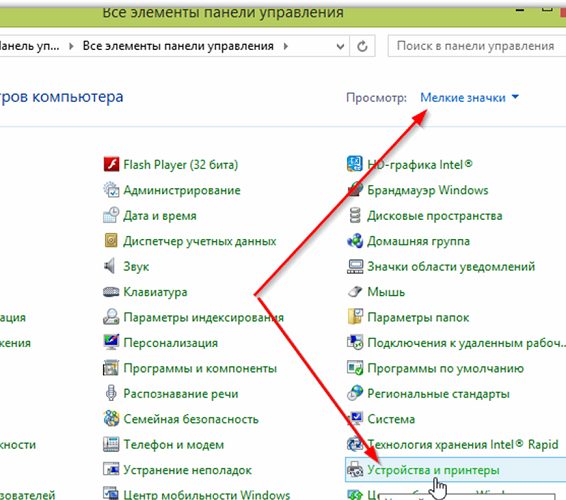
What to do in this situation? First, you need to get into the “Control Panel” again, turn on the display of small icons and open the “Device Manager”. Further, being in this window, find the line relating to your printing equipment. She may have a different name. In the image below, the line is called “Print Queue”.
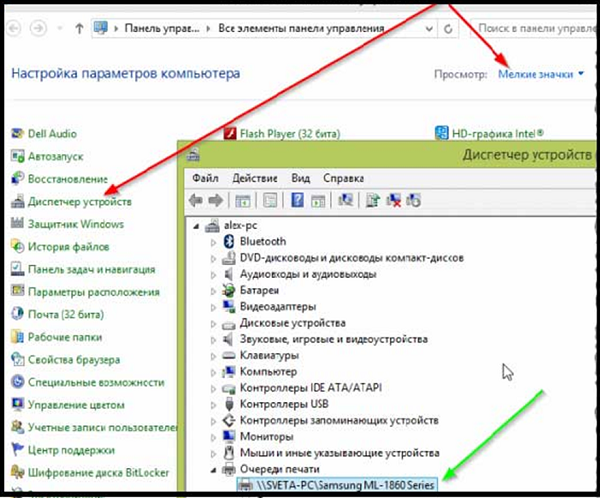
You should also check on the dispatcher page if there is any equipment in front of it. circle or triangle with an exclamation mark. Thus, the system marks the device having a problem with the drivers. If you find an icon opposite the name of any printer, you will need to install a driver for it. The driver is installed either from the disk that comes with the device, or after downloading it from the Internet.
Usually drivers can be found on the official website of the hardware manufacturer.
When the warning icon is not detected, but the device still does not turn on, it is still recommended to reinstall the driver. To do this, select the desired unit in the device manager and at the top of this window, click on the screen image with a cross. This procedure will remove hardware from the system.
After removing the device from the system, you will need to reinstall the drivers. This can be done, as already mentioned, either from the installation disk, or you can run the downloaded file. Sometimes drivers do not have an installer startup file, and to install them, you need to click on the “Update hardware configuration” button in the dispatcher window to find the line with the equipment, opposite which there is an icon (!). Then, highlighting it, click on the “Update driver” icon located at the top of the window and follow the instructions that will appear. The system will offer to find drivers on the Internet or install them from a computer. Specify the folder where you unpacked the drivers downloaded from the Internet. After installation, it is recommended to restart the PC.
Print queue setup
A very common reason that your printer fails to work is a failure, which is directly related to the print queue. In this case, the system queues the document, but the unit does not start work.This may occur due to a power surge in the network or for software reasons if the device is used as a network and connected to several PCs. In this case, the special file created by the system when the user sends the file to print is damaged. In this case, the equipment is often gives a print error.
To correct the error, do the following.
- Go to “Control Panel”. For convenience of searching, switch the window to the small icons mode, then click on “Devices and Printers”.
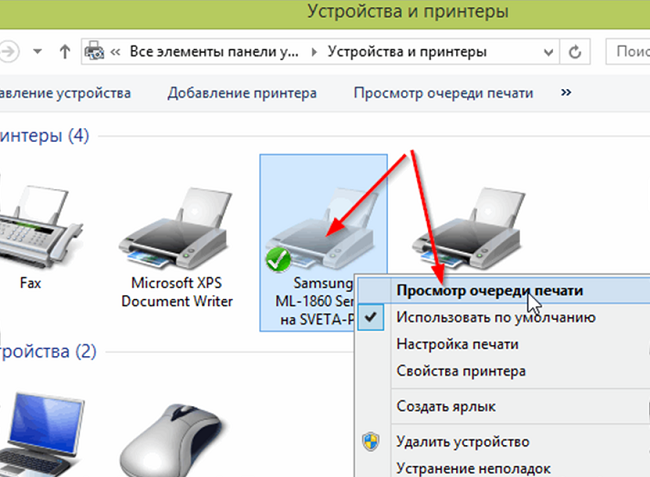
- In this window, you need to select the device to which you sent the document, and click on its right-click icon.
- A menu will pop up where you want to select “View Print Queue”.
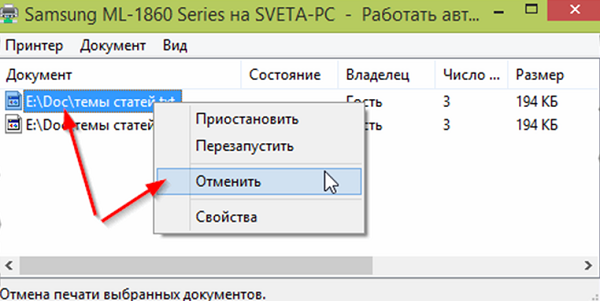
- A window will appear, where all documents sent to print will be visible. Select them one by one with RMB and click “Cancel”.
After carrying out this simple procedure, the printing equipment, in most cases, returns to a healthy state. But, although rarely, a situation arises where the print queue is not cleared and the print error continues to appear. In this case, you can resort to the following method:
- unplug the cables connecting the printer and PC, and disconnect the unit from the network;
- go to “Services”, as mentioned above, and stop “Print Manager”;
- Next, open Windows Explorer, and paste C: \ Windows \ System32 \ Spool \ PRINTERS into the address bar, then press Enter;
- in the folder that opens, delete the files in it;
- turn off the PC;
- Before switching the printer on the network, make sure that at least 60 seconds have passed. after it is disconnected from the outlet;
- connecting the device cable to the PC, turn on the unit with the button intended for it;
- turn on the PC, wait until the operating system is fully loaded;
- Now you can try to send the file to print.
If this method also turned out to be ineffective, and the document could not be printed, then it is recommended to use special programs that the equipment manufacturer offers for the users of their equipment. For example, for HP printers, there is HP Print and Scan Doctor, which can be downloaded for free from the official HP website.
Typically, these programs search for and fix hardware problems automatically.
Check ink and paper
When the machine refuses to print, or blank sheets come out, this may mean that it has run out of ink.Although the equipment self-diagnostics program successfully detects this fact and alerts are given with an error code, in some situations there may be no warning, for example, if a CISS is used or toner counting on the cartridge is frozen.
Determination of ink level in inkjet
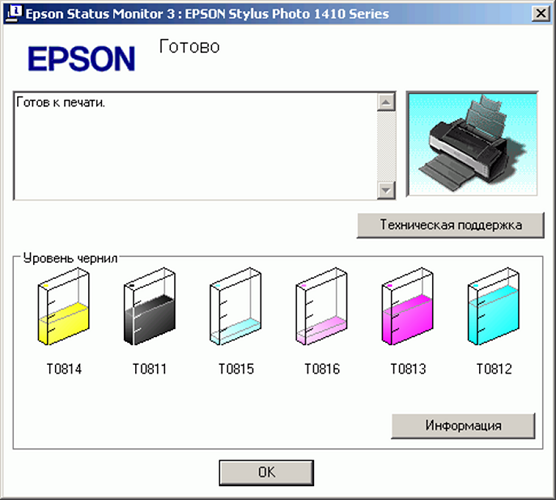
If you use original cartridges, you can use the service program that comes with the printing equipment to find out at what stage the ink level of an inkjet printer is.. For example, the Epson is the “Status Monitor” program. To open this program, it is enough to find the printer icon located in the tray and double-click on it. Next, on the “Service” tab, select “Status Monitor”.
If you do not find the tray icon, you can find the equipment in the control panel by going to the “Devices and Printers” section.
For HP Also, double-click on the unit icon in the tray. Further:
- select “Settings” and open the “Functions” window;
- in the appeared tab click on the “Printer Services” button;
- After that, select the “Ink Level Information” tab.
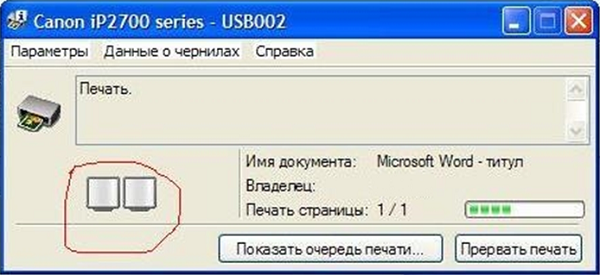
For Canon units actions are similar to those described for Epson devices, only in the “Service” tab, select the “Printer Status” line, after which a window will appear where ink data will be displayed.
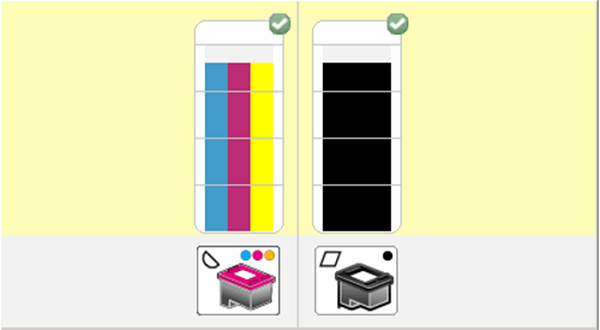
In the case of using CISS, the ink level in the containers is determined visually, as they are transparent.
Determining the amount of toner in a laser
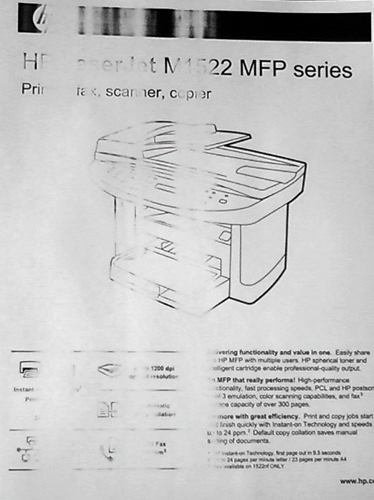
If you need to determine the level of toner in a laser printer where the chip is “frozen”, this is also done visually: the unit prints badly (the image or text on the pages becomes faded), white stripes appear, or a blank sheet of paper generally comes out. These signs indicate that the toner cartridge is running low.
If you use original cartridge or self-zeroingWhen counting the amount of toner is possible, do the following:
- press the “Print Screen”, “Print”, “Cancel” button (depending on the equipment manufacturer) and hold it for at least 5-7 seconds;
- as a result, the machine will print a page with a report where you should find the line “Toner Remaining”, which is translated as “Toner residue”.
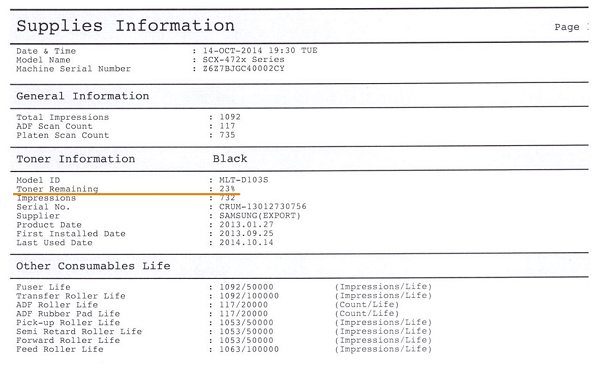
It should be remembered that this information is inaccurate, and the error can reach up to 50% of the actual amount of powder.
Sometimes, if your device has started to produce poor quality when printing, the following method helps: take a cartridge and shake it, then insert it back into the laser. This method sometimes helps when, by all indications, toner runs out and the document urgently needs to be printed.
Check paper in device
If the machine has stopped printing because the paper has run out or jammed, a warning message with an error code should appear. But sometimes this does not happen, so you have to inspect the "insides" of the unit.
Paper jams often occur for the reason that the user uses to save used sheetsfor example, printing information on the back. Such paper, in some cases, can be crumpled, have excesses, etc. Therefore, it is not always possible to lay it in an even stack in the paper tray. When the device is in operation, when a sheet is grabbed, it can be twisted and crumpled, which is why the equipment stops.
If you see that the paper is jammed, then you need to remove it carefully, without much effort and jerks. Users sometimes make this mistake, as a result of which they may remain in the device case small scraps of paper, which finding at once and you will not define. This can cause a crash. To find a piece of paper, you need to open the lid of the unit and remove the cartridge from it (if it is a laser), or when the device is turned off, move the carriage with cartridges (if you have an inkjet printer). After detecting scraps of paper, carefully remove them from the unit body. Usually they are on the shaft or rollers.
/rating_off.png)


