Homemade welding machine at home
The welding machine is a fairly popular device both among professionals and among home craftsmen. But for domestic use, it sometimes makes no sense to buy an expensive unit, since it will be used in rare cases, for example, if you need to brew a pipe or put up a fence. Therefore, it will be more reasonable to make a welding machine with your own hands, investing in it the minimum amount of funds.
The main part of any welder working on the principle of electric arc welding is a transformer. This part can be removed from the old, unnecessary household appliances and make it homemade welding machine. But in most cases, the transformer needs a little refinement. There are several ways to make a welder, which can be both the simplest and more complex,requiring knowledge in electronics.
Content
Microwave Welding Machine
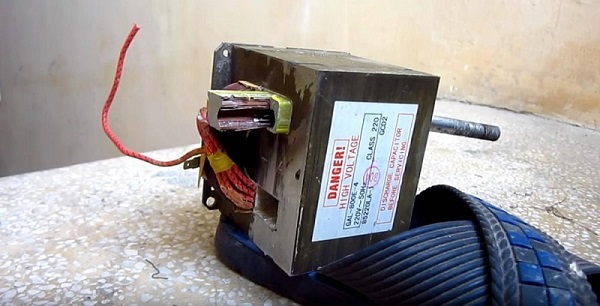
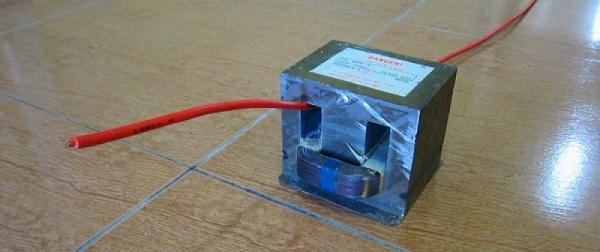
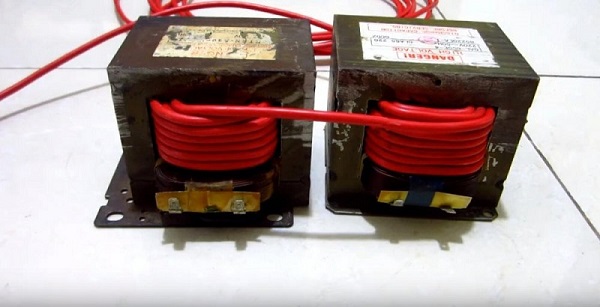
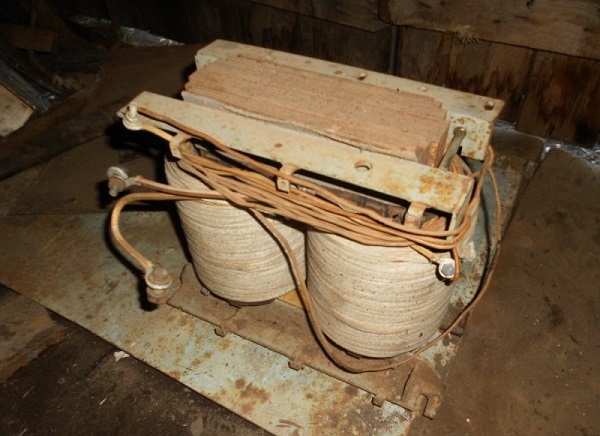
To make a mini-welding machine, you will need a pair of transformers removed from an unnecessary microwave oven. It is easy to find a microwave with friends, acquaintances, neighbors, etc. The main thing is that it has a power in the range of 650-800 W, and the transformer was intact in it. If the stove has a more powerful transformer, then the device will turn out with higher rates of current.
So, a transformer taken from a microwave has 2 windings: primary (primary) and secondary (secondary).

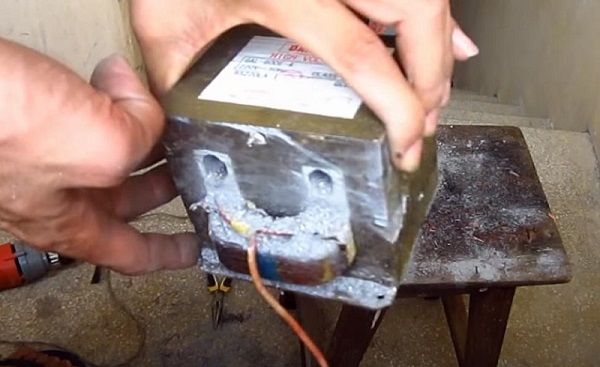
Secondary has more turns and a smaller wire cross section. Therefore, in order for the transformer to become suitable for welding, it must be removed and replaced with a conductor with a larger cross-sectional area. To extract this winding from a transformer, it must be cut on both sides of the part with a hacksaw.
This should be done with great care so that you do not accidentally touch the primary winding with a saw.
When the coil is cut down, its remains will need to be removed from the magnetic circuit. This task is much easier if you drill the windings to relieve metal stress.
Next, using a drill or chisel, knock out the remains of the winding.
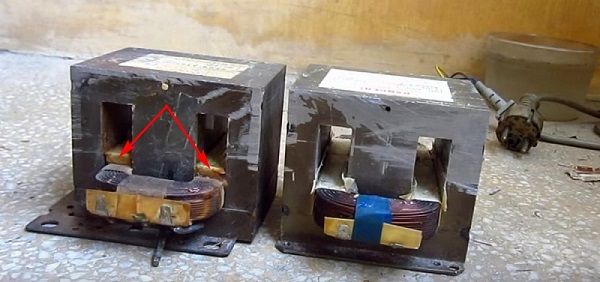
Do the same with another transformer. As a result, you will get 2 parts that have a primary winding of 220 V.
Important! Do not forget to remove the current shunts (shown by arrows in the photo below). This percent will increase the power of the device by 30%.
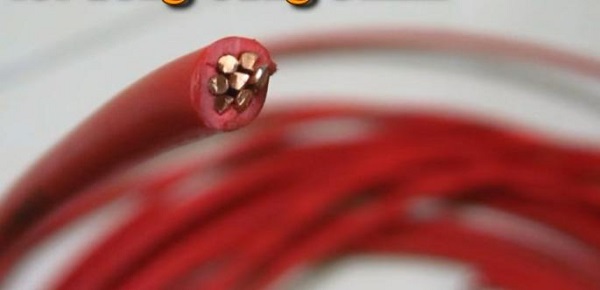
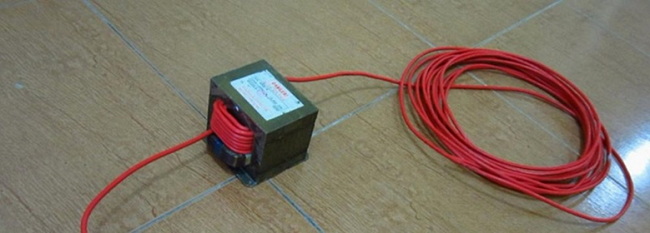
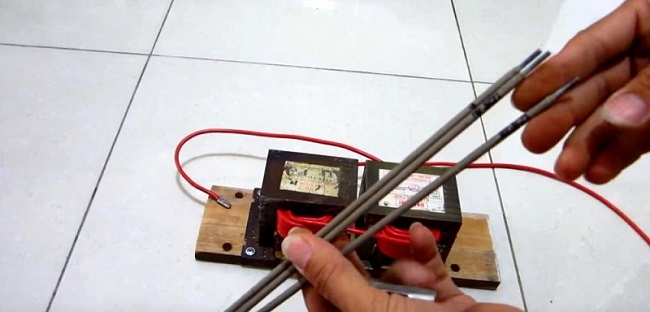
For the manufacture of the secondary will need to purchase 11-12 meters of wire. It must be stranded and have section not less than 6 squares.
To make a welding machine, for each transformer you will need to wind 18 turns (6 rows in height and 3 layers in thickness).
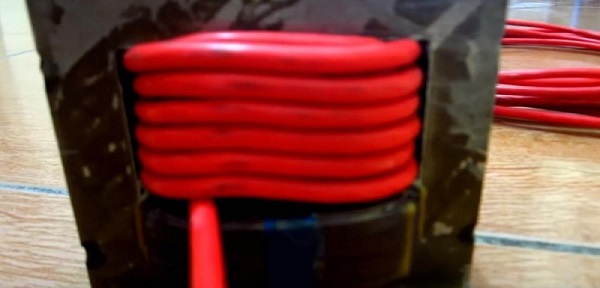
It is possible to wind both transformers with one wire or separately. In the second case, the coils should connect in series.
Winding should be done very dense, so that the wires are not loose. Next, the primary windings need connect in parallel.
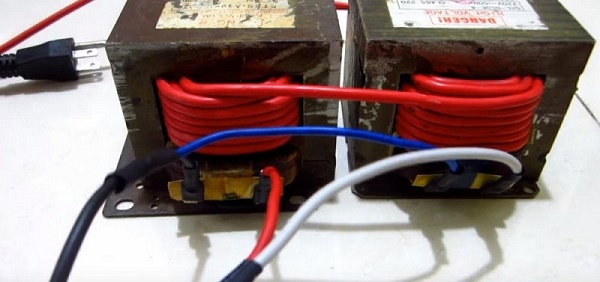
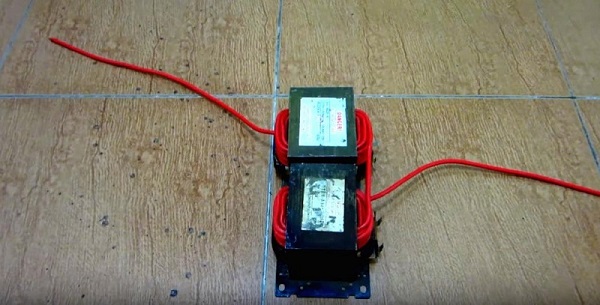
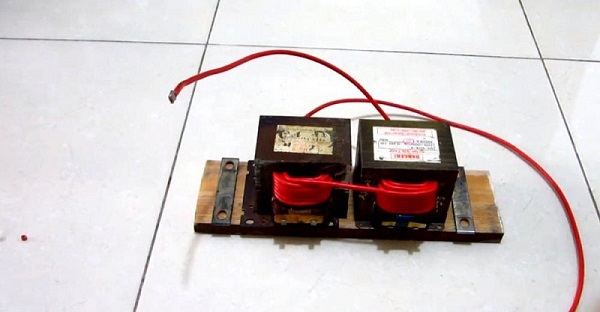
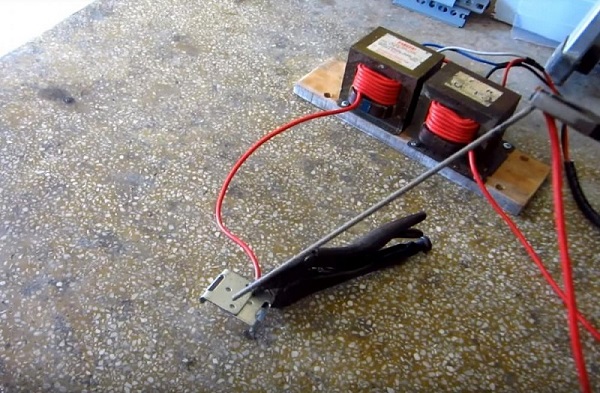
To connect the parts together, they can be screwed to a small trimming of a wooden board.
If you measure the voltage on the secondary transformer, then in this case it will be equal to 31-32 V.
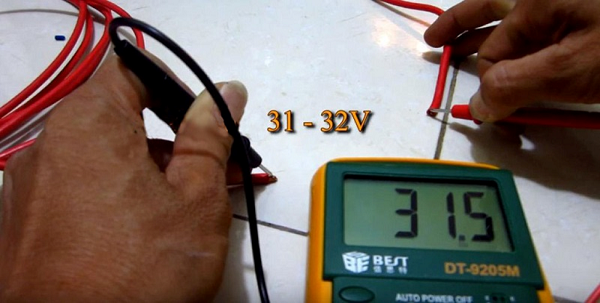
This home-made welder can easily weld metal with a thickness of 2 mm with electrodes with a diameter of 2.5 mm.
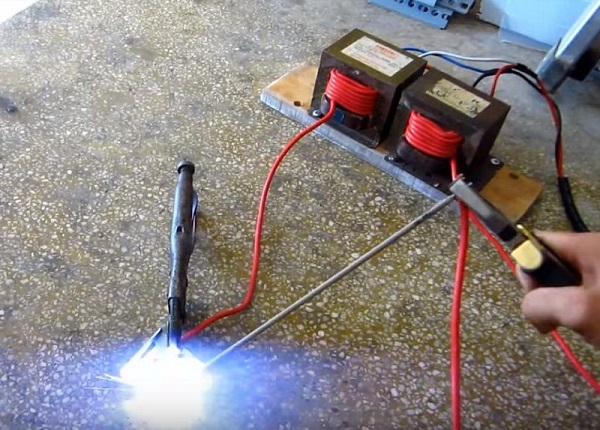
It should be remembered that cooking with such an improvised device should be with rest breaks, since its windings become very hot. On average, after each electrode used, the device should cool for 20-30 minutes.
Thin metal with an aggregate made from a microwave will not work, as it will cut it. A ballast resistor or choke can be connected to the welder to adjust the current. The role of the resistor can perform a piece of steel wire of a certain length (selected experimentally), which is connected to the low-voltage winding.
AC Welder
This is the most common type of apparatus for welding metals. It is easy to make it at home, and it is unpretentious in operation. But the main drawback of the device is large mass of step-down transformer, which is the basis of the unit.
For home use, it is enough that the device produces a voltage of 60 V and can provide a current of 120-160 A. Therefore for primarywhich is connected to a household network of 220 V, you will need a wire with a cross section of 3 mm2 up to 4 mm2. But the ideal option is a conductor with a cross section of 7 mm.2. With this cross section, voltage drops and possible additional loads to the device will not be intimidating. From this it follows that for the secondary need a conductor having 3 mm in diameter. If you take an aluminum conductor, the calculated cross-section of copper is multiplied by a factor of 1.6. For the secondary you will need a copper bus with a cross section of at least 25 mm2
It is very important that the winding conductor be covered with rag insulation, since traditional PVC sheath melts when heated, which can cause an inter-turn short circuit.
If you have not found a wire with the necessary cross section, then it can be make by yourself of several more thin conductors. But this will significantly increase the thickness of the wire and, accordingly, the dimensions of the unit.
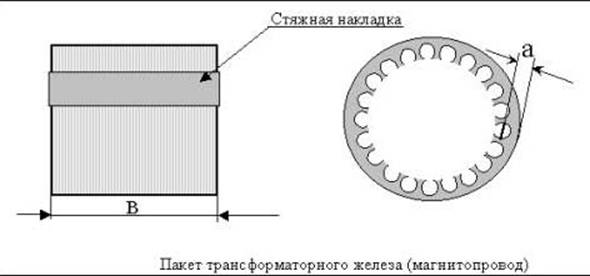
First thing, the base of the transformer is made - core. It is made of metal plates (transformer steel). These plates should have a thickness of 0.35-0.55 mm. The studs connecting the plates must be well insulated from them.Before assembling the core, its dimensions are calculated, that is, the dimensions of the “window” and the cross-sectional area of the core, the so-called “core”. To calculate the area using the formula: S cm2 = a x b (see figure below).
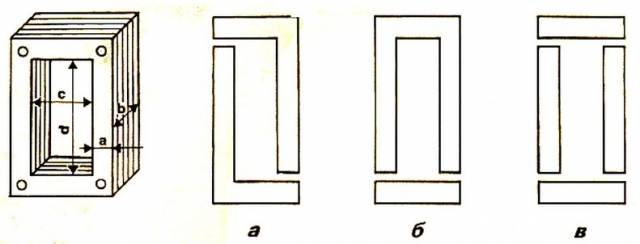
But from practice it is known that if you make a core with an area of less than 30 cm2, then such a device will be difficult to obtain high-quality seam due to lack of power reserve. Yes, and it will heat up very quickly. Therefore, the cross section of the core must be at least 50 cm2. Despite the fact that the weight of the unit will increase, it will become more reliable.
For the assembly of the core is better to use L-shaped plates and place them as shown in the following figure, until the thickness of the part reaches the desired value.
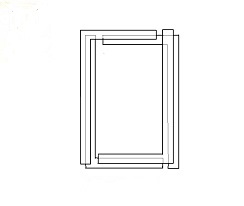
Plates at the end of the assembly must be fastened (at the corners) with bolts, then cleaned with a file and insulated with fabric insulation.
Now you can start winding transformer.
- First of all, the primary should be wound. For its manufacture will need to make 215 turns.
- It is recommended to make a branch on the 165th and 190th coils. To do this, it is necessary at the top of the transformer to attach a plate from a PCB.All branches are fixed on it with bolts. But near them should be marked. For example, near the first wire you should write “Common”, near the 2nd branch - “165 turns”, near the 3rd - “190 turns” and near the 4th - “215 turns”. In the future, this will allow you to adjust the strength of the current. If you want to increase the strength of the current, then choose a winding with a smaller number of turns, and vice versa.
- Next, a secondary winding is made, consisting of 70 turns.
One nuance should be taken into account: the ratio of turns on the core should be 40% to 60%. This means that on the side where the primary is located, there should be a smaller number of turns of the secondary. Due to this, at the beginning of welding, the winding, which has more turns, is partially disconnected due to the occurrence of eddy currents. This will increase the strength of the current, which will positively affect the quality of the seam.
When the winding of the transformer is completed, the power cable is connected to the common wire and to the branch 215 of the loop. Welding cables are connected to the secondary winding. After that, the contact welding machine is ready for operation.
DC unit
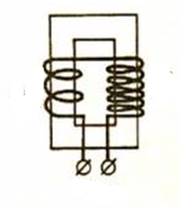
To cook cast iron or stainless steel, a DC apparatus is required.It can be made from a conventional transformer unit, if its secondary winding connect rectifier. Below is a diagram of the welding machine with a diode bridge.
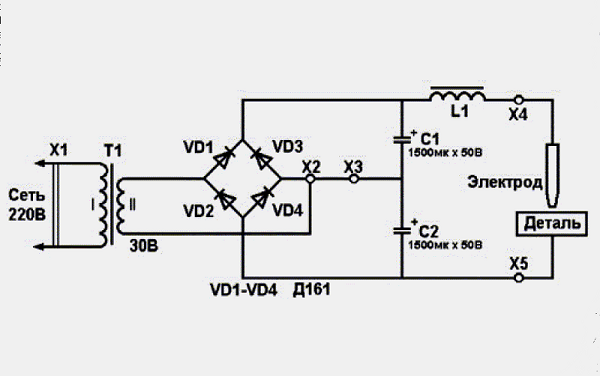
Diagram of the welding machine with a diode bridge
The rectifier is assembled on D161 diodes capable of withstanding 200A. They must be installed on radiators. Also, to equalize the current ripple, 2 capacitors (C1 and C2) with 50 V and 1500 μF will be required. This circuitry also has a current regulator, the role of which is performed by the choke L1. Welding cables (direct or reverse polarity) are connected to contacts X5 and X4, depending on the thickness of the metal being joined.
Inverter from computer power supply
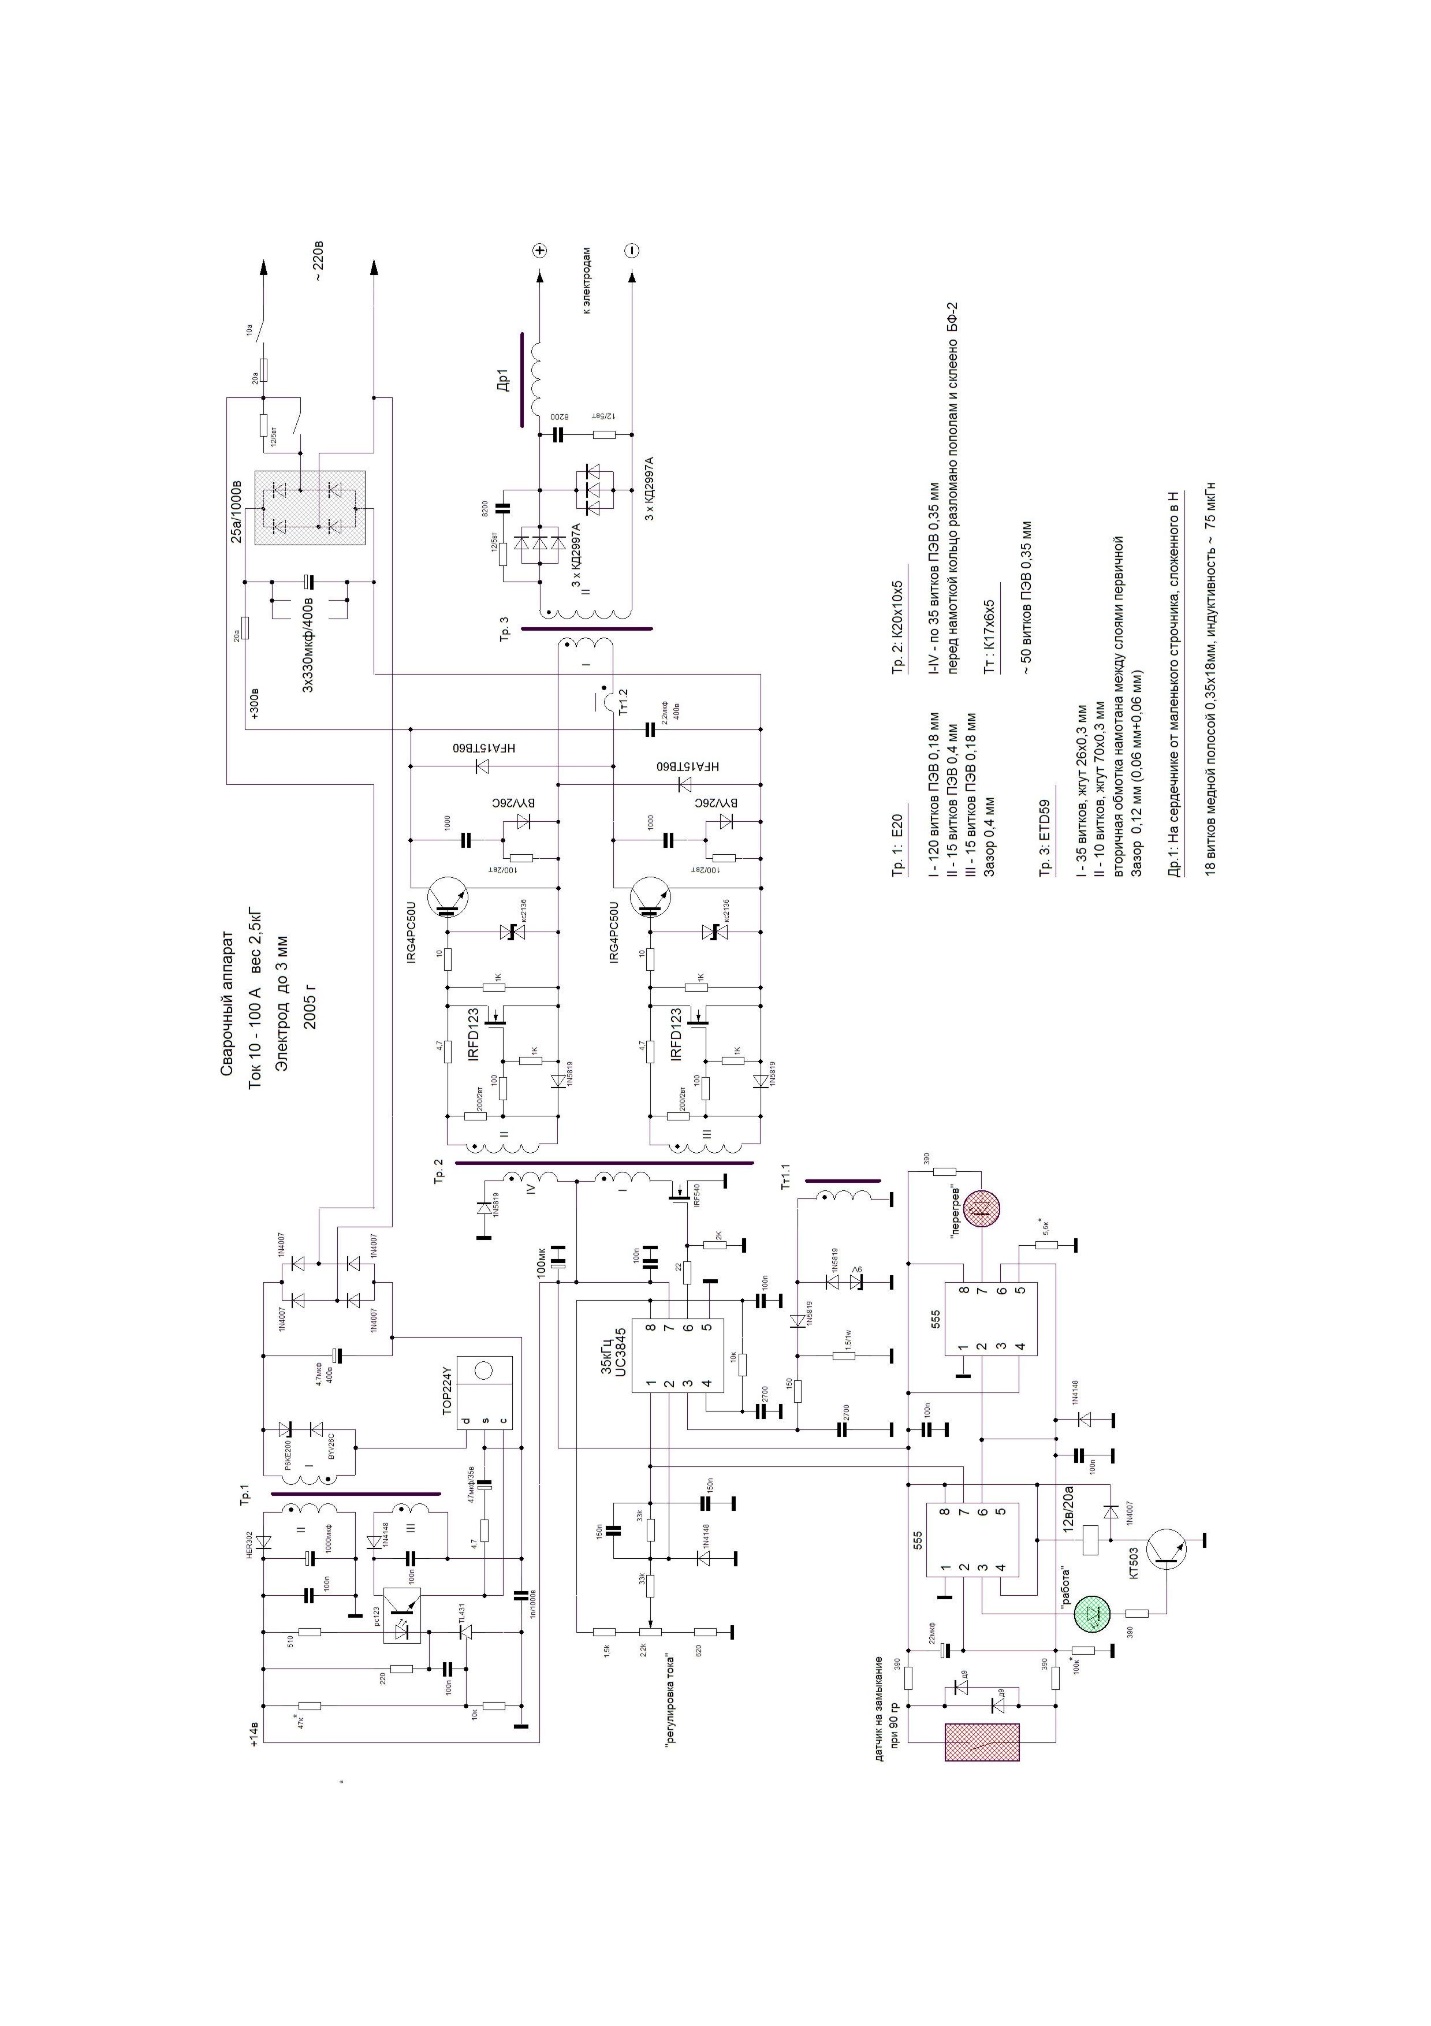
The welding machine from the power supply of the computer cannot be done. But to use its case and some details, and also the fan is quite real. So, if you make the inverter with your own hands, then it can easily be placed in the PSU case from the computer. All transistors (IRG4PC50U) and diodes (КД2997А) must be installed on radiators without the use of gaskets. For cooling parts, it is desirable use a powerful fansuch as Thermaltake A2016.Despite its small size (80 x 80 mm), the cooler is capable of developing 4800 rev / min. Also, the fan has a built-in speed control. The latter are regulated by a thermocouple, which must be fixed on the radiator with installed diodes.
Below is the electrical circuit diagram of the welding inverter (in high resolution), according to which the device can be made to fit in the PSU case.
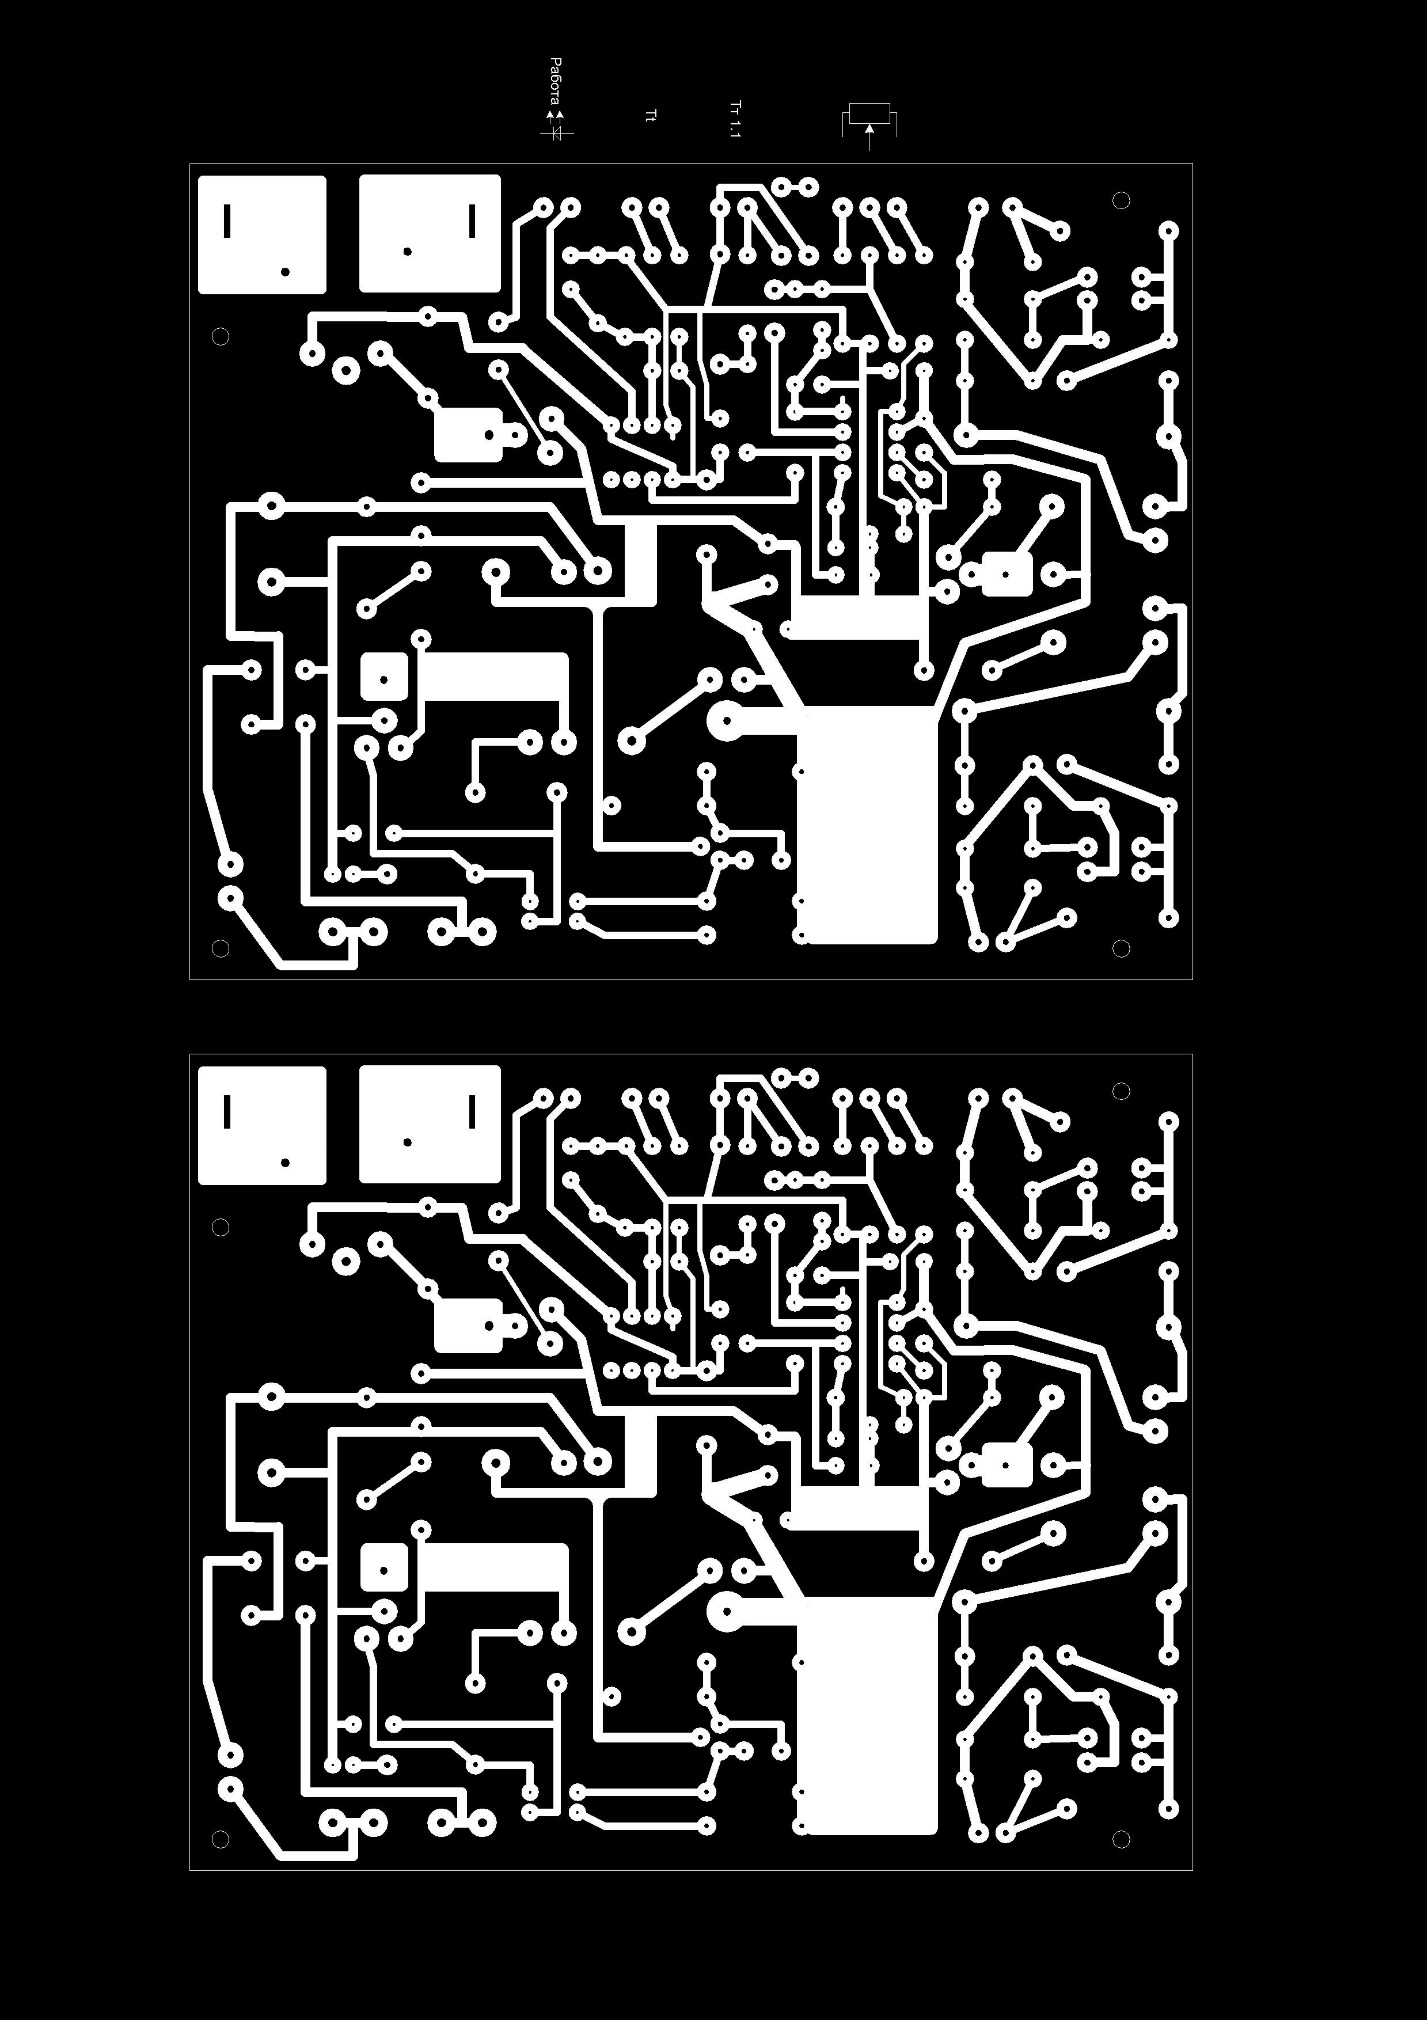
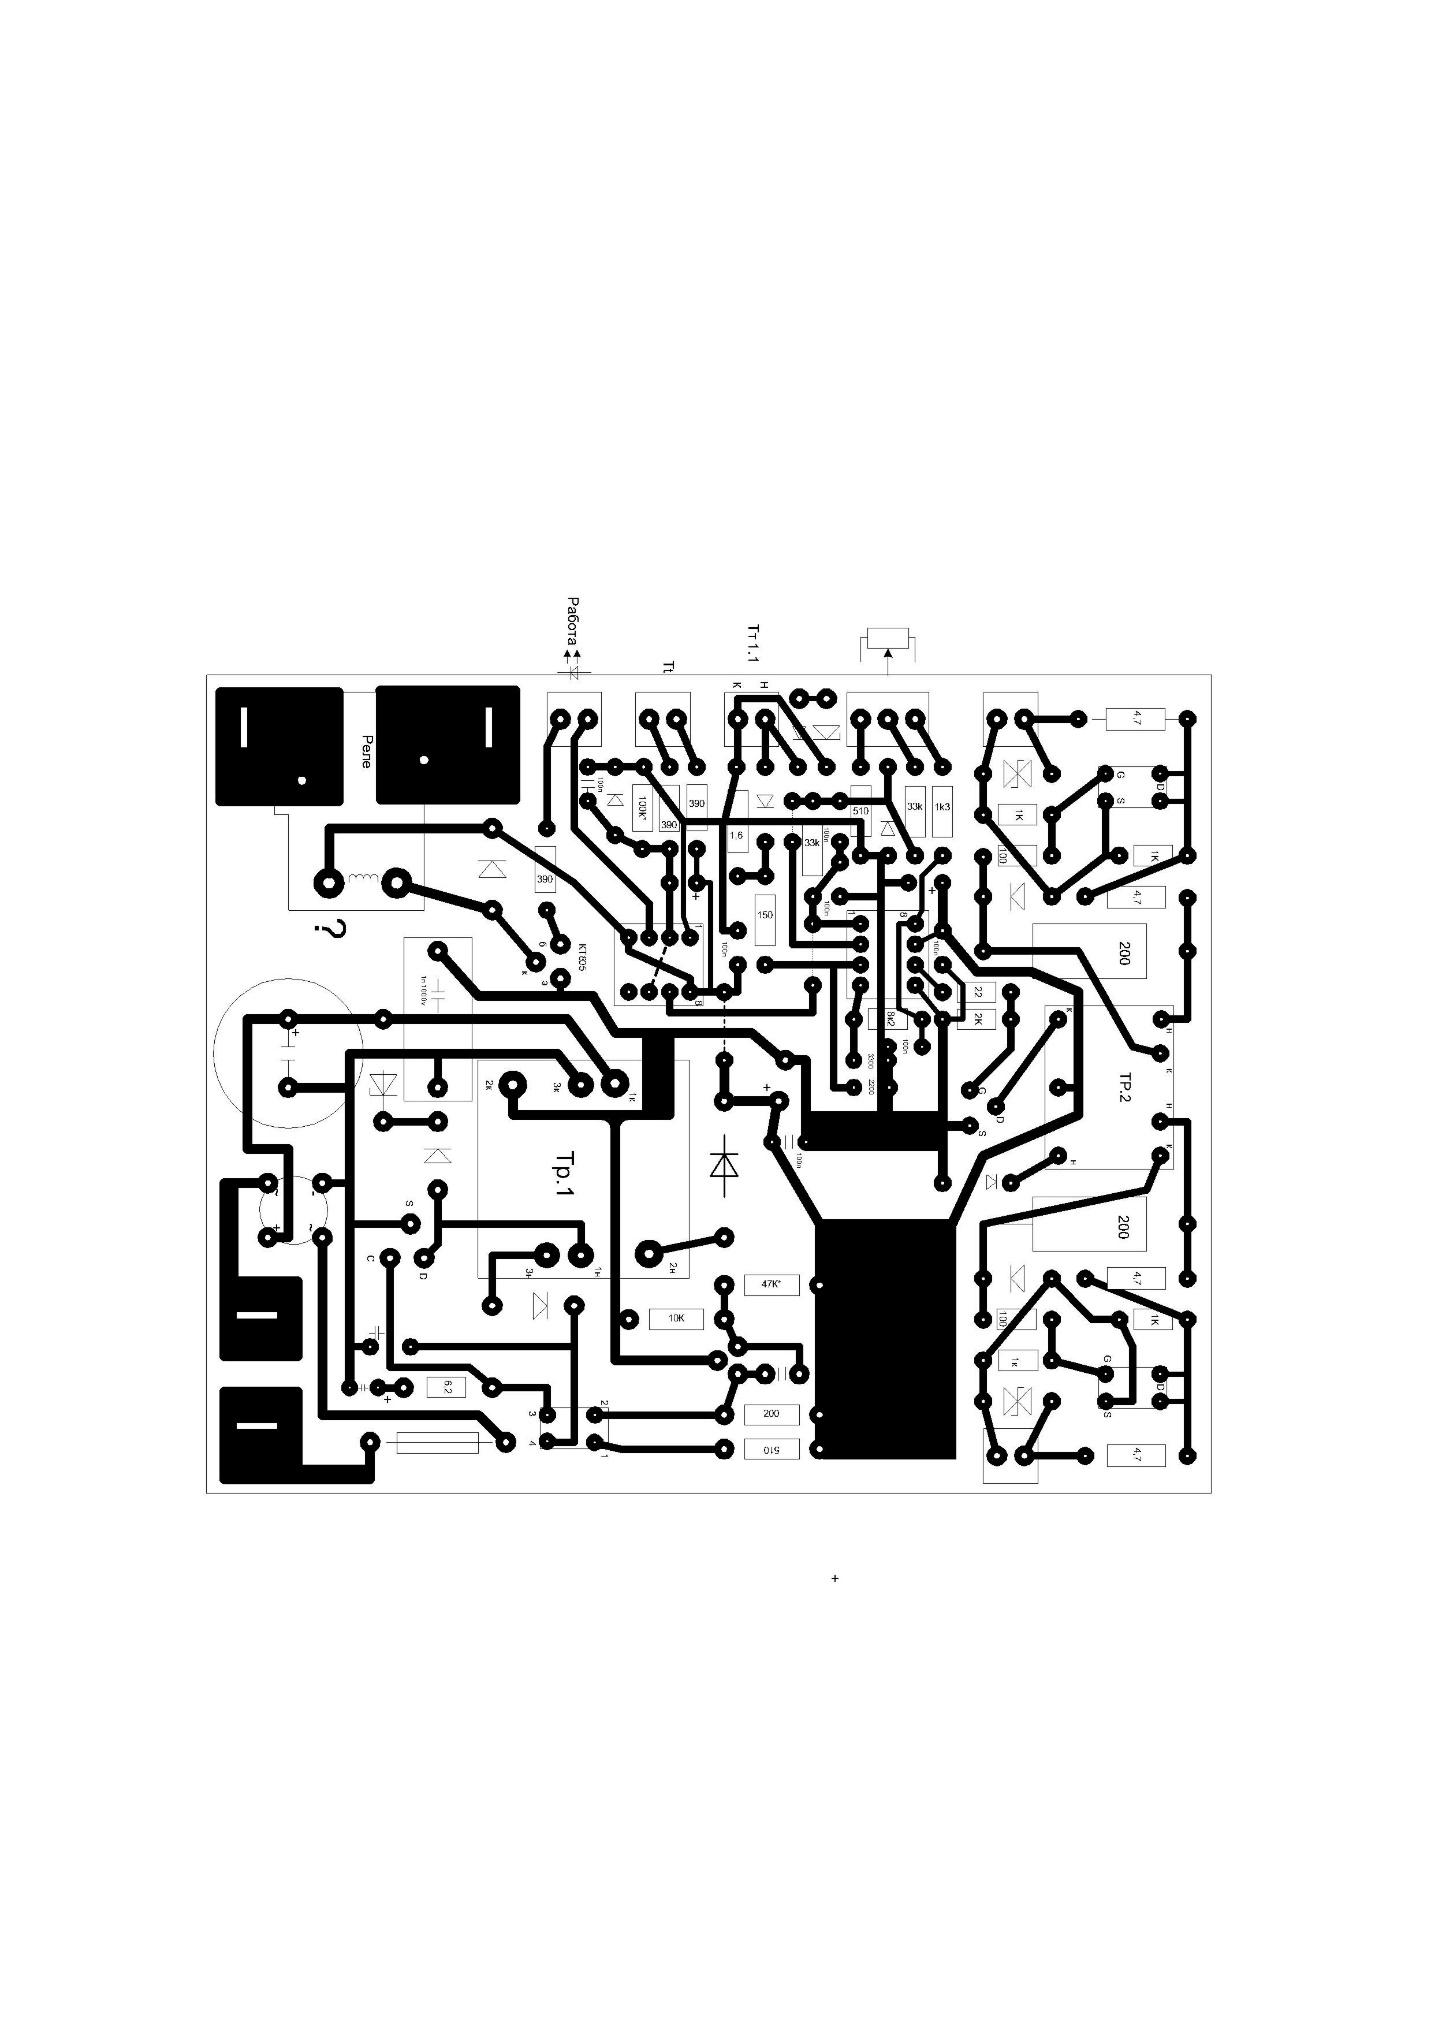
The following are the schemes for the production of printed circuit boards that are needed to make an inverter.

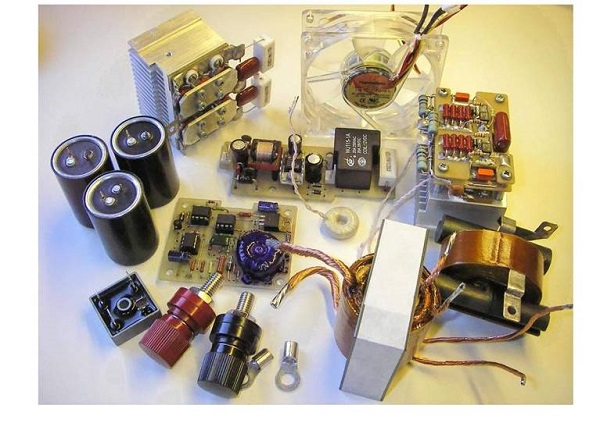
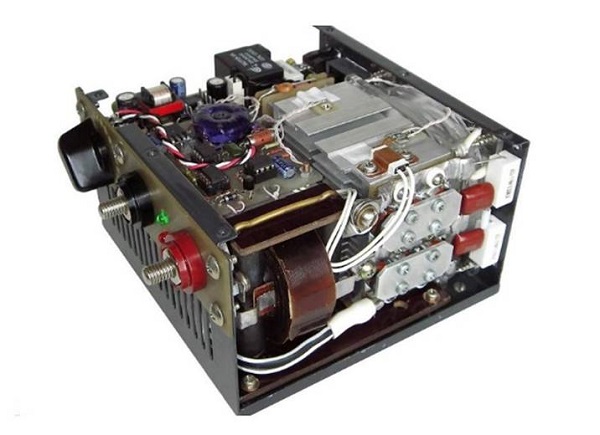
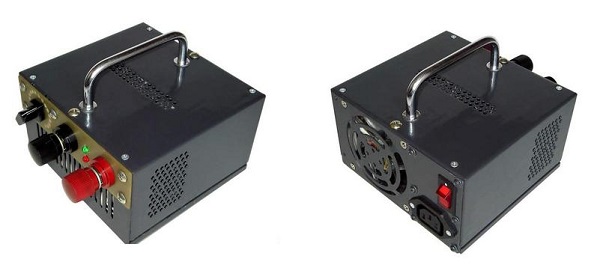
The following photos show what components a self-made inverter welding machine consists of and how it looks after assembly.
Electric motor welder
To make a simple welding machine from the stator of an electric motor, it is necessary to select the motor itself that meets certain requirements, namely, that its power should be from 7 to 15 kW.
You can get the desired stator in places where take scrap.As a rule, it will be cleared of wires and after a couple of blows with a sledgehammer it breaks. But if the body is made of aluminum, then to extract the magnetic core from it, you will need to stitch the stator.
Preparation for work
Place the stator with the hole up and lay the bricks under the part. Next, fold the firewood inside and set it on fire. After a couple of hours of roasting, the magnetic core is easily separated from the body. If there are wires in the case, they can also be removed from the grooves after heat treatment. As a result, you get a magnetic core, cleaned of unnecessary elements.
This disc should be good saturate with oil varnish and let it dry. To speed up the process, you can use a heat gun. Lacquer impregnation is done so that after removing the screeds there is no scattering of the package.
When the pig is completely dry using the grinder, remove screedsplaced on it. If the screeds are not removed, they will serve as short-circuited coils and take the power of the transformer, as well as cause its heating.
After cleaning the magnetic core of unnecessary parts need to make two end plates (see picture below).

The material for their manufacture can be either cardboard or press board. You also need to make two liners from these materials. One will be internal, and the second - external. Next, you need:
- install both end plates on the blank;
- then insert (put on) cylinders;
- wrap all this construction with keeper or glass tape;
- soak the resulting part with varnish and dry.
Transformer manufacturing
After carrying out the above steps, a welding transformer can be manufactured from a magnetic circuit. For these purposes, you will need a wire coated with fabric or glass-enamel insulation. To wind the primary winding, you need a wire with a diameter of 2-2.5 mm. About 60 meters of copper busbar (8 x 4 mm) will be required for the secondary winding.
So, the calculations are done as follows.
- At the core should be wound 20 turns of wire having a diameter not lower than 1.5 mm, after which you need to apply a voltage of 12 V.
- Measure the current flowing in this winding. The value should be around 2 A.If the value is greater than the required, then the number of turns needs to be increased, if the value is less than 2A, then decrease.
- Count the number of turns obtained and divide it by 12. As a result, you get a value that indicates how many turns you need per 1 V of voltage.
For primary winding suitable conductor with a diameter of 2.36 mm, which is required to be folded in half. In principle, you can take any wire with a diameter of 1.5-2.5 mm. But first you need to calculate the cross section of the conductors in the coil. First you need to wind the primary winding (220 V), and then the secondary. Its wire must be insulated along its entire length.
If in the secondary winding to make a tap on the area where it turns out 13, and put a diode bridge, then this transformer can be used instead of the battery, if you want to start the car. For welding, the voltage on the secondary winding should be in the range of 60-70 V, which will allow the use of electrodes with a diameter of 3 to 5 mm.
If you put both windings, and in this design there is free space, you can add 4 turns of the tire made of copper (40 x 5 mm). In this case, you get a spot welding winding that allows you to join sheet metal up to 1.5 mm thick.
For case manufacturing metal is not recommended.It is better to make it out of PCB or plastic. In places where the coil is attached to the body, rubber gaskets should be laid to reduce vibration and better insulation from conductive materials.
Homemade spot welding machine
The finished device for spot welding has a fairly high price, which does not justify its internal “stuffing”. It is arranged very simply, and it will not be difficult to make it yourself.
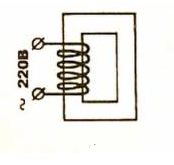
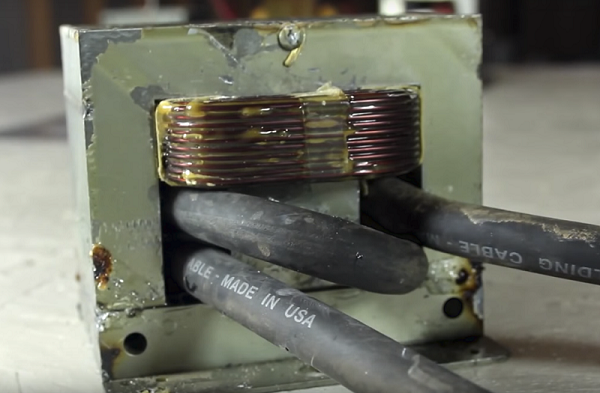
To make a spot welding machine yourself, you will need one a transformer from a 700-800 watt microwave. From it you need to remove the secondary winding in the manner described above, in the section where the manufacture of the welding machine from the microwave was considered.
The device for spot welding is done in the following way.
- Make 2-3 turns inside the manitower with a cable with a conductor diameter of at least 1 cm. This will be the secondary winding, which allows to obtain a current of 1000 A.
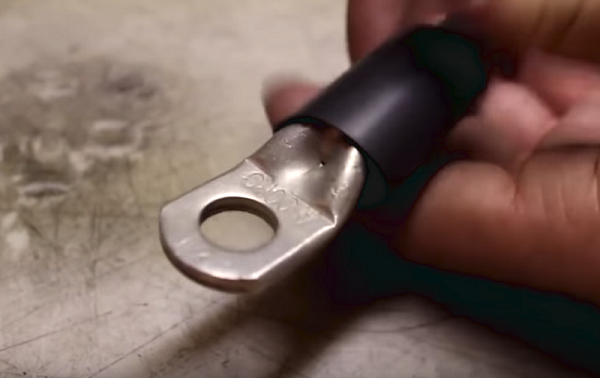
- It is recommended to install copper tips on the ends of the cable.
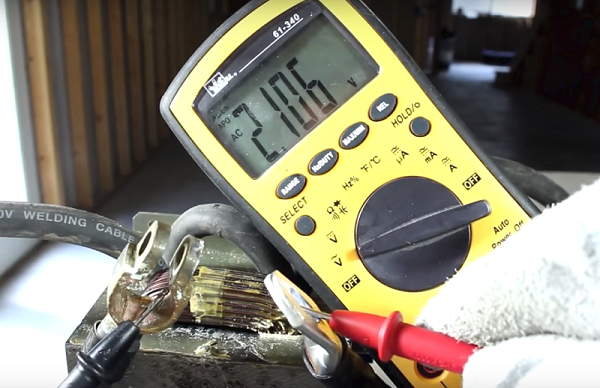
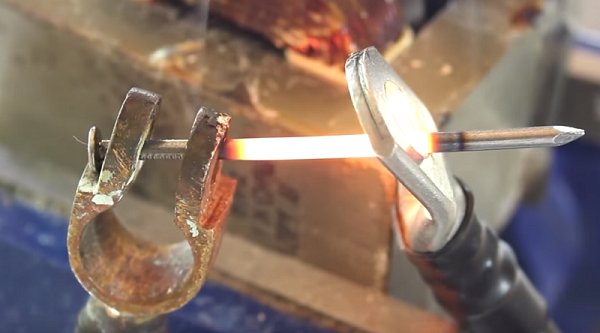
- If you connect to the primary winding of 220 V, then on the secondary winding we will get a voltage of 2 V with a current strength of about 800 A. This will be enough to melt an ordinary nail in a few seconds.
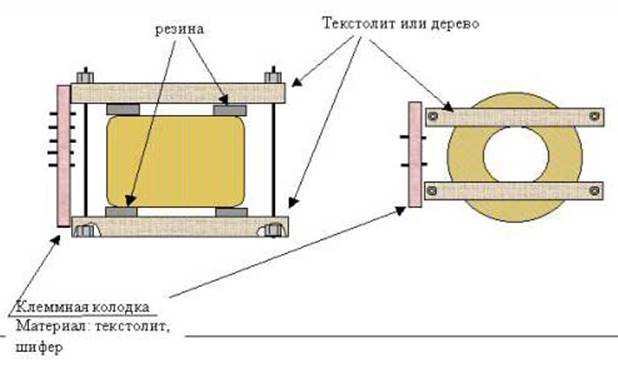
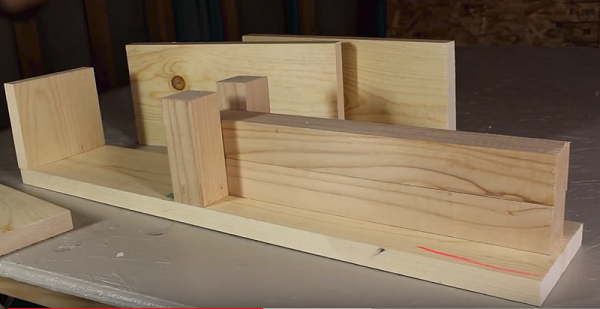
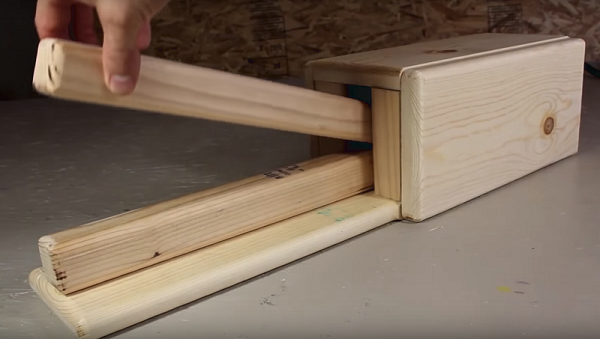
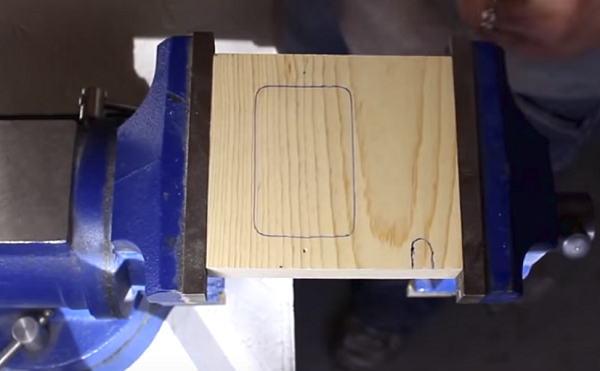
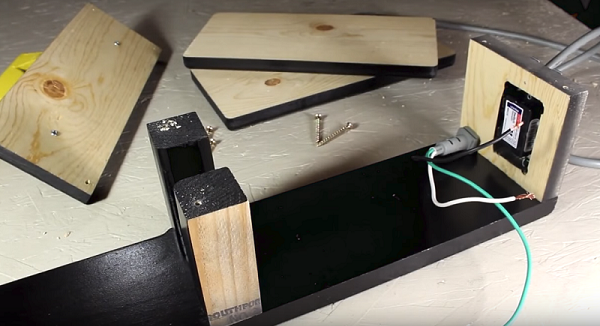
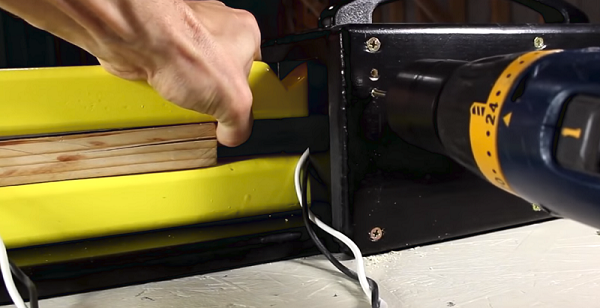
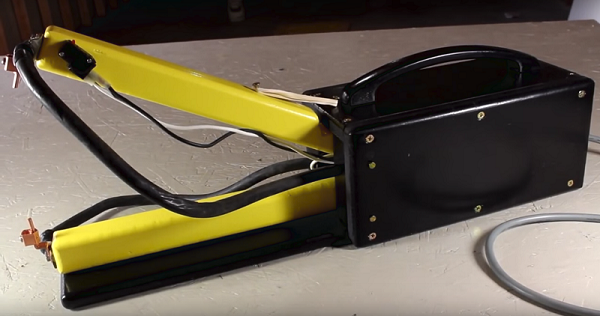
- Followed by make the case for the device. A wooden board is well suited for the base, from which several elements should be made, as shown in the following figure. The dimensions of all parts can be arbitrary and depend on the dimensions of the transformer.
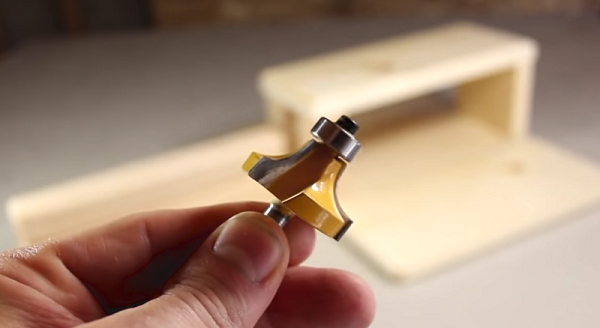
- To give the body a more aesthetic look, sharp corners can be removed using a manual router with an edging milling cutter installed on it.
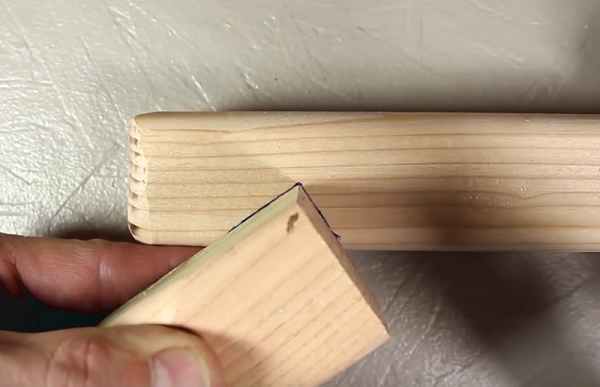
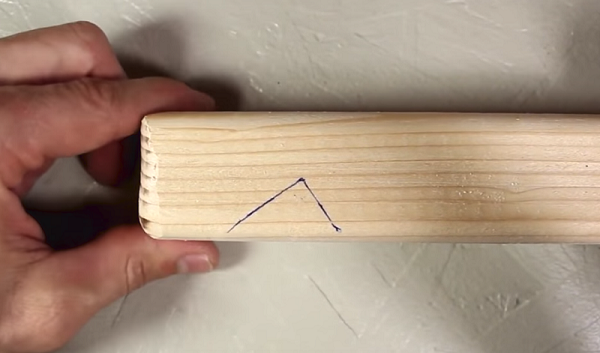
- On one part of the welding pliers need cut a small wedge. Thanks to him, ticks will be able to climb higher.
- Cut a hole for the switch and the power cord on the back of the case.
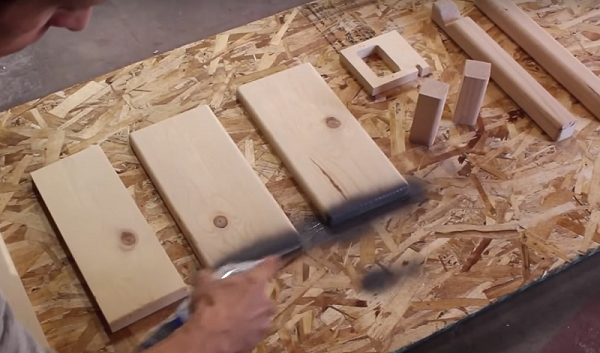
- When all the parts are ready and polished, they can be painted with black paint or varnished.
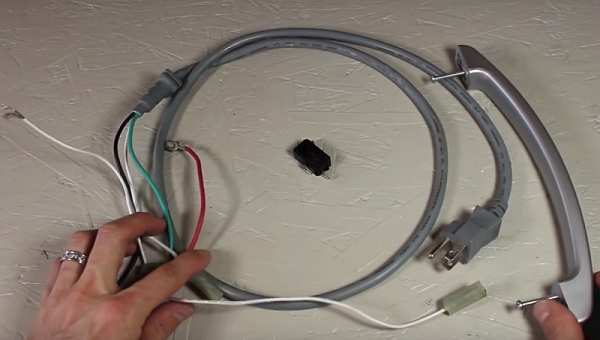
- From the unnecessary microwave you will need to disconnect the power cable and the limit switch. Also need a metal door handle.

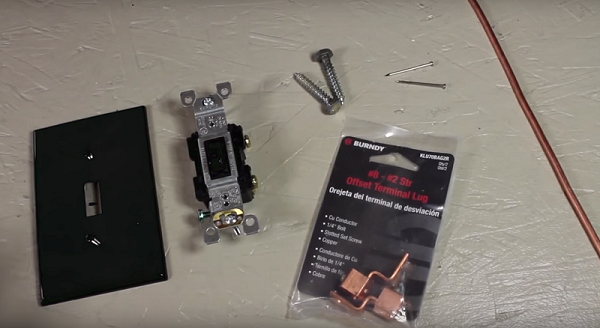
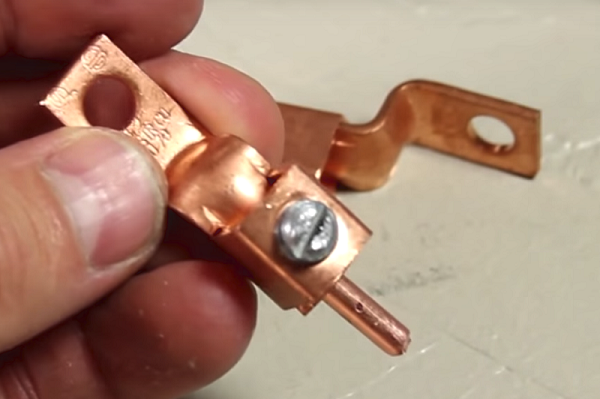
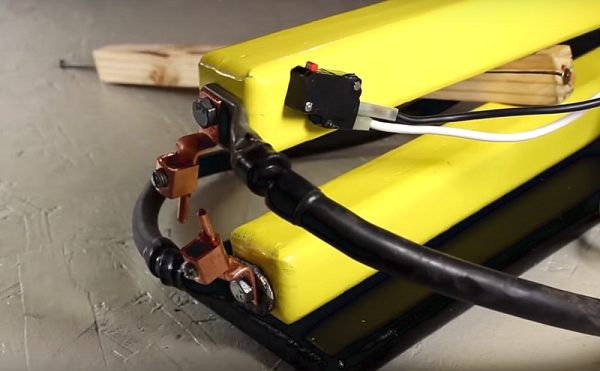
- If a switch and a copper bar, as well as copper clips, were not left in your house, then these details need to be purchased.
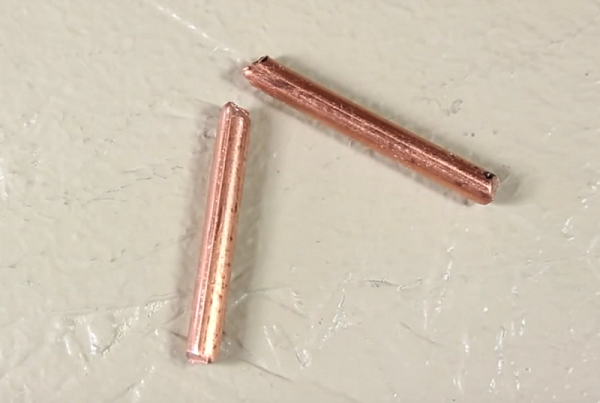
- Cut 2 small rods from the copper wire, which will act as electrodes, and fasten them in the clamps.
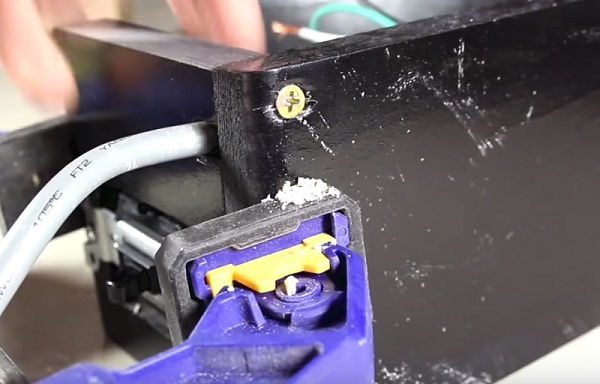
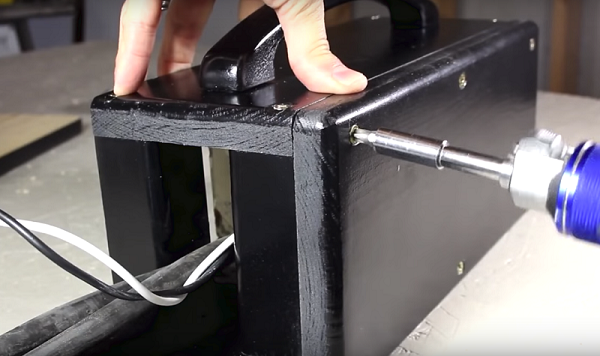
- Screw the switch to the back of the unit.

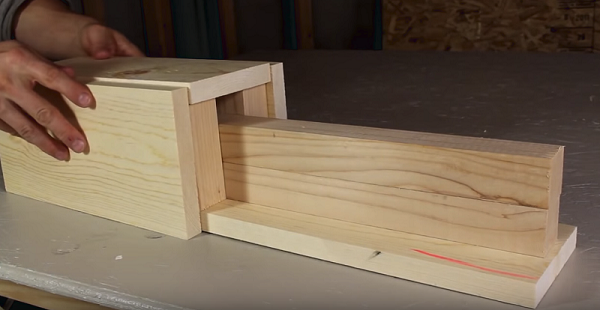
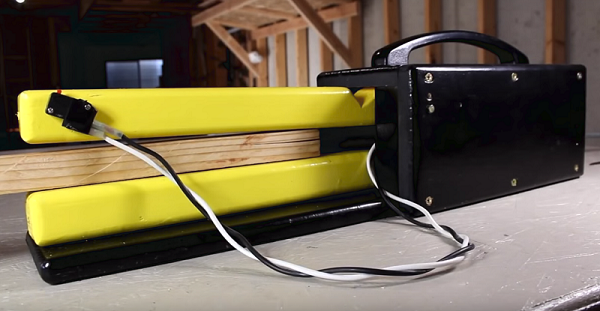
- Screw the back wall and 2 racks to the base, as shown in the following photo.
- Fasten the transformer to the base.

- Next, one mains wire is connected to the primary winding of the transformer. The second mains lead is connected to the first terminal of the switch. Then you need to attach the wire to the second terminal of the switch and connect it to another output of the primary. But on this wire should make a gap and set it microwave breaker. It will play the role of a welding switch. These wires must be of sufficient length to accommodate the breaker at the end of the clamp.
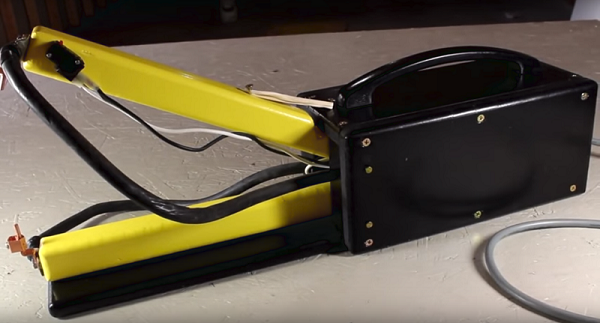
- Fasten the apparatus cover with the handle installed on the uprights and the back wall.
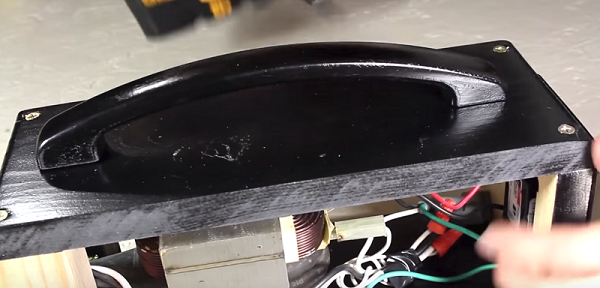
- Fasten the side walls of the housing.
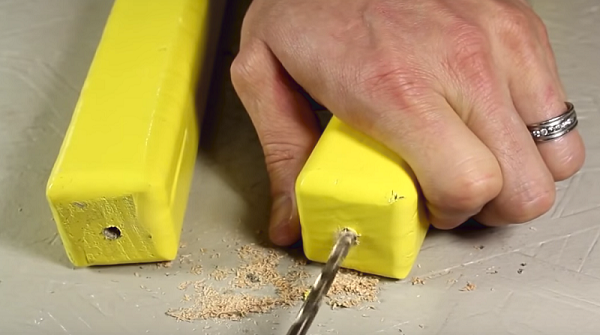
- Now you can install welding tongs. First, drill holes at their ends into which the screws will be screwed.
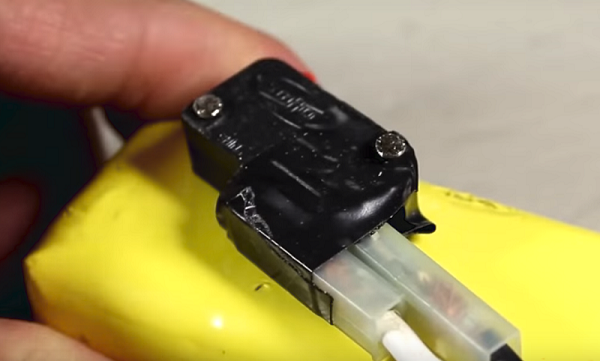
- Next, secure the switch to the end.
- Insert the tongs into the body, preliminarily placing a square bar between them. Drill holes in the tongs through the side walls and insert long nails into them that will serve as axes.
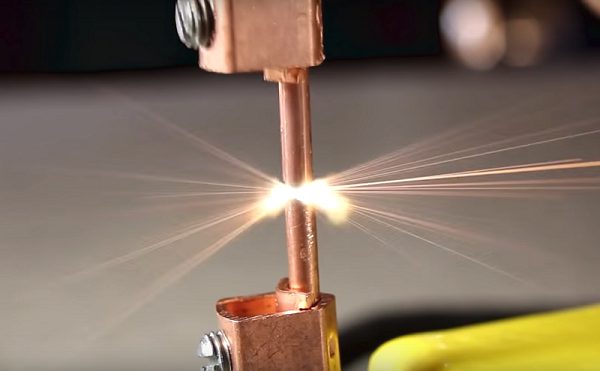
- At the ends of the tongs, fasten the copper electrodes and align them so that the ends of the rods are opposite each other.
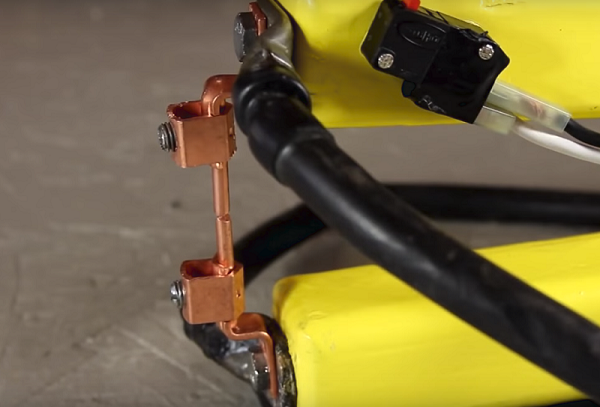
- To raise the upper electrode automatically, screw in the 2 screws and fasten the gum onto them, as shown in the following photos.

- Turn on the unit, connect the electrodes and press the start button. You should see an electrical discharge between the copper rods.
- To check the operation of the unit, you can take metal washers and weld them.
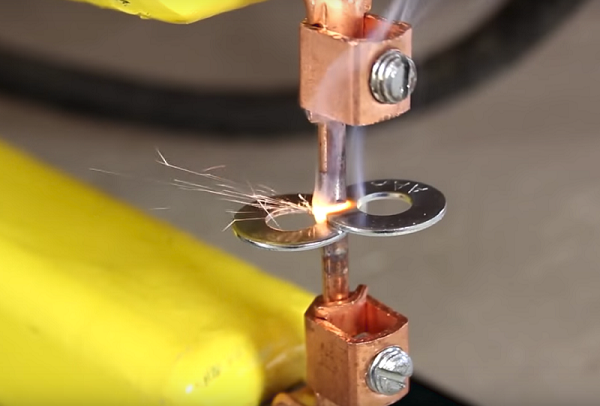
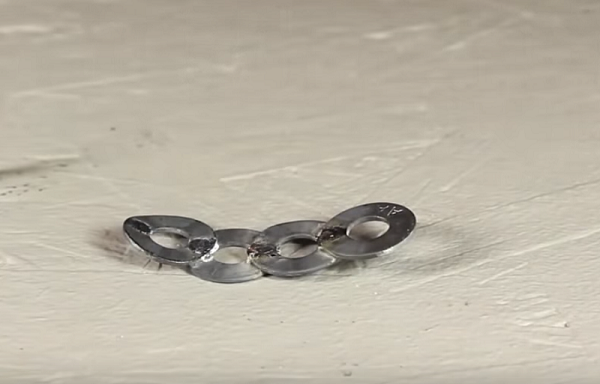
In this case, the result was positive. Therefore, the creation of a spot welding machine can be considered complete.
/rating_off.png)


