Replacing the cartridge in the printer
The more often you use your printing device, the sooner you will encounter such a problem as replacing an empty cartridge. The first signs that the cartridge is running out may occur even before the device refuses to print the document. Modern manufacturers are reinsured, and the equipment offers to replace the consumables a little earlier than it is completely empty: as a rule, there is still a few percent of working ink in the stock. This is done so that the replacement does not come as a surprise and does not paralyze the work of the office. How to change the cartridge in the printer to continue to print bright, saturated pages?

Content
How to determine if a cartridge should be replaced
Consider the signs in which it is better to attend to the purchase of a new replacement cartridge.
- The tone of the print becomes less saturated, faded.
- Not the whole page is printed, some letters may be lost, the effect of “non-printed corners” is present.

- The printer display appears "Replace cartridge" (This does not mean that it is necessary to do this right now, but now the device may refuse to print at almost any moment).
- Appearance effect "light stripes", well-known to all who deal with printers (this is the most frequent and sure sign that it’s time to replace the cartridge).
There are two types of cartridges - chipped and unchipped. Having a chip in their equipment is more expensive to maintain, but also more technological. For example, such a device itself informs the owner that it is time to replace the consumable. Unprocessed cartridges are equipped with the usual, low-cost options for office equipment, and here the owner himself will have to calculate the printer resource. However, experienced users are able to determine the degree of completeness of the cartridge literally "by eye", based on the amount of printed material.
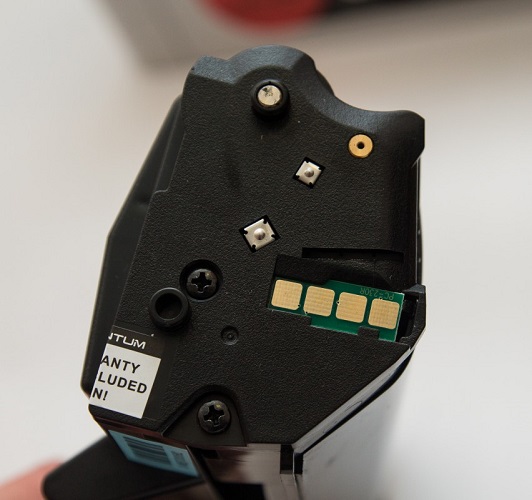
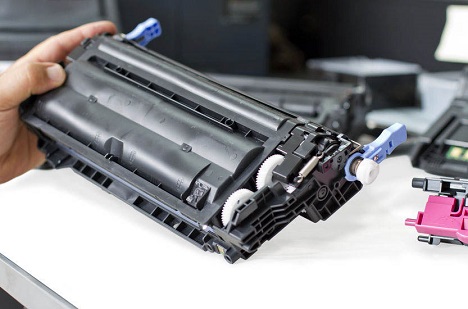
Chip cartridge
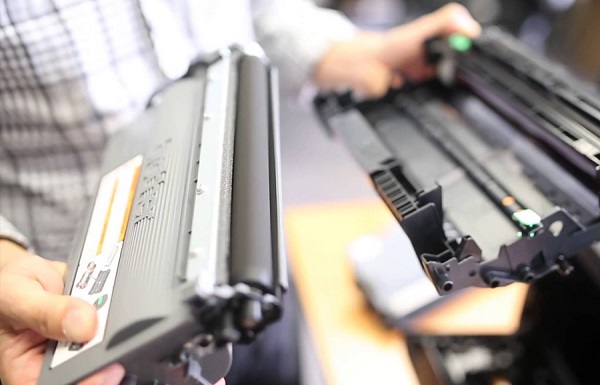
Choosing a cartridge wisely
Before you change the cartridge in the printer, you should decide what it is. Externally, this is a plastic box, inside of which there is a fixed amount of working ink. This box (or cassette) is usually called a cartridge. Being placed in the printer, the cartridge allows you to continue working with printing.
Important: there is a label on each cartridge, thanks to which you can easily get a new one by simply writing it down or taking a photo.
Virtually every major manufacturer of printing equipment has analogues of consumables that produce third party companies (often this happens without a license and even obtaining the consent of the parent company). The question of the reliability and durability of such consumables remains open, but they are often resorted to when it is necessary to quickly change the toner.
The most important indicator for a cartridge is its resource. It is important to understand that any parameters specified in the characteristics are averaged. Simply put, it all depends on how full the page is. Most often, manufacturers of cartridges indicate the resource, taking into account 5% of the filling of one page.But 5% of filling, and, say, one printed page of the text is not one and the same. Further calculations are based on this figure (which may differ in quantitative terms from different manufacturers).
Regular budget printer or multifunction printer working on ink:
- a single-color cartridge can print approximately 90-95 pages, although the manufacturer indicates 120-130 pages;
- color cartridges about 35-45 photos, the manufacturer quotes the number 60.
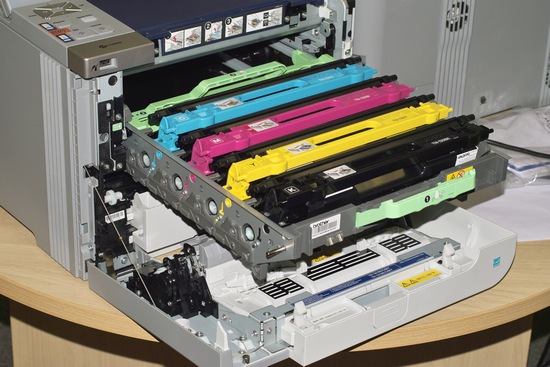
Printer with color cartridge
Medium laser printer or MFP:
- one-color from 900 p. up to 1400 pages
A test cartridge is included with the printer, it is supplied to demonstrate the capabilities of the equipment and, as a rule, is less than half full.
Non-original consumables have less resource. You can safely reduce the capacity of non-original consumables by 15-20 percent and get an approximate number of pages for which it is enough. But do not forget that each individual cartridge and toner is unique, there are cases where non-original parts last even longer, although this happens much less frequently.
Chip cartridges have software that can artificially limit their functionality to protect against refilling. The chip counts the number of pages printed and counts the amount of ink consumed. It is worth remembering this when choosing consumables (original or not original). If such a chip is provided in the cartridge, but it will not be in an original one, compatibility problems may arise.
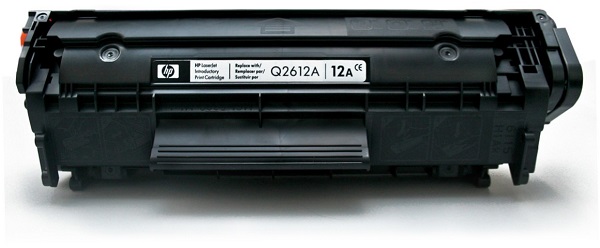
HP Original Cartridge
Using non-original consumables, you can not claim a full warranty, some of its items do not work, if the complete set of the printer is not original. Is it worth the slight savings in order to refuse the warranty conditions, decide the user.
Removing the used cartridge
So, the printer writes that the ink has run out - it is obvious that the cartridge needs to be replaced. Of course, it is not recommended to open the device without basic skills and superficial knowledge of the printing equipment. If you don’t have time to thoroughly study the printer, we suggest using the basic algorithm of actions.
- For starters, it is best to remove and put aside all the jewelry (rings, bracelets) to avoid injury.
- Turn off the device from the outlet.
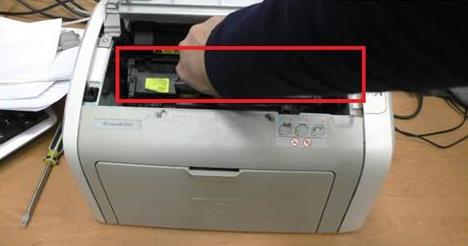
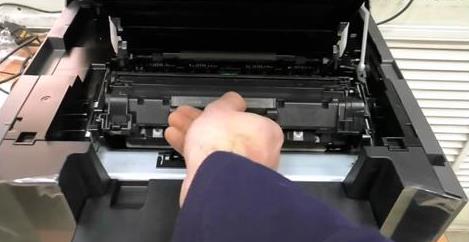
- Next, throw off the printer cover.This is done quickly and easily, each device has a special notch, or a tongue by which this cover can be picked up. If you have laser printer, you should do it carefully, because the fuser may remain hot. The cartridge, as a rule, rests on several (usually 2-4) clamps-clamps, which are easy to snap off or fold back.

- After the latches have been folded back, you must gently pull the plastic case towards you to remove it. If the cartridge does not move, try changing the direction a bit, as if shaking it, but only a little, not much. If the forward movement has not led to a positive result, and the cartridge is tightly stuck, it will be better contact the service center, because there is a risk of damage to the device, if you continue independent attempts to remove the toner.
- When the cartridge is removed, carefully place it on the paper; residues of non-dried ink (ink) may remain on the surface. If you get dirty, wipe your hands better so as not to soil clothes and surrounding objects.
Important: inkjet printers should not be left without a cartridge for a long time, sincethe printing element may dry up, and this is fraught with device failure. Therefore, the best option would be “hot swap” when an empty cartridge is given for refueling, and a full one is immediately installed in its place.
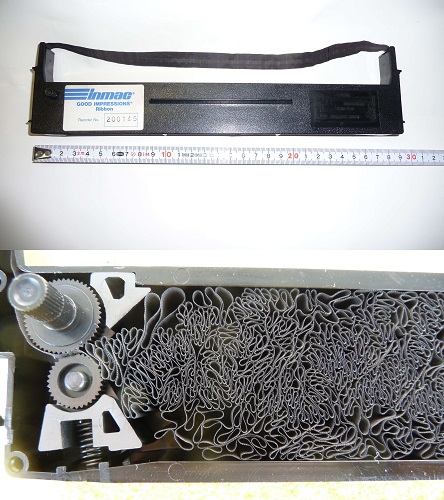
Different manufacturers may have a slightly different scheme. Let's say in inkjet printers Some brands need to flip the top cover of the scanner, and in the laser do not need to do, just throw away the tray and get out an empty cartridge. Somewhat more complicated this operation looks like matrix printer, But only at first glance. Removing the tape on the drum is not much more difficult than the cartridge (toner), however, it is worth it, only if you are confident in your abilities.
Once you have done this operation yourself, you will understand the principle itself. In consequence, you will most likely be able to do this procedure on almost any model of printing equipment, since there are no fundamental differences.
Install the cartridge back
Install the cartridge in the reverse order.
- Do not turn on the device until the cartridge is installed.
- Make sure the new cartridge is clean.
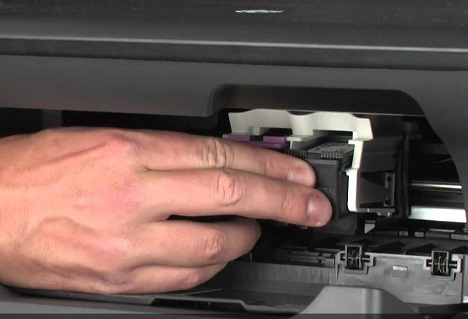
- Carefully insert it into the empty compartment, without cramming it with force. If the box itself is stuck and fails, you should not try to shove it, it is better to completely pull out and try again.
- Snap in all retainers and check fasteners.
- Close the lid.
- Plug the device into a power outlet.
- After connecting the device to the network, wait until the printer recognizes the new consumables, and the inscription "replace the toner"Will not disappear from the display.
There may be problems with the latter if non-original consumables are used. In such cases, it is recommended to reset the settings of the device itself, enter combinations (each model has its own), but even this may not help. However, this very inscription itself most often does not affect the operation of the device itself, which continues to print regularly, even with the words “replace toner”.
If the printer refuses to print even with the refilled cartridge installed, then it is best to contact the service center.
Do not try to fix a complex technical malfunction yourself, it can lead to serious damage, besides, you can get injured, scratching the sharp edges.
Replacing the toner is fast, there is nothing difficult, but there may always be abnormal situations. Experts recommend not changing consumables on their own; in most cases, leaving a specialist saves a lot of time and, in the end, money. In some cases it is more convenient to pay for the service than to decide what to do with a bunch of documents queuing for a printout in a printer that is paralyzed due to the inept actions of the employee.
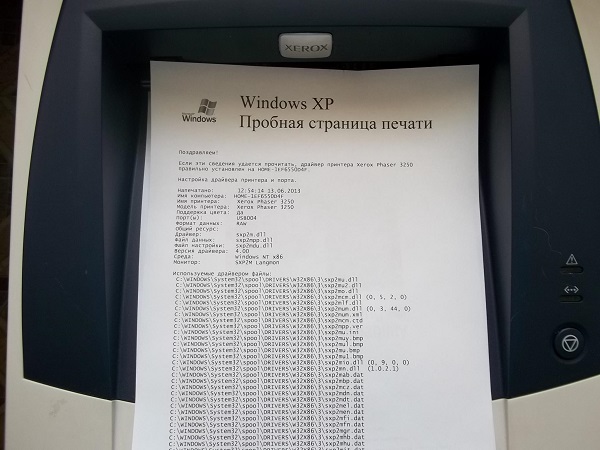
We are printing a test page.
Printing a test page is required to check the relevance of all settings of your printing device.. If there is any malfunction, or a new cartridge is defective, testing will help identify them in order to quickly eliminate them. In the case of color printers, a test page helps to determine the color gradations that are necessary before professional use, for example, in a print shop (printing photos, etc.). Another important aspect in favor of the printed page is the complete device namedisplayed on the sheet (useful if you do not remember the marking for the order of consumables) and the software version.
To print a test page, we will need the printer itself and a PC with the installed OS (Windows is best suited).
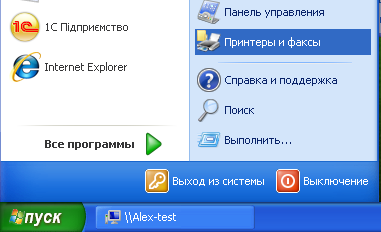
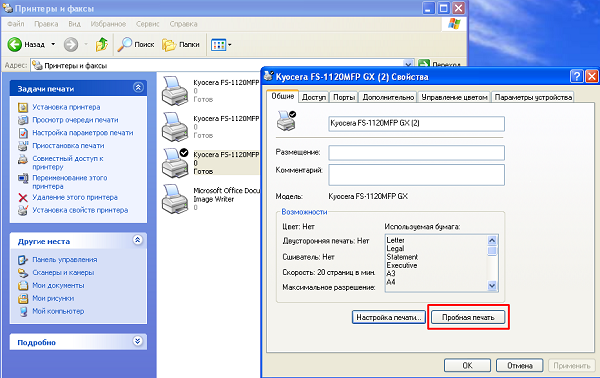
- On the desktop, press the "start" button (a window with the OS logo in later editions), then follow the "control panel". In it we find "printers and faxes" and click the left mouse button. The names of the sections may differ slightly depending on the versions of the operating systems (7,8.1, 10). In the section that opens, all devices connected to this PC are displayed.
- We select the printer we need (if there are several of them, find the one we need) and click on it with the right mouse button. In the menu that opens, find the "properties" and click again.
- In the "properties" we look for the tab "General" and select it, then we find the "test print". It is important that all this time the printer remains on the network. If the device has not been used for a long time, then it will take from 15 to 40 seconds to prepare the seal. Subsequent pages will be printed at a faster speed. It is not possible to set the parameters of the test page, they are determined by the manufacturer by default and contain comprehensive information about your device.Different manufacturers set different parameters, so you should not be surprised if you see different test pages on different devices.
- When printing is completed, you need to pull out the finished page and determine the quality. It should contain graphics, text inserts, color spectrum (if your printer is color). No mistakes, uneven blending of colors or half tones are allowed. If in some place the text is typed badly, then this is a reason to contact the service. The inkjet printer does not allow any ink leaks.
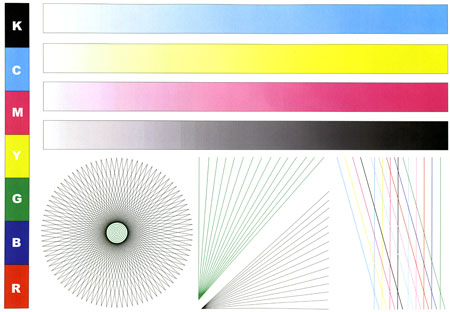
Color Print Test Page
- After the device finishes, it prompts you to save the settings. If the settings are completely satisfied, then click “ok”, if not, then go to troubleshoot (debug the system), but first it is recommended to print the test page again, sometimes, especially after a long standstill, the printer may give you incorrect information. When re-printing, defects may disappear.
The page is printed in the same way in all models of printers, be it Epson, Canon, HP or Samsung, since it is carried out through the computer's OS.
There are no additional settings to be made in the printer, printing a test page is provided by default, and if it is not printed, this is a serious reason for diagnosis. It is always possible to return to the default print settings. If you’re no longer satisfied with certain settings, just reset them to "factory". This can be done by going to the manufacturer’s proprietary application (program), or in the OS itself in the section “Printers and Faxes”.
Replacing the cartridge takes a little time, but only on the condition that you know what and where you need to remove, fold and pull out. If you are not confident in your abilities, the best solution would be to seek the help of a specialist.
/rating_off.png)


